
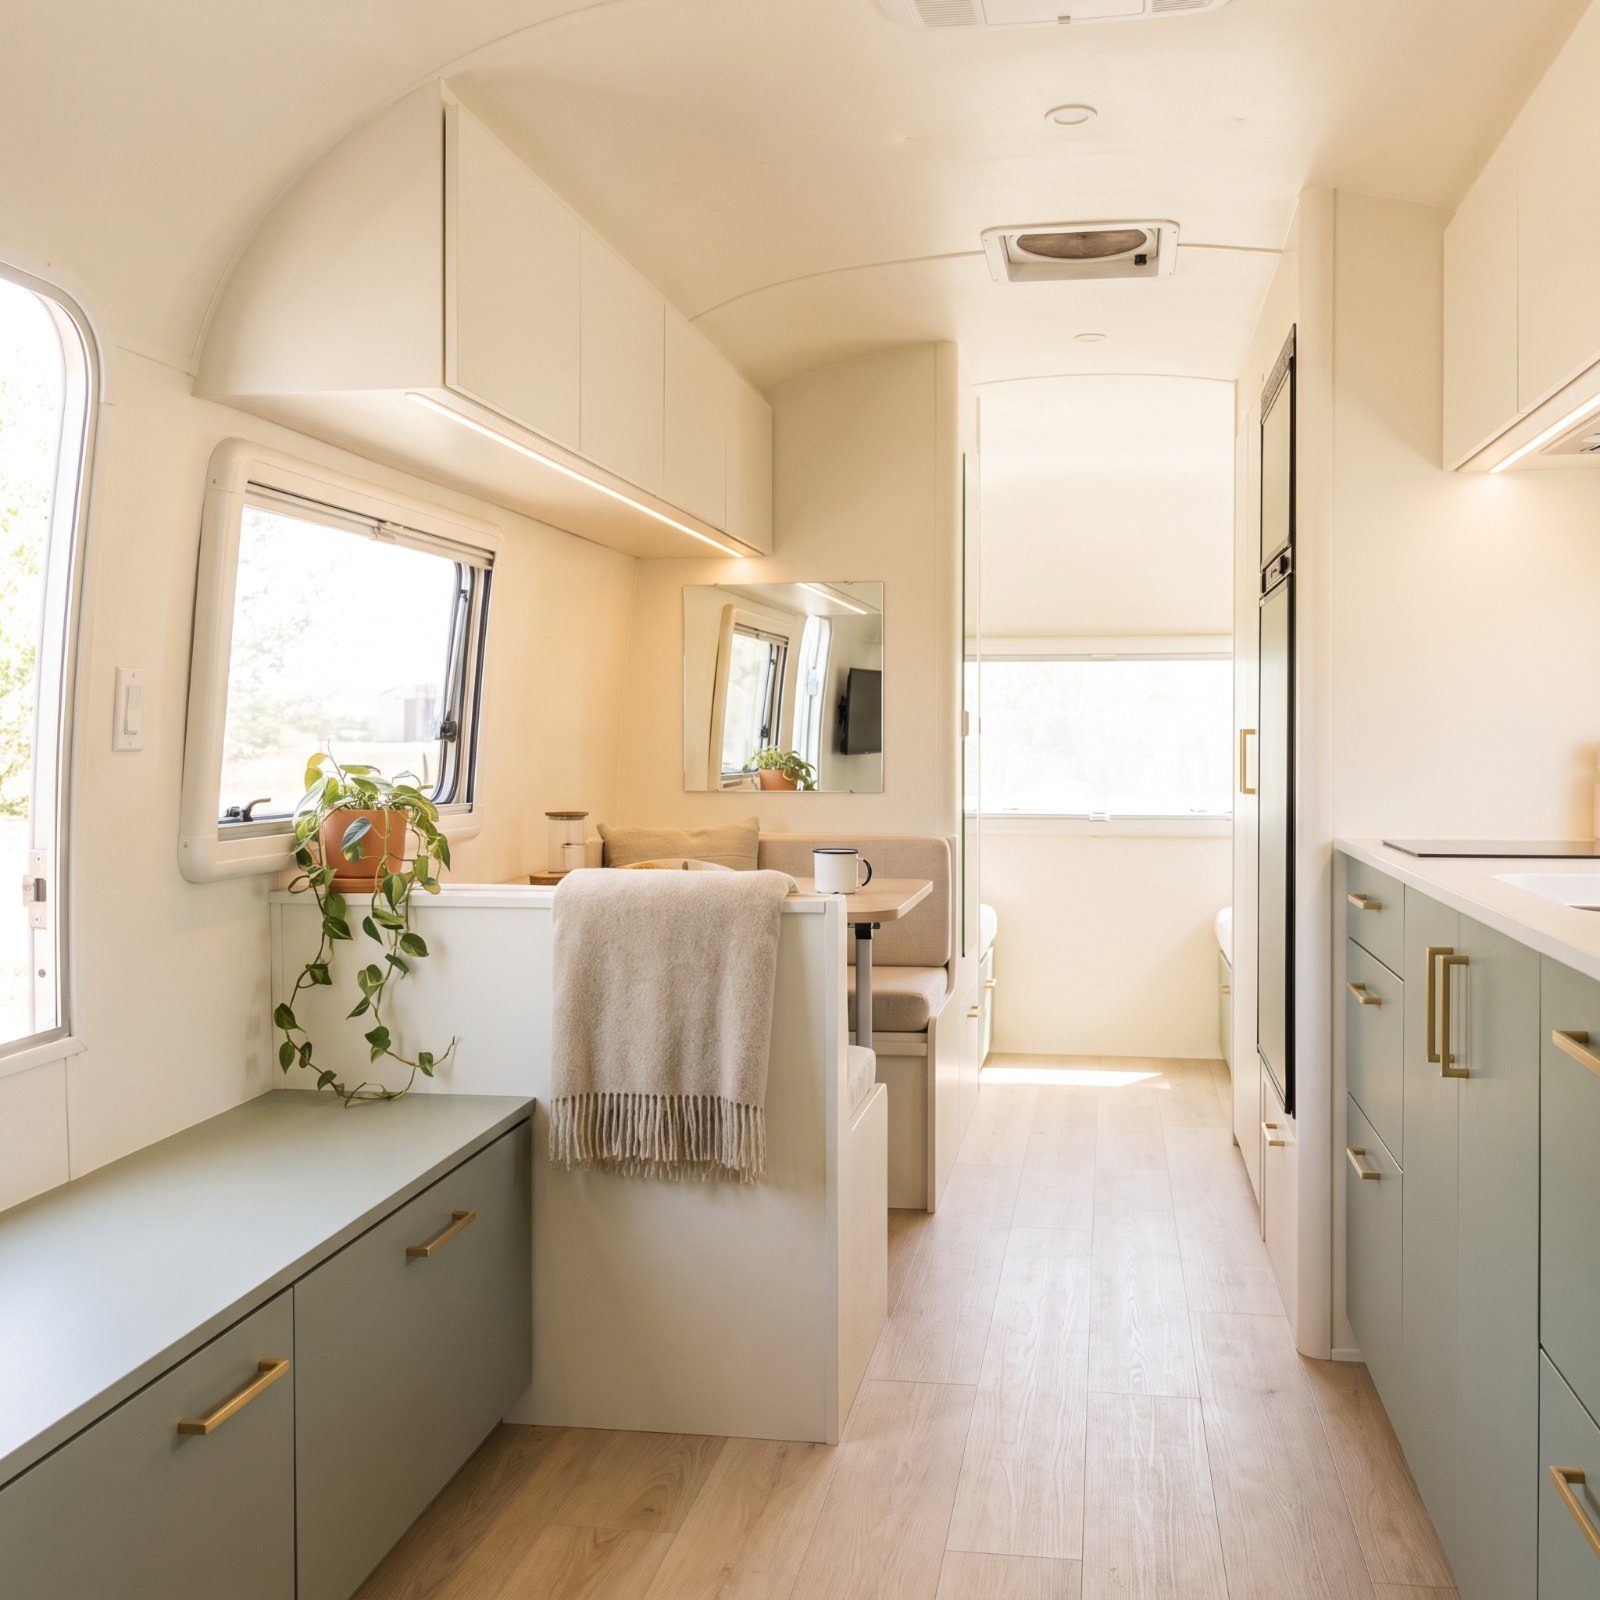
You step into a 24-foot travel trailer and it feels like a shoebox with curtains. Step into the same floor plan done right, though, and suddenly there’s room to breathe, light where there wasn’t, and a clean sightline running from the galley all the way to the rear window.
Please note that some of the images in this article were created with the assistance of AI.
The square footage never changed. The tricks did. What follows are the renovations that open up a rig without adding a single inch of length, and most of them you can knock out over a long weekend with a careful hand and the right hardware.
49. Run One Continuous Floor From Door to Rear, No Transition Strips
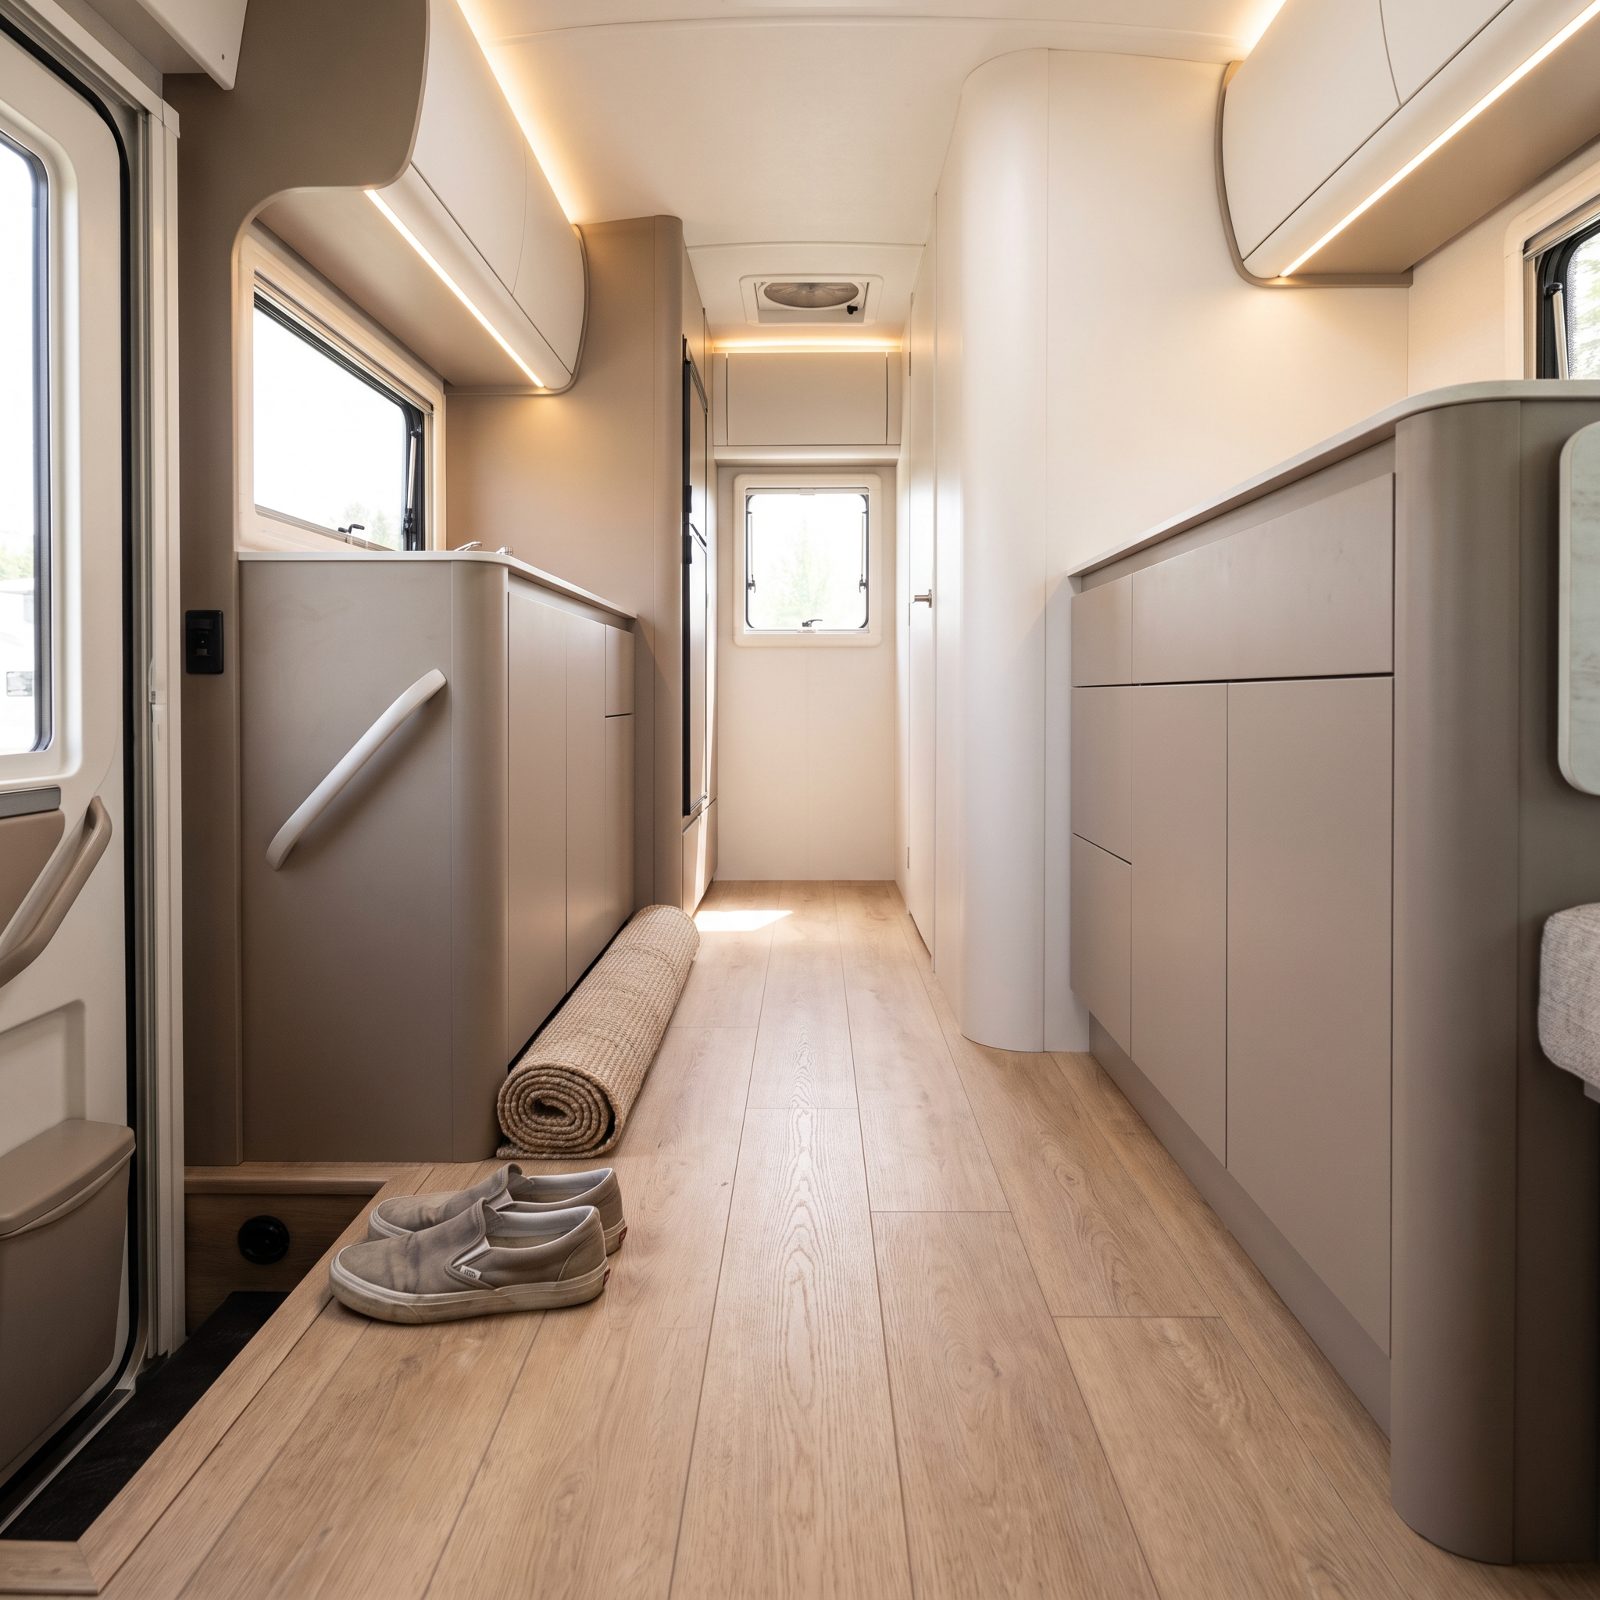
Most RVs roll off the line chopped into zones: carpet in the bedroom, vinyl in the galley, a little tile-look patch by the door, and a metal strip screwed down at every border. Your eye stops dead at each one. The floor reads as four small rooms instead of one.
Pull all of it and lay a single luxury vinyl plank floor end to end, planks running the length of the rig. No transition strips, nothing to interrupt the line. The floor becomes one unbroken plane and the whole interior stretches out in front of you.
48. Pull the Overhead Cabinet Above the Dinette and Let the Room Open Up
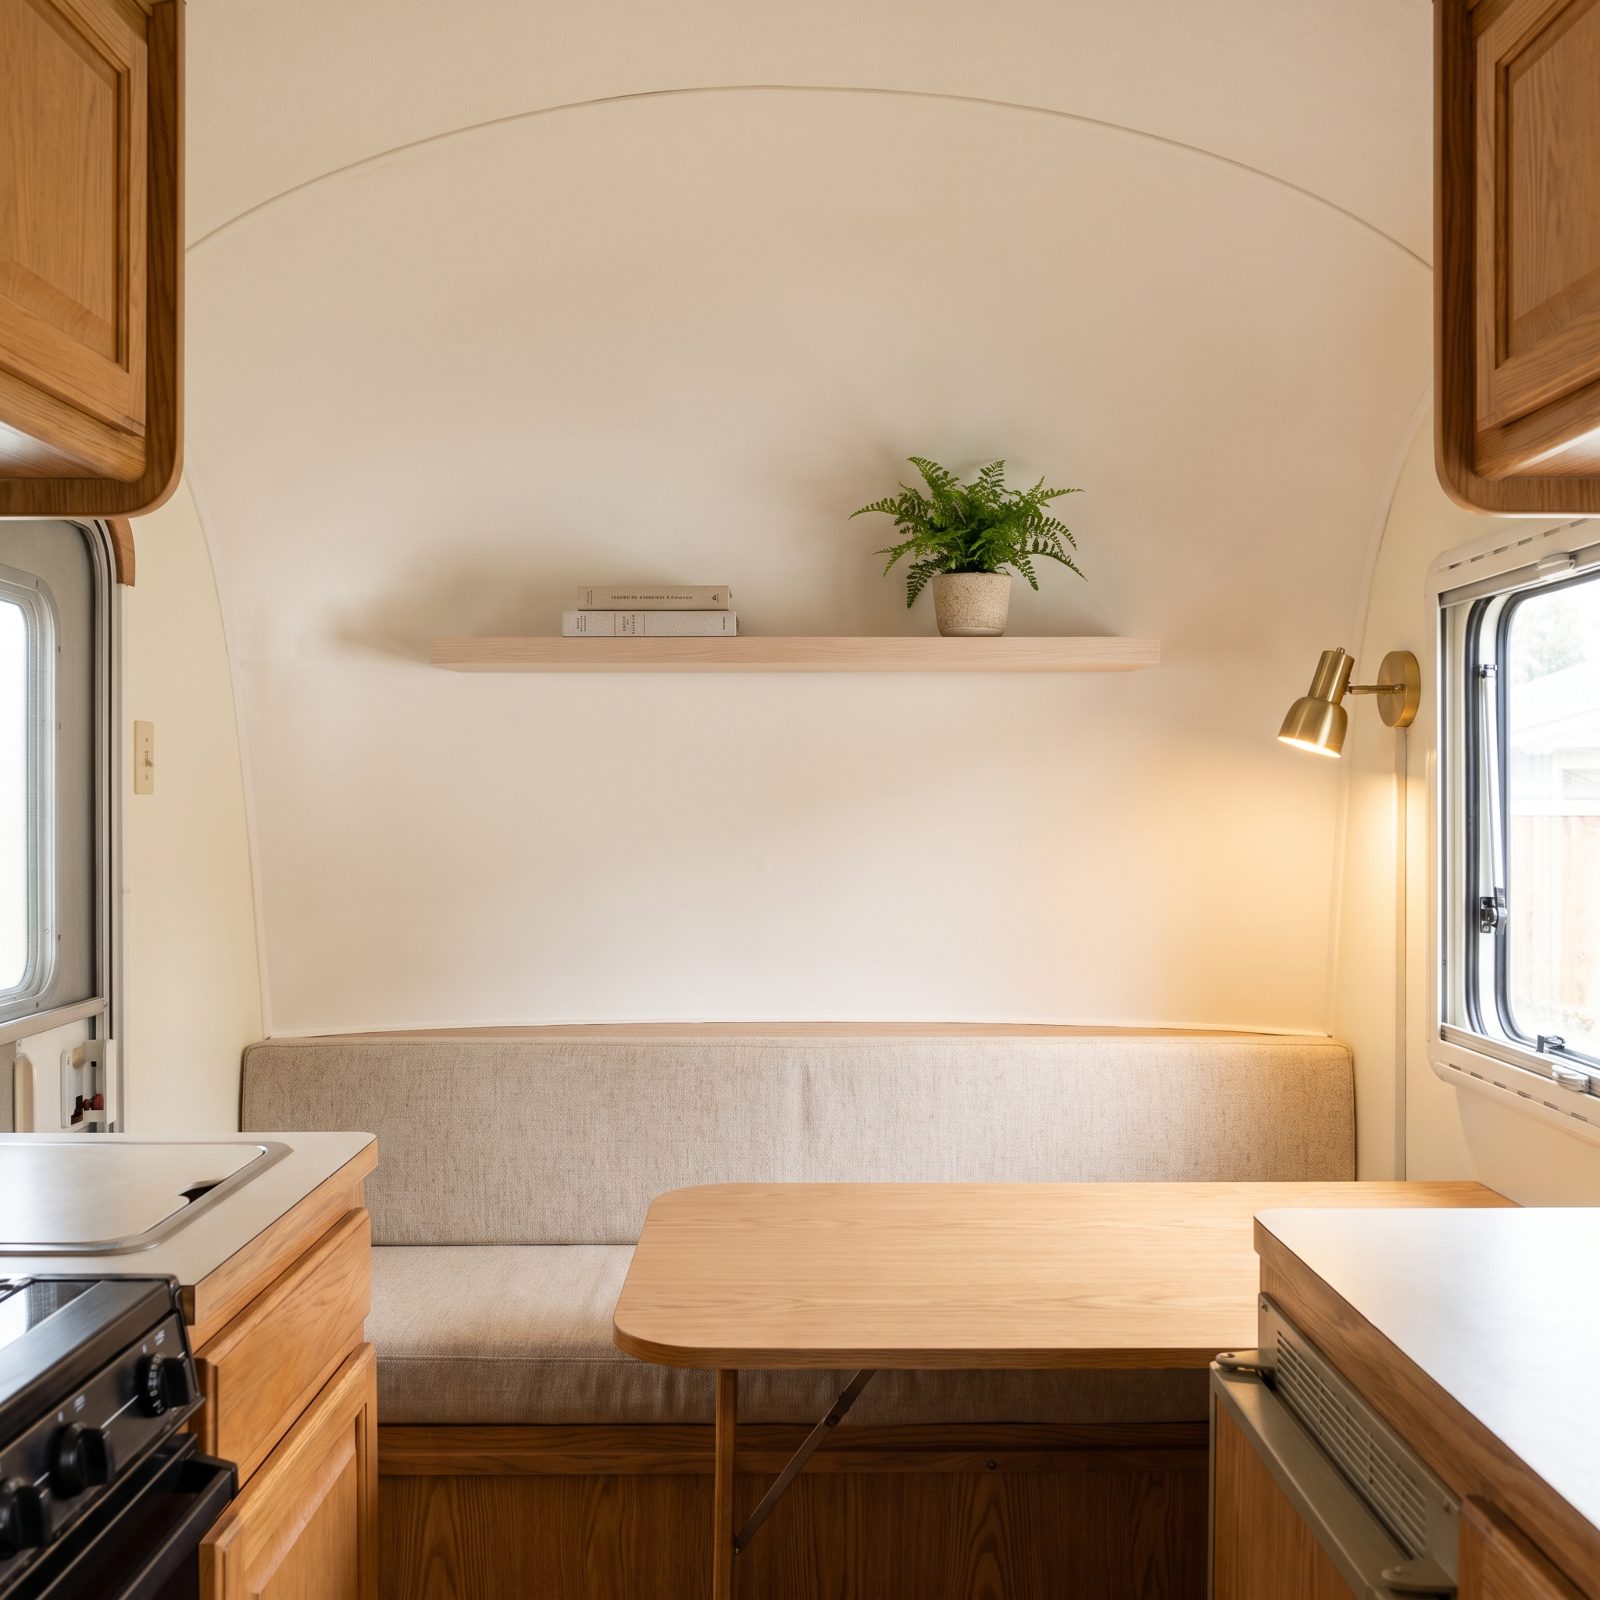
That box of a cabinet hanging over the dinette holds maybe three cereal boxes and a stack of paper plates. Mostly it just looms. It cuts the ceiling height in half right where you sit and walls off your view to the rest of the rig.
Take it out. Patch and paint the wall, add one slim floating shelf if you miss the storage, and sit back down. The ceiling curve shows itself, the window reads bigger, and the sightline runs clean across the whole cabin.
I fought this one for a long time because I’m a storage hoarder by nature. Then I did it and gained back about two inches of forehead clearance I didn’t know I’d lost. No regrets.
47. Paint the Walls Warm White and Watch the Daylight Travel
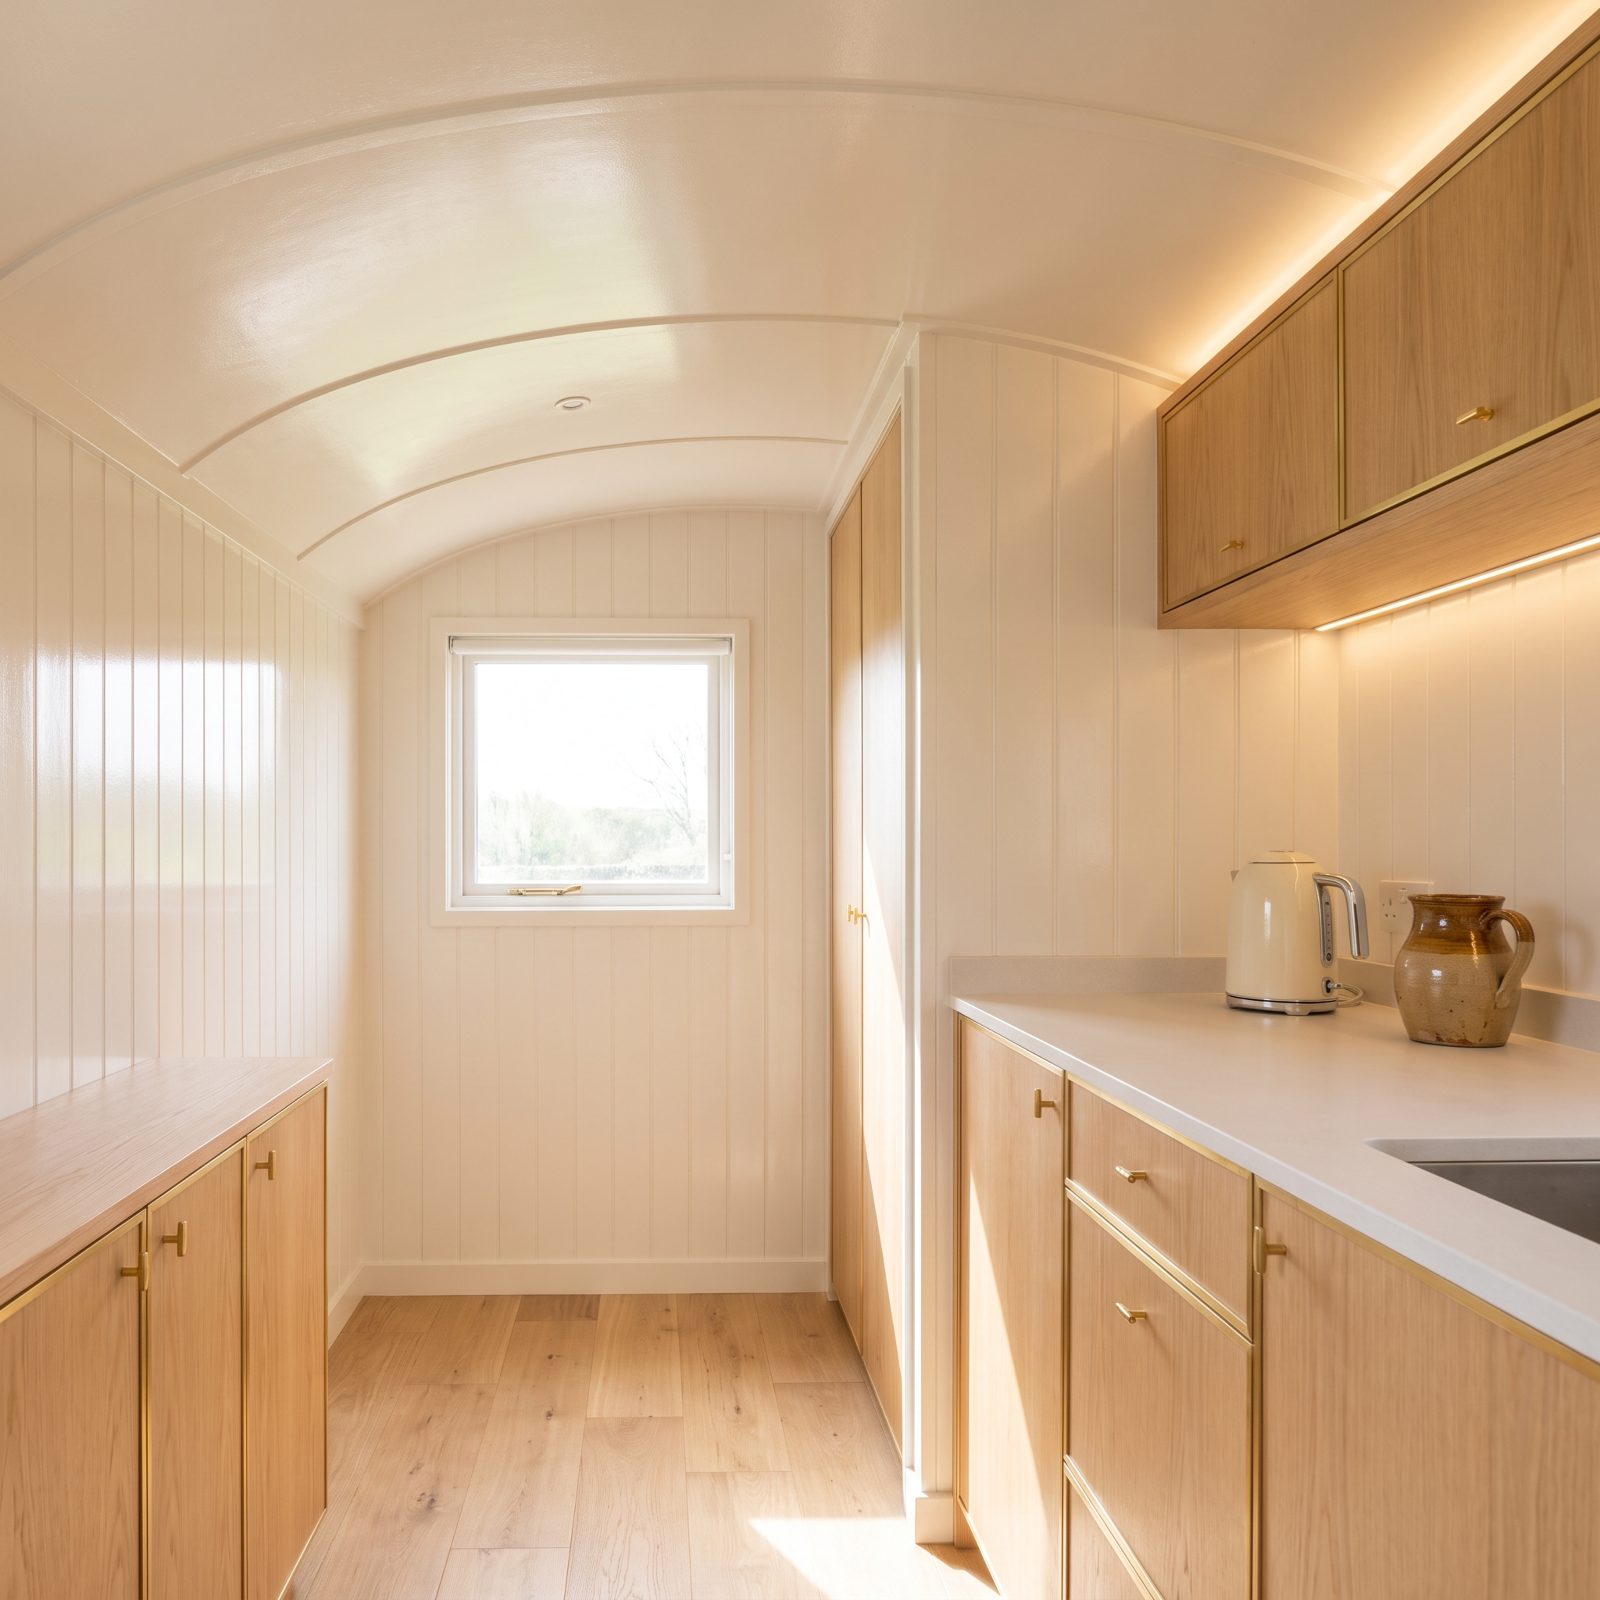
Factory RV walls are almost always some shade of taupe-brown-beige that soaks up light like a sponge.
That dark wood-grain vinyl got picked to hide scuffs, not to brighten your space. A warm white with a drop of cream in it, so it doesn’t go clinical, bounces daylight from one compact window clear across the cabin.
Clean the surfaces, prime with a bonding primer made for glossy vinyl, then two coats of a durable eggshell. That primer step is non-negotiable. Skip it and the paint peels. And keep it warm white, not stark white, because stark reads cold in a small space.
46. Keep Uppers Light, Take Bases Darker, Kill the Top-Heavy Look
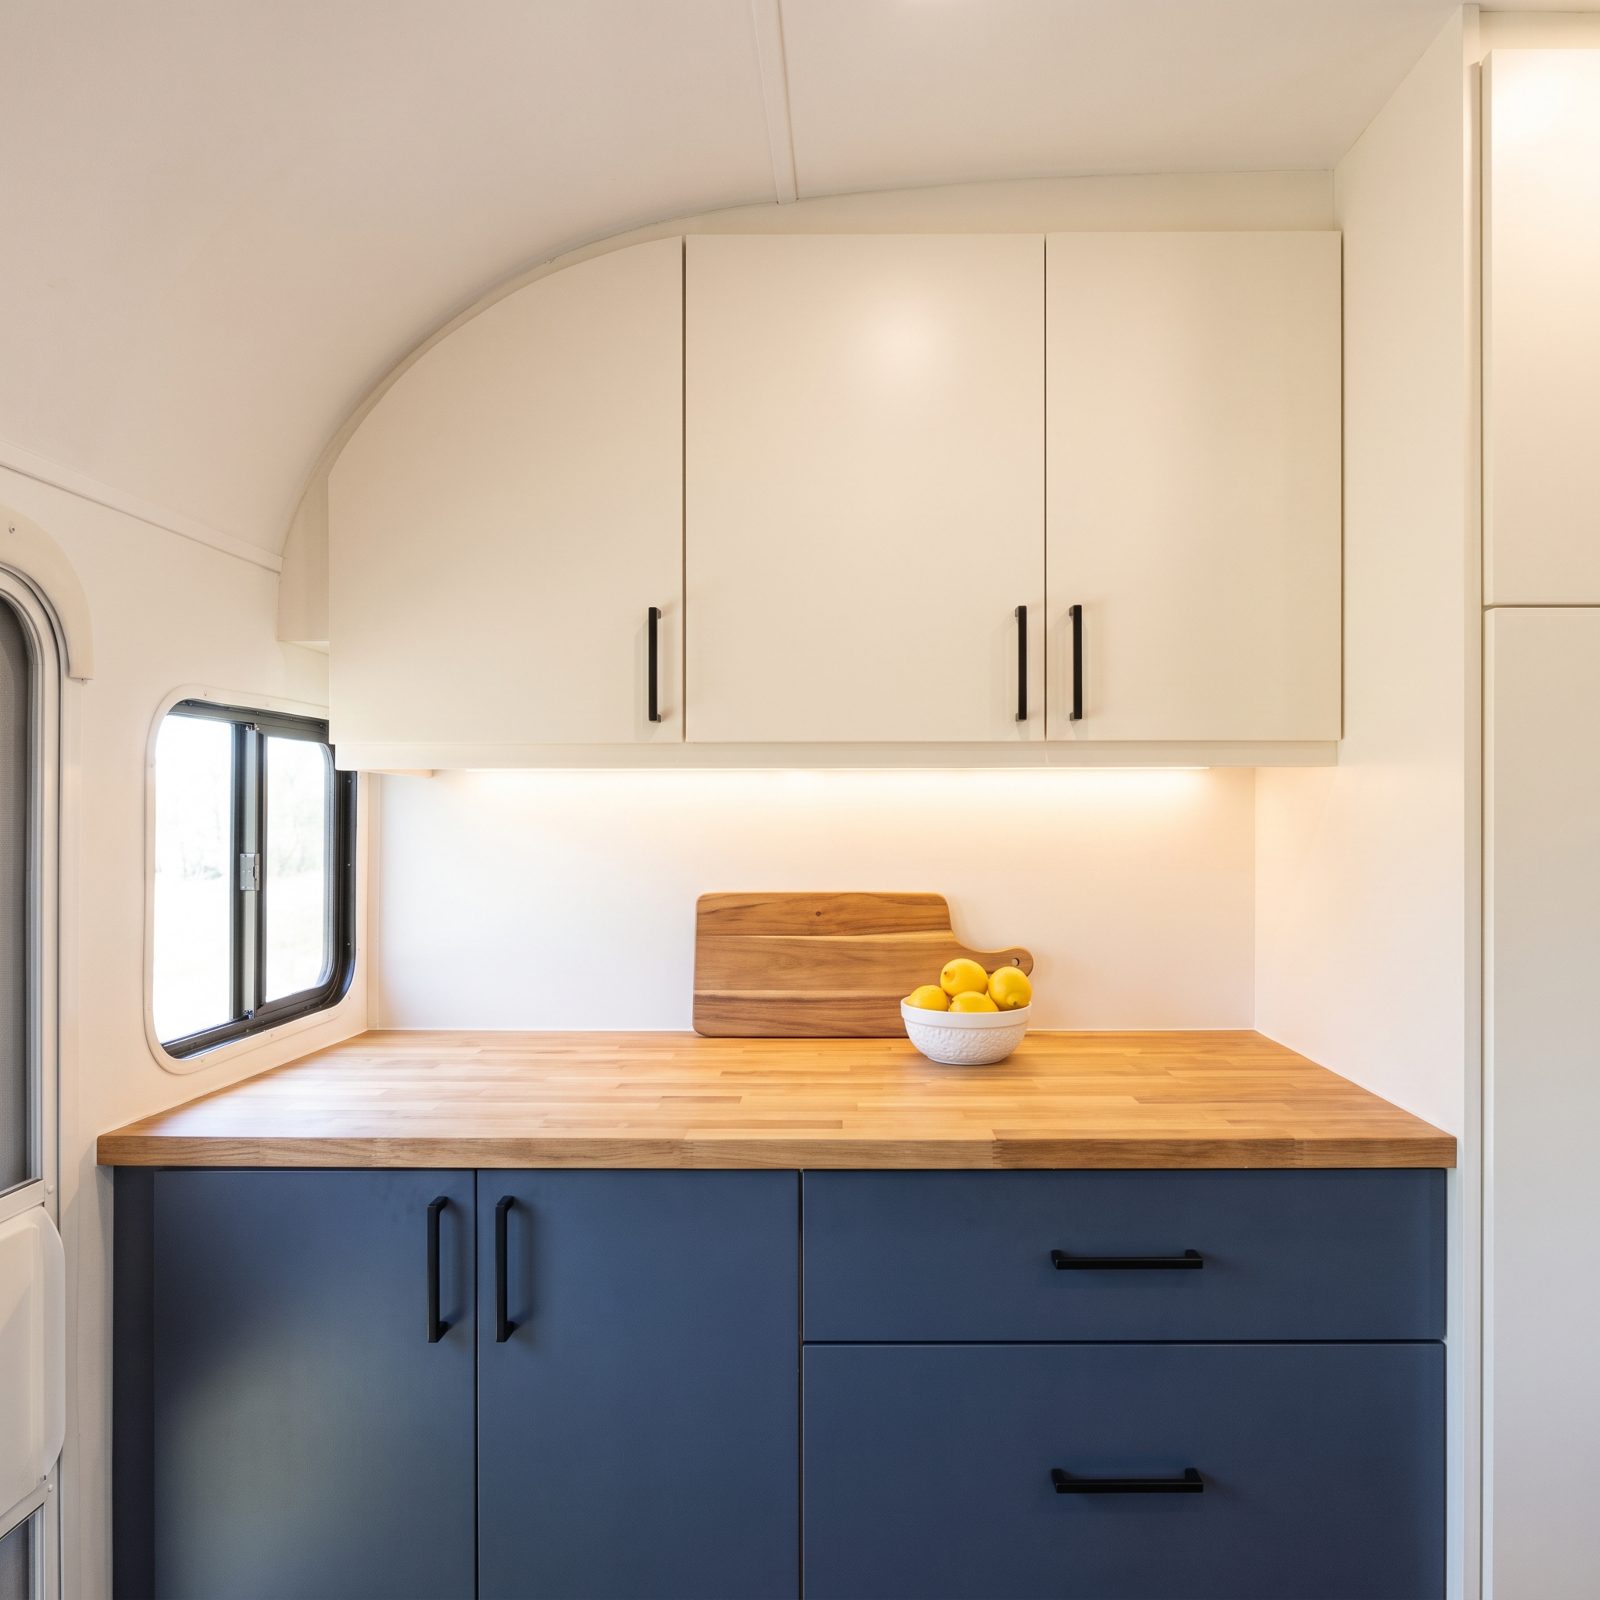
When every cabinet in the rig is the same dark wood, top and bottom, the whole box closes in on you. Your eye reads a solid wall of weight from floor to ceiling.
So split it. Paint the upper cabinets a light warm white so they fade into the ceiling, and take the base cabinets deeper, a muted navy or forest green against a butcher block counter. The dark anchors low where weight belongs, the light floats up top, and the galley stops feeling like it’s leaning over you.
Design people call this “visual grounding.” I call it the trick that stopped my 7-foot-wide galley from giving me claustrophobia at the coffee pot.
45. Hang a Big Mirror Across From the Main Window to Double the View
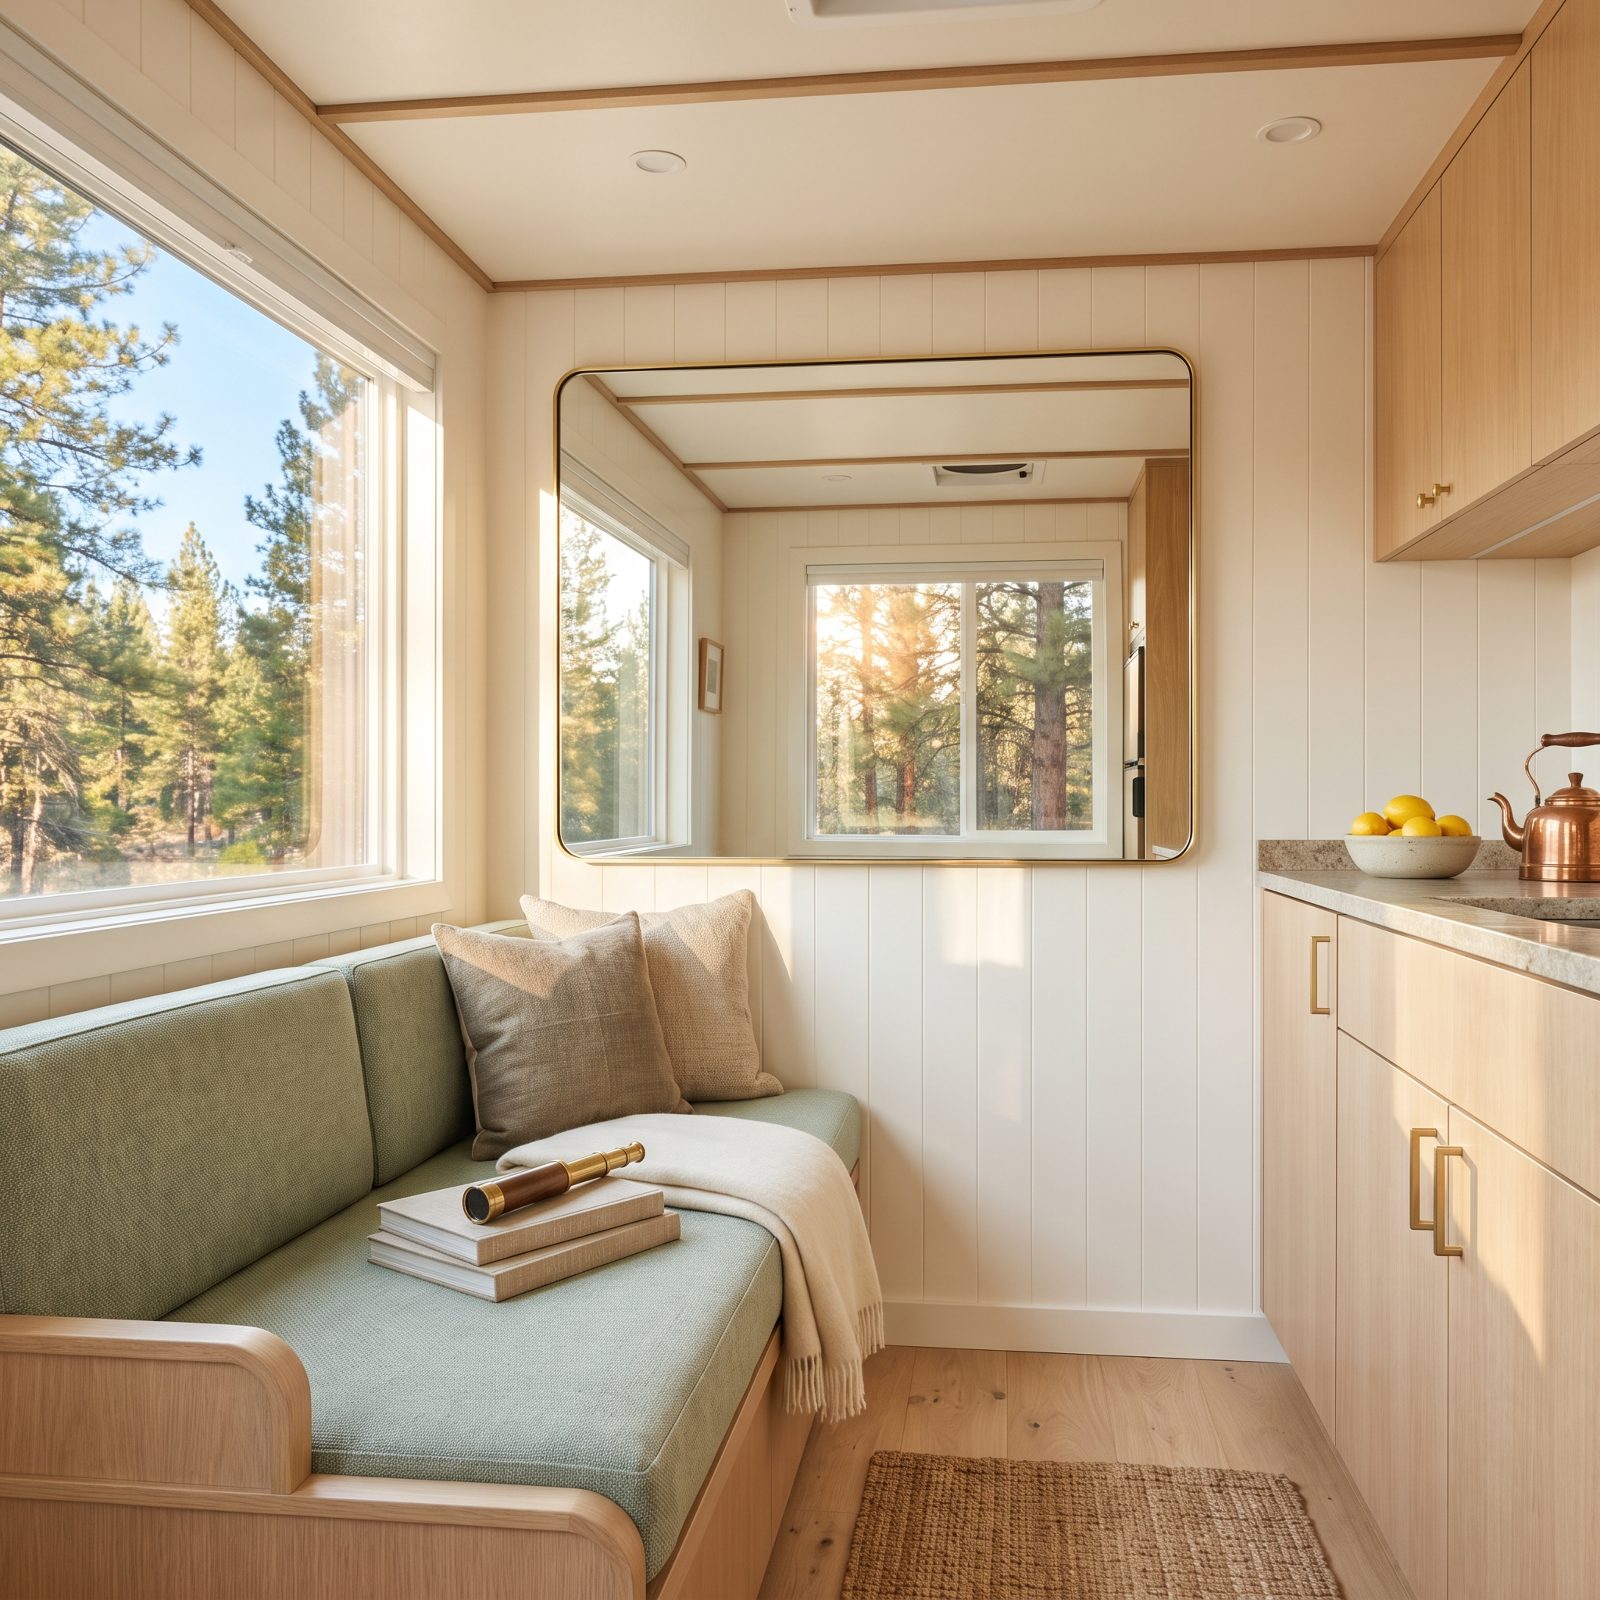
A mirror opposite your biggest window is the oldest small-space trick going, and it works every single time in a rig because RV windows are small to begin with.
Mount a large mirror, the lighter the frame the better, on the wall facing your main window. It catches the outdoor view and throws it back across the cabin, so you read two windows instead of one. Daylight gets a second bounce too, reaching corners it never touched.
44. Swap the Swinging Bathroom Door for a Slider That Stays Out of the Aisle
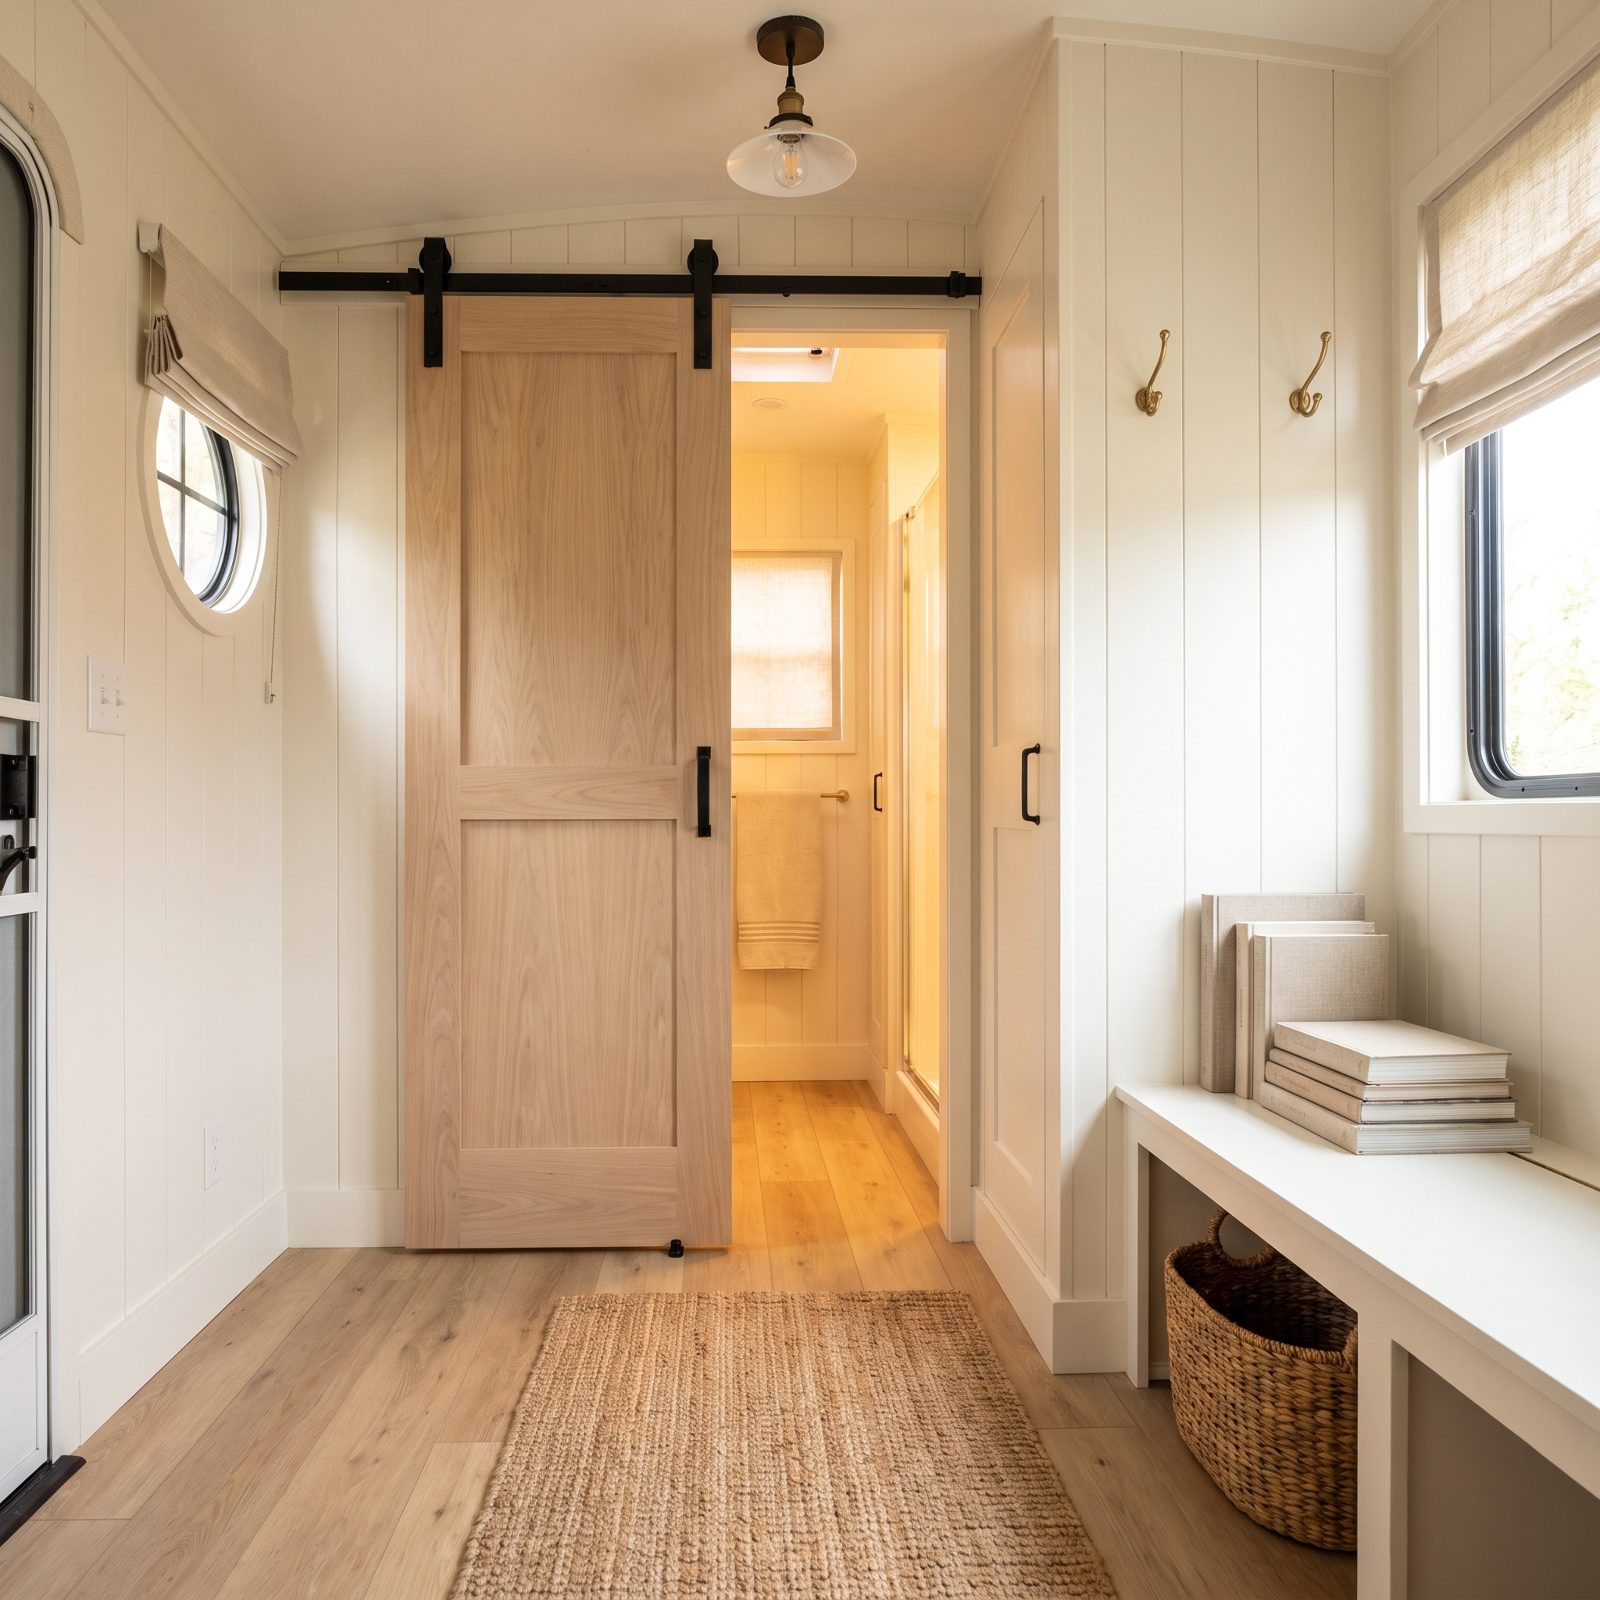
You know the standard RV bathroom door. It swings into the hallway, blocks the whole aisle while it’s open, and bangs into the opposite cabinet every time you take a corner on the highway.
Replace it with a slider on a wall-mounted track. A barn-style slider or a pocket door glides flat against the wall and never claims an inch of walkway. Now two people can pass in the aisle while the bathroom’s in use, and you reclaim that whole swing arc as usable floor.
Spend the extra on a soft-close track. Otherwise it rattles open at 70 miles an hour and drives you up the wall by the second night. Ask me how I know.
43. Trade the Opaque Shower Surround for Clear Frameless Panels
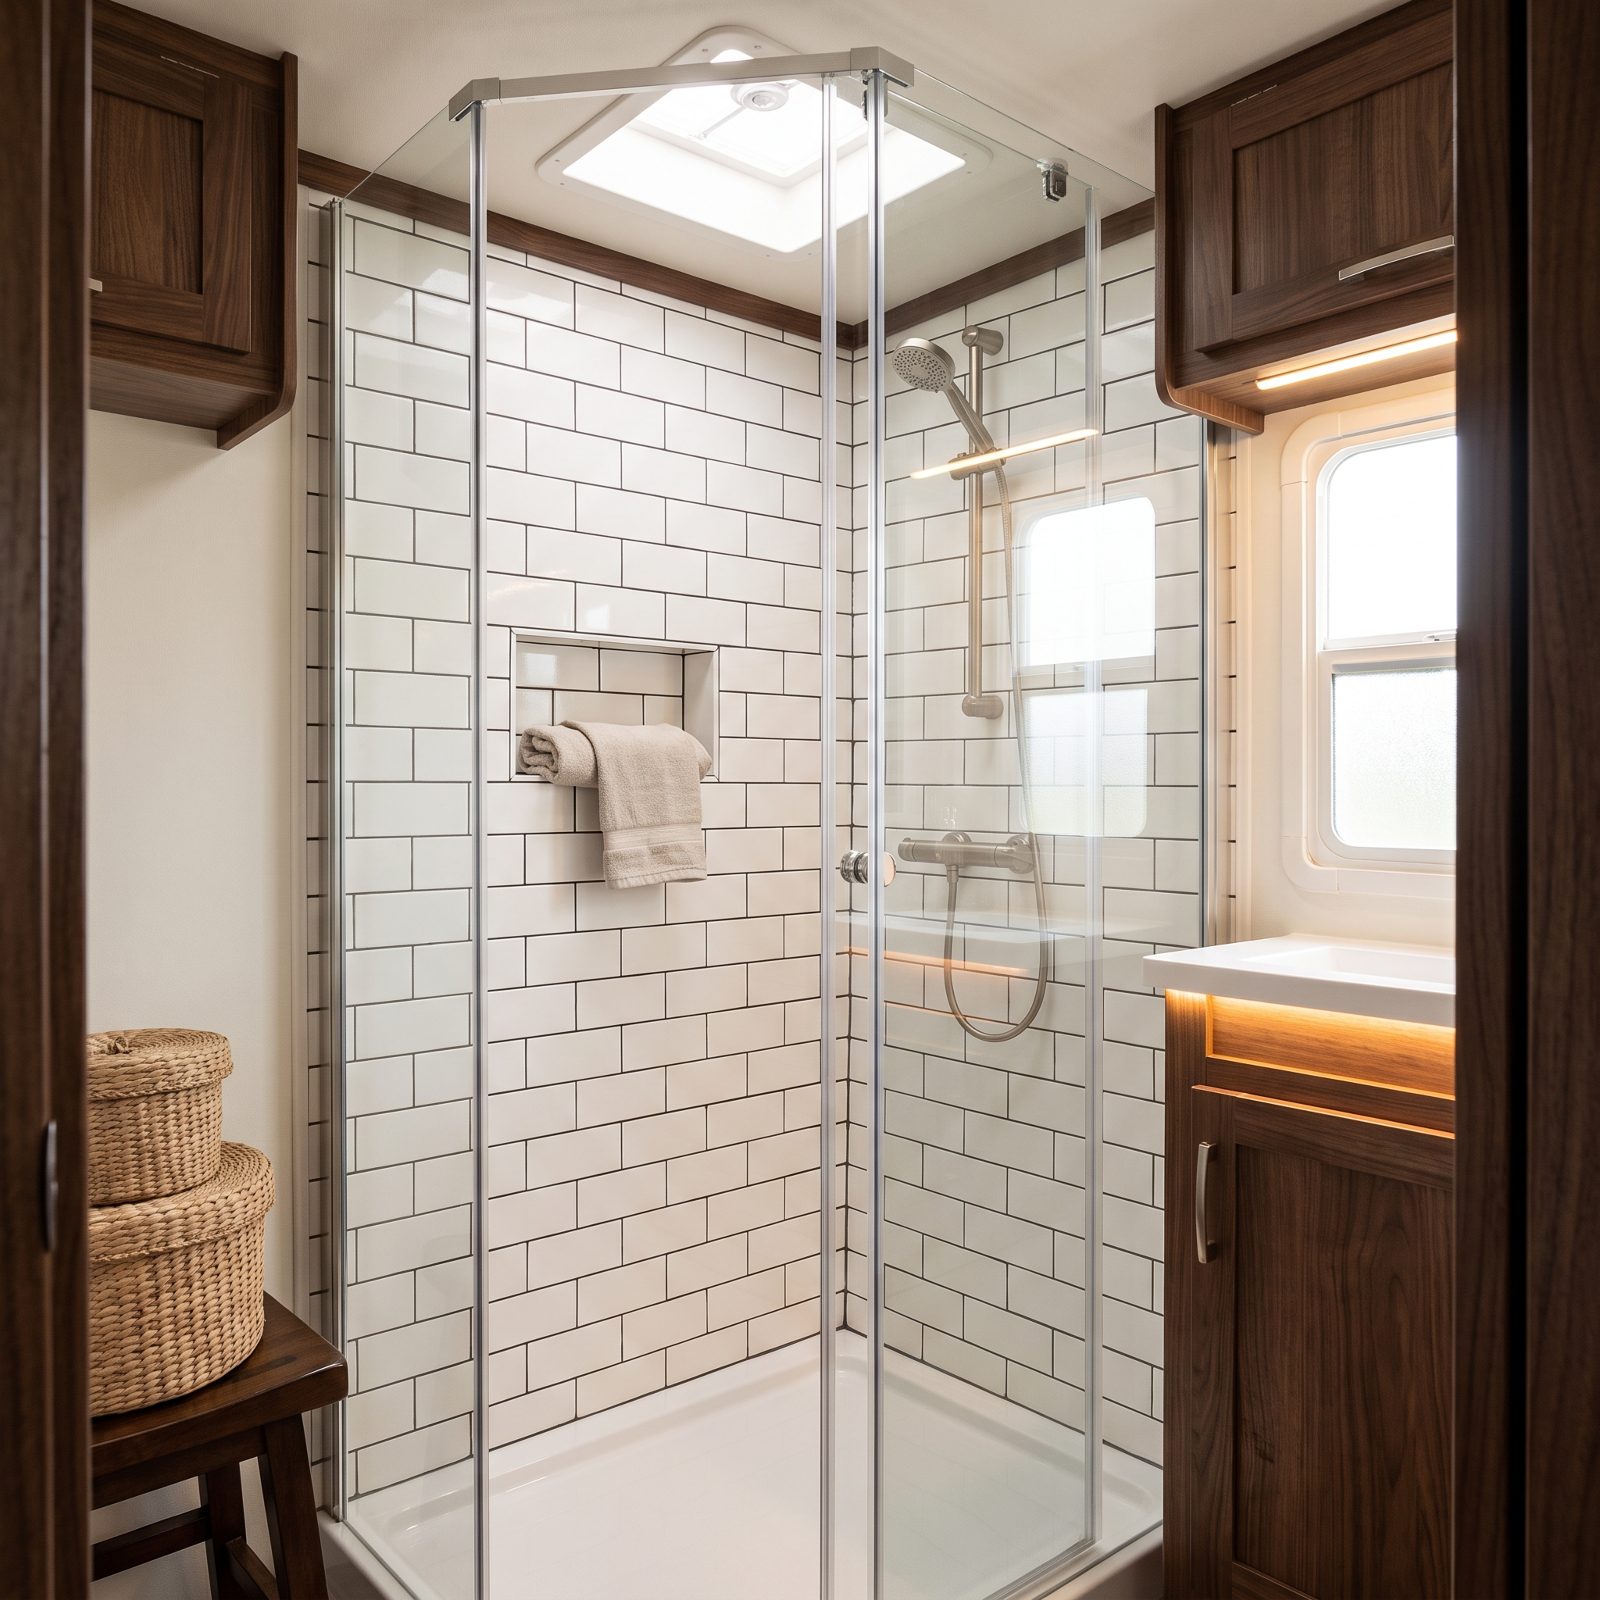
The frosted, folding, yellowing plastic shower surround is the single most claustrophobic thing in most RV bathrooms.
It carves an already-tiny bathroom into two boxes, and that opaque panel stops your eye cold at a wall barely past arm’s reach. Swap it for clear frameless panels, acrylic for the weight and durability, and your eye travels all the way to the far shower wall. The whole bathroom reads as one room again.
42. Lose the Ornate Cabinet Fronts for Clean Flush Slab Doors
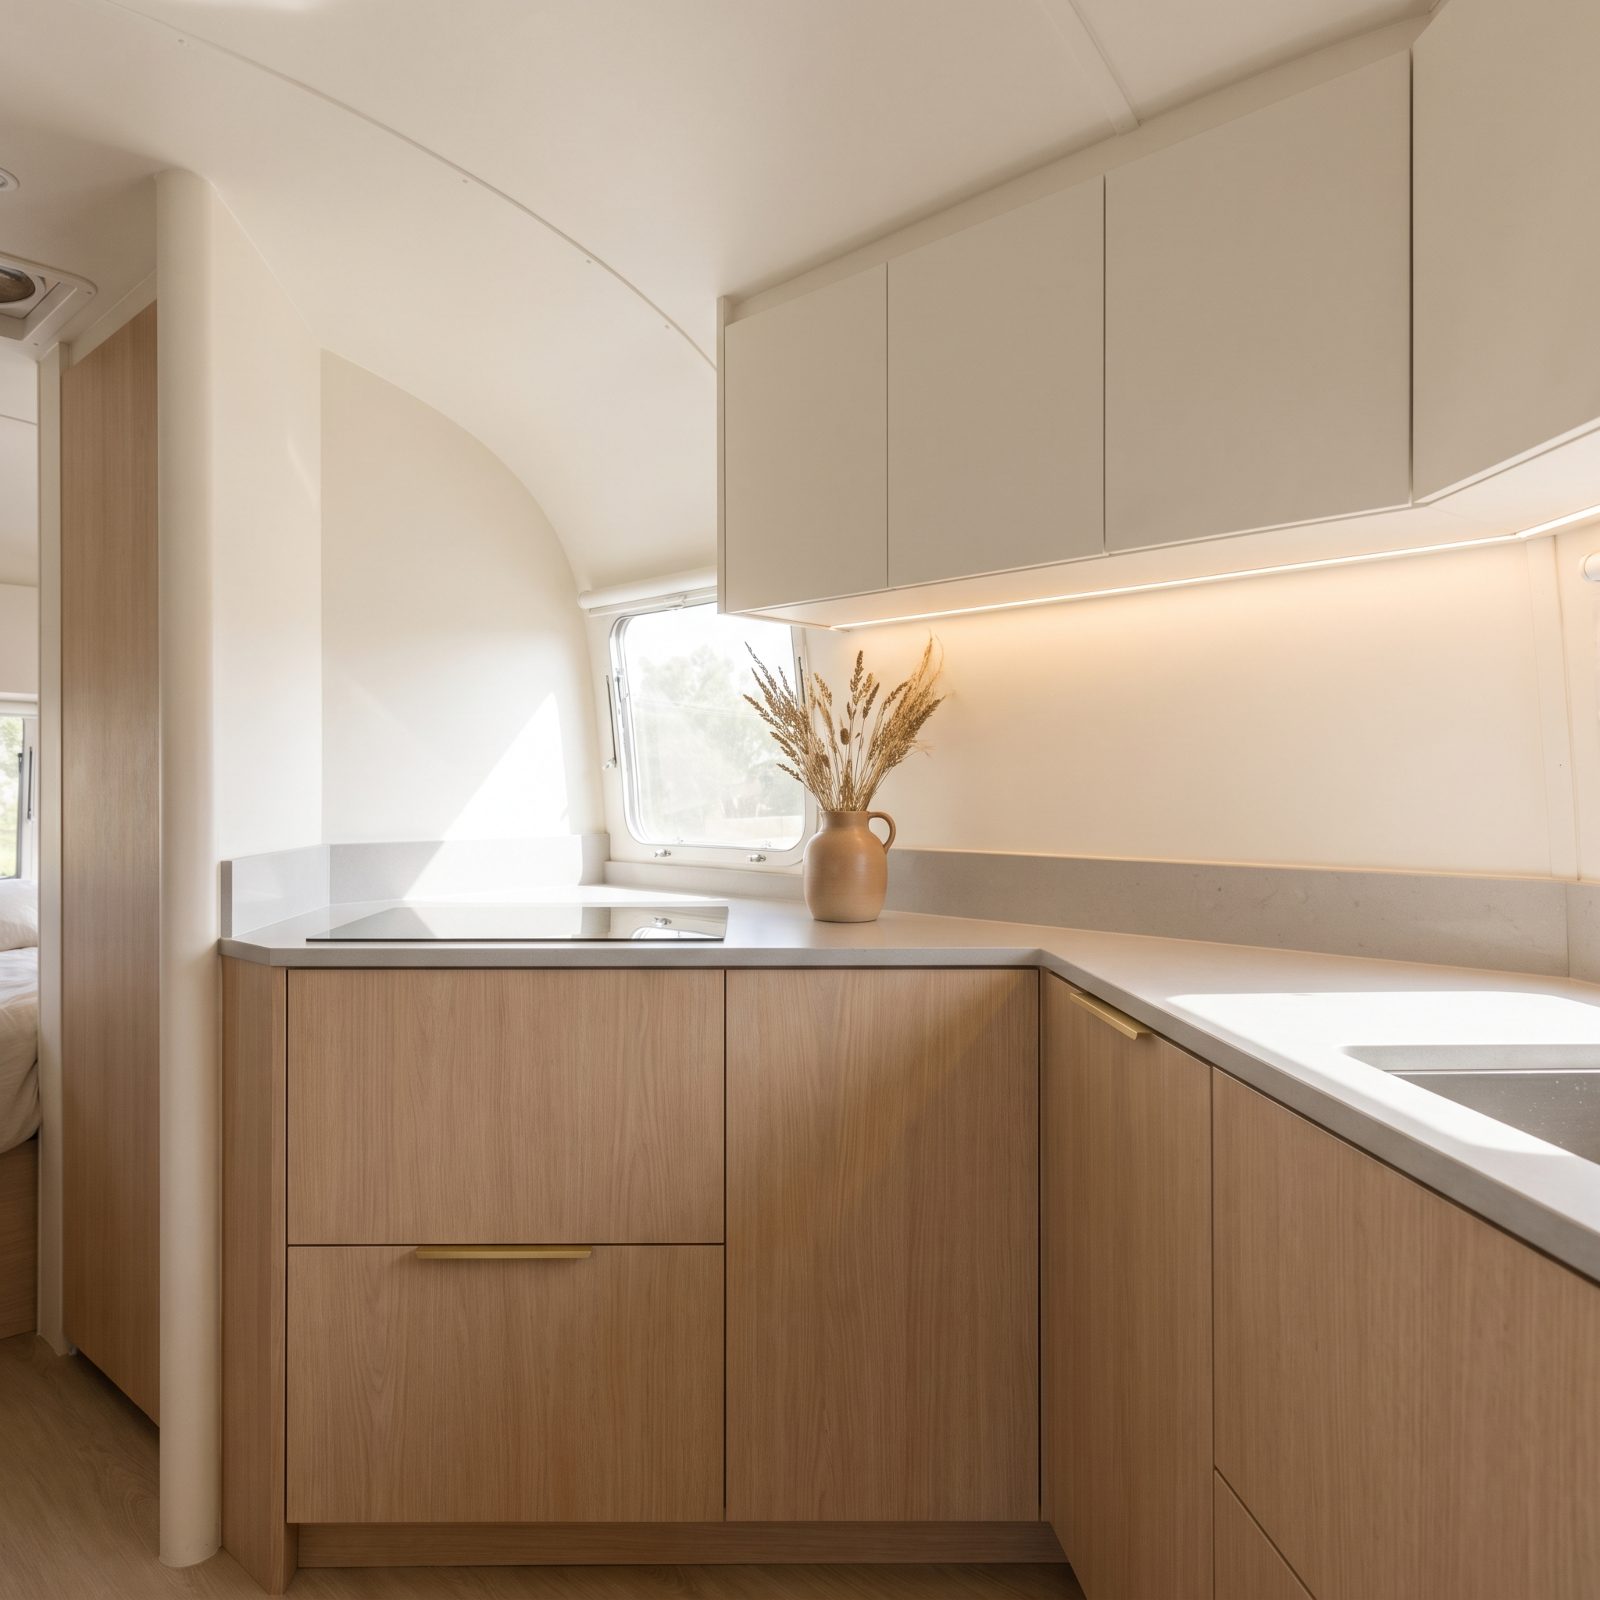
Older rigs are full of oak cabinet doors with raised panels, routed edges, and little arched cutouts that scream 1998. All that detail throws shadow lines, and shadow lines chop a surface into busy little pieces.
Flat slab fronts do the opposite. A smooth, flush door with a slim edge pull reads as one quiet plane. Repeat that across every cabinet and the galley wall goes calm instead of cluttered, which makes the whole space feel bigger even though nothing actually moved.
Here’s the good news: you can often reface rather than replace. New slab fronts on your existing boxes, painted, with simple pulls. Cheaper, lighter, and you keep the carcasses you already paid for.
41. Shrink Deep Uppers to Shallow Storage and Get Your Headroom Back
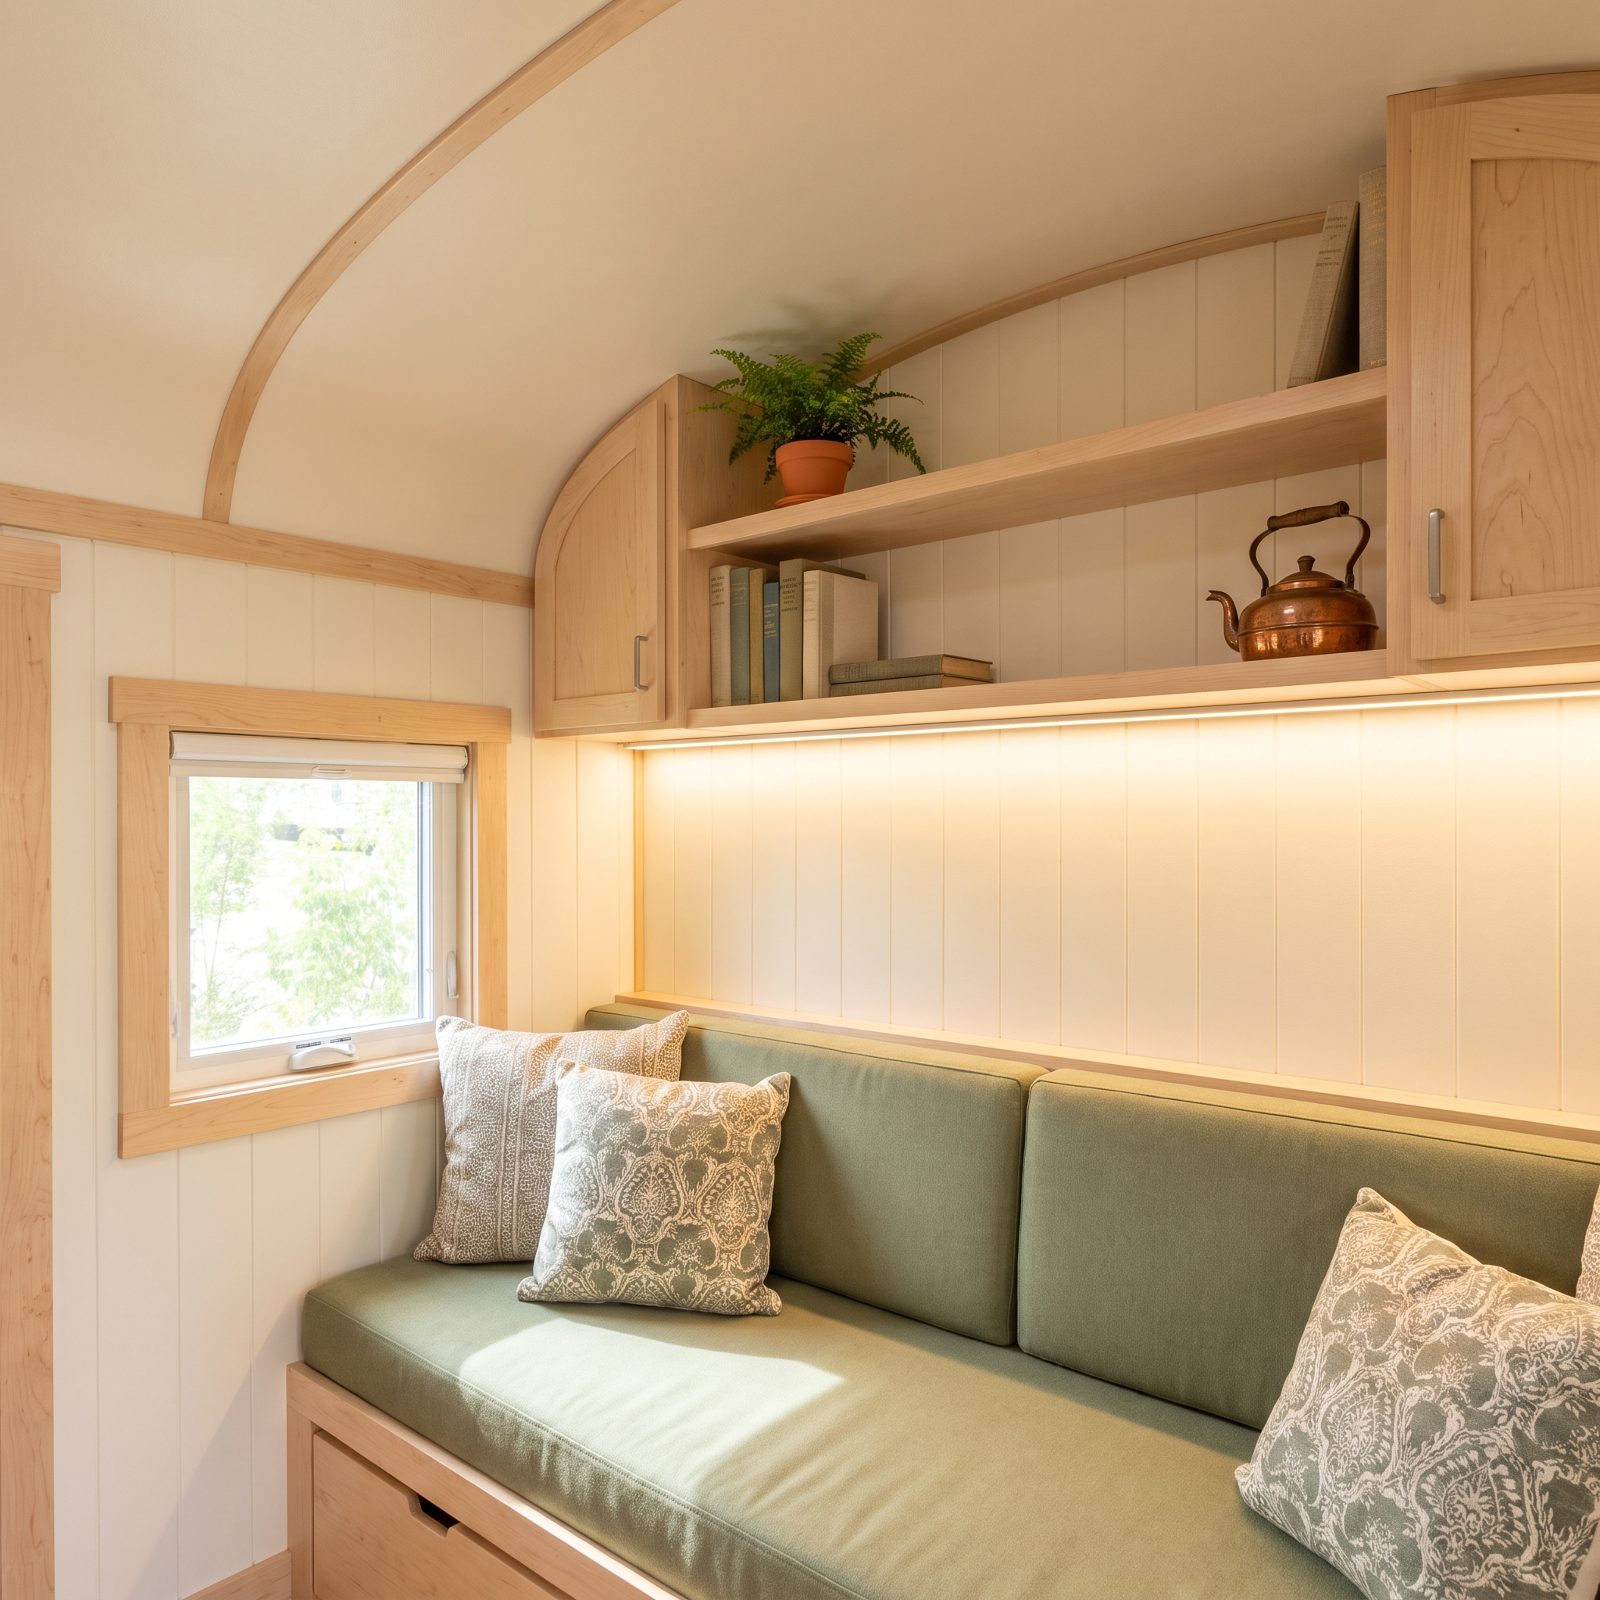
Factory overhead cabinets jut out a good foot deep, right at head height along both walls. You feel them before you see them, usually with your temple, somewhere around the third day.
Cut them down to shallow uppers half that depth, or swap in slim open shelving. You lose room for the stuff you never used anyway and you win back the headroom that makes a cabin feel open instead of pressing in on you.
40. Replace Solid Cabinet Panels With Translucent Acrylic Inserts
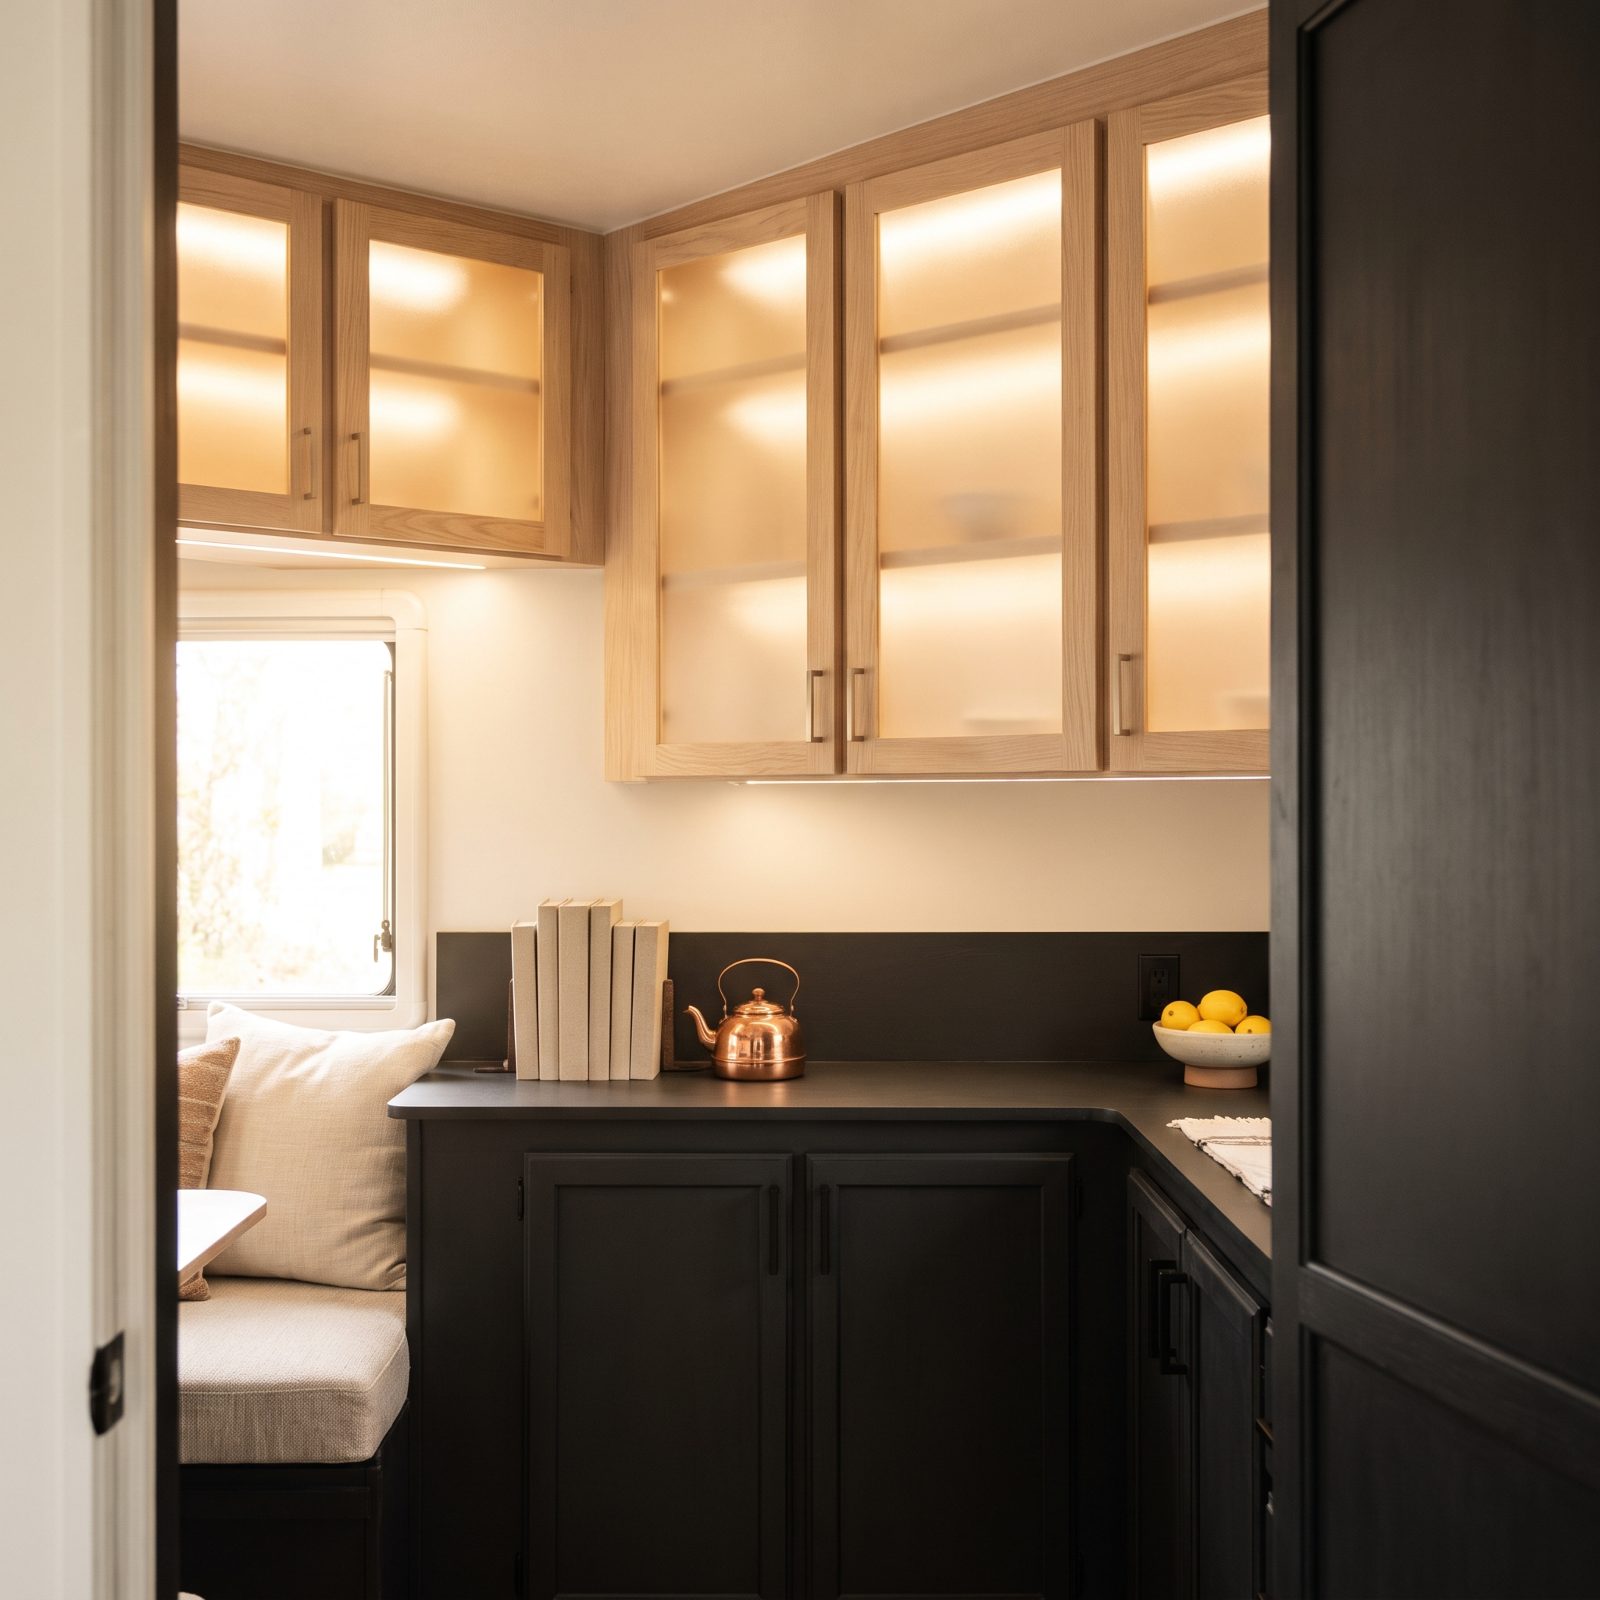
Swapping solid cabinet panels for translucent acrylic, reeded or frosted, is the sneakiest weight-cutter on this list. Light passes through instead of smacking into a wall, so the cabinet row stops reading as a solid block.
Do it across the whole run of upper doors. Frosted panels blur the contents, so you get the glow without putting your whole kitchen on display. Tuck a warm LED strip inside and the panels glow in the evening, which doubles as soft ambient light.
Small change, big payoff. The uppers look like they’re floating instead of hanging there like a shelf full of bricks.
39. Swap Busy Tile for a Seamless Backsplash Panel With Barely-There Grout Lines
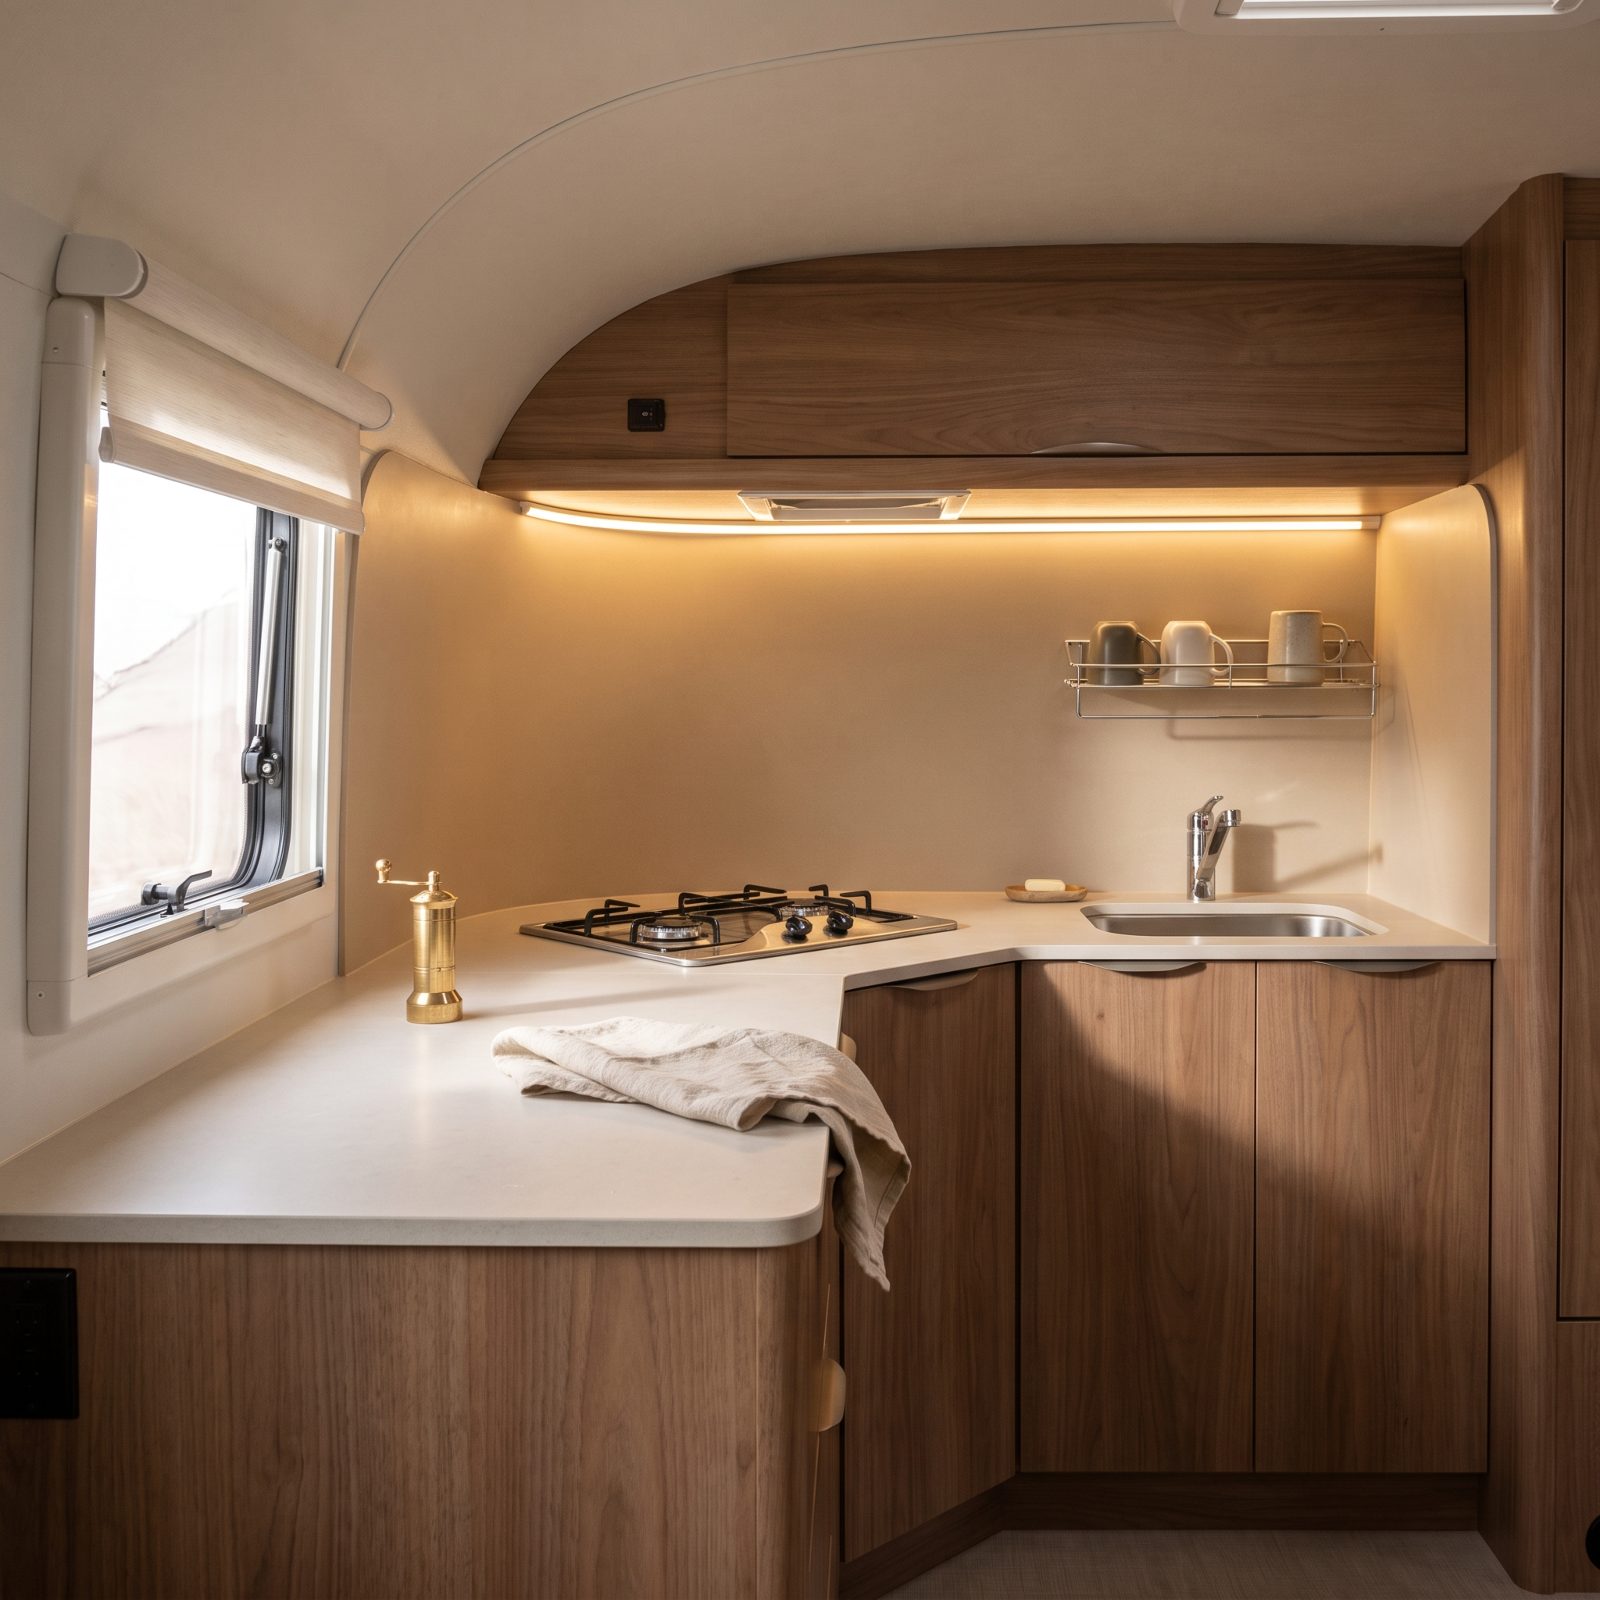
Tiny subway tile in a tiny kitchen is a visual trap. All those grout lines chop a two-foot backsplash into fifty little segments, and your eye reads every seam as a wall closing in. You bought it because it looked cottagey at the store, but in the rig it makes the galley feel like a phone booth.
A single panel fixes it in an afternoon. Large-format porcelain, an acrylic sheet, or a solid composite in a quiet tone gives your eye nothing to trip over, so the surface reads as one calm plane and the space feels wider than it measures.
Go matte, never glossy. Glossy throws glare from your overhead lights and announces every water spot you ever leave behind.
38. Round Off Those Sharp Cabinet Corners and Watch the Aisle Grow
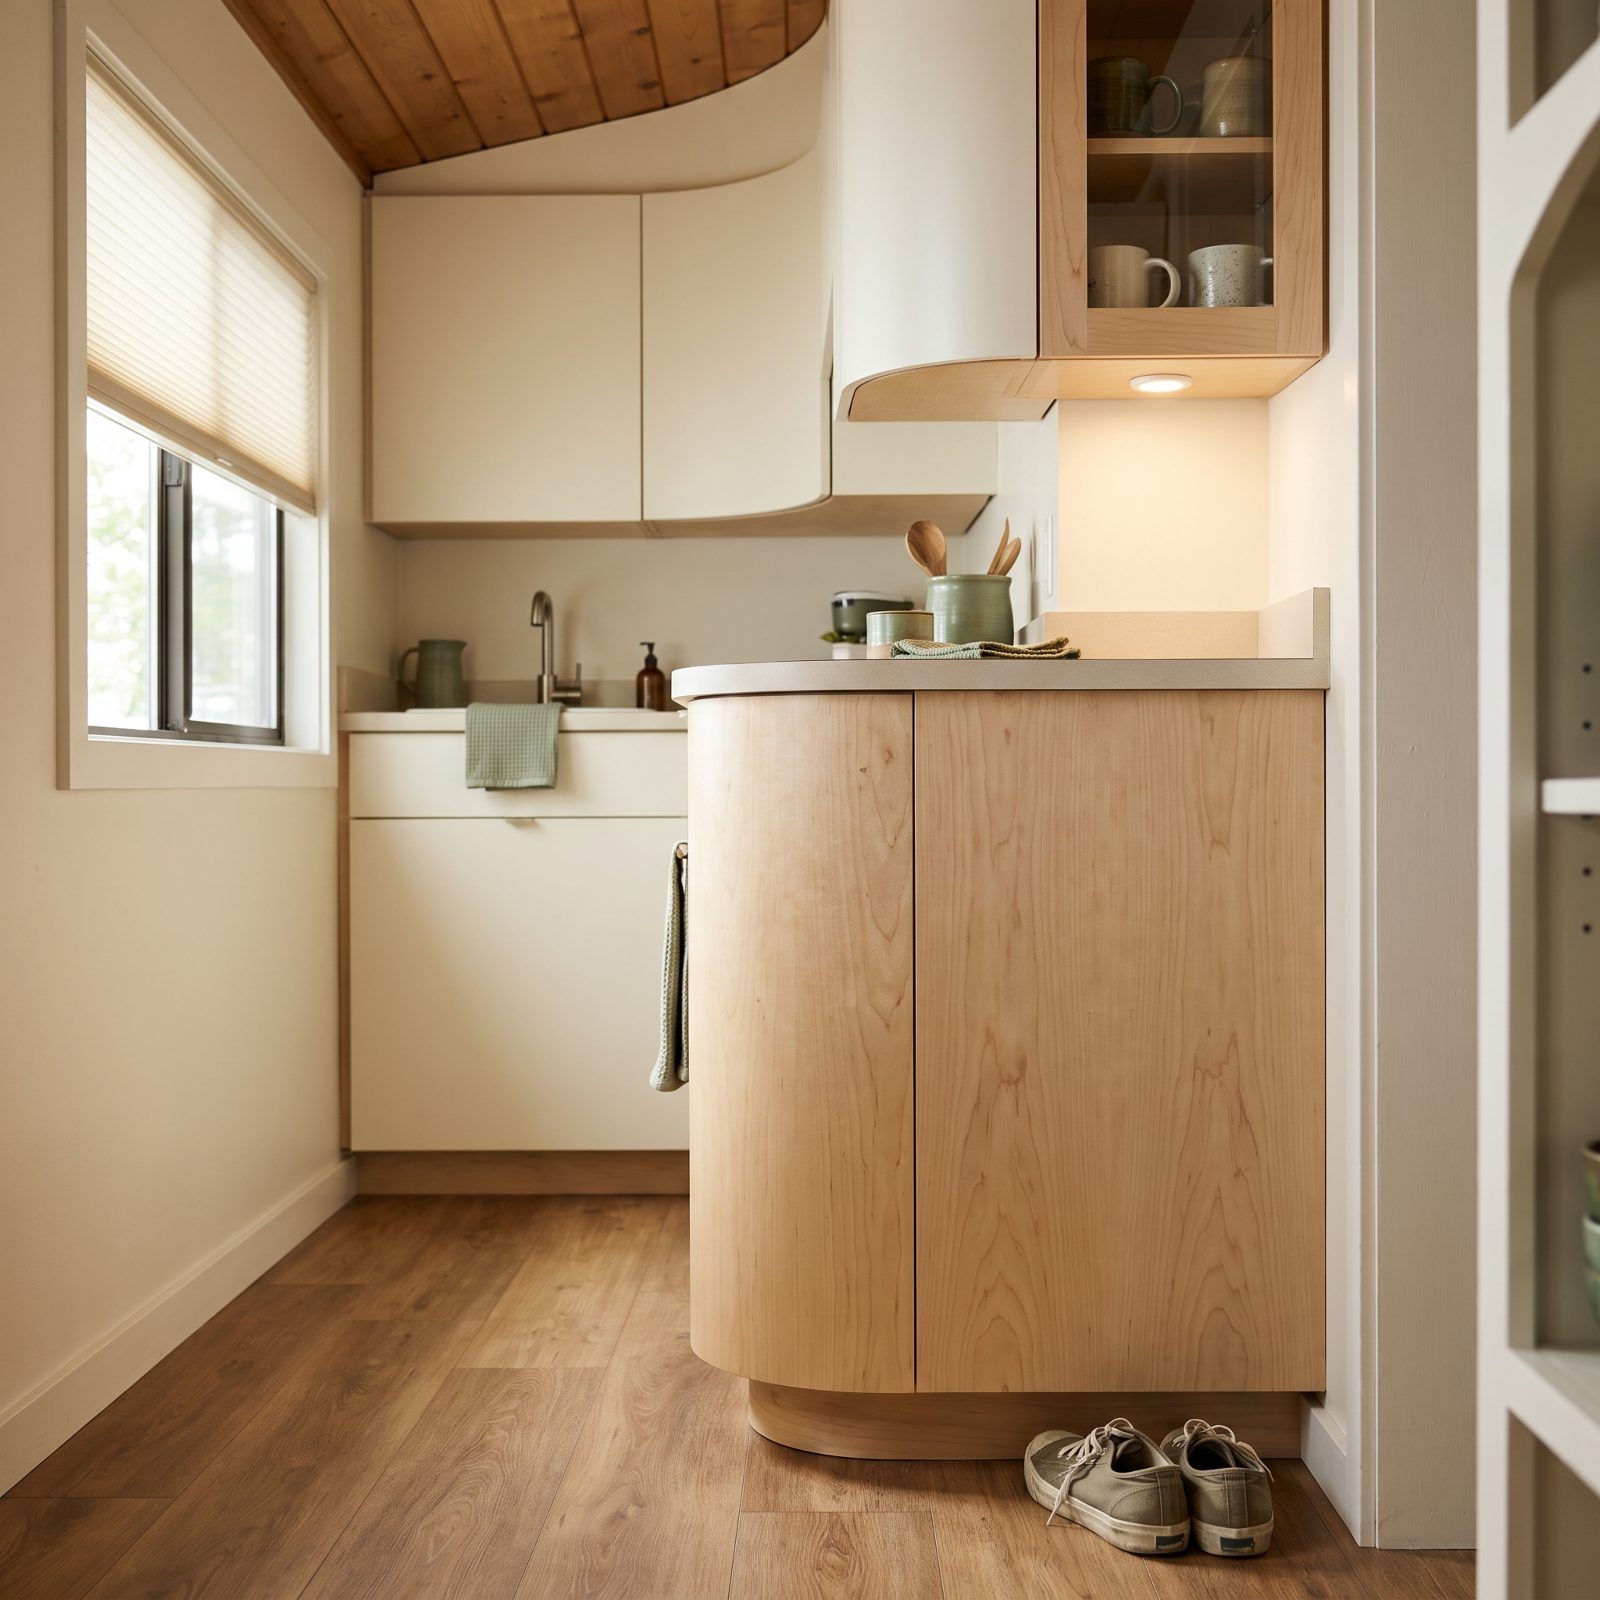
You know the hip bruise. Every full-timer has one, right where the cabinet corner catches you on the way to the bathroom at 2 a.m. That sharp point isn’t just a bruise factory — it visually narrows the aisle, because your eye and your body both flinch away from it.
Round the corner into a gentle radius. A router with a roundover bit, or a retrofit curved end cap, softens the edge so you flow past instead of edging around. The aisle doesn’t get physically wider. It feels wider, though, and your hips will file a formal thank-you.
37. Reclaim the Dead Space Under the Cabinets With Toe-Kick Drawers
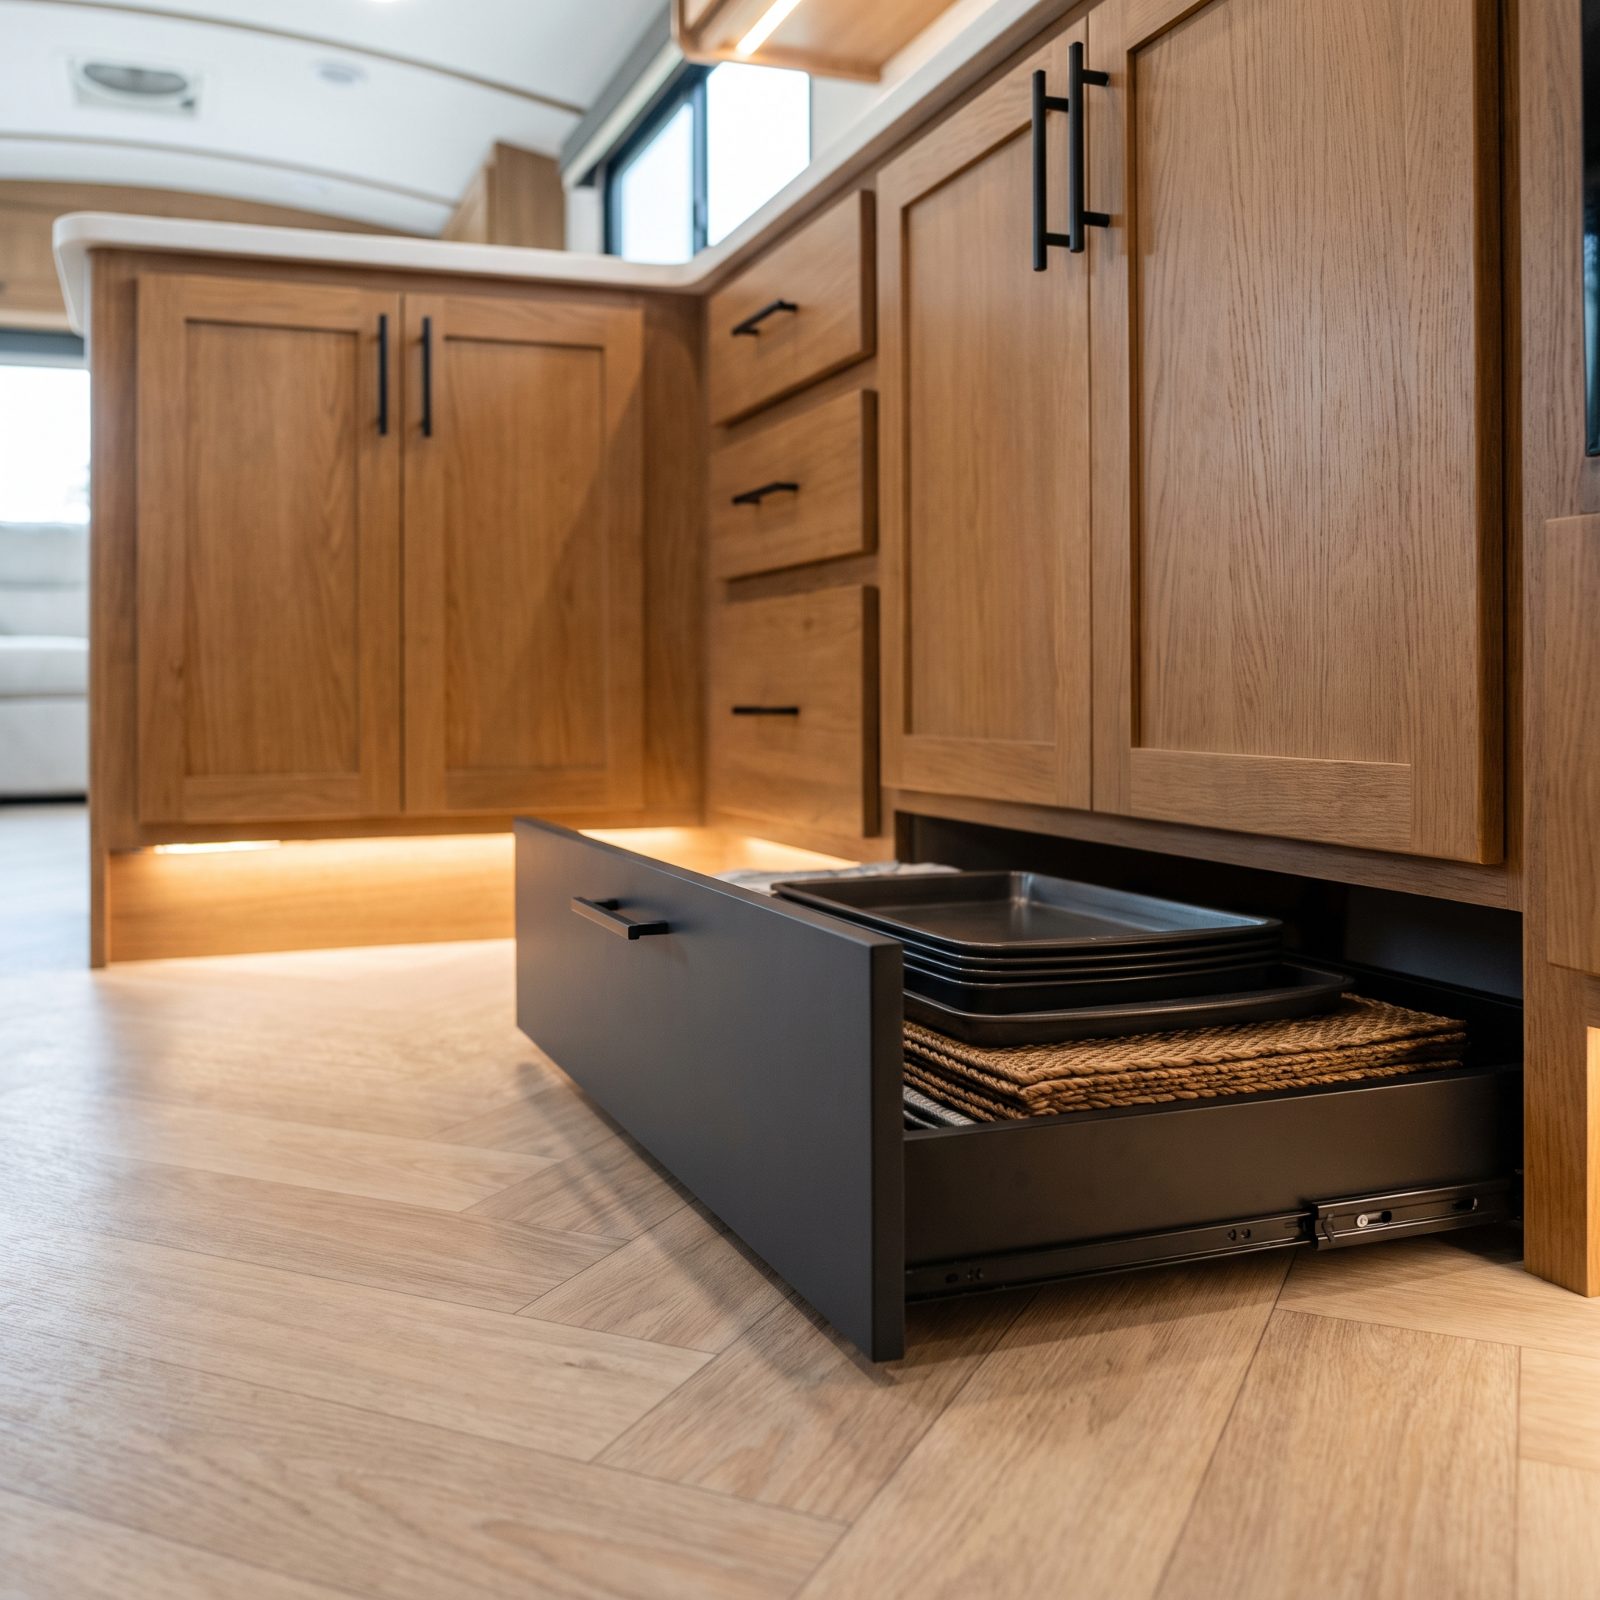
There’s a three-to-four-inch gap running under the base cabinets in your rig, and right now it’s holding nothing but dust and a pen cap that rolled under there years ago. That recessed toe-kick is prime real estate going to waste.
Fit deep drawers into it. They swallow the flat, annoying stuff that never has a home: cutting boards, cooling racks, placemats, your folding dog bowl. The counter stays clear because the clutter dropped below your sightline entirely.
Soft-close slides are worth the extra few dollars here. Nothing wakes you at a boondocking site like a drawer slamming shut on a washboard road.
36. Hide the Toaster and Coffee Maker in a Pull-Down Appliance Garage
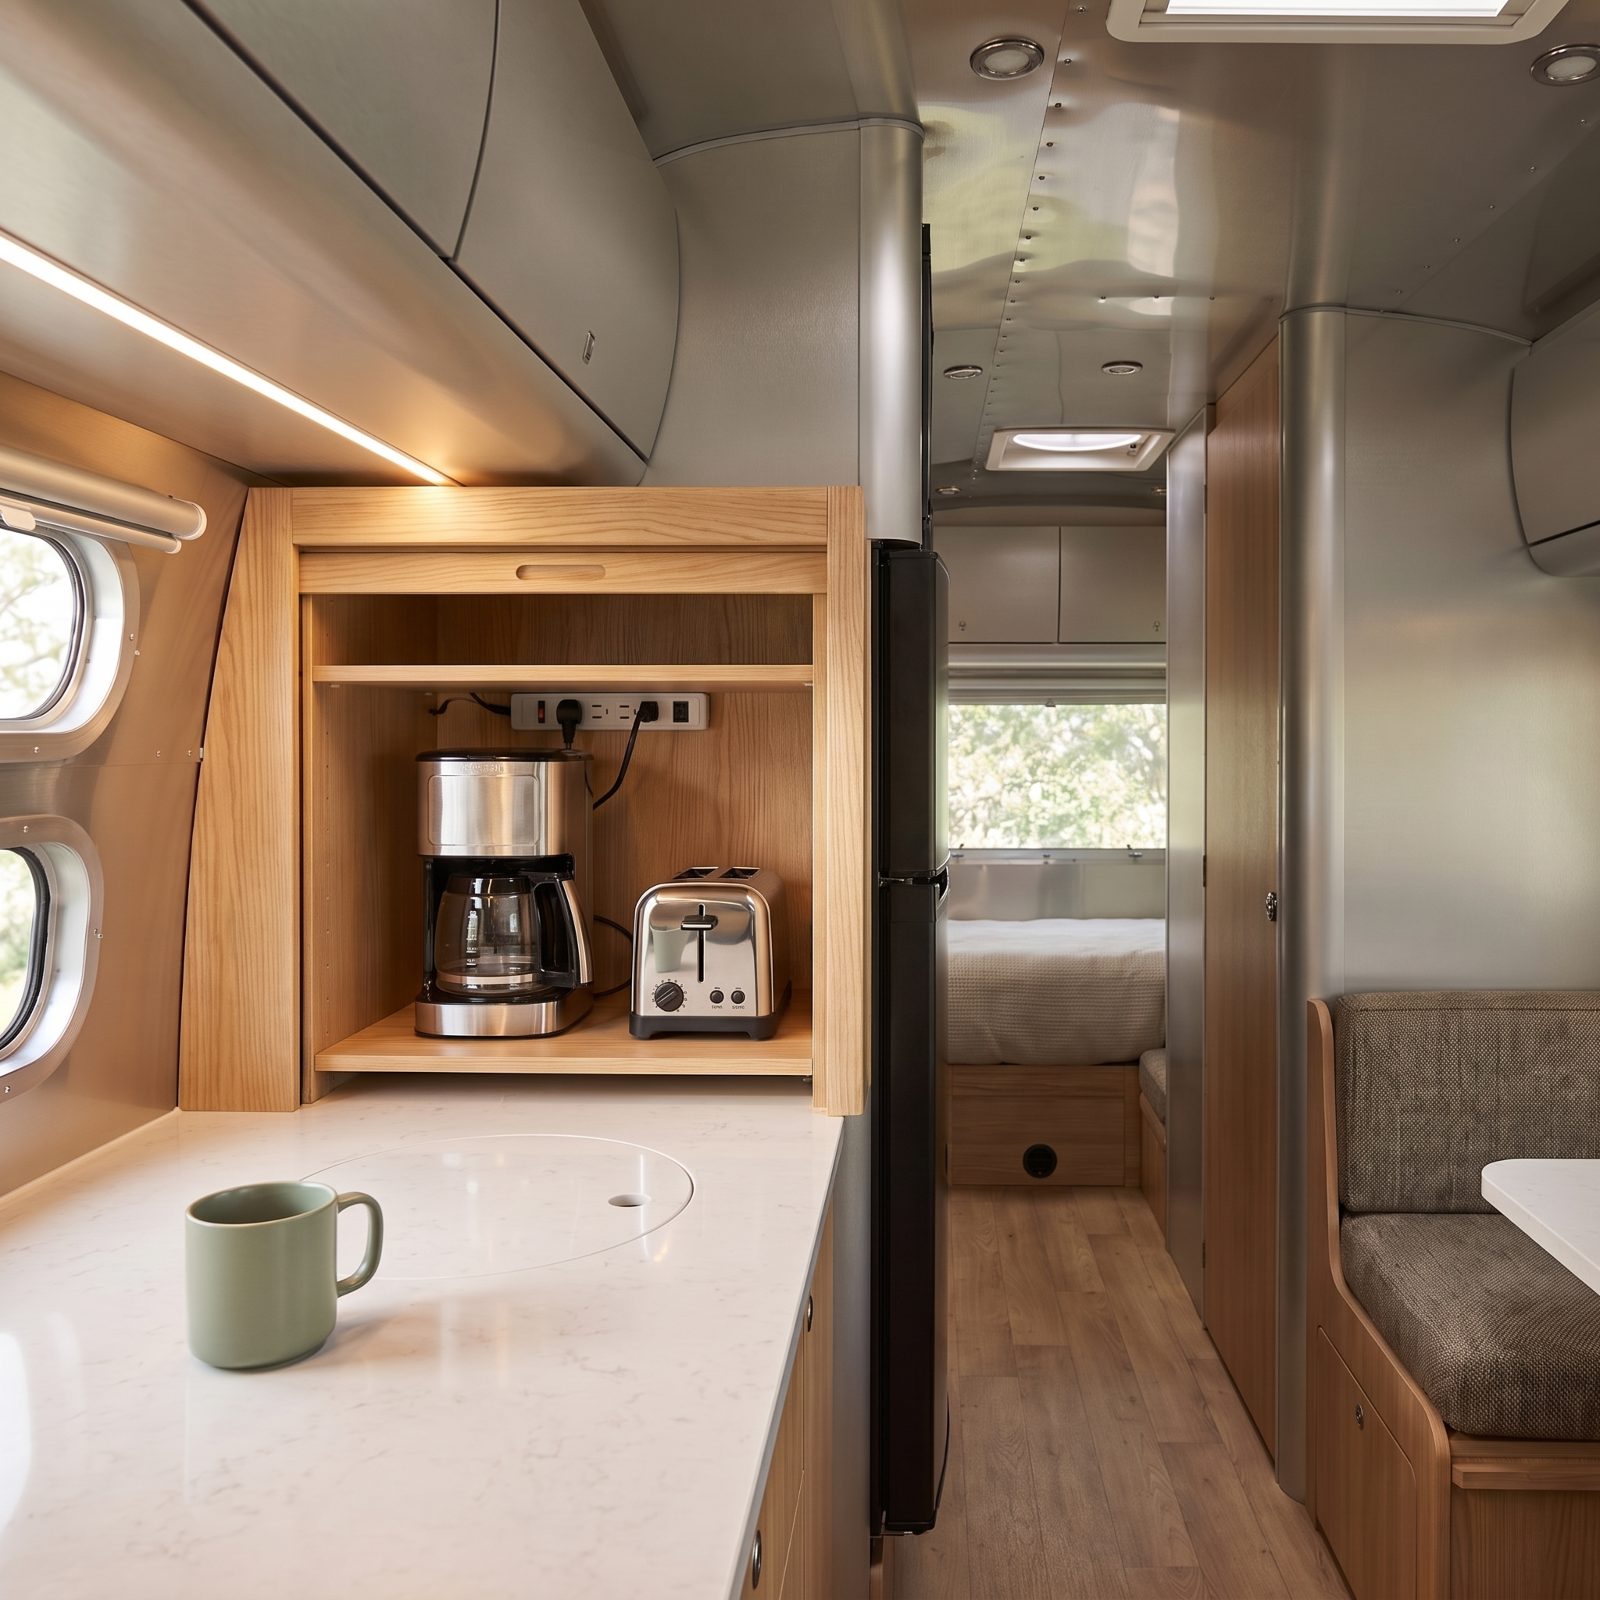
Your counter is doing double duty as an appliance shelf, and it shows. The toaster, the coffee maker, the little blender you use twice a season — all of it lives out in the open, eating up the two square feet of prep space your galley actually has.
Build an appliance garage into a back corner of the counter with a horizontal tambour door that rolls up and tucks away at the top, wired with an outlet inside. Pour your coffee, roll the door down, and the whole morning-counter circus vanishes. Your sightline across the kitchen clears, and the counter goes back to being a counter.
Run the outlet off your existing galley circuit and leave the toaster plugged in permanently inside. One less cord to fish out every day.
35. Install a Fold-Down Counter Extension That Vanishes After Dinner
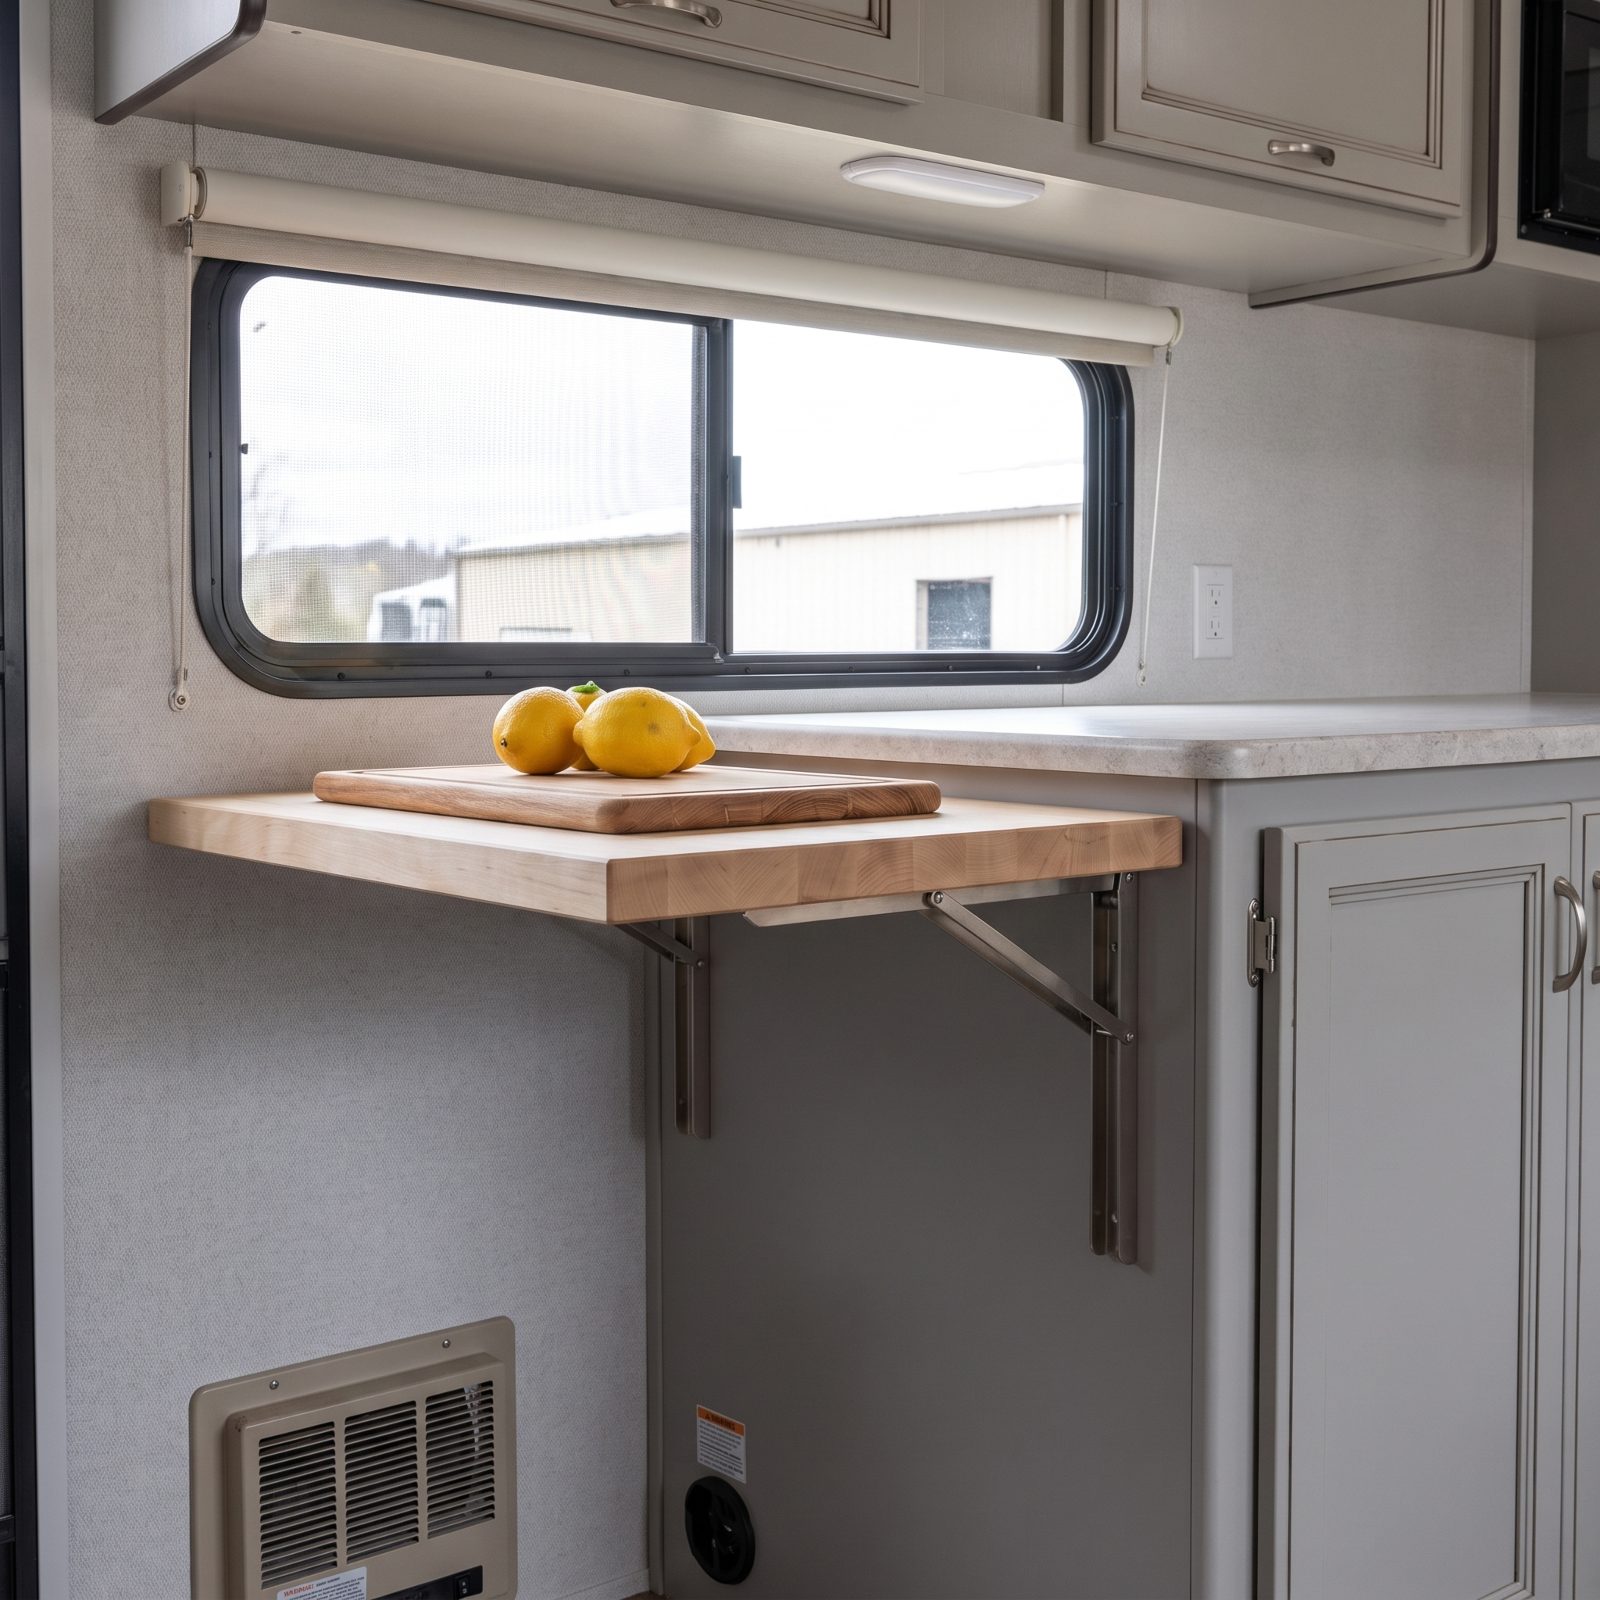
Prep space in a camper is a cruel joke. You’ve got maybe a foot of counter, half of it taken by the sink, and somehow you’re supposed to dice an onion on it without launching pieces into the aisle.
A hinged counter extension gives you twelve more inches when you need them and disappears when you don’t. It folds flat against the cabinet face, drops down on a pair of slim folding brackets, and adds a warm butcher-block top that sits right beside your speckled stone-look counter. Chop your dinner, fold it back up, and the usable floor returns — no permanent footprint, all the working space.
34. Drop a Flush Sink Cover On and Turn Your Basin Into Prep Space
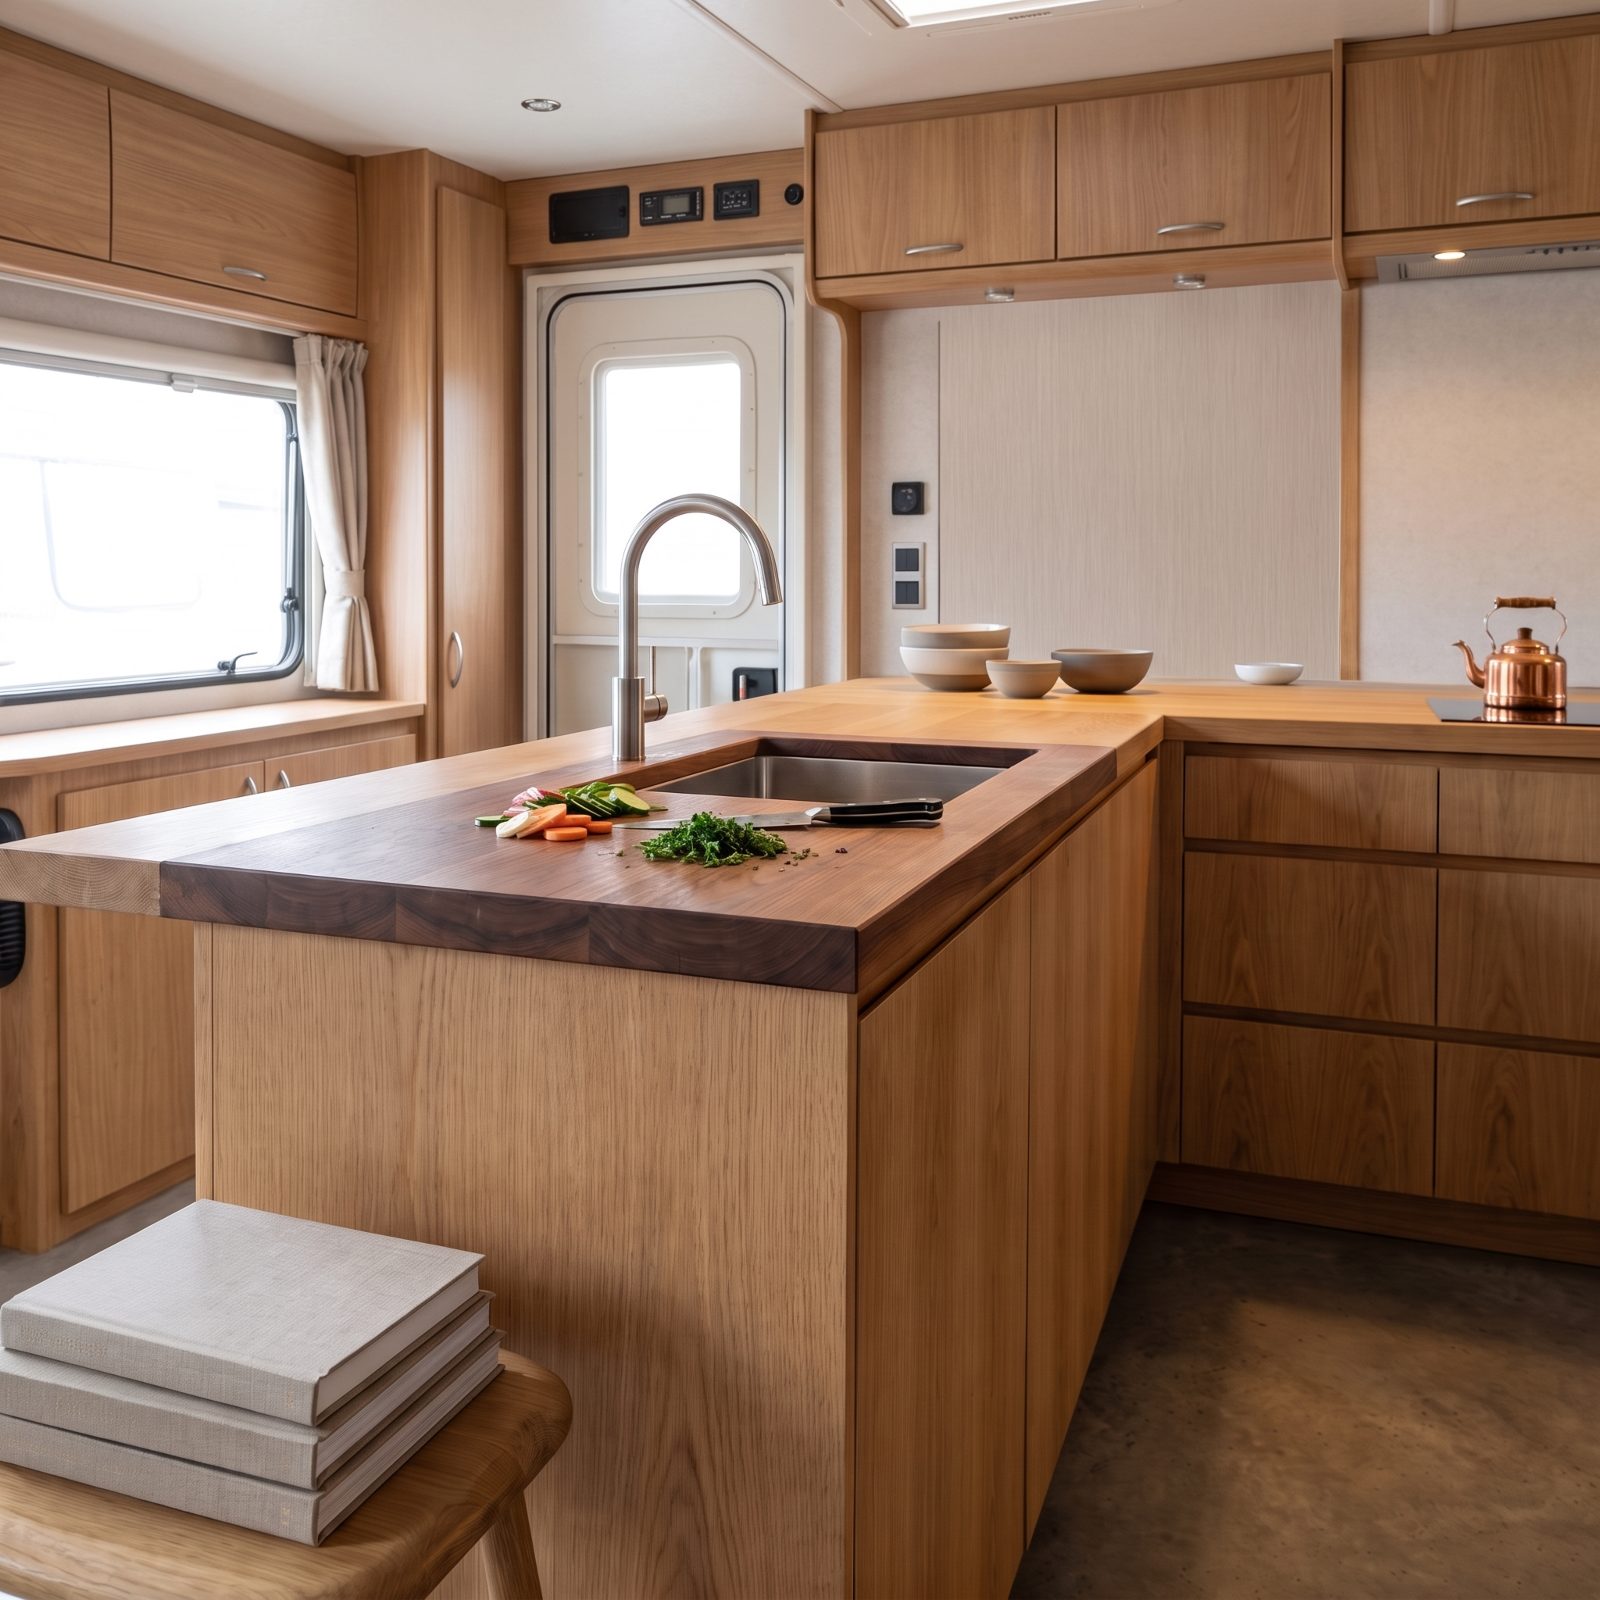
The sink is the single biggest hole in your counter. Any time you’re not actively rinsing something, it’s just a stainless pit breaking up the one continuous surface you wish you had.
A cutting-board cover cut to drop flush into the sink rim closes the gap. Your counter runs edge to edge, and you gain the sink’s whole footprint as prep room. Lift it off to wash, drop it back to roll out dough.
33. Mount a Drop-Leaf Dining Table Right to the Wall
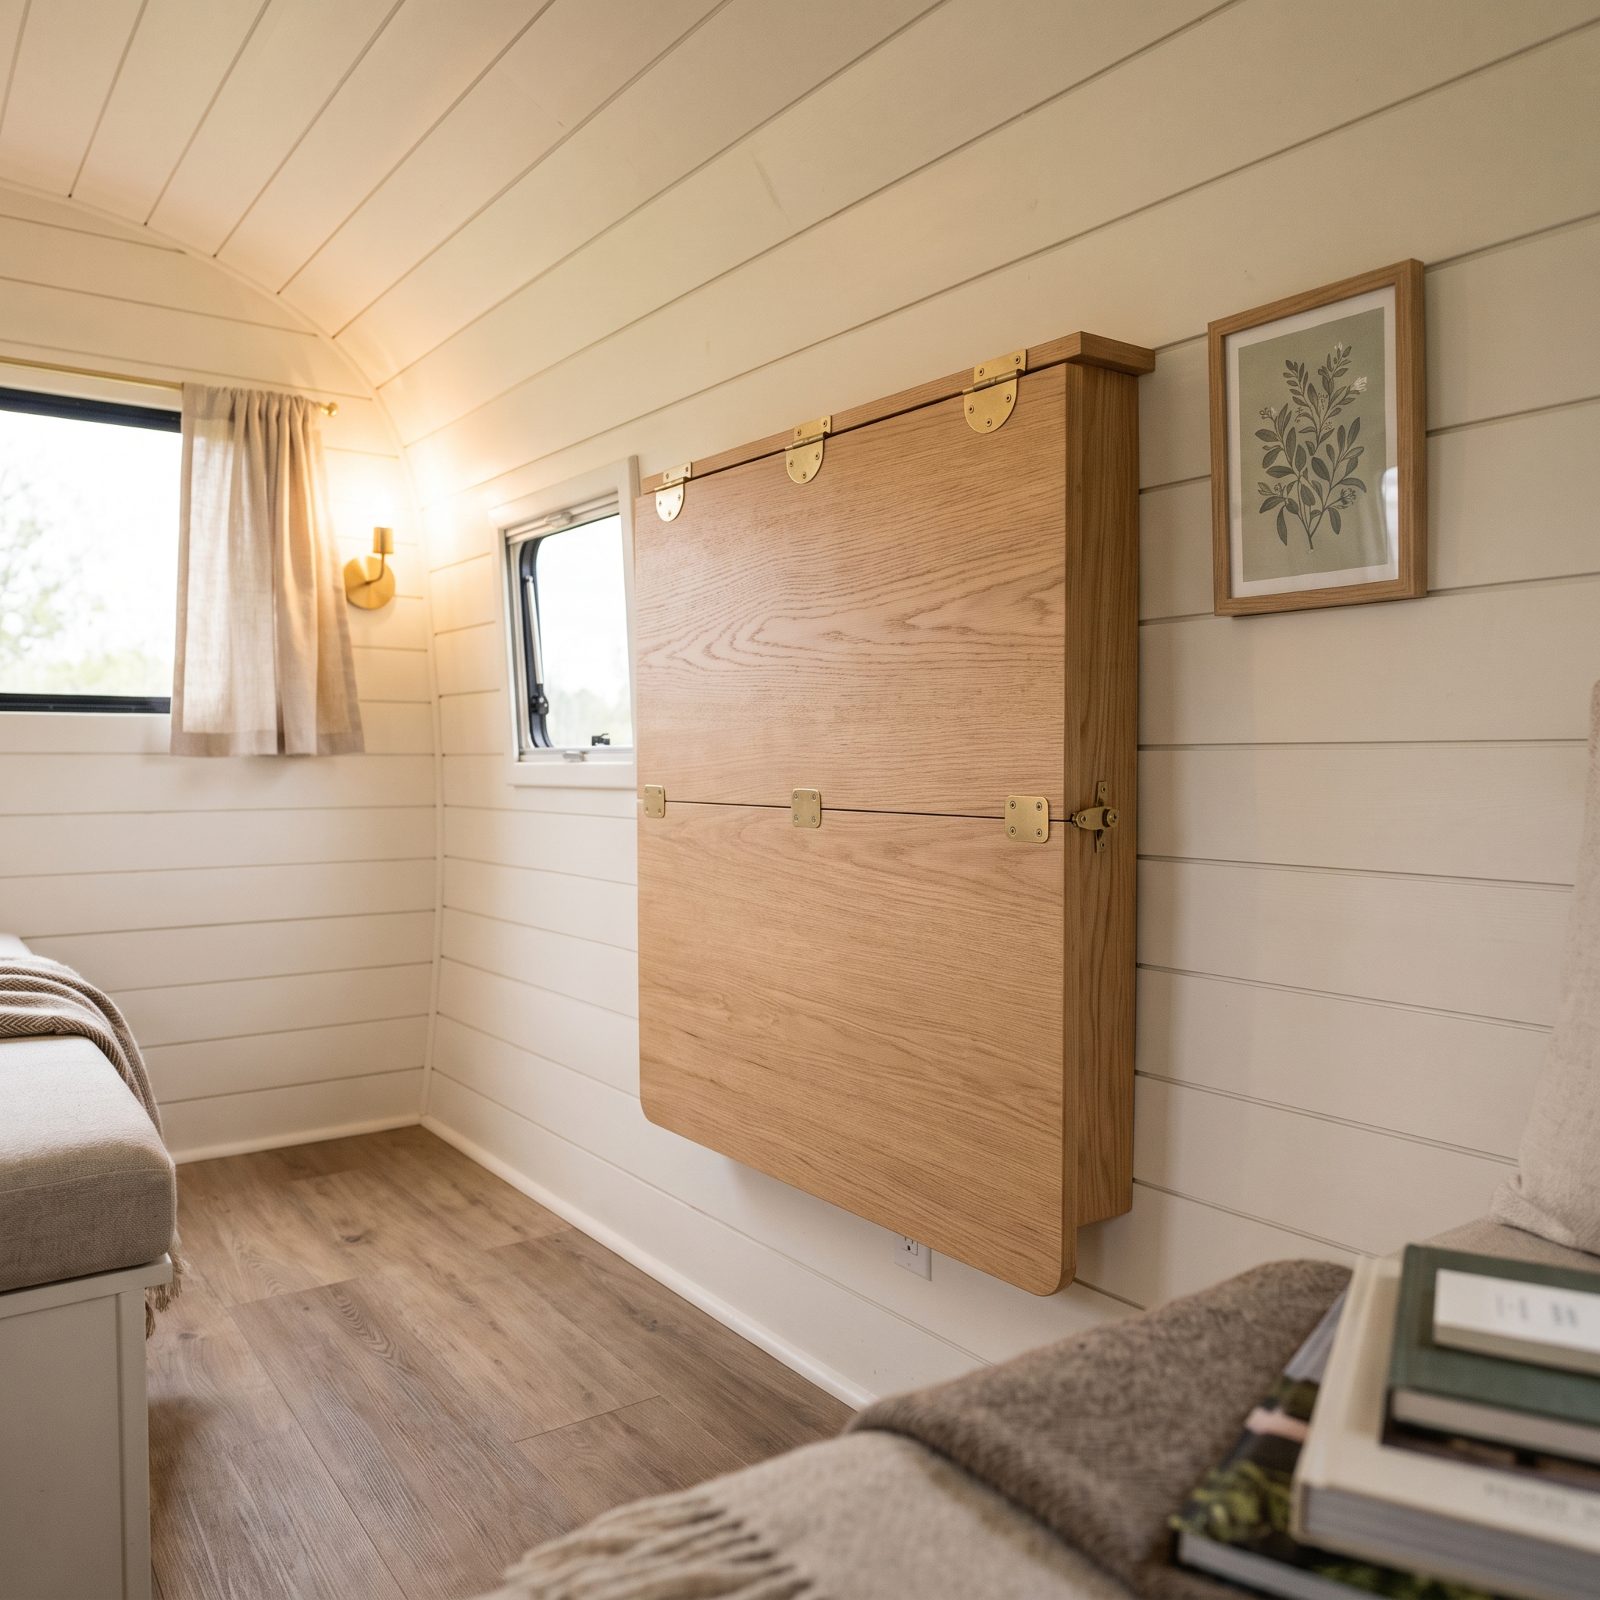
A freestanding table with legs is a floor hog. It camps out in the middle of your living space whether you’re eating or not, and you’re forever sidestepping it to get to the bed.
Bolt a drop-leaf table to the wall instead. Up for meals, folded flat the rest of the day, reclaiming every square inch of floor underneath. A sturdy piano hinge and a fold-out leg are all it takes. When it’s down, you barely notice it’s there, and the walkway opens right back up.
Mount it at the height that works for your chairs, not the factory default. I’ve seen too many wall tables set an inch too low, so you knee it every time you sit down.
32. Build a Floating Workstation That Keeps the Floor in Full View
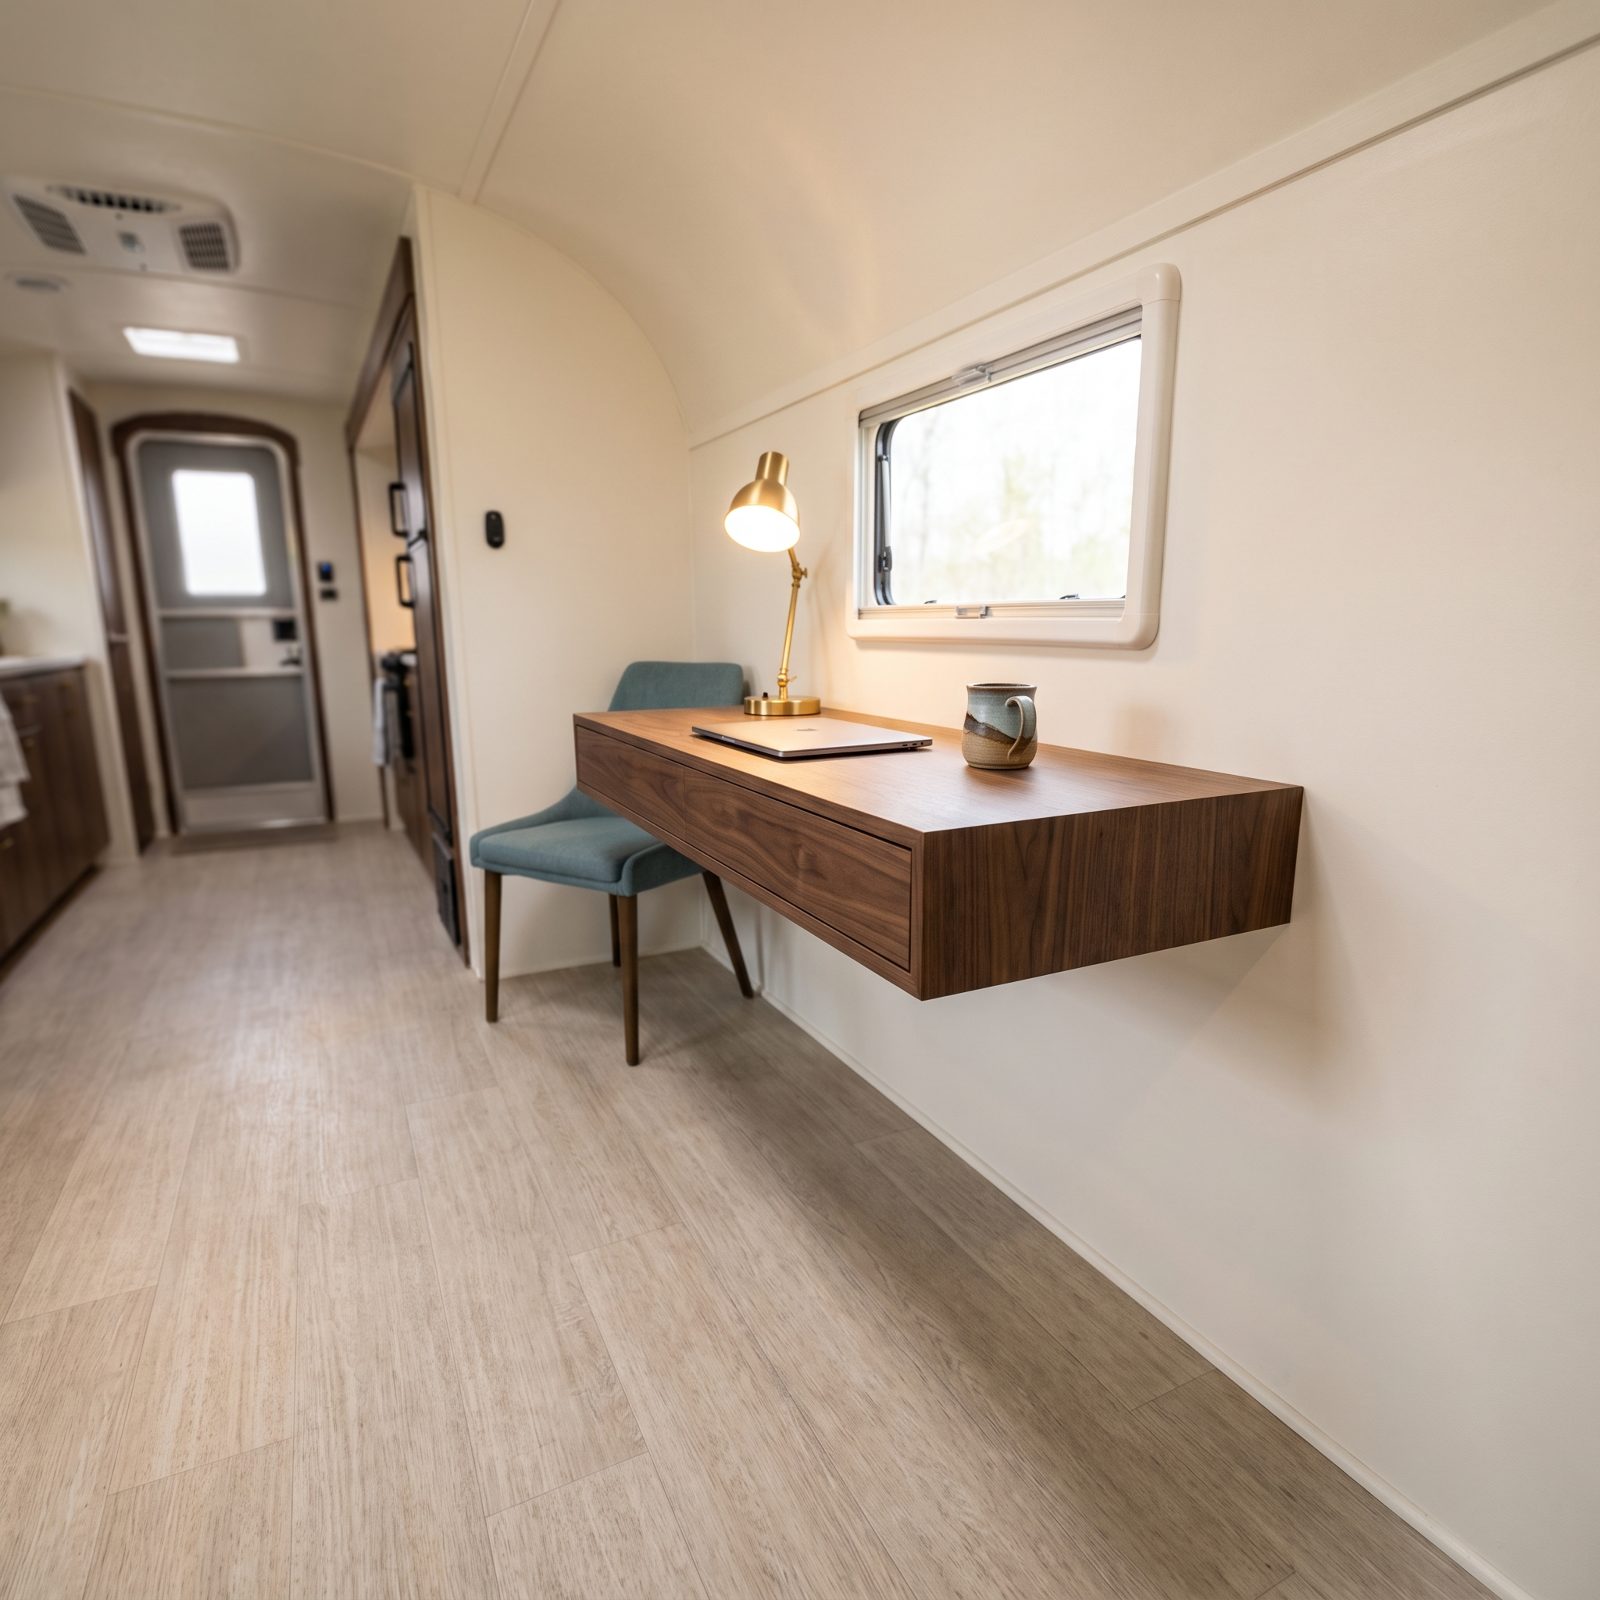
More of us are working from the rig now, and a desk changes the math on space fast. Plant a standard four-legged desk in a travel trailer and you’ve just parked a visual wall in the room.
Cantilever it off the wall instead. A floating desk mounted on a hidden bracket or a ledger board puts your laptop at the right height while leaving the floor completely visible underneath. That sliver of open floor is what tells your eye the room is still open.
The floor you can see is the space you feel you have. Legs break it up. Floating keeps it whole.
31. Ditch the Bulky Dinette Pedestal for a Slim Adjustable Table Mount
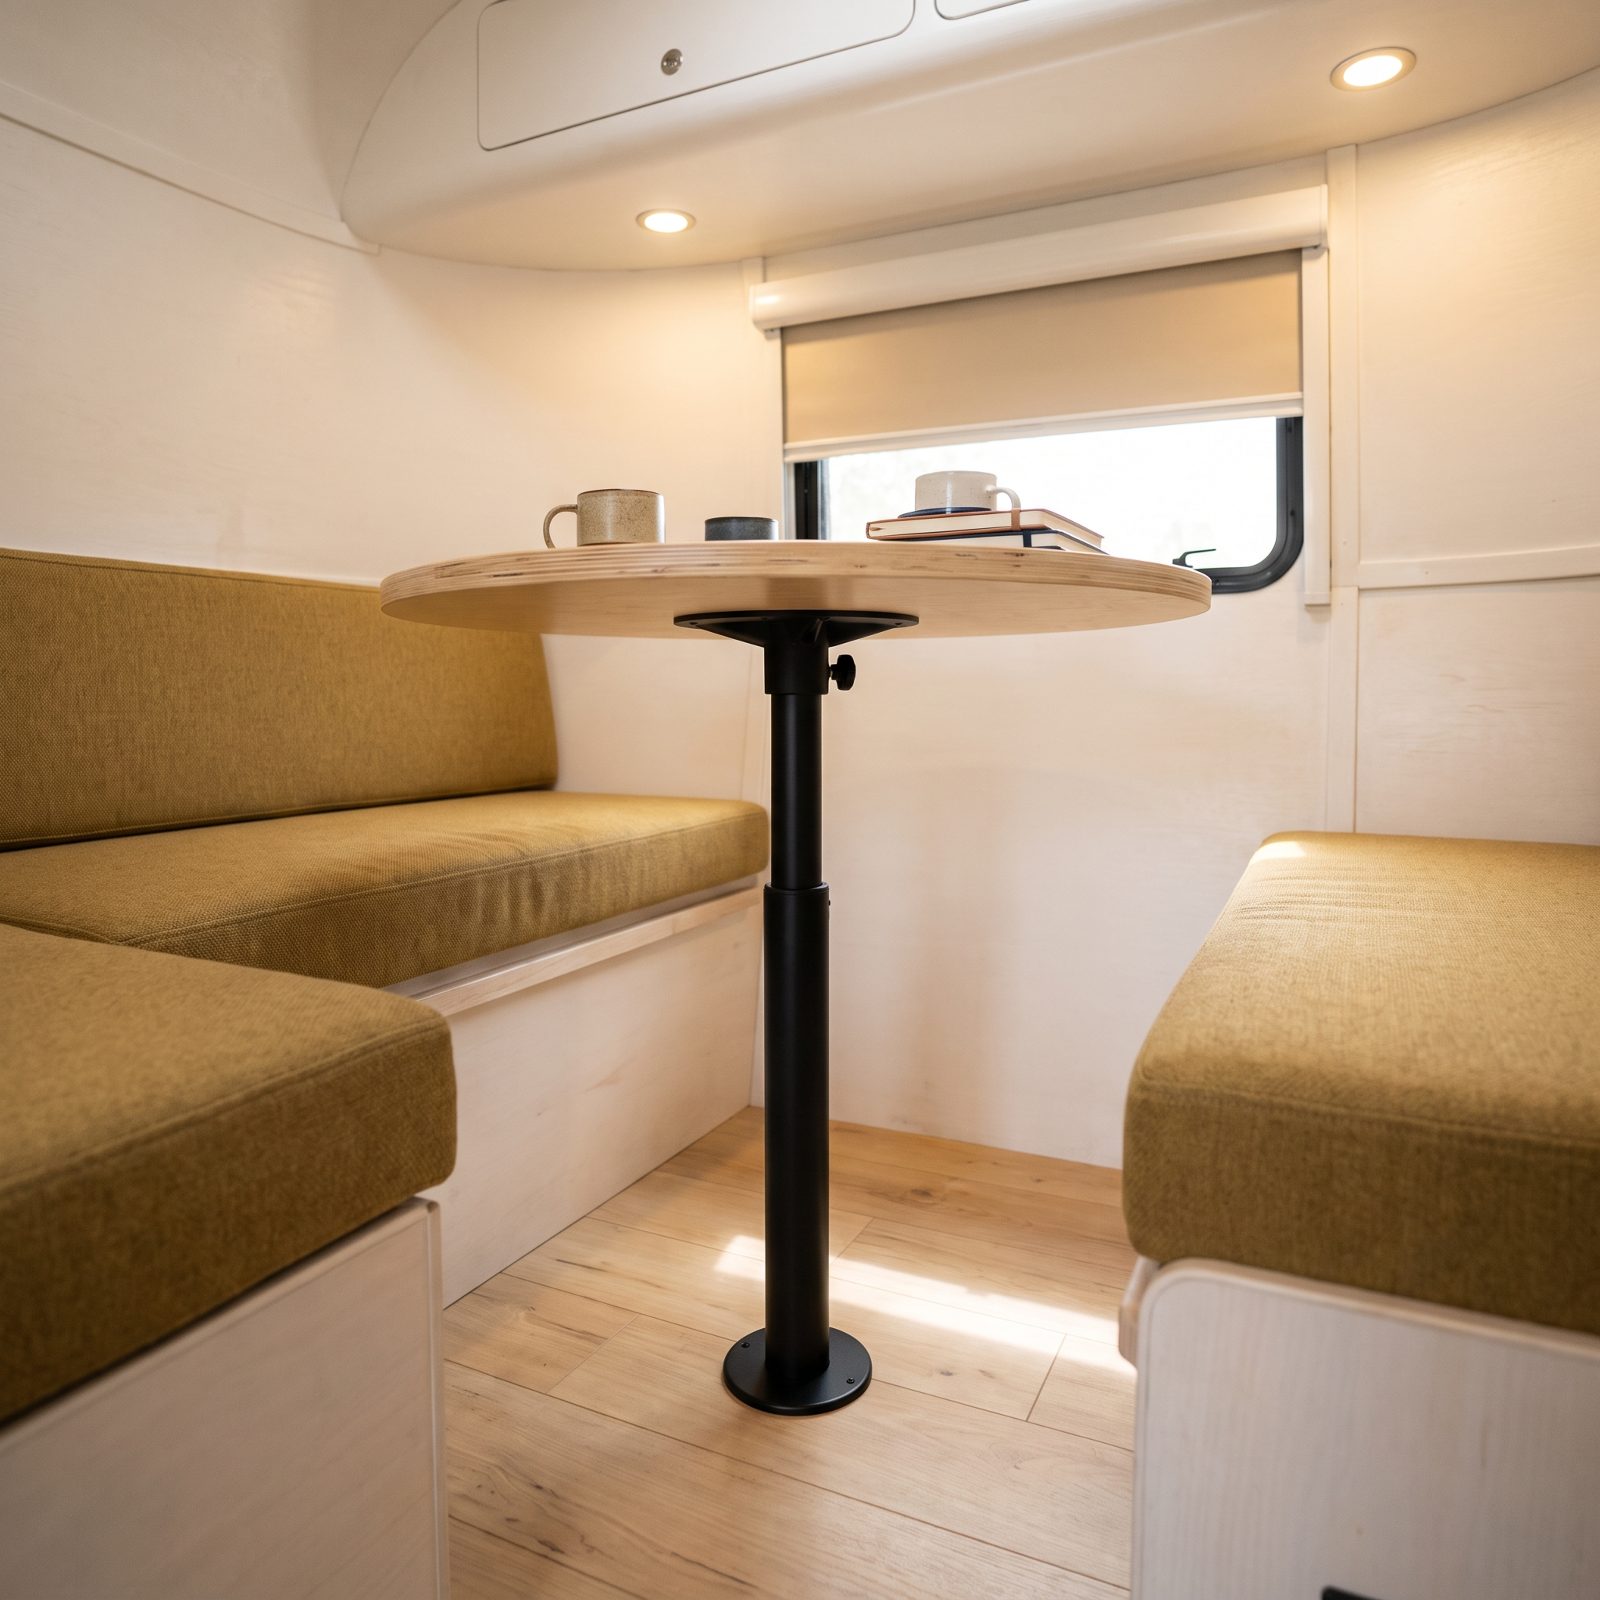
That fat factory pedestal in the middle of your dinette is a shin magnet and a sightline killer — a chunky column planted dead center where your feet want to go.
Swap it for a slim telescoping mount. A single narrow post, often adjustable so the table drops to make a bed, clears out the bulk and gives your legs somewhere to live. The round floor base vanishes, the post reads as a pencil line instead of a stump, and the whole dinette breathes.
30. Turn a Boxed-In Dinette Into One Clean Streamlined Banquette
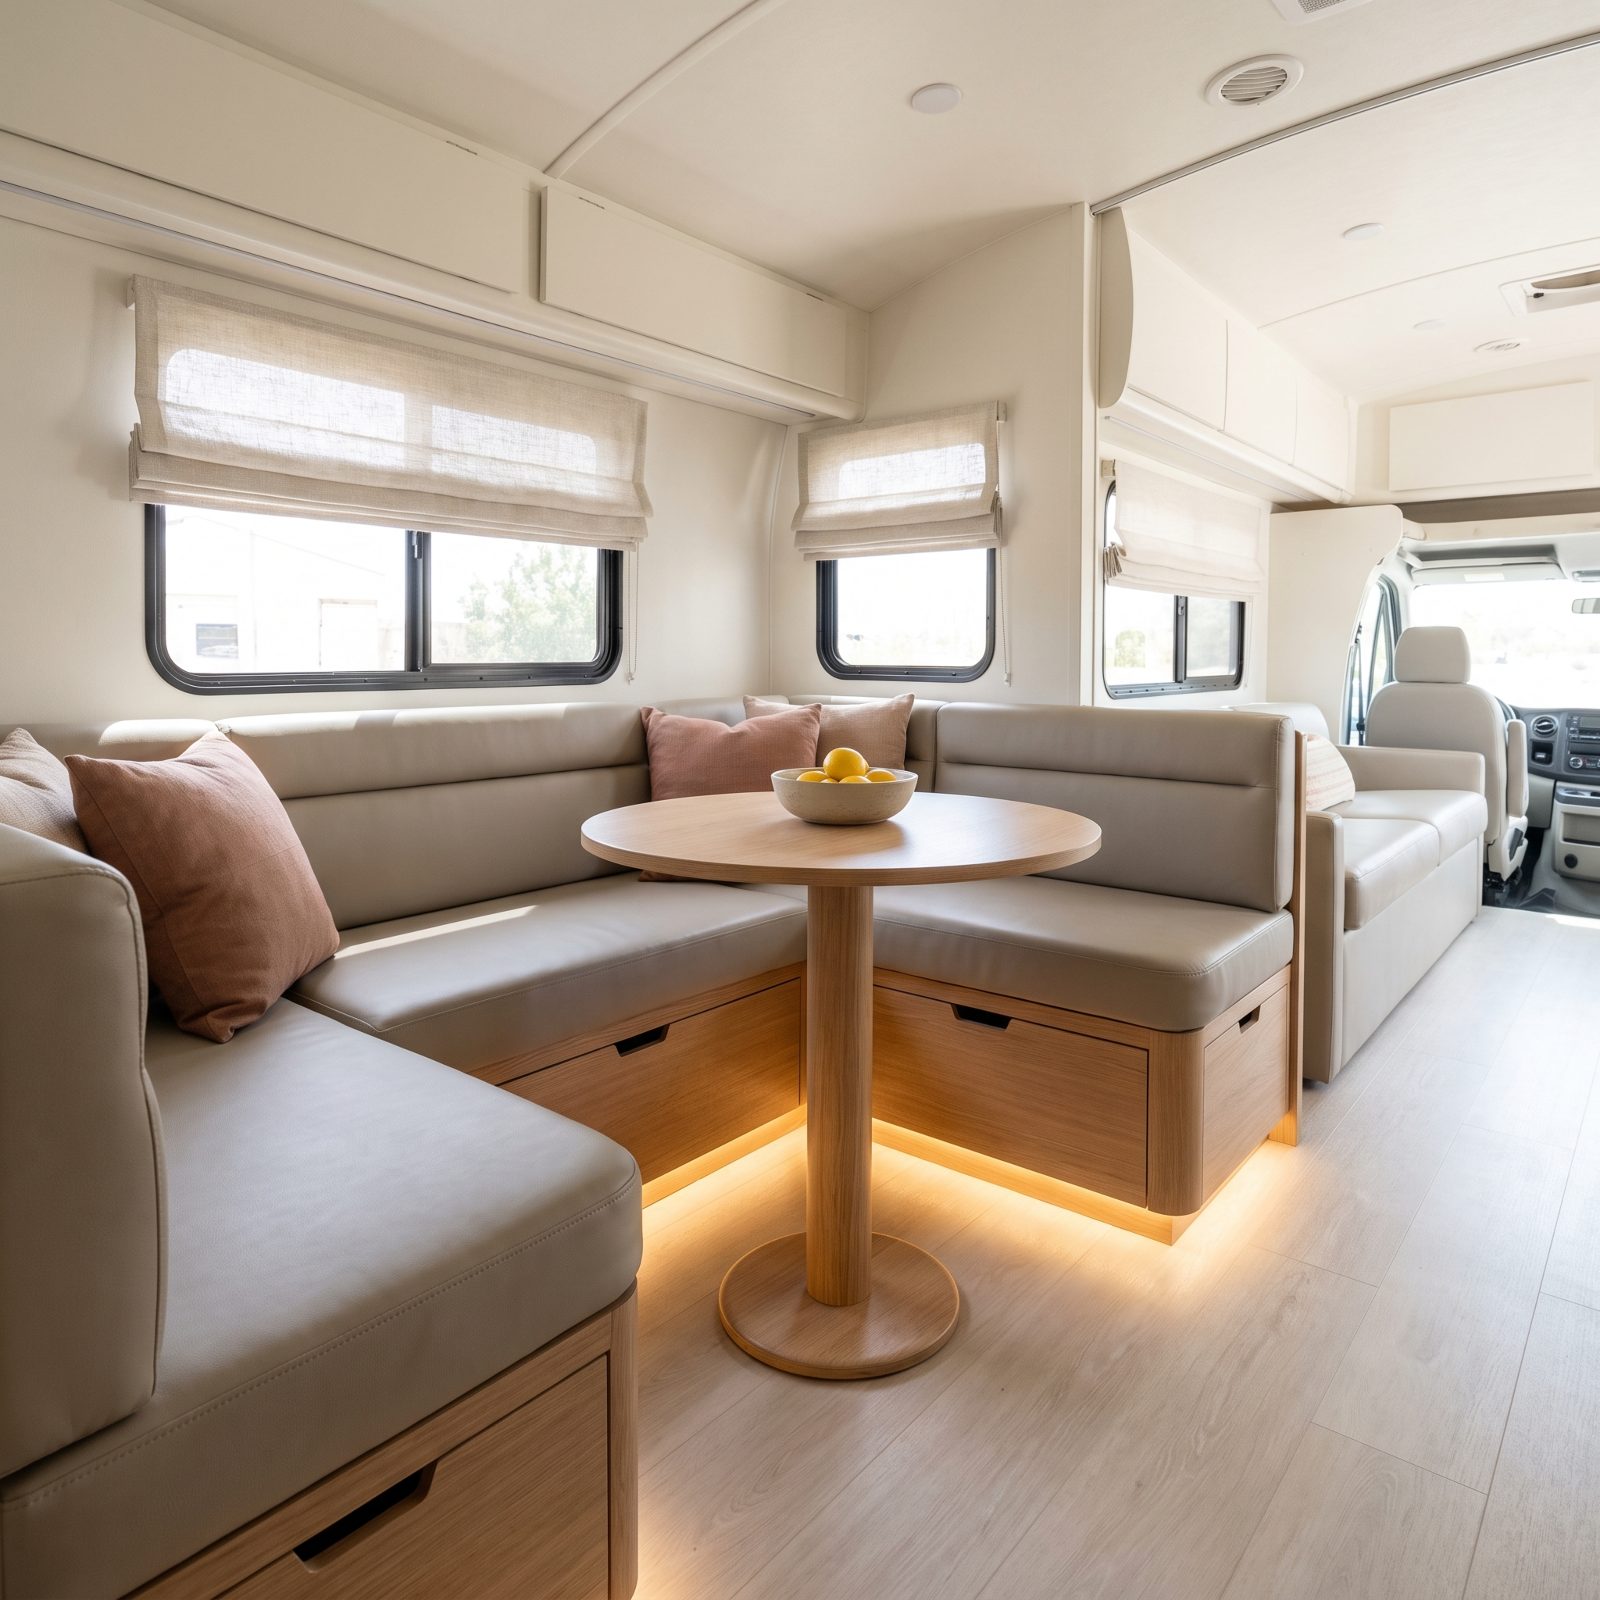
The classic facing-bench dinette eats more room than it ever gives back. Two bulky bench boxes staring at each other, a chunky table between them, and a whole corner that feels walled off from the rest of the rig.
Rebuild it as one continuous U-shaped banquette. A single low seat line wrapping the corner, flush under-seat storage drawers, a slim pedestal table in the middle. The sightline runs clean across the whole space instead of slamming into two upholstered cubes, and the seating flows as one piece instead of two separate boxes.
This is the biggest project on the list and the one that pays off most. I put mine off for two seasons because it looked like real carpentry. One long weekend and a borrowed jigsaw later, I was kicking myself for waiting. Go slower than you think on the measurements and the rest is forgiving.
29. Swap the Bolted-Down Coffee Table for Hollow Nesting Ottomans
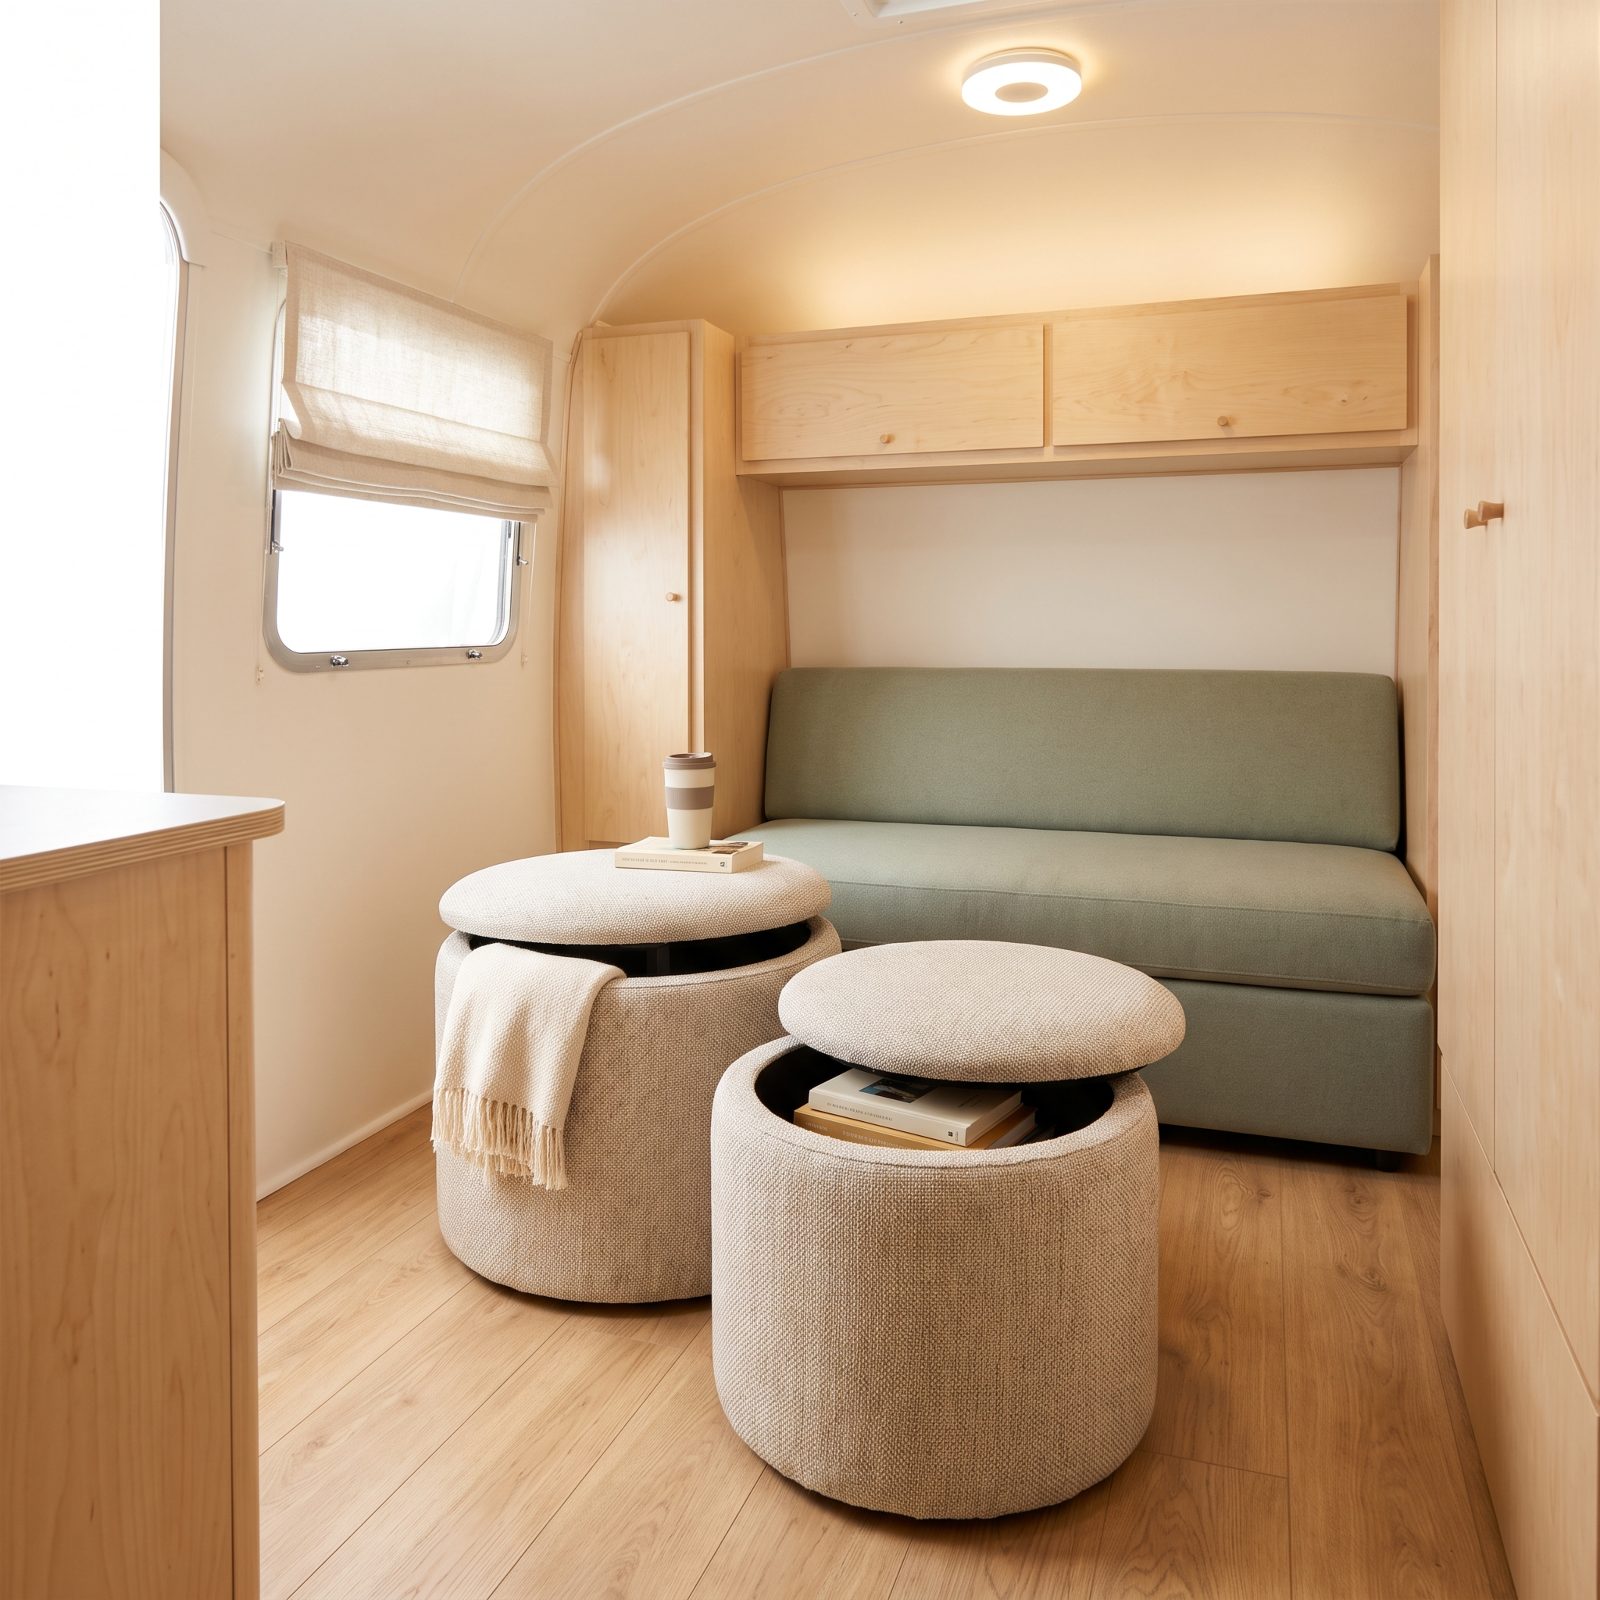
That fixed coffee table bolted to the floor was the first thing I’d rip out. It eats the one open patch of floor you have, and you walk around it a dozen times a day. A nesting pair of hollow ottomans does three jobs at once: footrest, extra seating when the in-laws show up, and storage for the blankets that currently live nowhere good.
Push them together under the window and the aisle opens right up. Pull them apart when you need them. The hollow lids swallow a surprising amount, which matters when every cubic inch is spoken for.
28. Pick an Armless Sofa and Watch the Walls Move Back
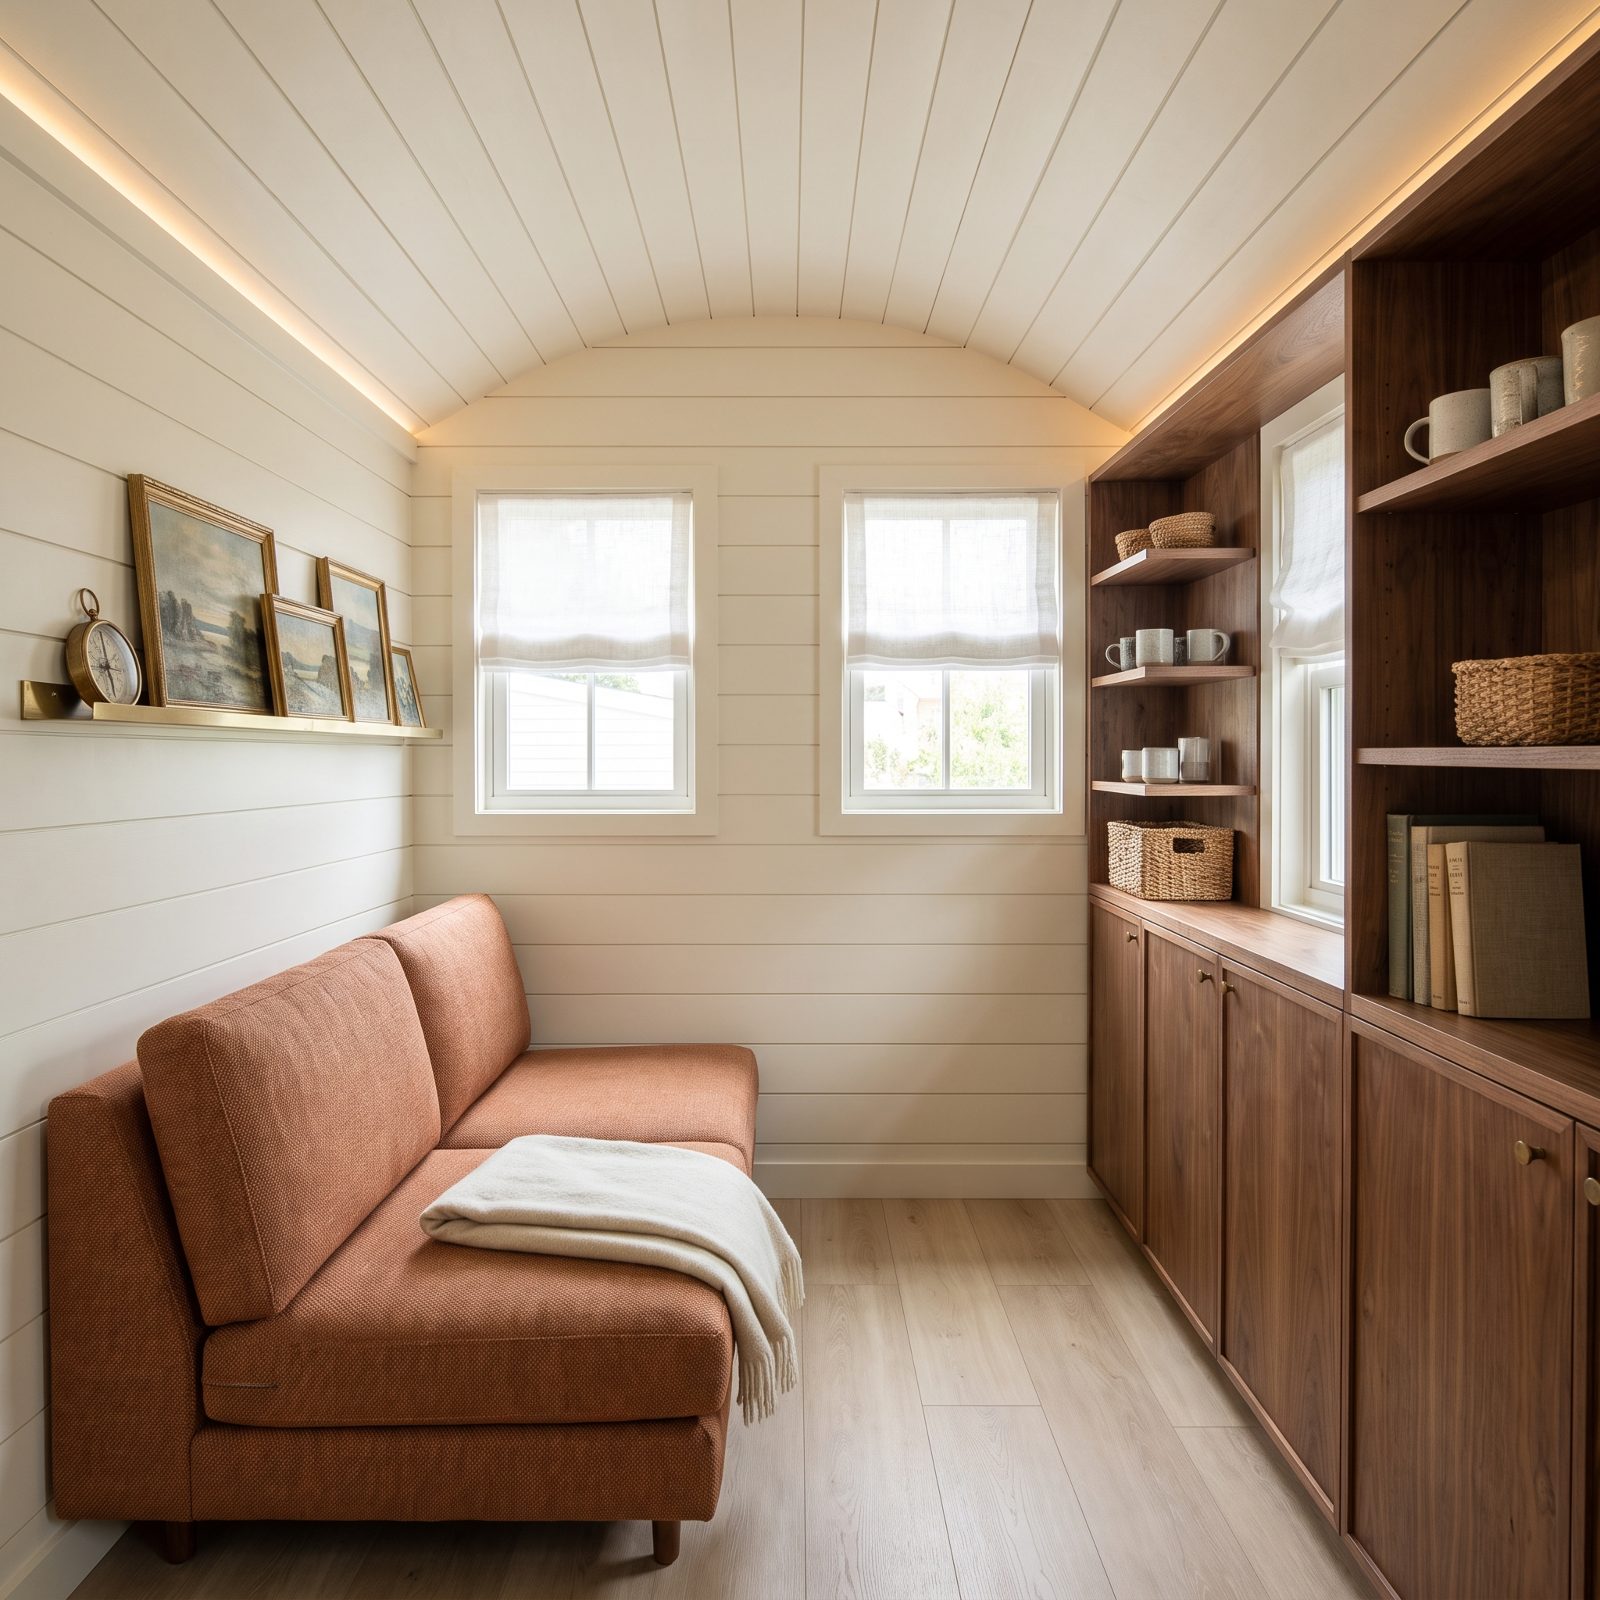
Chunky rolled arms look cozy in a showroom and swallow a foot of wall in a camper. In a space this narrow, an arm is a wall, and your eye stops dead at it.
Go armless. The seat line runs clean from one end to the other, the wall reads longer, and you gain real usable cushion where the arm used to sit. A terracotta armless sofa with a low back does the most work here. You lose a place to prop your feet, sure — but that’s what the ottoman was for.
27. Raise Everything Off the Floor and Let It Flow Underneath
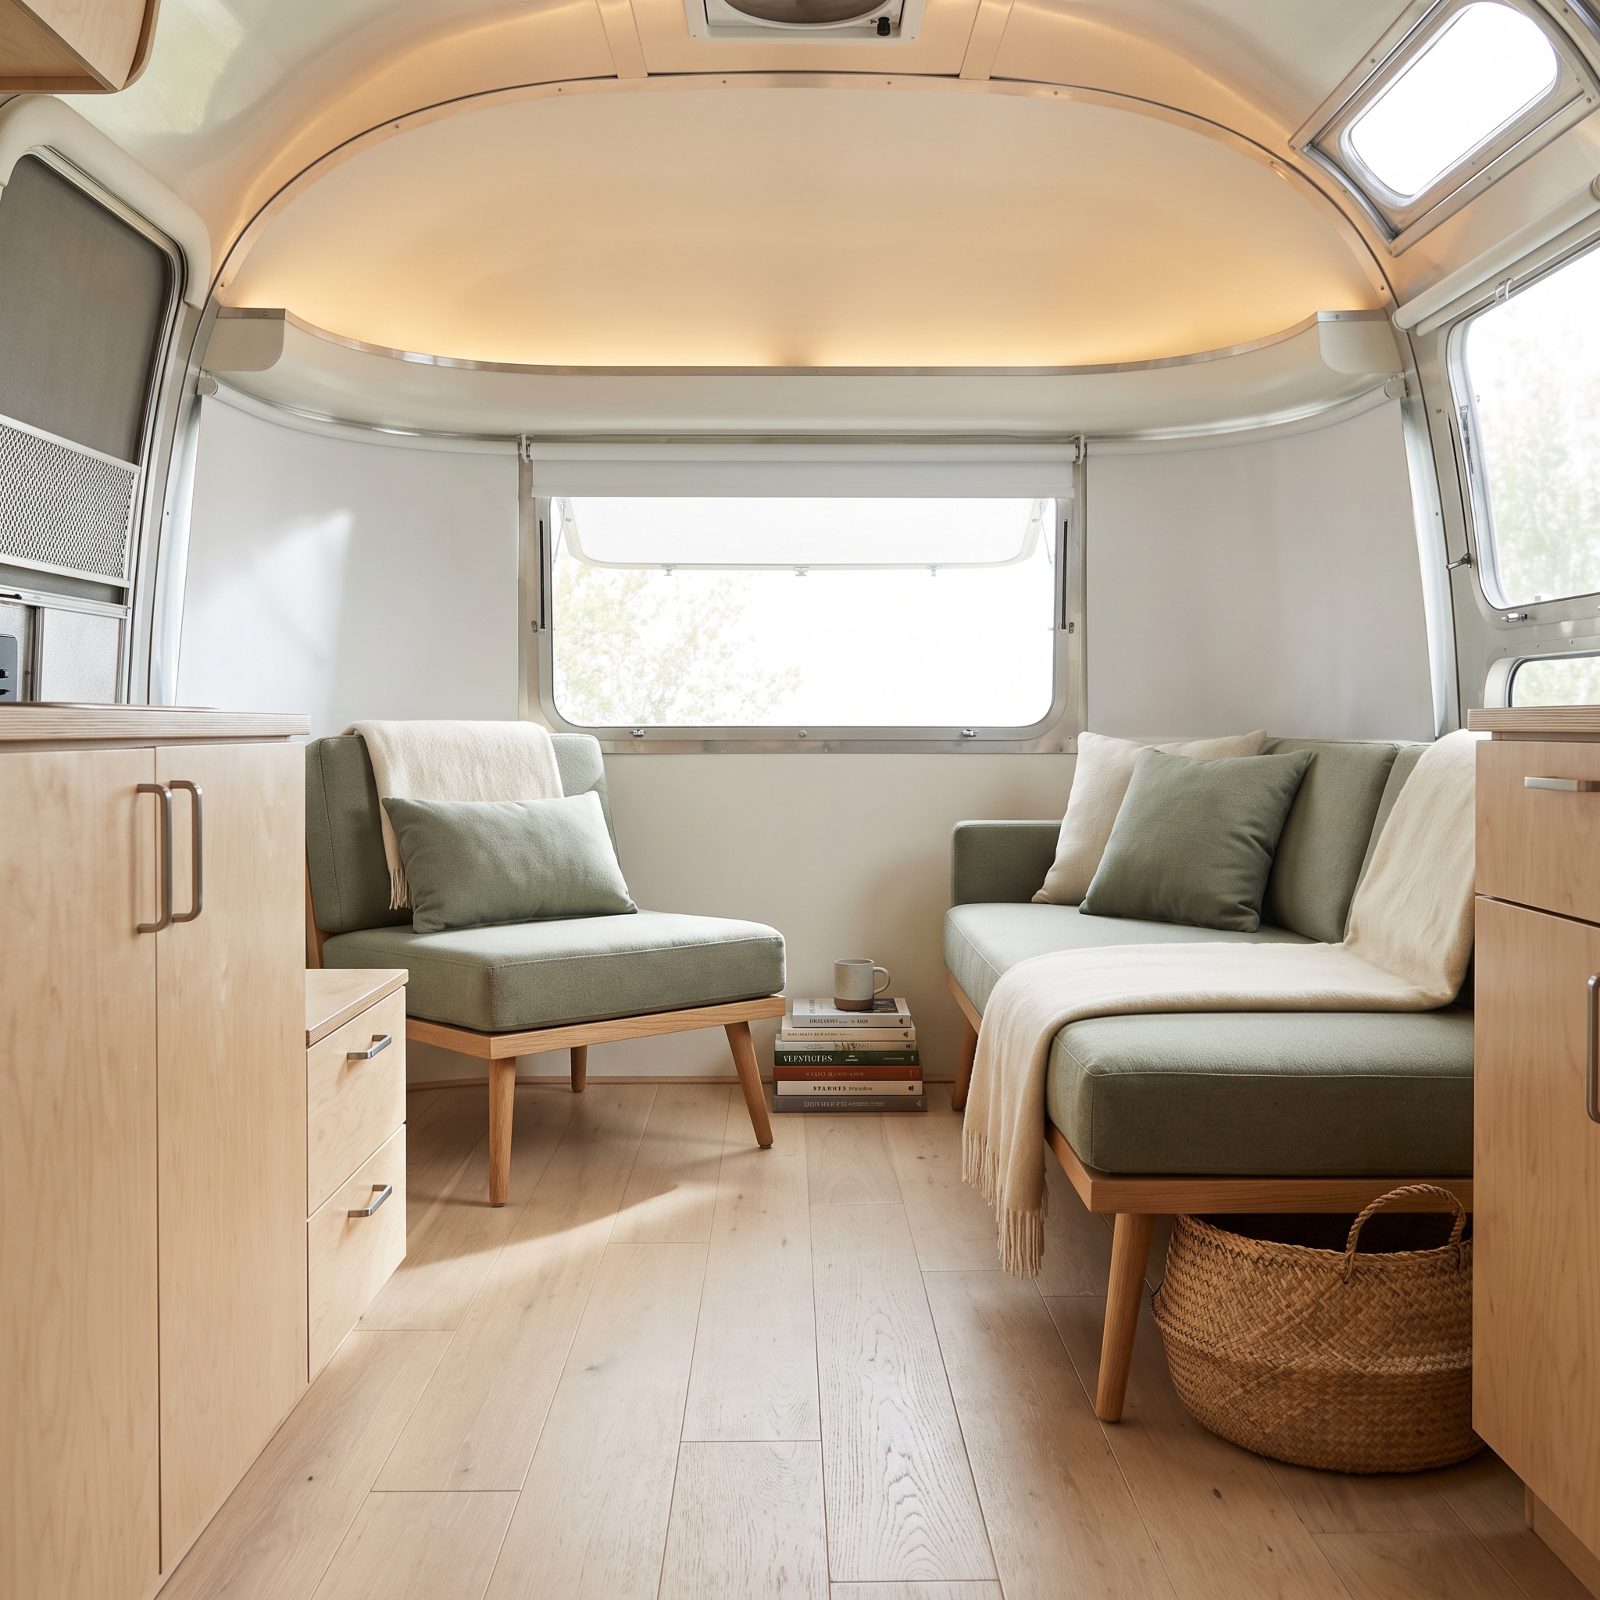
Furniture that sits flat on the floor plants itself like a tree stump. Nothing moves behind it, nothing moves under it, and the room ends where the piece begins.
Lift it. Four slim legs, five or six inches of clearance, and the floor runs on underneath. Your eye follows the floor the whole way, which tells your brain the room is bigger than it is. Bonus: you can sweep under there, and you can stash a flat basket where dead space used to be.
26. Float the Nightstands and Free Up the Floor Beside the Bed
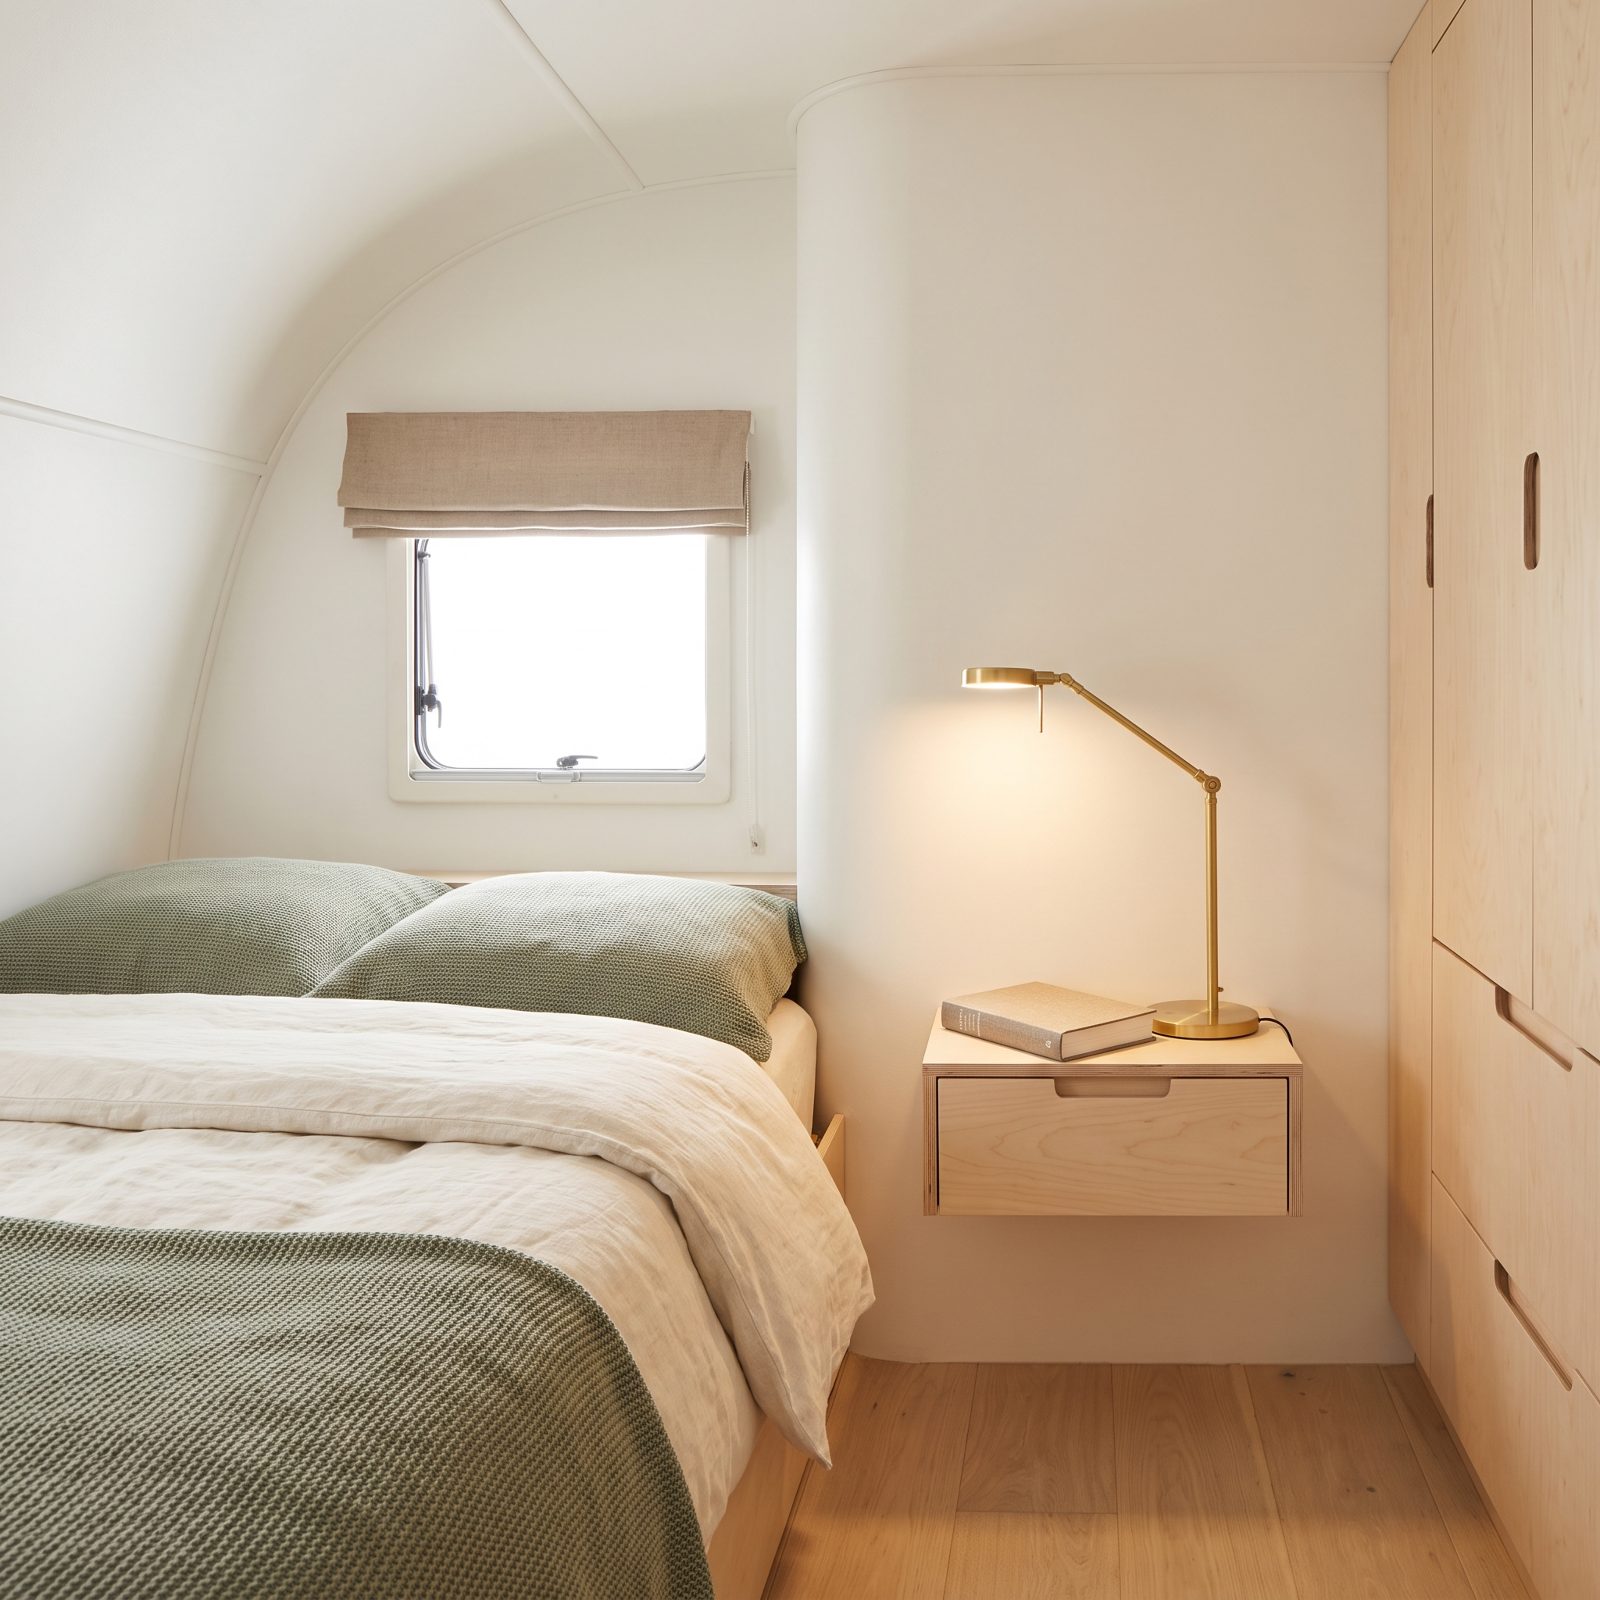
Floor-standing bedside cabinets in an RV bedroom are a shin-barking tax you pay every single night. They pin down the little floor you have on either side of the mattress.
Mount a floating nightstand instead. Bolt it to the wall at the height you like, let the floor carry on beneath it, and suddenly the bedroom doesn’t feel like a box you squeeze into. A single pale maple floating nightstand with a single drawer holds your lamp, glasses, and a stack of books without claiming an inch of floor.
25. Build Drawers Into the Bed Platform and Retire the Dresser
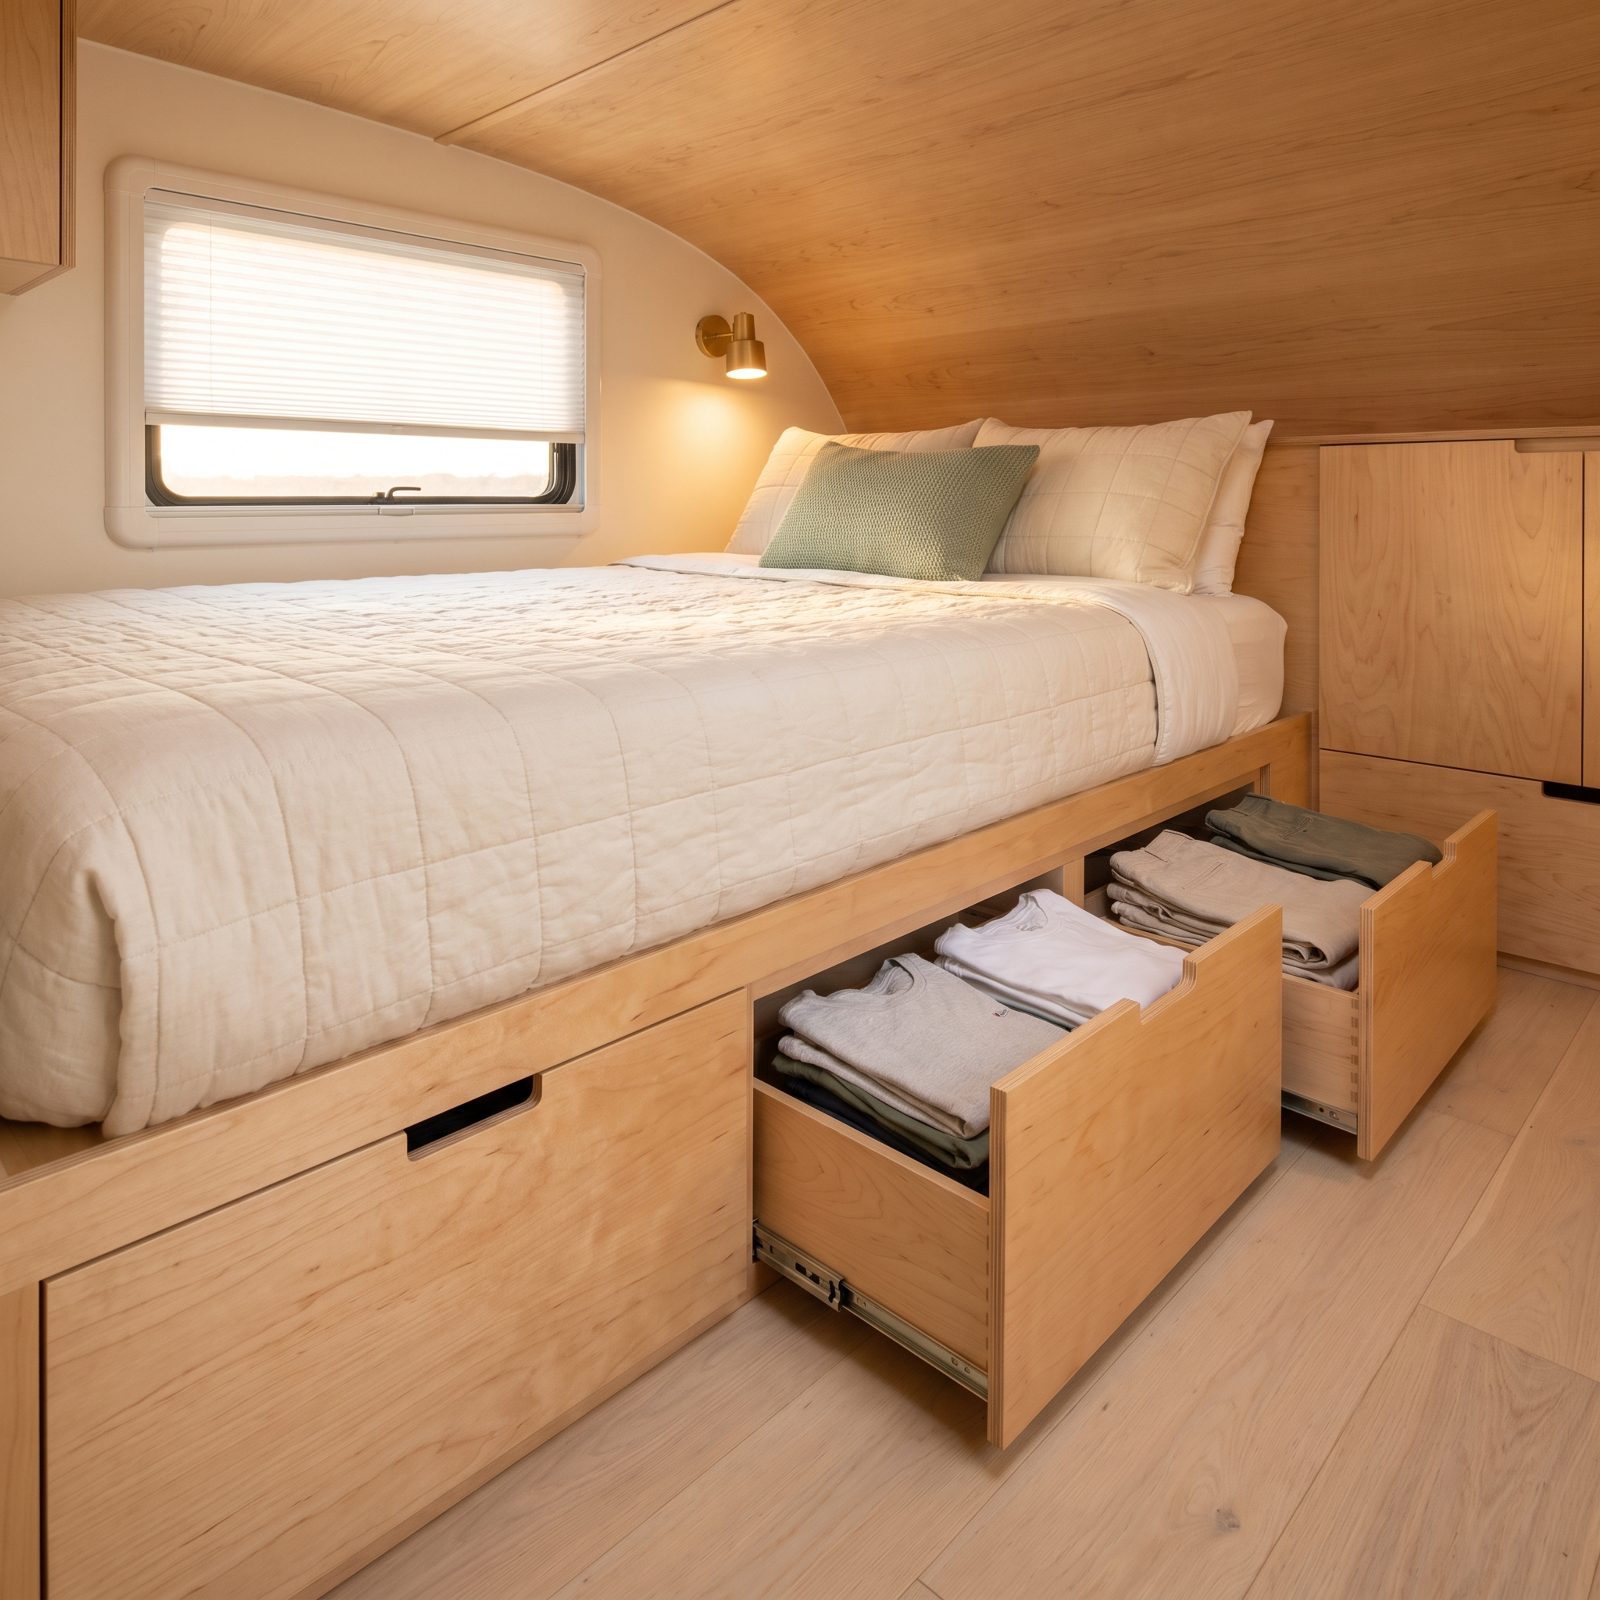
Here’s the math that changed how I pack a rig. The hollow space under your bed is the single biggest storage void you own, and most campers waste it on a lift-up mattress you have to clear every time you want a clean shirt.
Build drawers into the platform instead. Deep ones, on full-extension slides, pulling out from the foot or the side. That’s your whole wardrobe gone from the bulky dresser that was clogging the aisle. One piece of furniture deleted, zero storage lost.
24. Trade the Heavy Overhead Cabinets for One Slim Picture Ledge
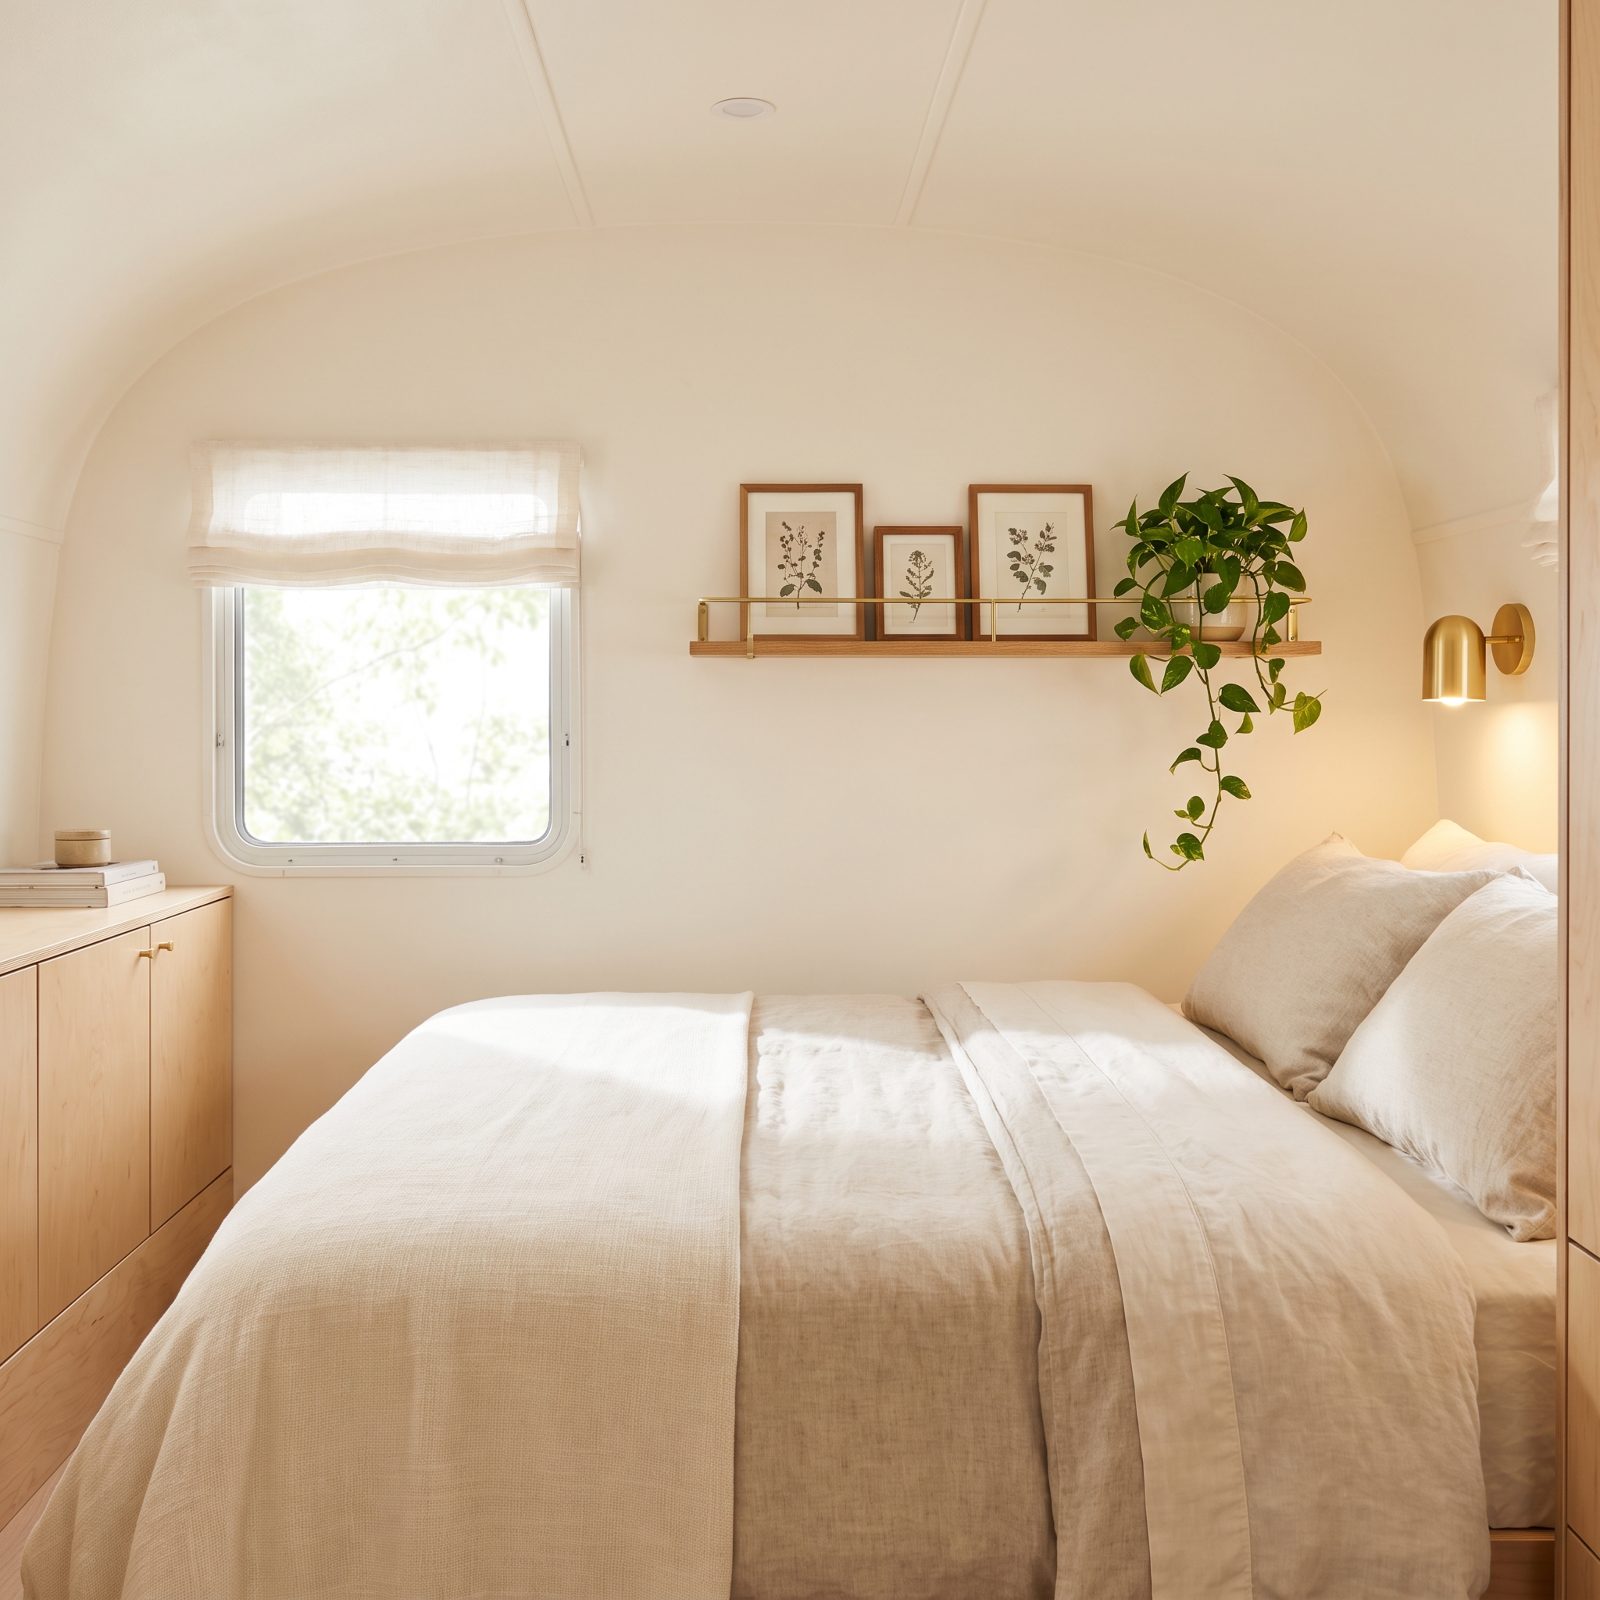
Those cabinets hanging over the bed are a low ceiling waiting to fall on you. They press down on the head of the bed, cast the pillows in shadow, and turn the whole corner into a cave.
Pull them out. Replace the lot with one narrow picture ledge, four inches deep, running the width of the wall. You lose some upper storage, which the new bed drawers already replaced. What you gain is headroom, light reaching the mattress, and a wall that finally breathes.
23. Cut Interior Access Into the Pass-Through So Gear Disappears
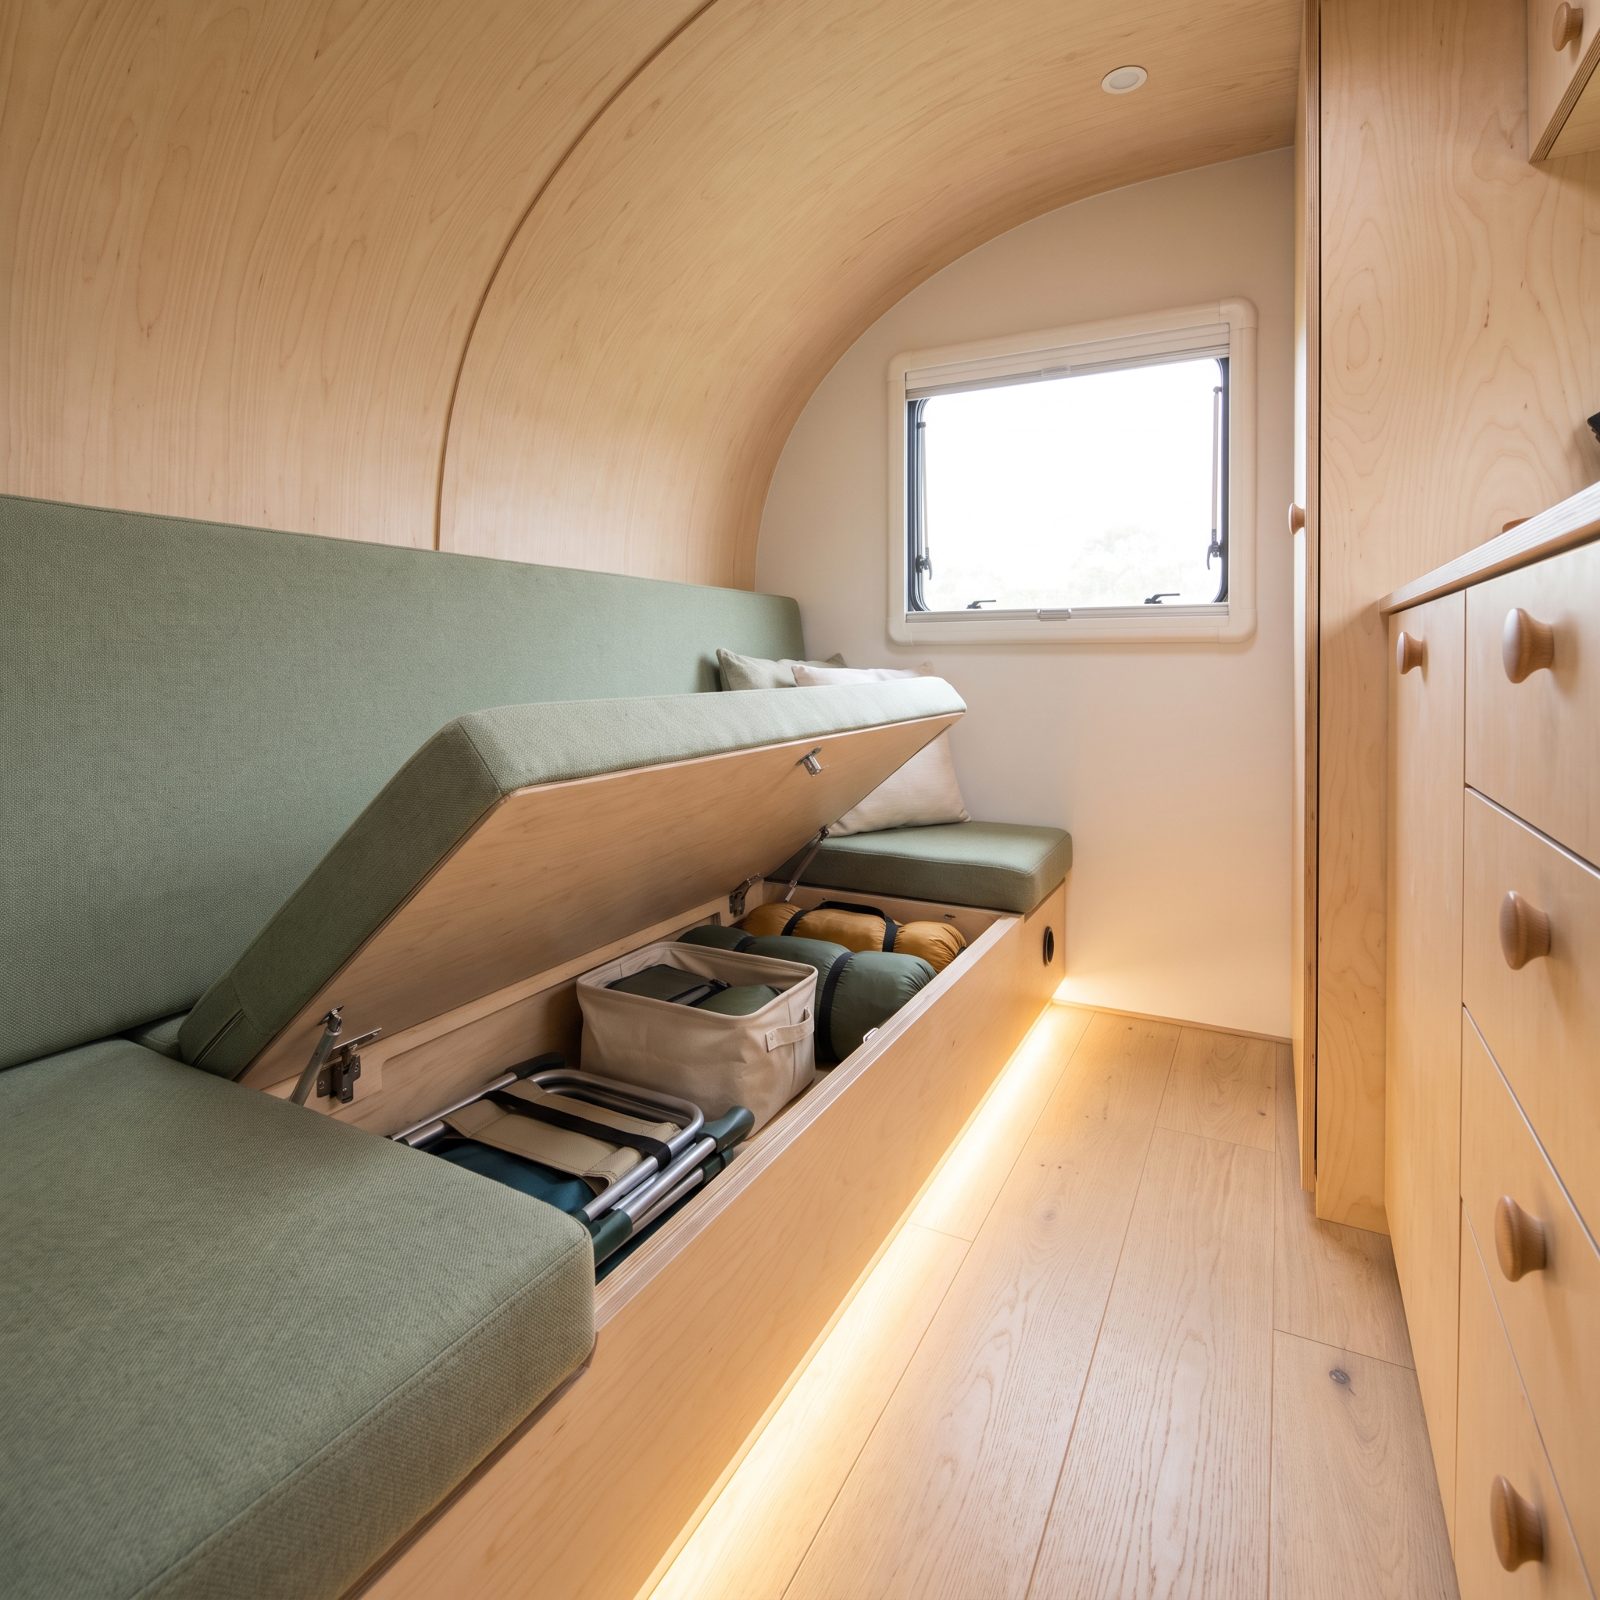
Your pass-through storage is a whole garage you can only reach from outside in the rain. So the daily stuff never goes in there. It piles up on the dinette instead.
Cut an interior access hatch into the bench or floor above it. Now the camp chairs, the leveling blocks, the bin of hoses all drop into that huge cavity from inside, out of sight, no coat required. The counters stay clear because the easy option finally lives somewhere.
22. Drop a Skylight Over the Lounge and Pull Daylight Into the Core
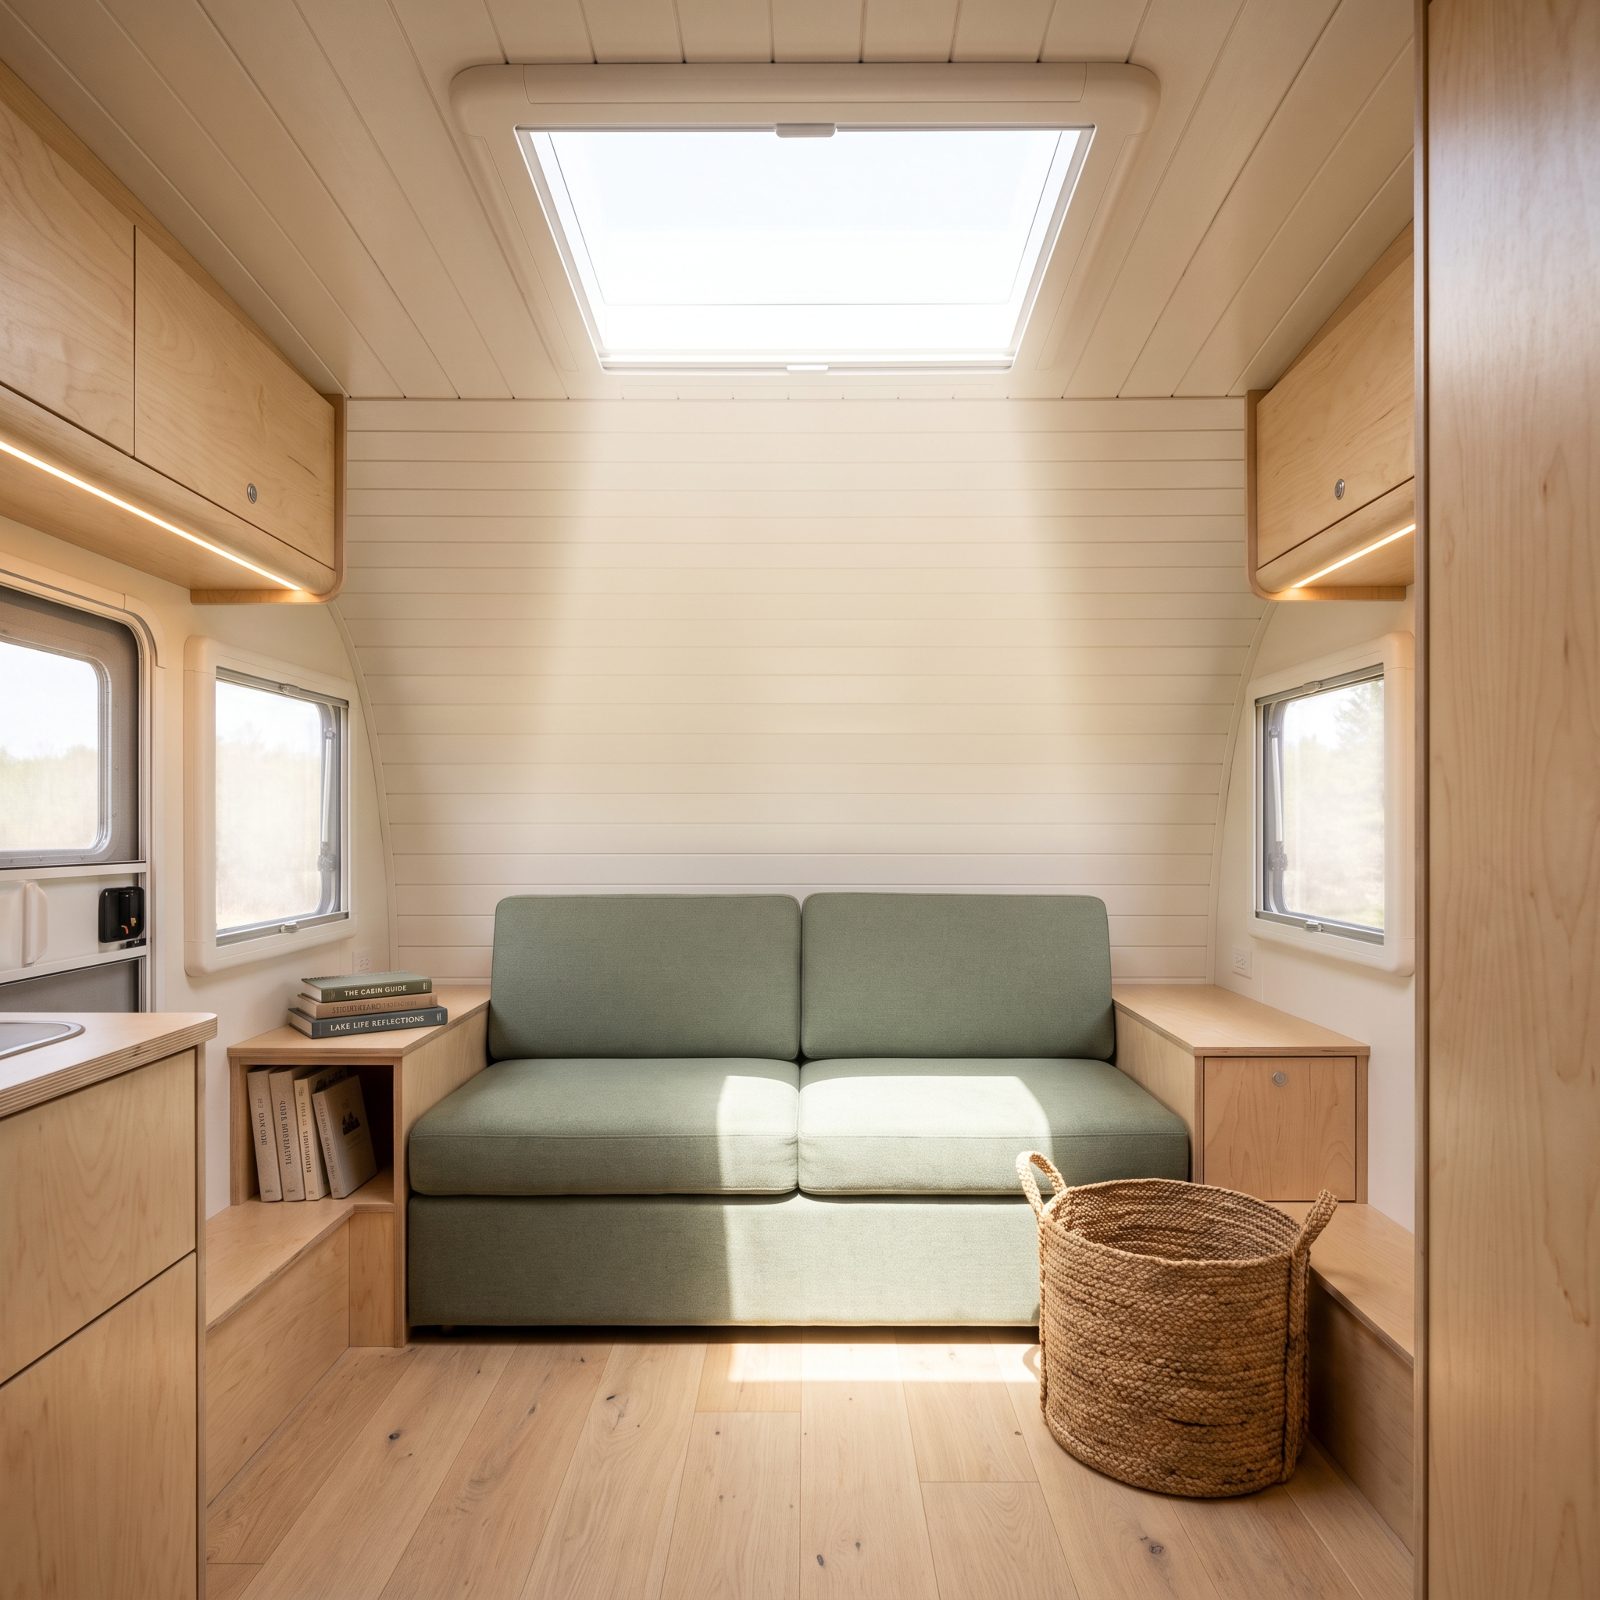
Every window in a camper sits down low on the walls, which leaves the center of the rig — right where you actually live — as the darkest spot in the whole place. It’s why midday still feels like dusk in there.
Put a skylight over the lounge. Light falling from directly above does something side windows can’t: it fills the core of the space and lifts the ceiling. Suddenly the middle of your rig is the brightest part instead of the gloomiest.
21. Run Hidden LED Cove Lighting Around the Ceiling Edge
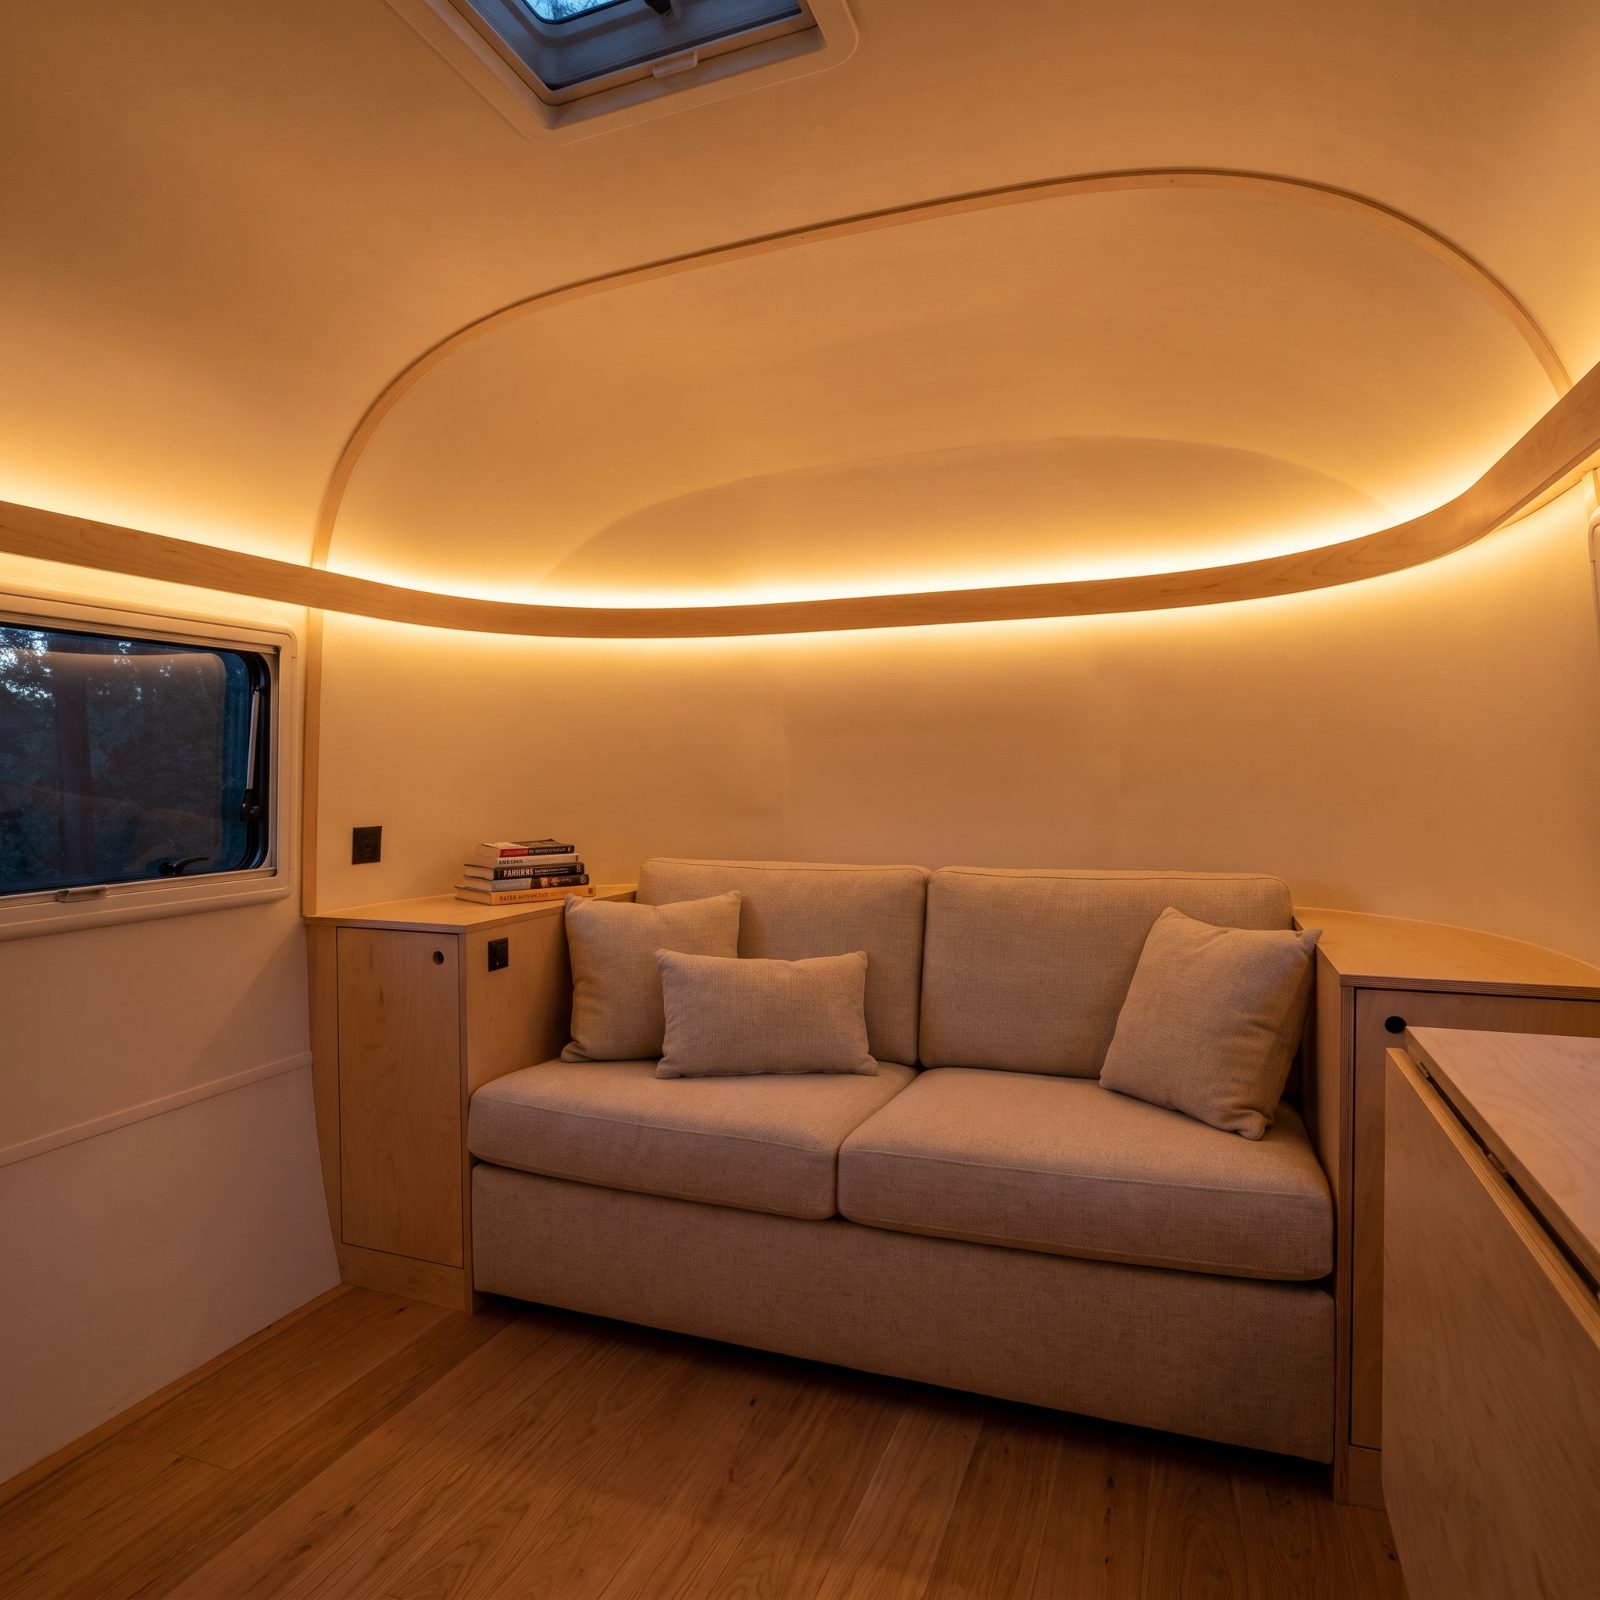
Most RV ceiling lights are harsh little pucks that throw hard shadows and glare straight in your eyes. They flatten the room and turn the ceiling into a lid.
Tuck an LED strip behind a slim trim lip all the way around the ceiling edge. The light washes upward, the ceiling appears to float, and the glow traces the whole room softly — no fixture in sight, just light that seems to come from the frame itself. Warm white, dimmable, and the cabin reads taller after dark.
20. Light the Countertops From Underneath and Kill Every Dark Corner
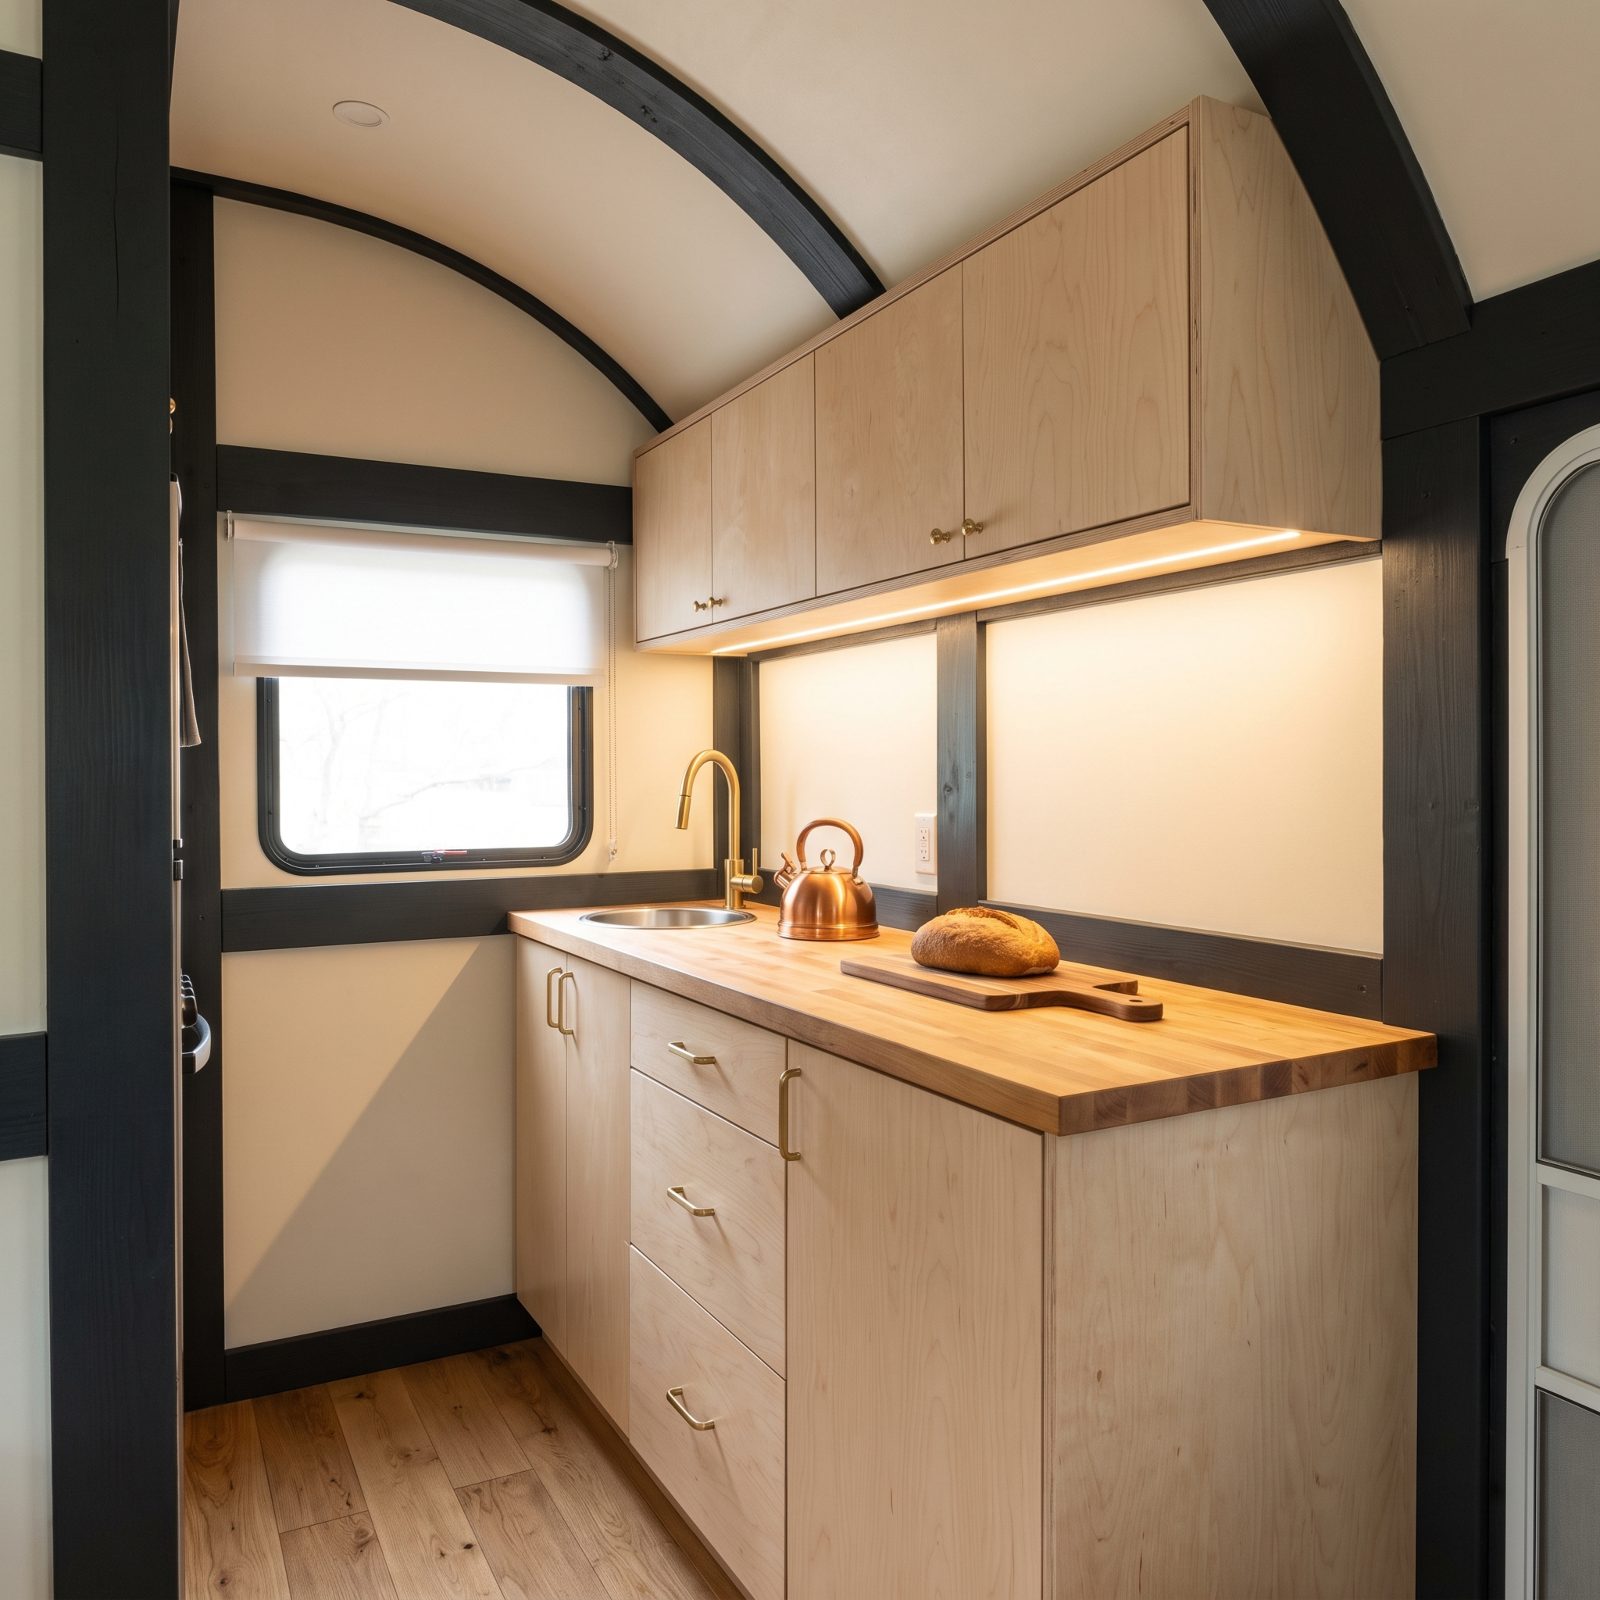
The galley counter in most rigs sits in the shadow of the cabinet right above it. So there you are, chopping onions in a dim corner, leaning in to see, cursing the one ceiling light that’s parked behind your own head.
Stick an LED strip under the upper cabinets. The whole work surface lights evenly, the back corners stop being black holes, and the counter looks deeper because the light reaches all the way to the wall. Twenty bucks, and the kitchen finally feels like a kitchen.
19. Add toe-kick lighting that makes cabinetry appear to float
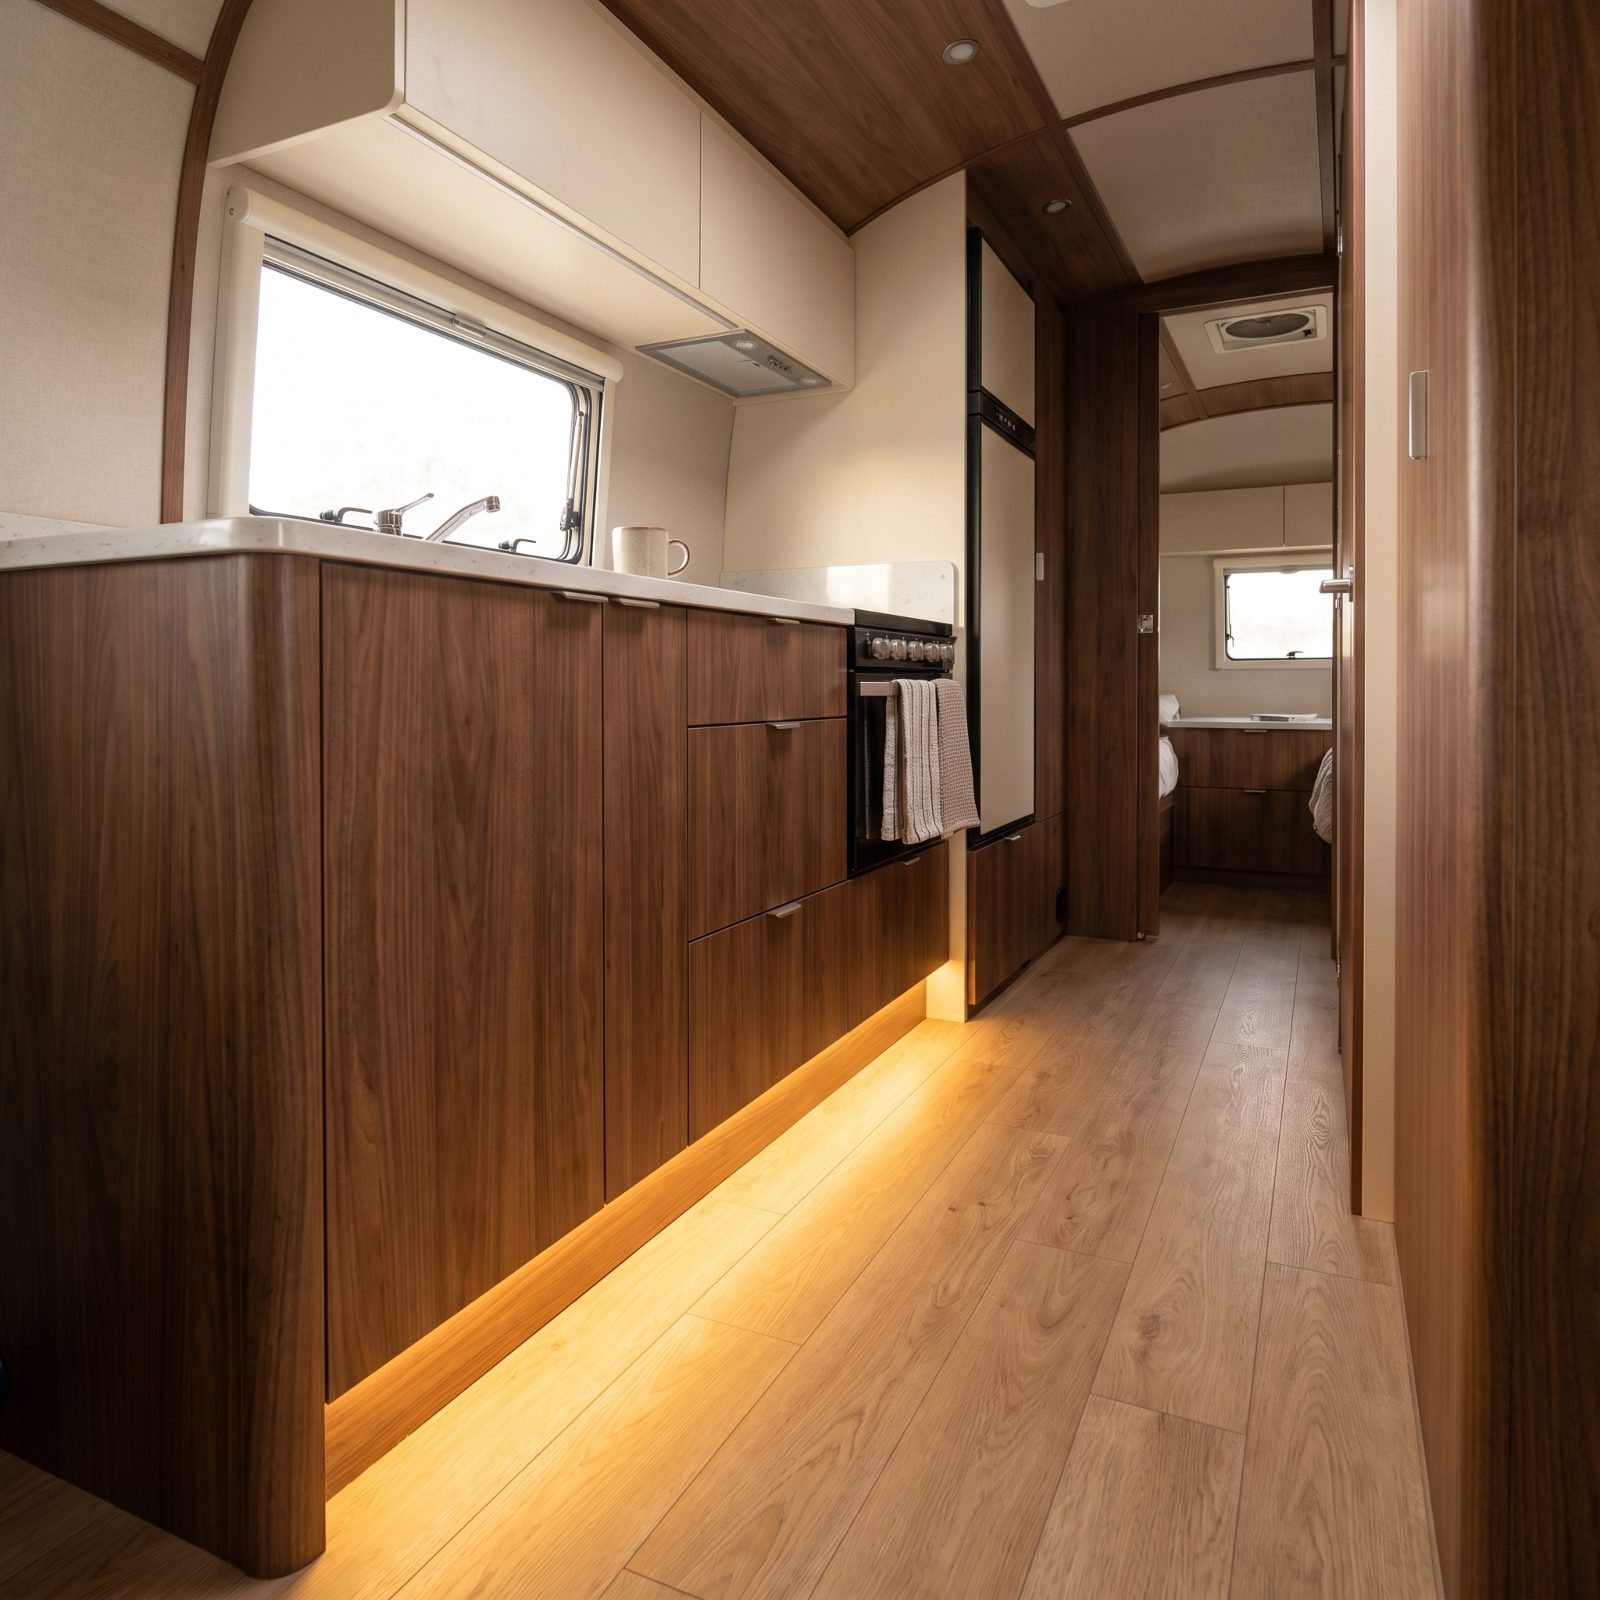
The gap at the bottom of your lower cabinets is dead space doing nothing. Drop a warm LED strip into that toe-kick recess and the whole run lifts off the floor visually — light spills across the flooring, your eye follows it, and the galley reads bigger than it measures.
Dark toe-kicks do the opposite, pinning the cabinets down and chopping the room off at the ankles. A warm white LED strip wired to the 12-volt system fixes that for about the price of a tank of propane. Stick it, tuck the wire, done before lunch.
18. Replace dangling ceiling fixtures with low-profile recessed lights
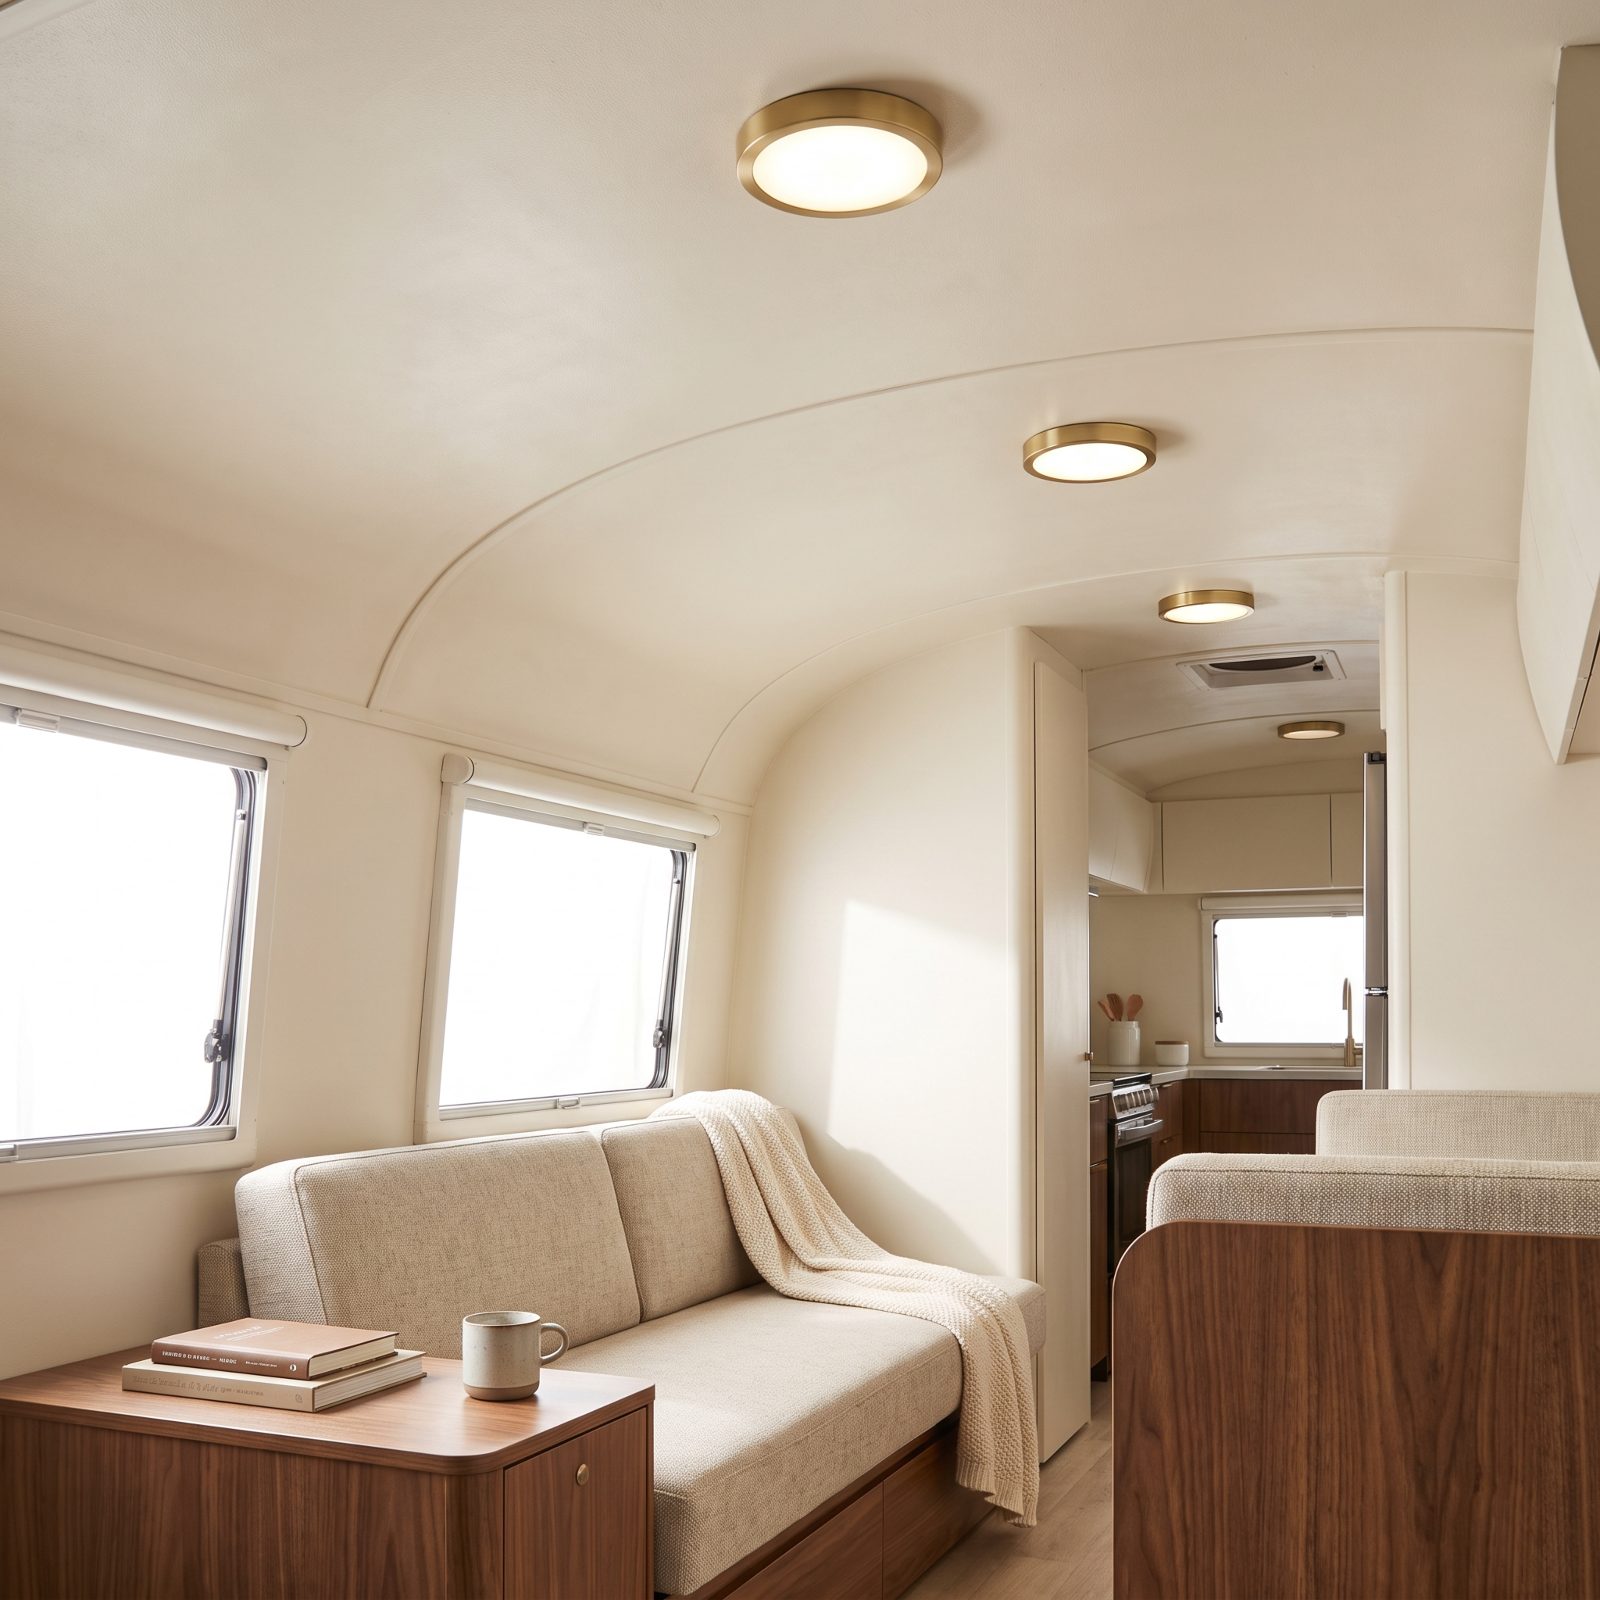
You’ve smacked your head on a swag-arm reading lamp at least once. Everybody has. Those dangling fixtures eat the few inches of headroom an RV can’t spare, and they clutter the ceiling line that would otherwise make a tight space feel taller.
Swap them for flush recessed LED pucks that sit nearly flat. The ceiling becomes one clean plane, your skull stays intact, and the light spreads more evenly than any single hanging bulb ever managed. Most are a direct 12-volt swap into the existing hole with a slightly larger trim ring.
17. Install a floating bathroom vanity that exposes more flooring
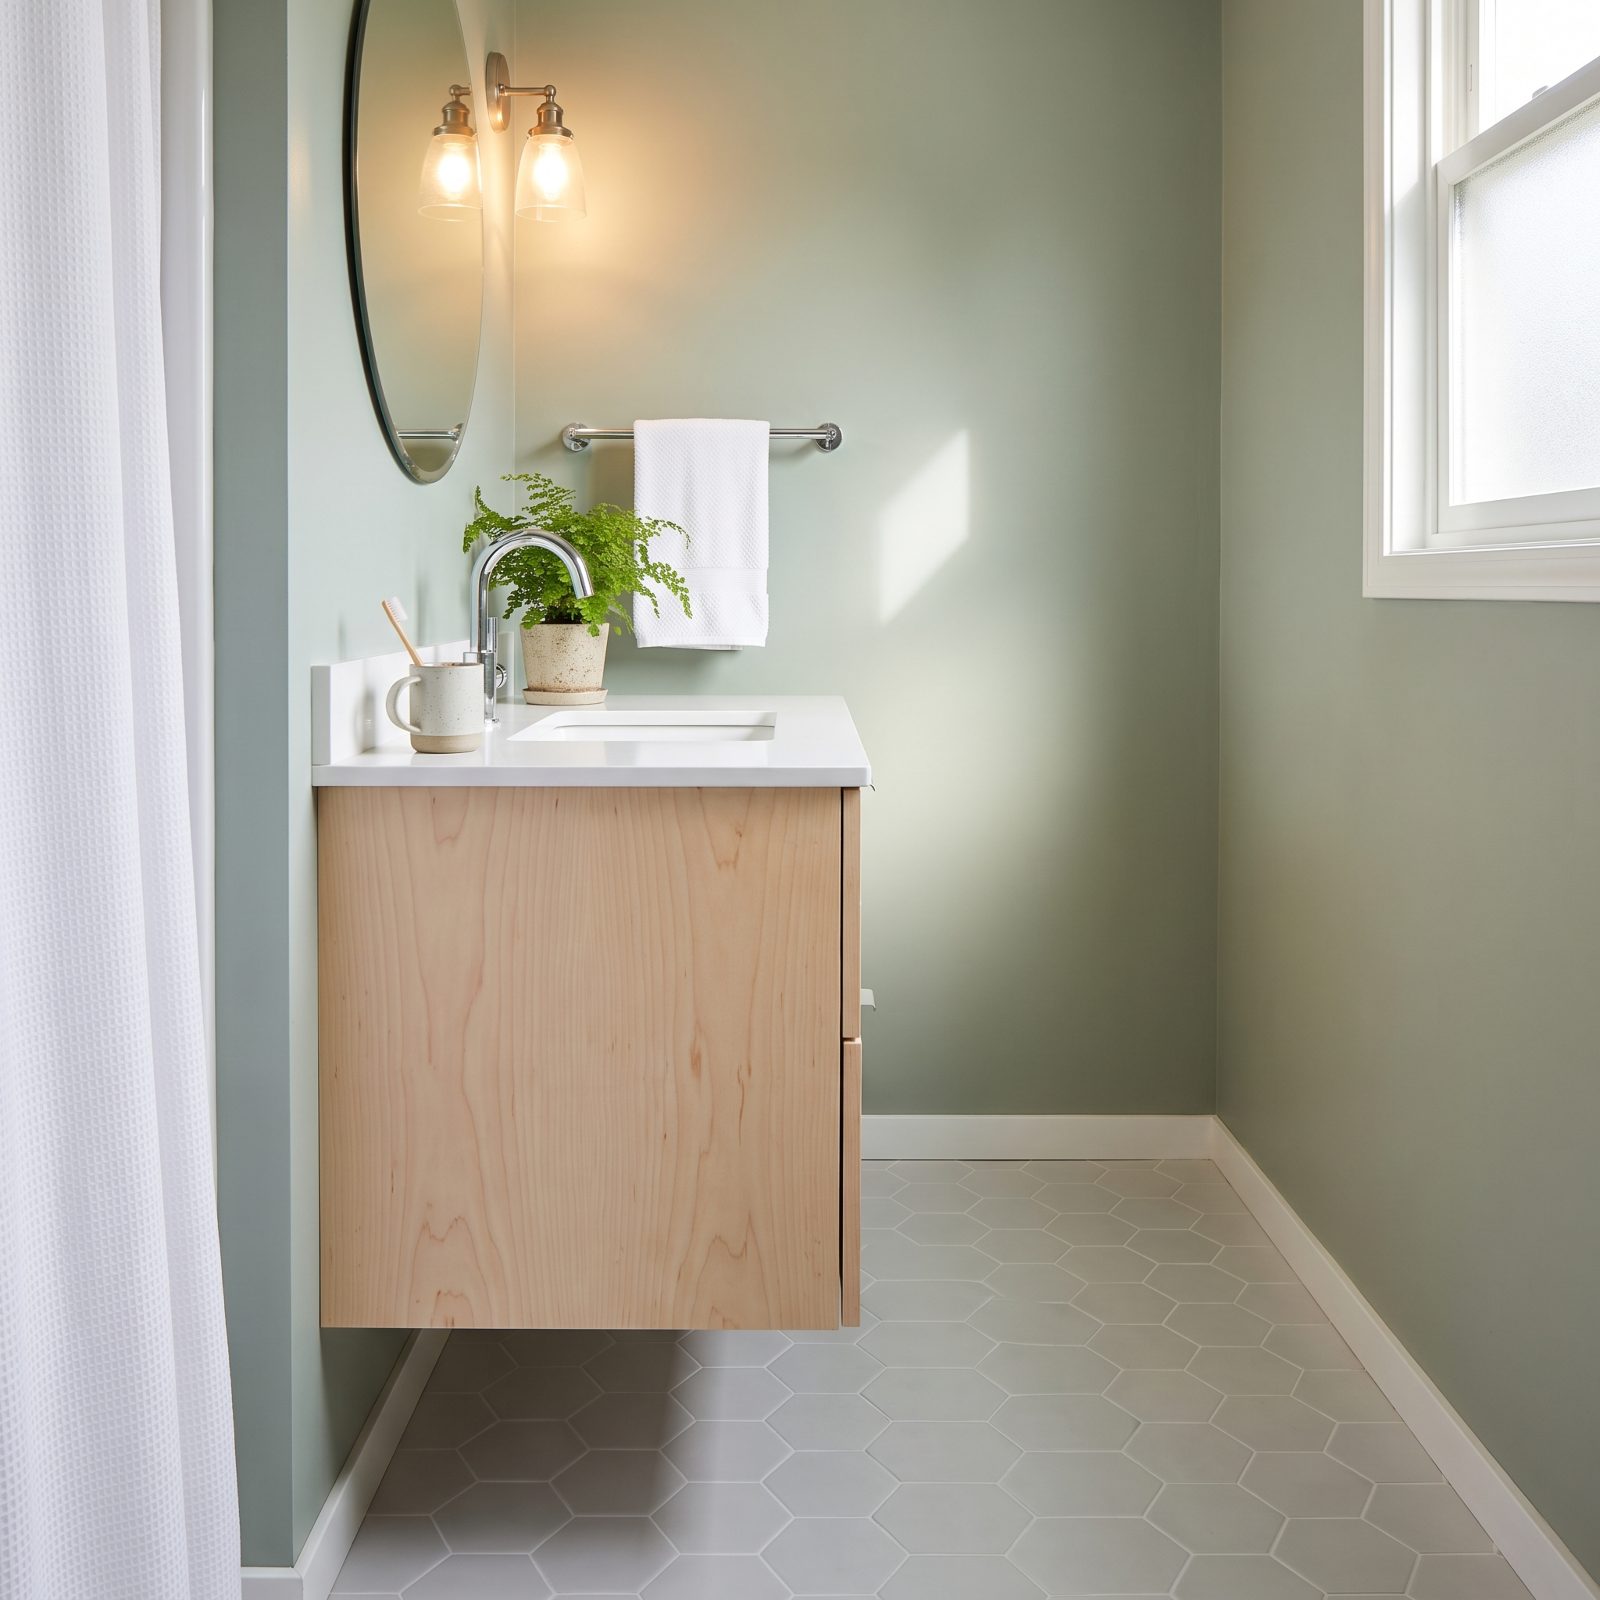
A vanity that touches the floor builds a wall you can’t see over. Hang it instead. When the flooring runs unbroken beneath the cabinet, the bathroom’s smallest dimension suddenly reads continuous, and that strip of visible floor does more for the sense of space than any mirror trick ever will.
Mount a floating bathroom vanity to the wall studs with a hidden French cleat, keep it shallow, and reclaim the cave underneath for a slim basket or just air. I put this off for years, assuming wall-mount meant flimsy. Done right into blocking, it holds fine.
16. Use a compact corner sink to recover bathroom standing room
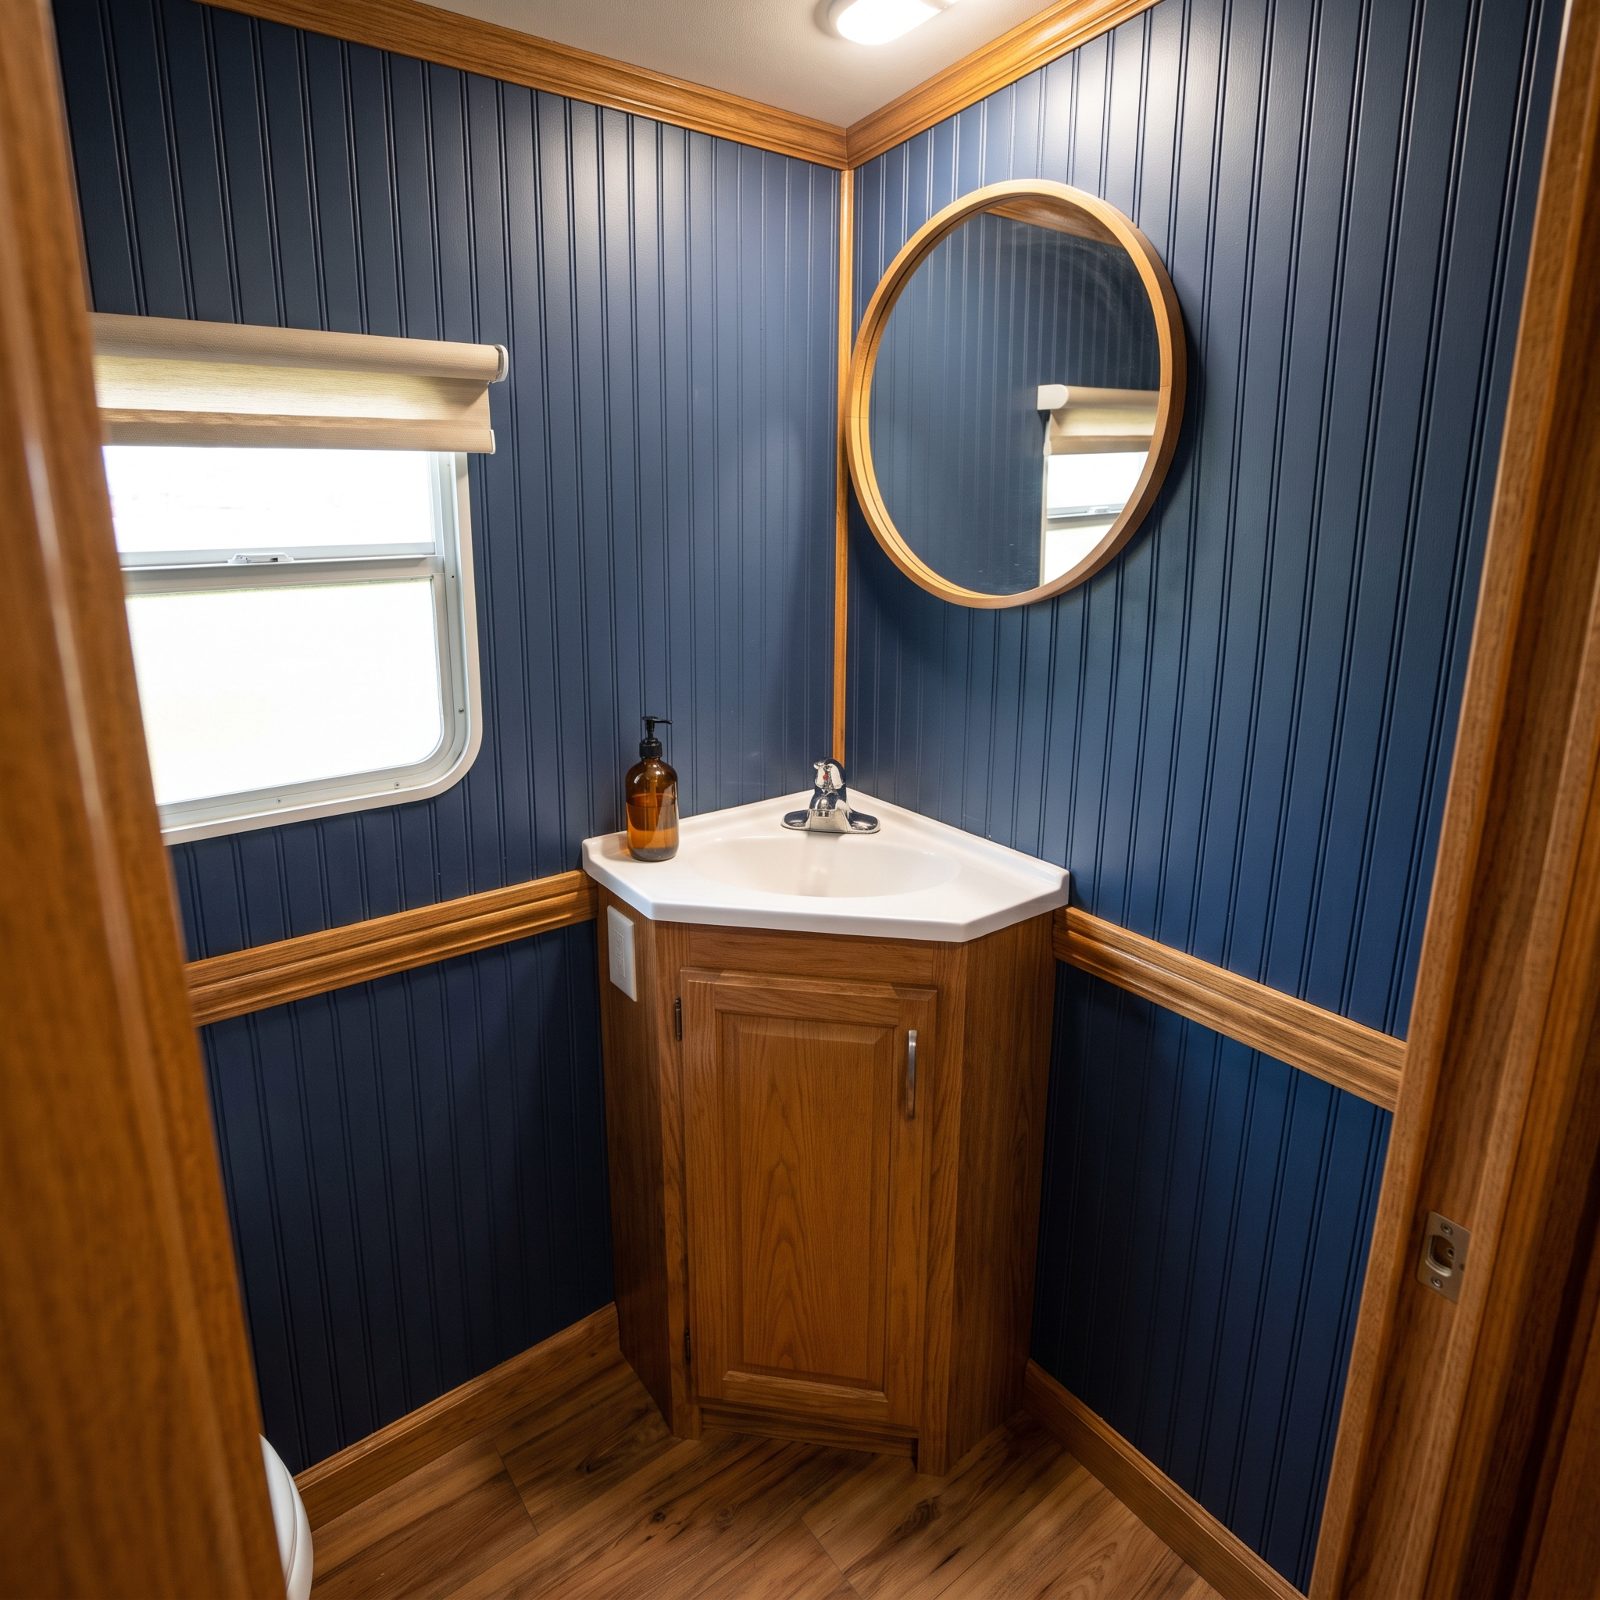
The standard rectangular sink juts straight into the one square foot you actually need to stand in. A triangular corner sink tucks the whole basin into the dead angle where two walls meet and hands that center floor back to you.
You’ll notice it the first morning — elbow room while you brush your teeth, somewhere to plant your feet. A corner model fits the plumbing you already have, just rerouted a few inches.
15. Recess the medicine cabinet into the wall
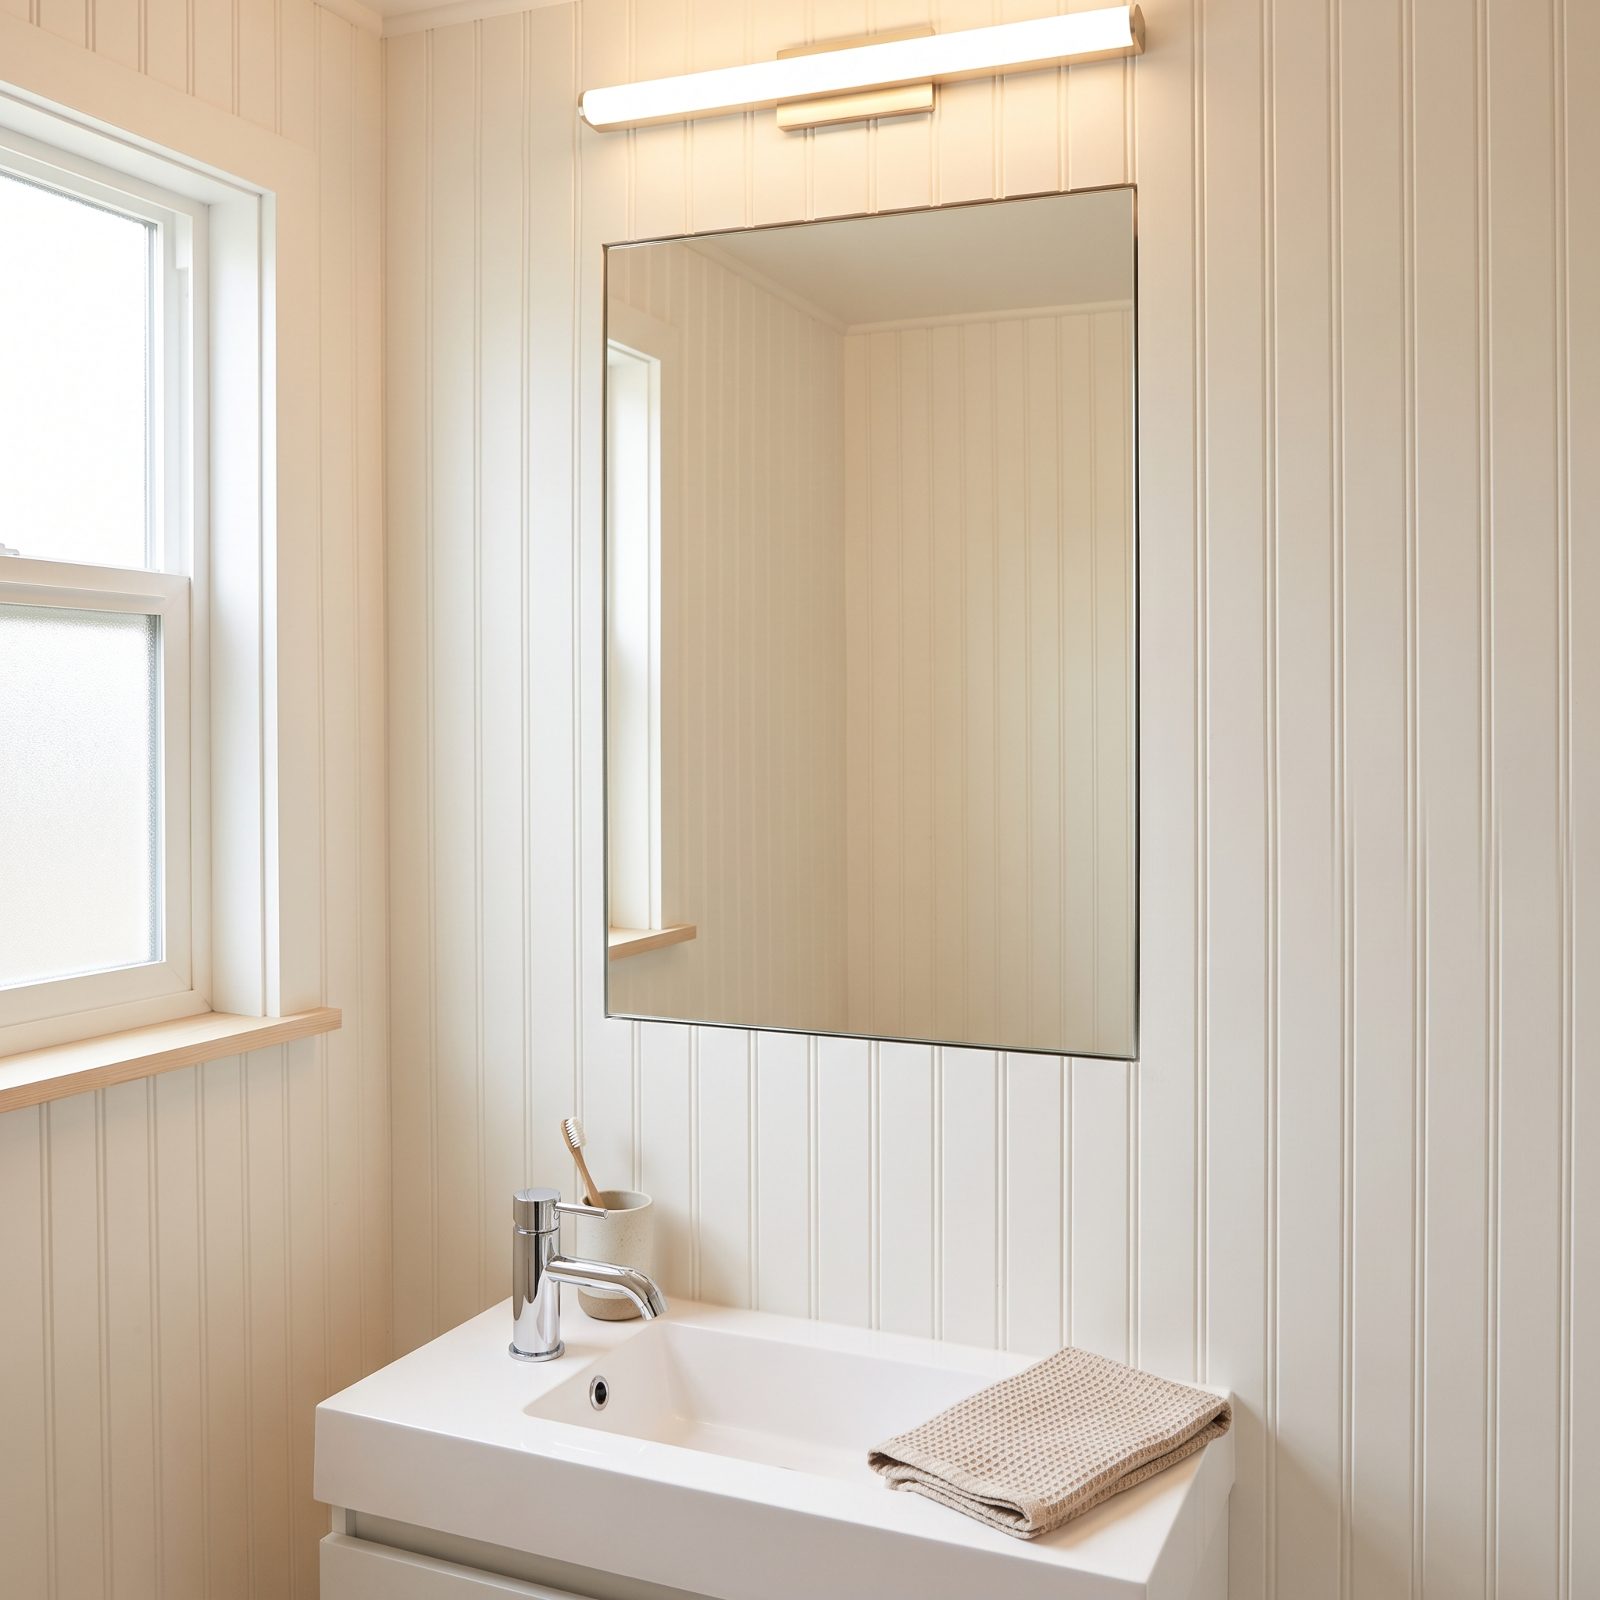
A surface-mounted cabinet sticks three or four inches off the wall, right at face height in an aisle you already turn sideways to walk through. Push it into the cavity between the framing instead, and the mirror sits nearly flush. Nothing clips your shoulder anymore.
RV walls are thin, so hunt for wiring and plumbing before you cut. Where the cavity is clear, a shallow recessed cabinet buys back inches exactly where you feel them most.
14. Build a shower niche instead of adding protruding caddies
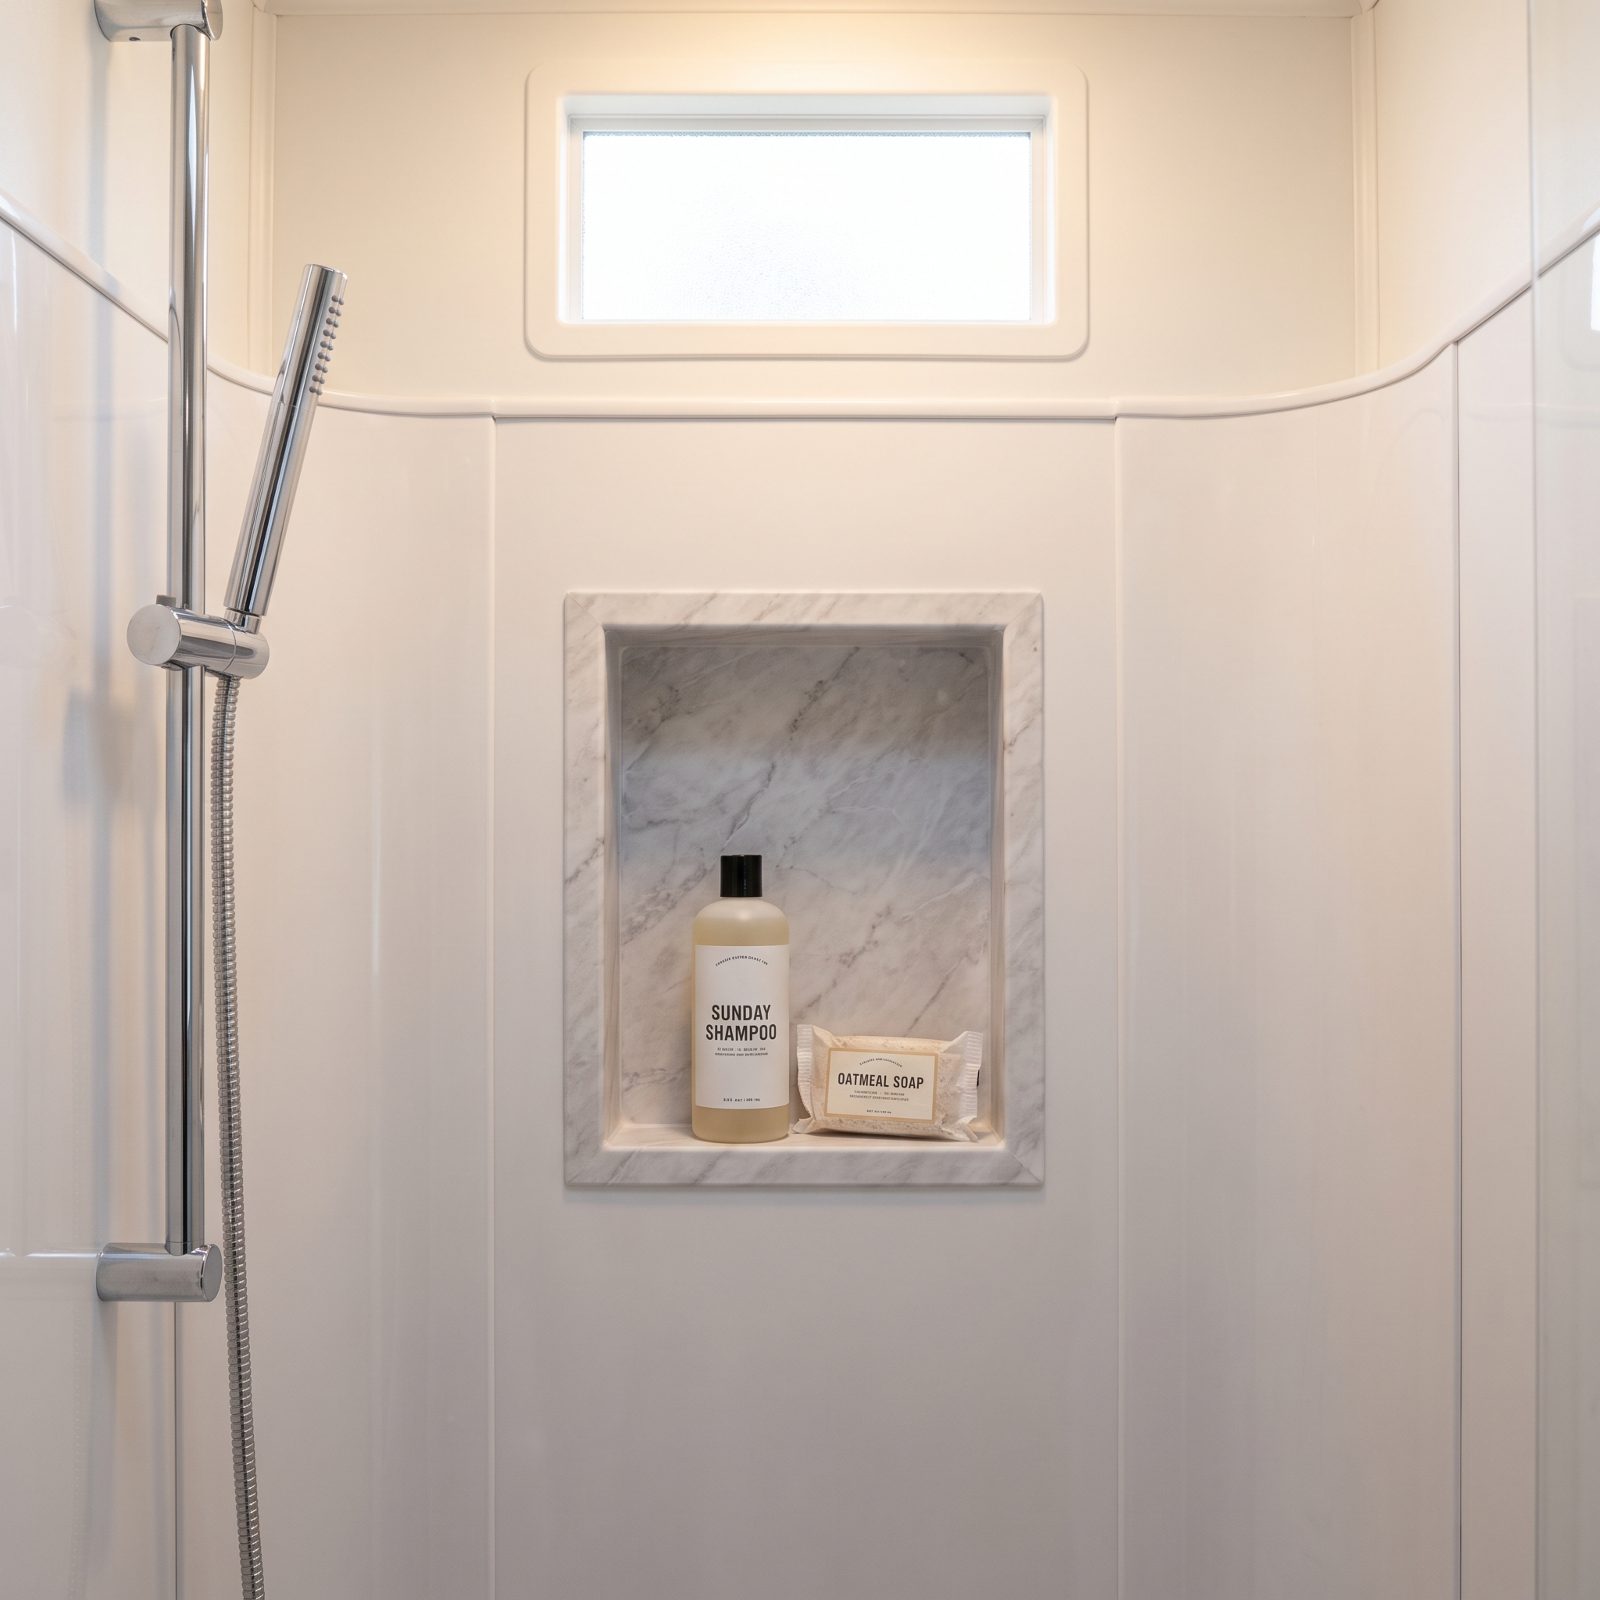
Hang-on shower caddies do two things in an RV shower. They bang into your elbow, and they fall off mid-rinse. A niche built flat into the wall holds your bottles without stealing an inch of the stall you’re already crowding.
Frame a shallow opening between studs, line it with the same shower surround material, seal it properly. One tidy ledge, nothing sticking out, and enough room to actually turn around.
13. Replace padded window valances with slim roller shades
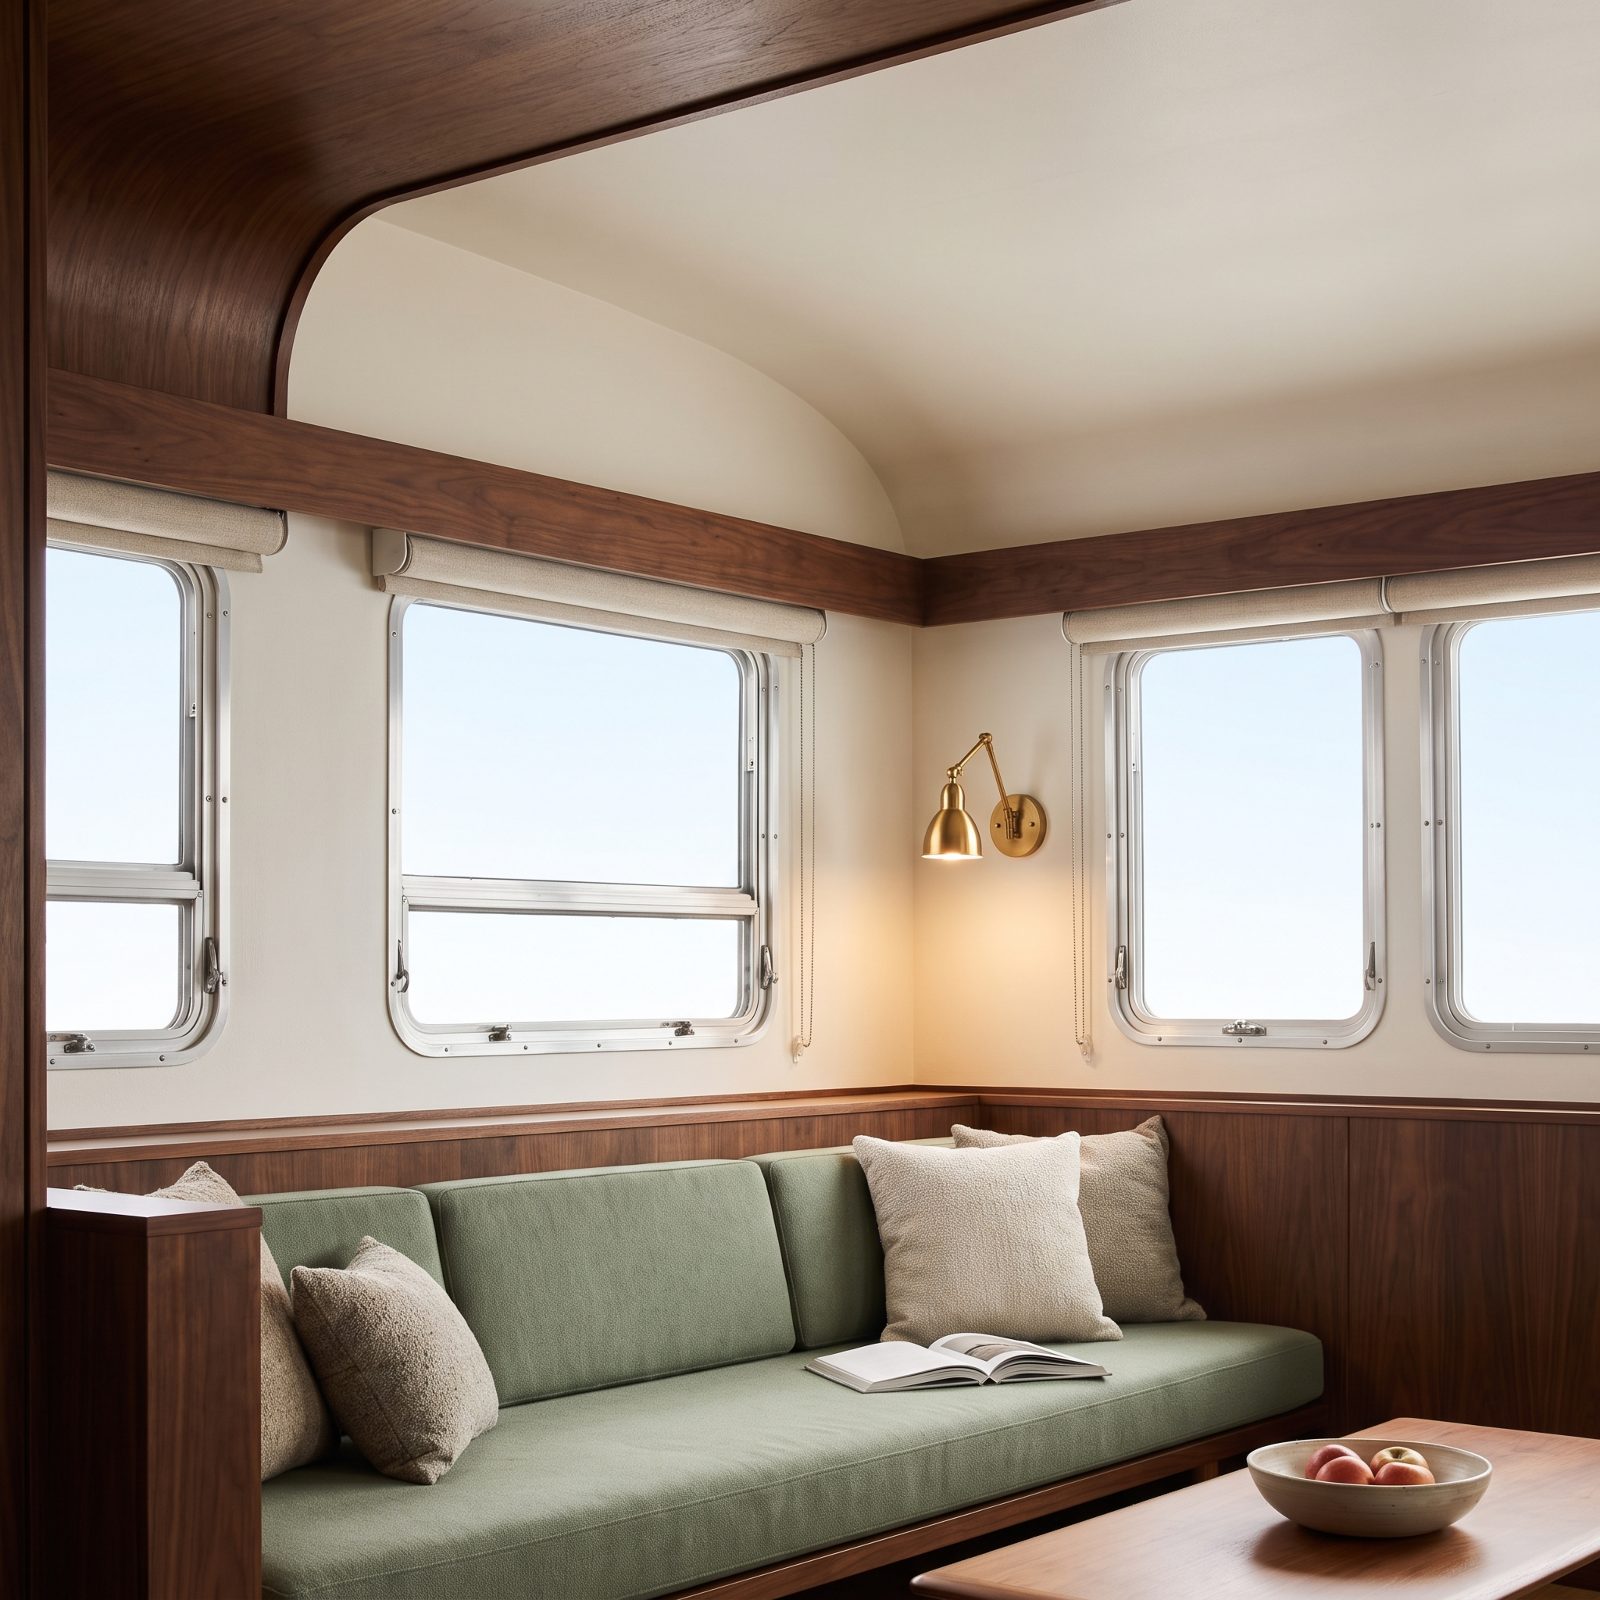
Those puffy padded valances came standard, and they’ve been quietly shrinking your windows since day one — crowding the top of the glass, blocking the upper light, and dating the whole interior to a decade nobody misses.
Pull them off and hang slim roller shades that vanish into a tight cylinder when open. The full window shows, daylight reaches deeper into the rig, and the ceiling line stays clean. A set of slim roller shades in a light linen weave softens the room without eating a single inch. Cheapest high-impact change on the list. I’d do it first.
12. Enlarge the dinette window to frame a wider outdoor view
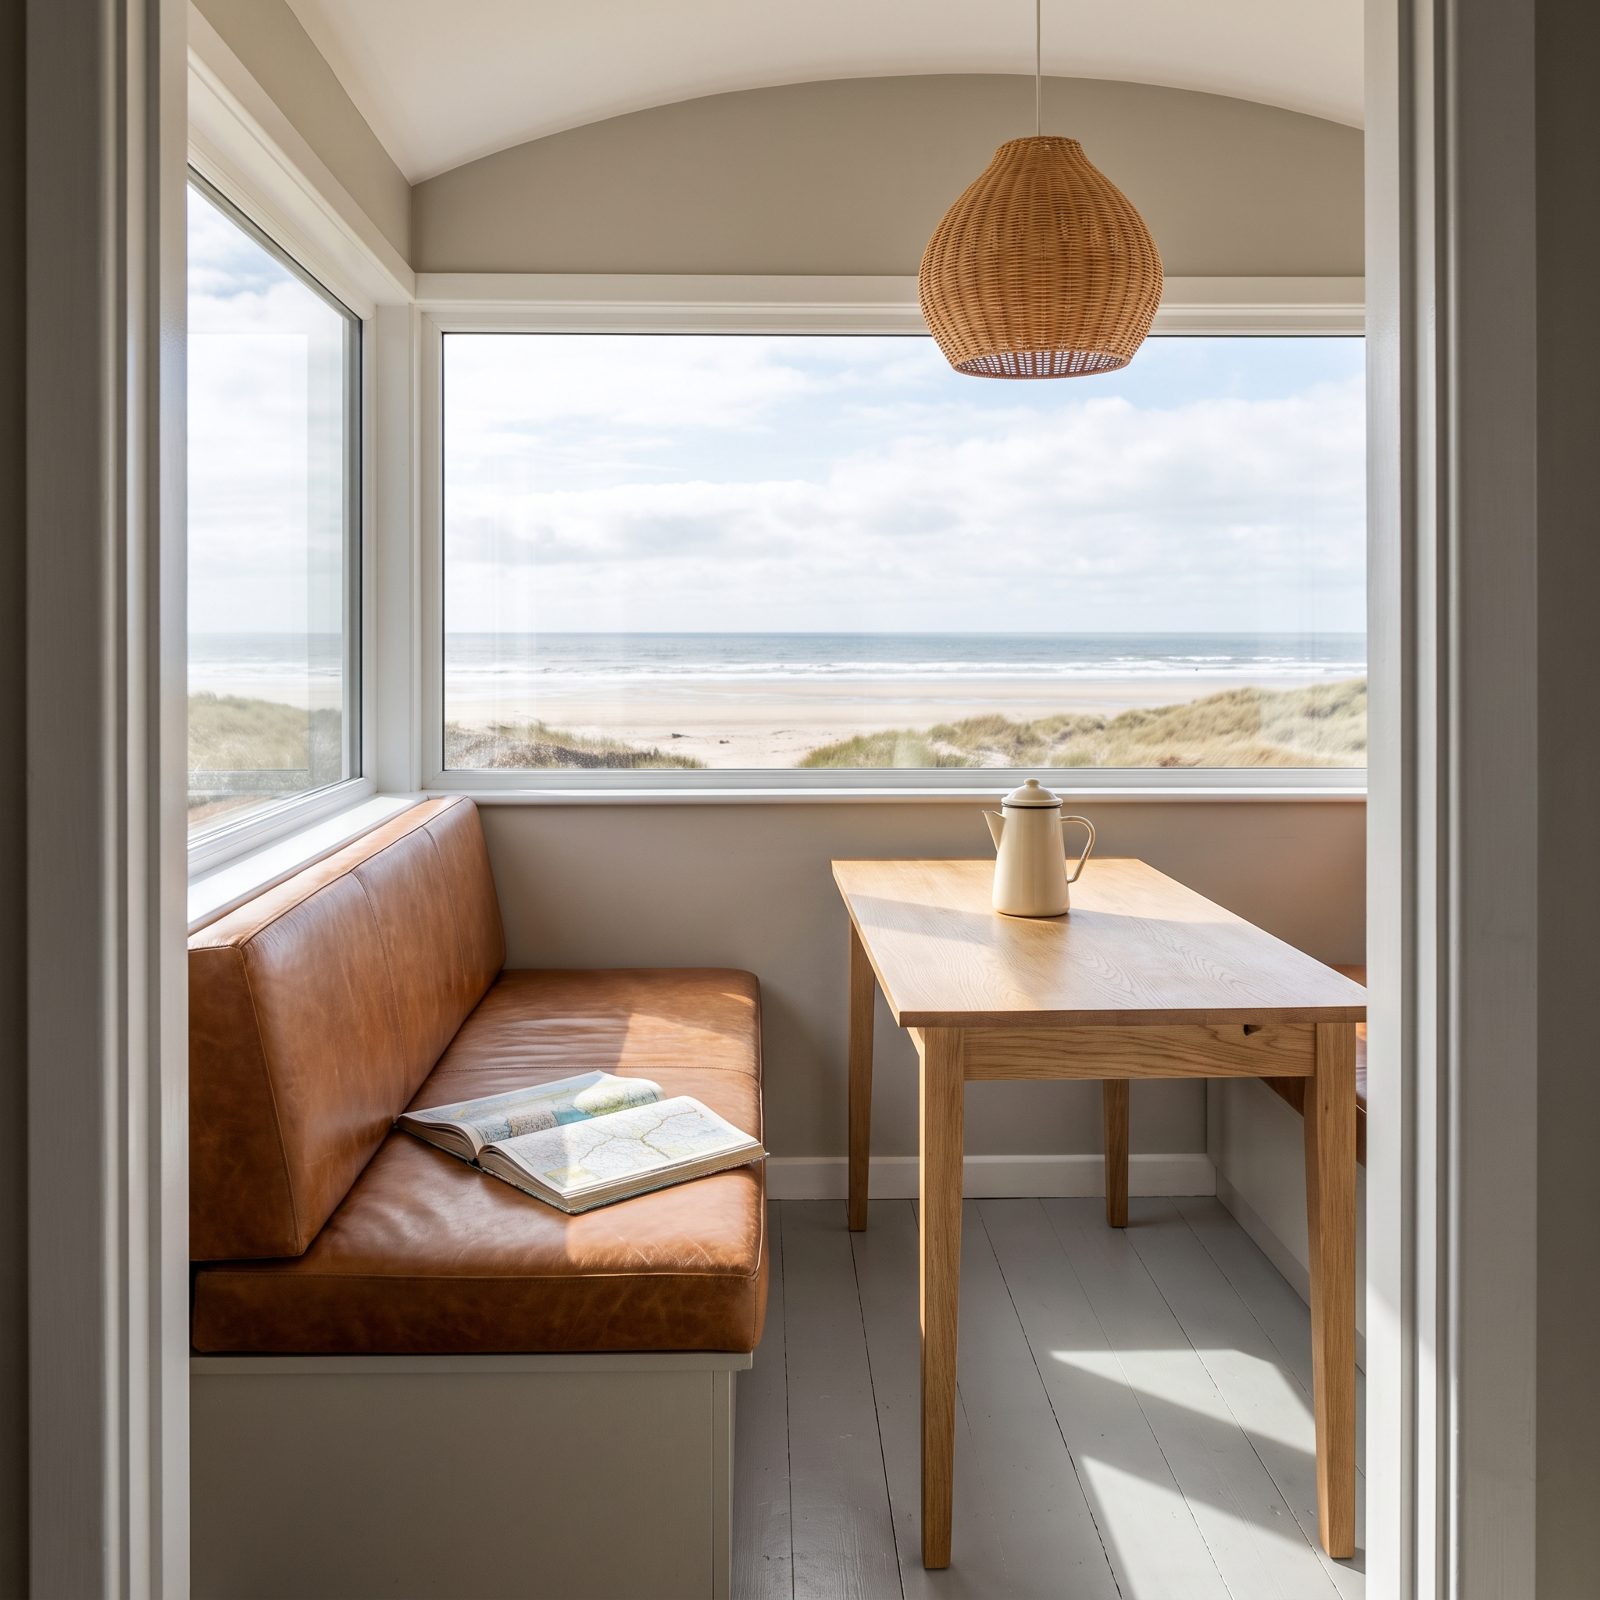
The dinette is where you eat, plan the next leg, and watch the weather roll in. A cramped factory window turns all of that inward. Enlarge it and you borrow the whole campsite as part of the room — and borrowed space is the only kind an RV can really gain.
This one’s a genuine project. Cutting and reframing the sidewall, sealing it right — have a shop handle it unless you’re confident with the structure. The payoff is a nook that feels twice its size because your eye never stops at the wall.
11. Install a glazed entry door to brighten the darkest end of the RV
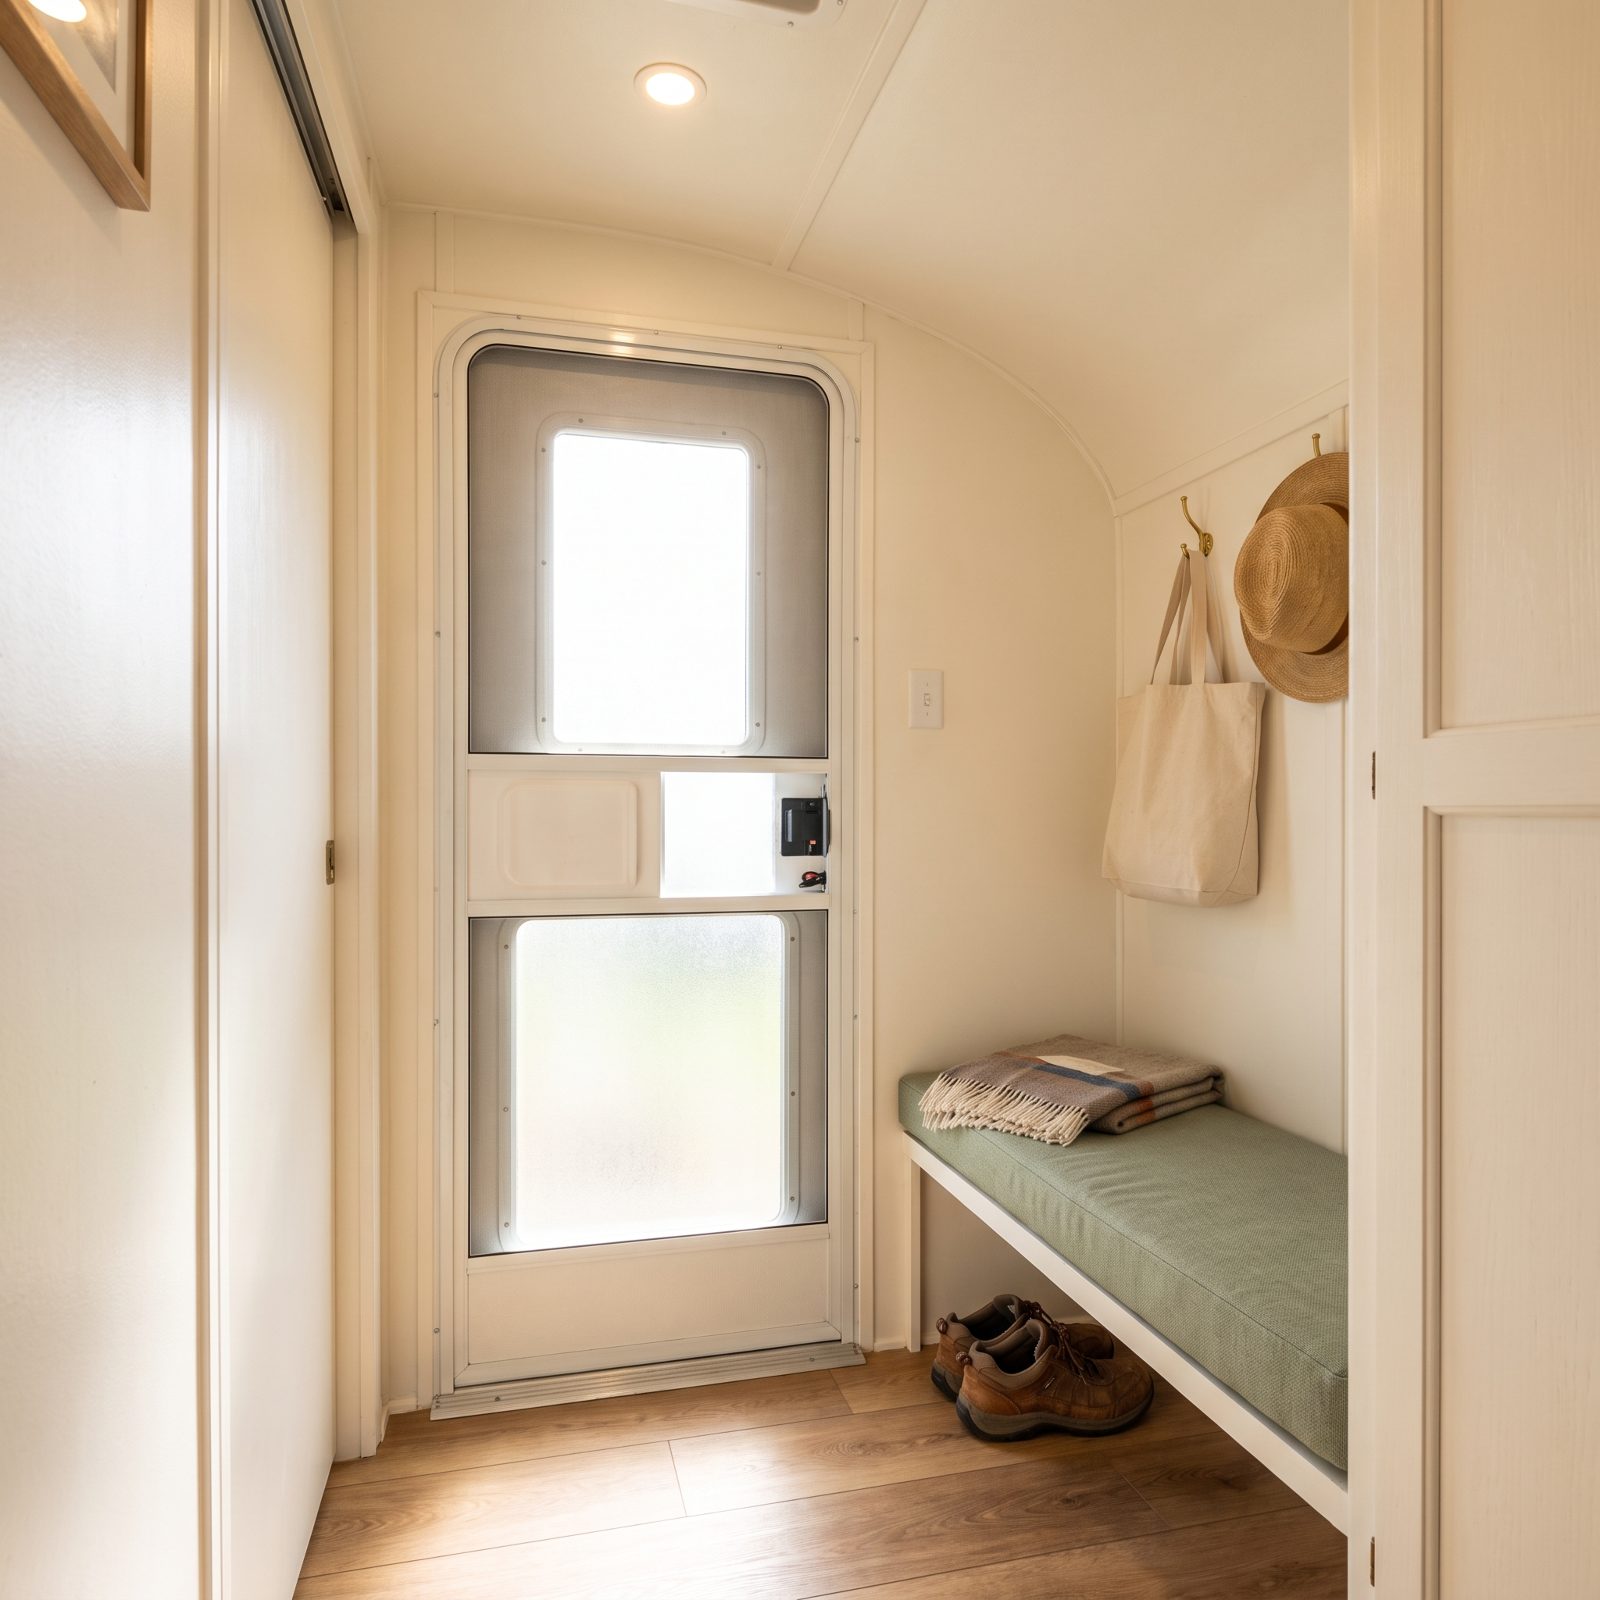
The entry end of most rigs is a cave. Solid door, small opening, the one spot you fumble for the light switch every evening. Swap in a door with a glazed panel and that corner comes alive with daylight you were already paying for and never using.
Frost the lower half for privacy, leave the top clear. Aftermarket RV doors with glass inserts fit standard openings, and the difference at 7am is hard to overstate.
10. Build shallow recessed cubbies into unused wall cavities
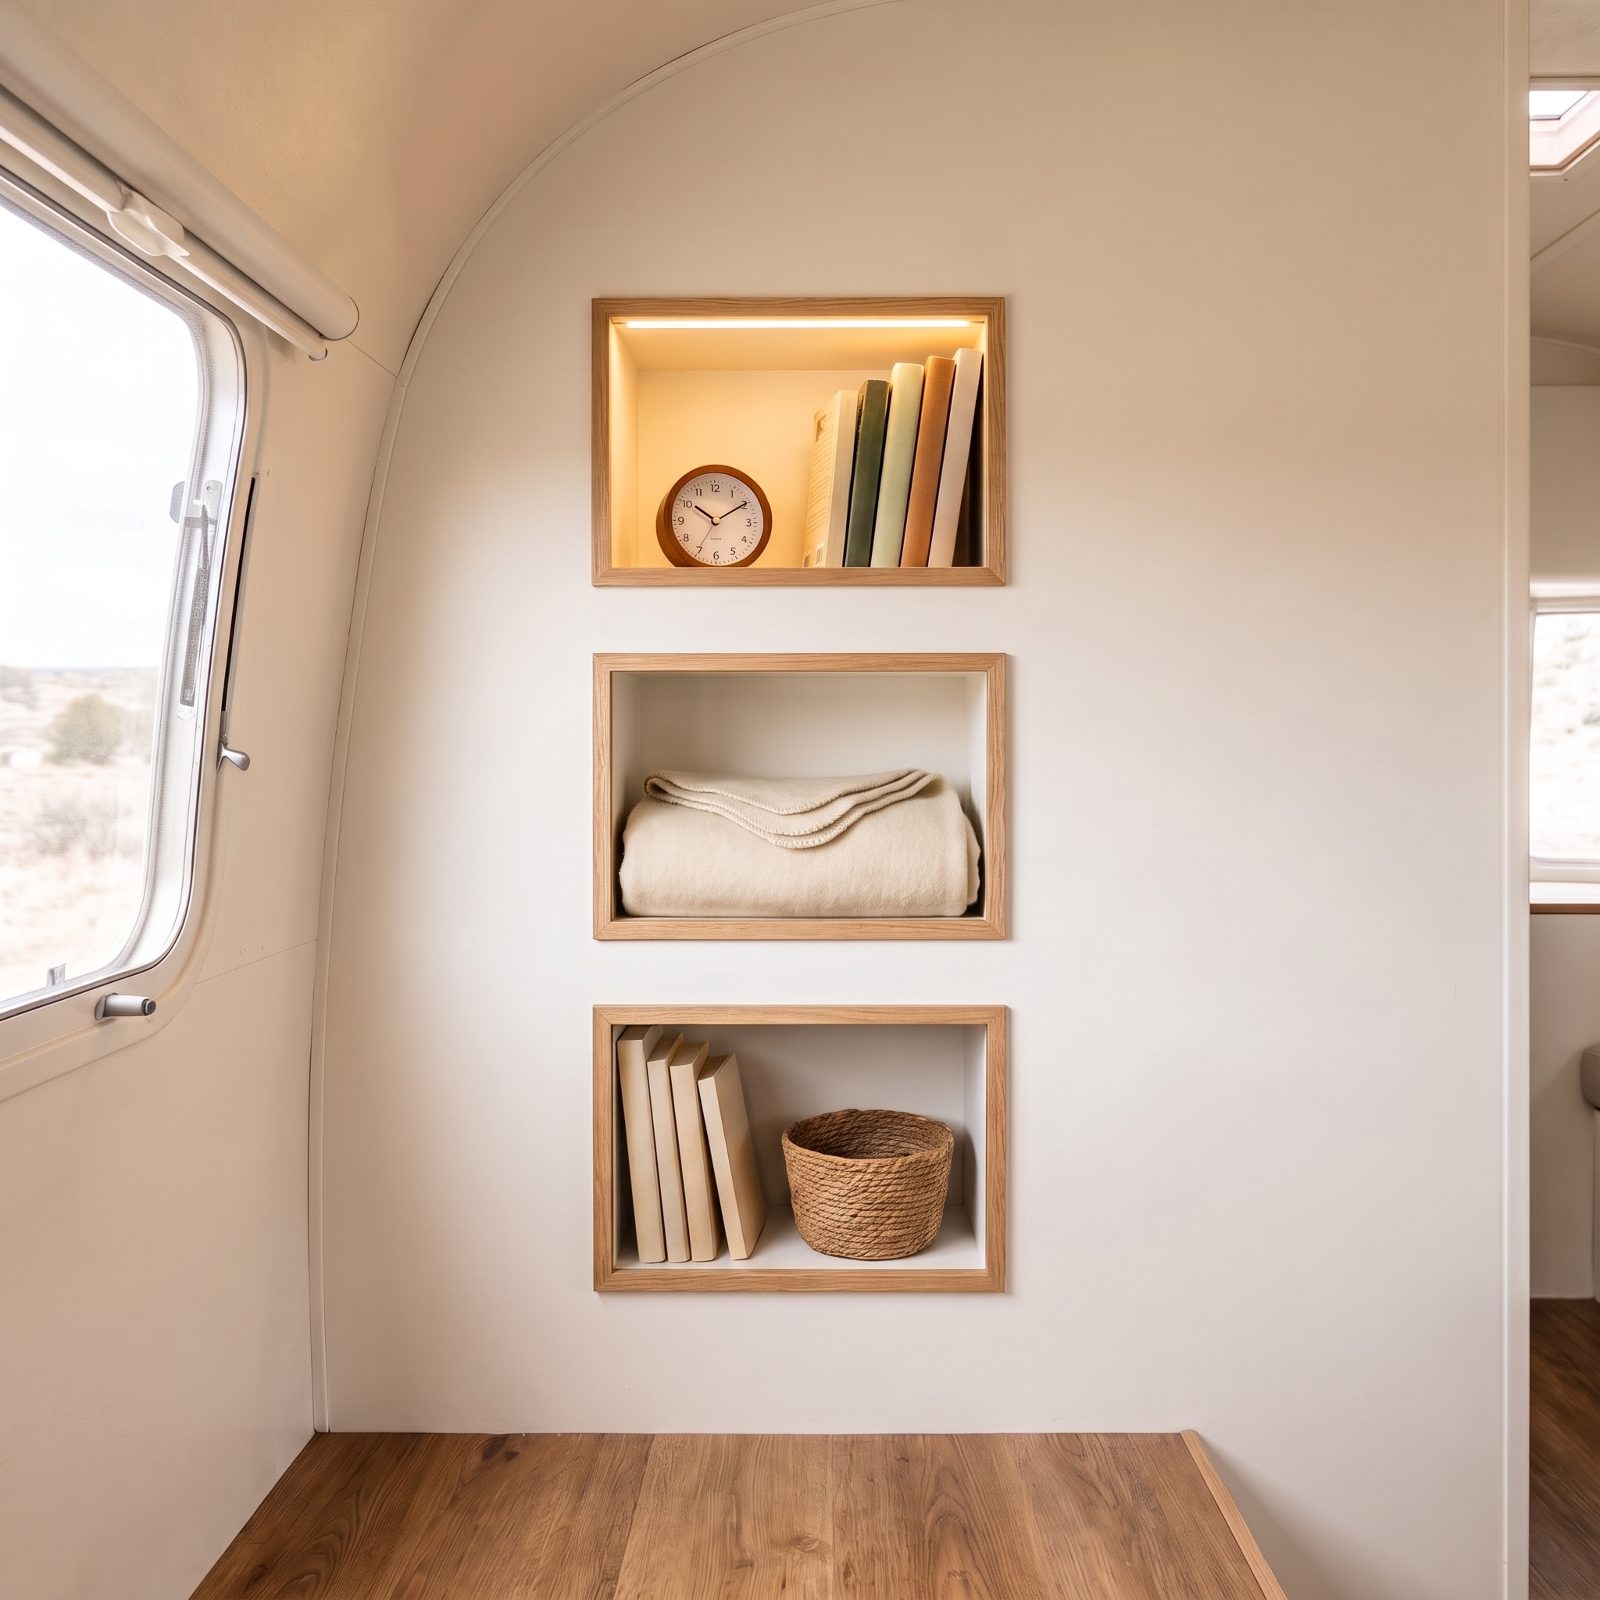
Every RV wall hides hollow space between the studs, and most of it just sits there wasted. Open it up into shallow, wood-lined niches and you gain storage without surrendering any floor or aisle. Books, a clock, folded blankets — all tucked into the wall itself.
Line each one in warm oak, and run a tiny LED inside the top one for a built-in reading light. It’s the kind of fix that makes guests ask where you bought the trailer.
Clear counters read as a bigger room. Move the clutter into the wall and watch the whole space exhale.
9. Mount a Magnetic Knife Strip and Reclaim the Galley Worktop
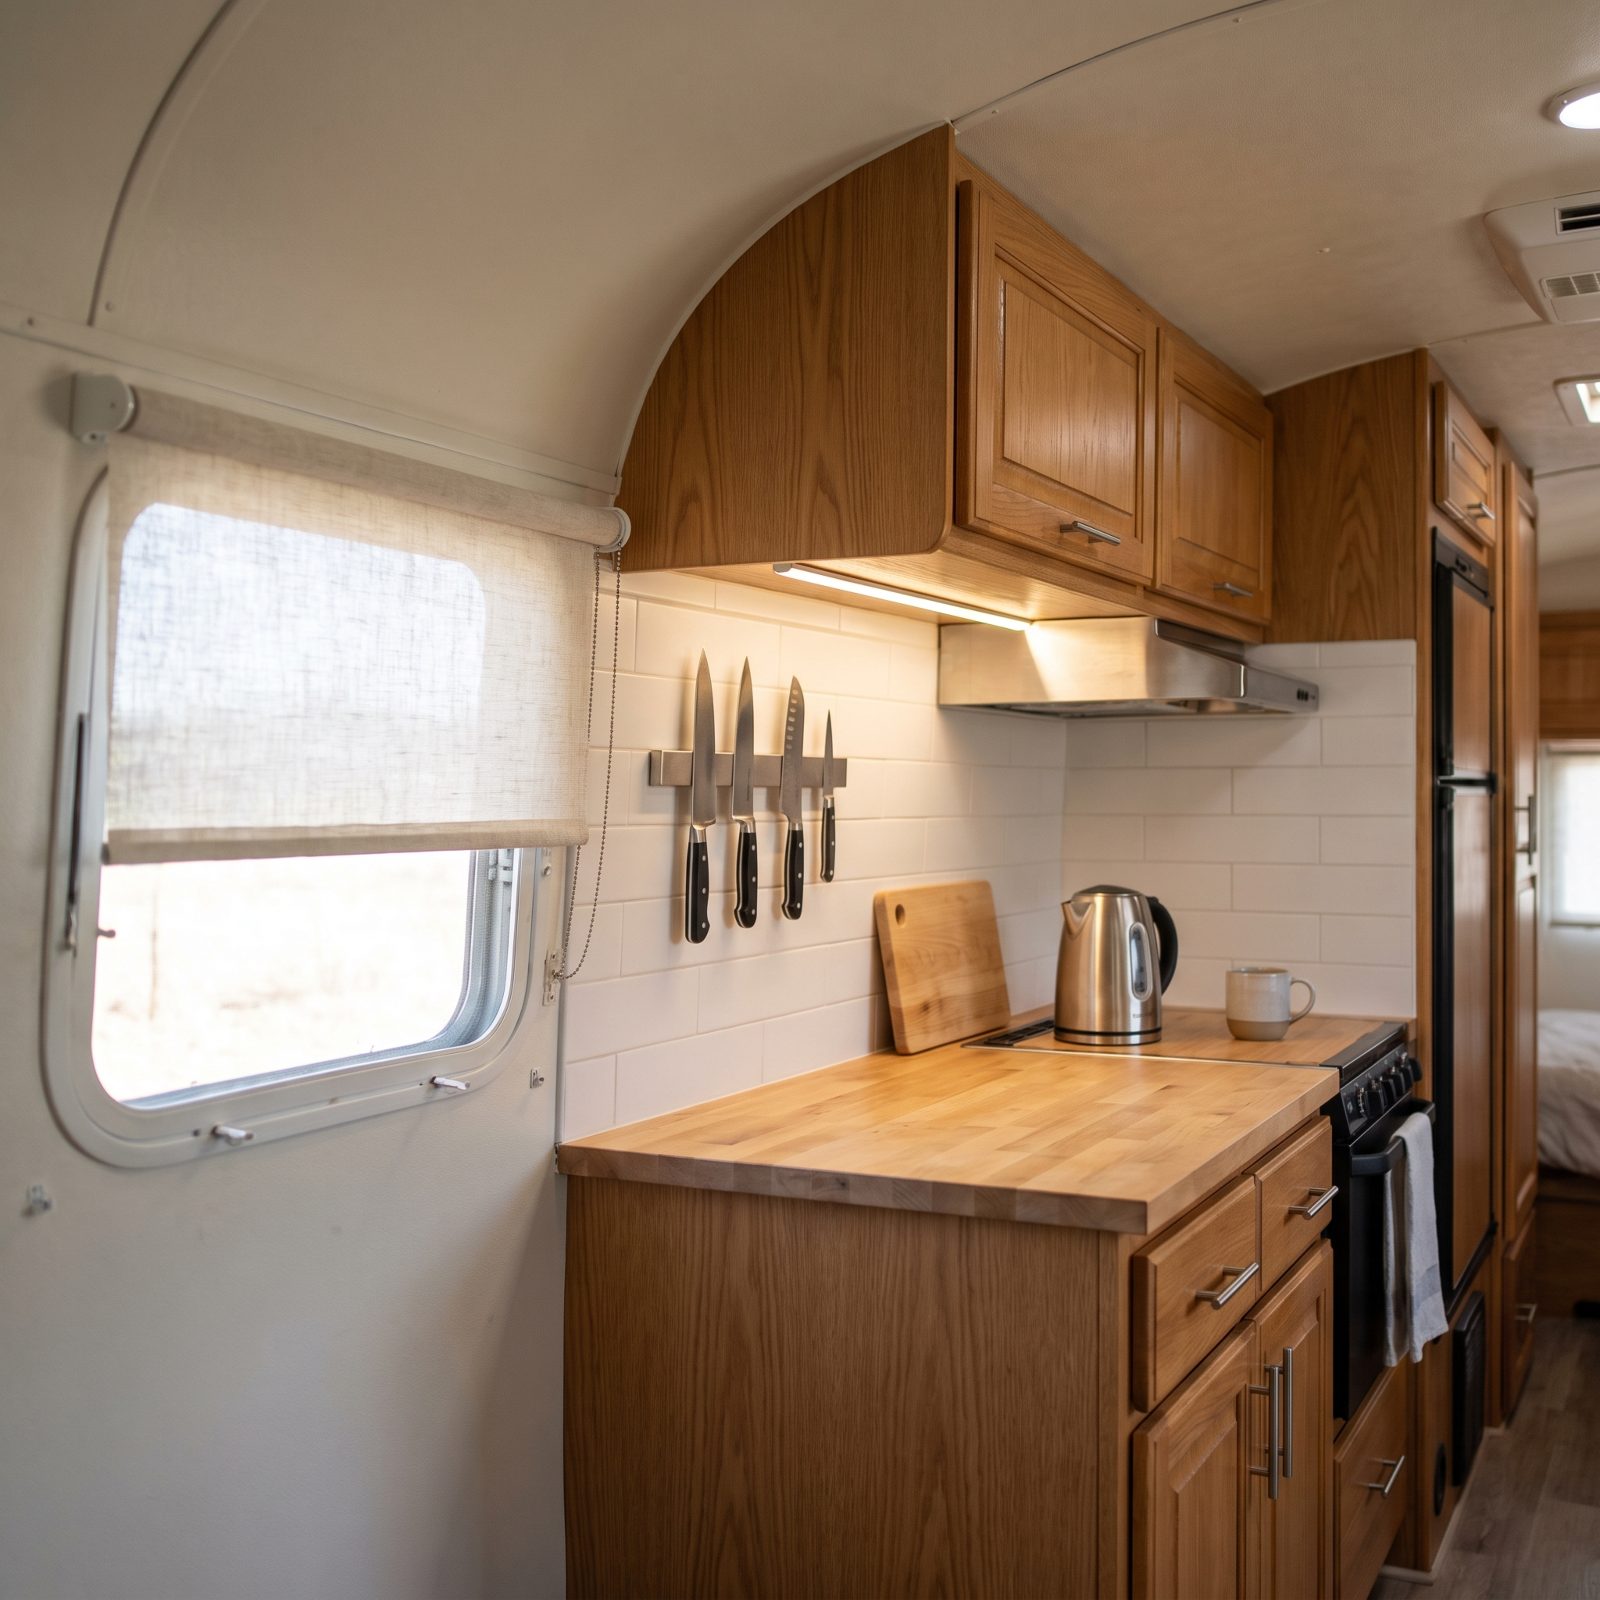
A knife block eats a square foot of counter you don’t have. In a galley the width of an ironing board, that square foot is the difference between chopping an onion and performing surgery.
Get the knives off the counter and onto the wall. A stainless magnetic knife strip screws into the backsplash in ten minutes, and suddenly your blades are visible, reachable, and holding on through washboard roads. I resisted this for a full season, figuring the magnets wouldn’t grip over bumps. They grip fine.
8. Slide a Narrow Pull-Out Pantry Into That Dead Cabinet Gap
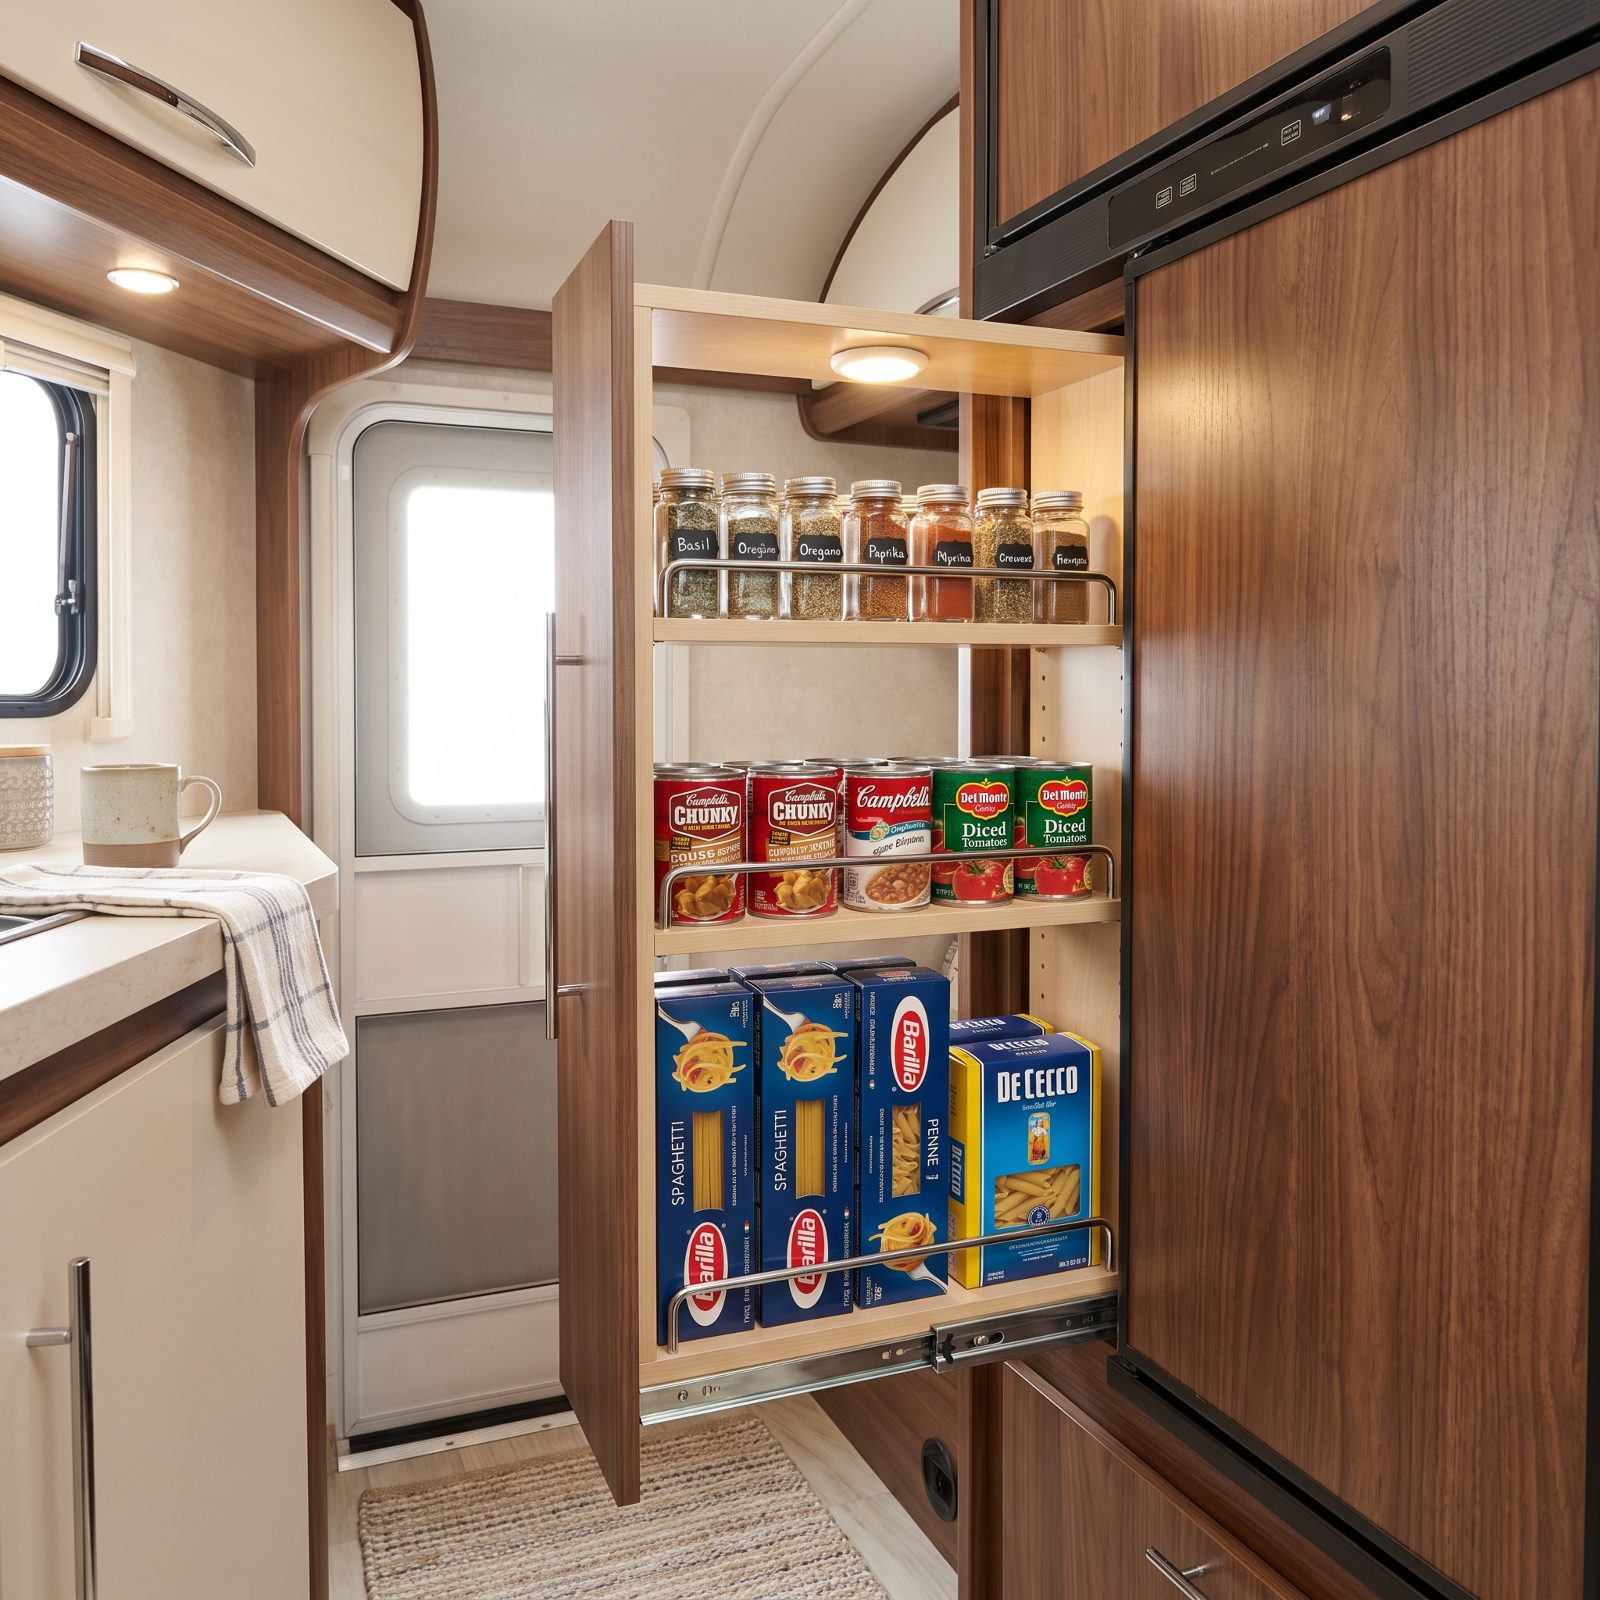
There’s almost always a gap. A few inches of dead air inside the tall fridge housing or at the end of a cabinet run, filler panel bolted over it, holding nothing but the void.
That gap wants to be a pull-out pantry. A slim slide-out rack on full-extension rails turns the width of a cereal box into vertical storage for cans, spices, and the oils you used to lose at the back of a deep shelf. You see everything at once. No more buying a third jar of cumin because you couldn’t find the first two.
7. Swap Projecting Knobs for Flush Edge Pulls
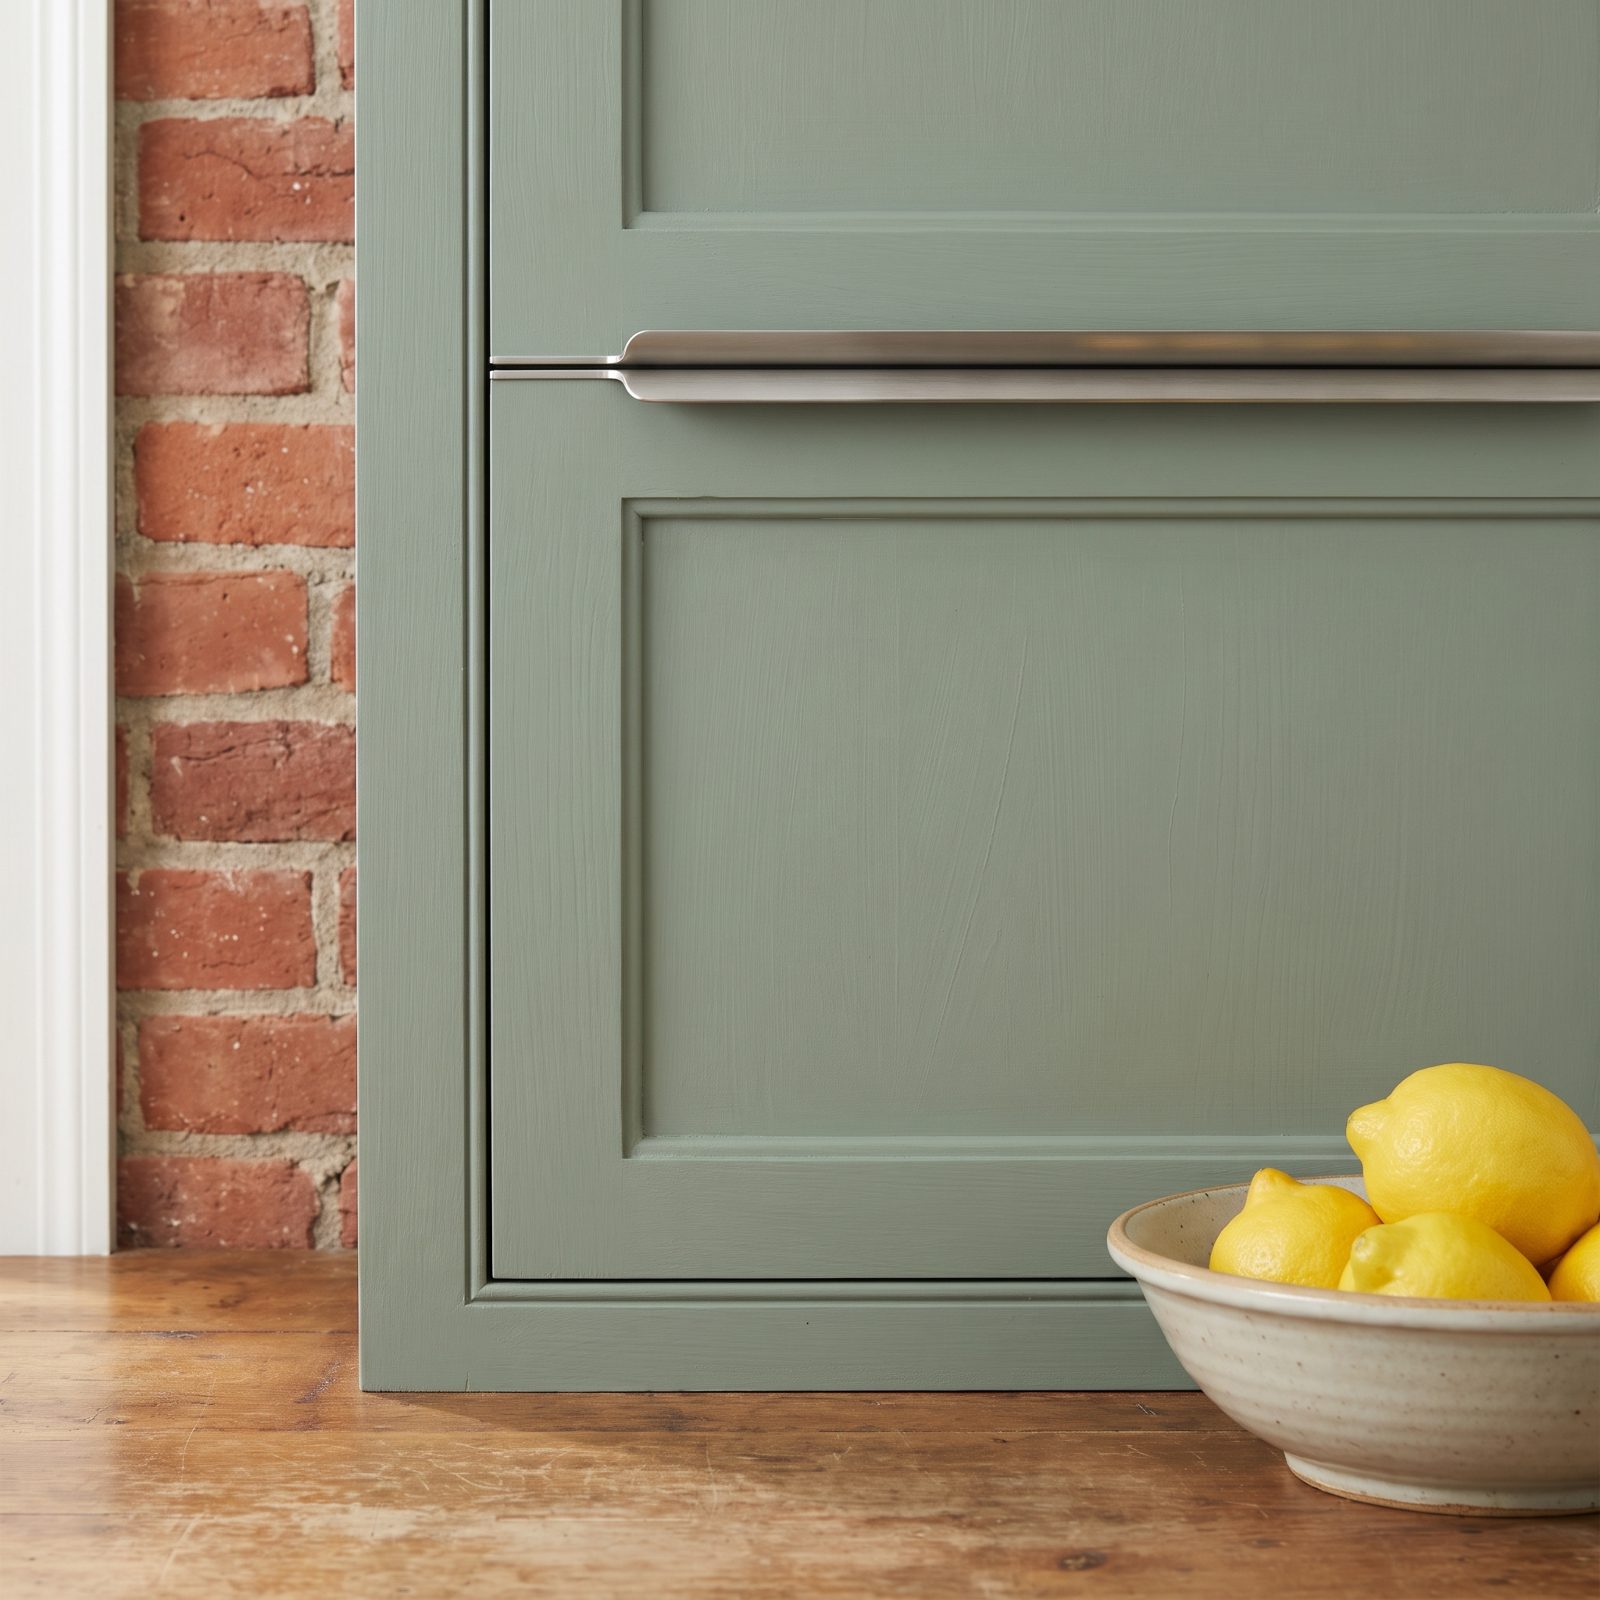
Knobs are the thing you keep snagging. Pocket, hip, the belt loop that nearly tears a cabinet off in a four-foot aisle. In a wide hallway you’d never notice; in an RV aisle you notice every single time.
Go flush. Black edge finger pulls or a routed finger groove sit flat against the cabinet face so nothing projects into the walkway. The aisle reads wider because your eye isn’t catching on a dozen little lumps, and nothing grabs you as you squeeze past. Cheap afternoon swap, and the whole galley feels calmer afterward.
6. Pull Up the Scatter Rugs and Let the Floor Run
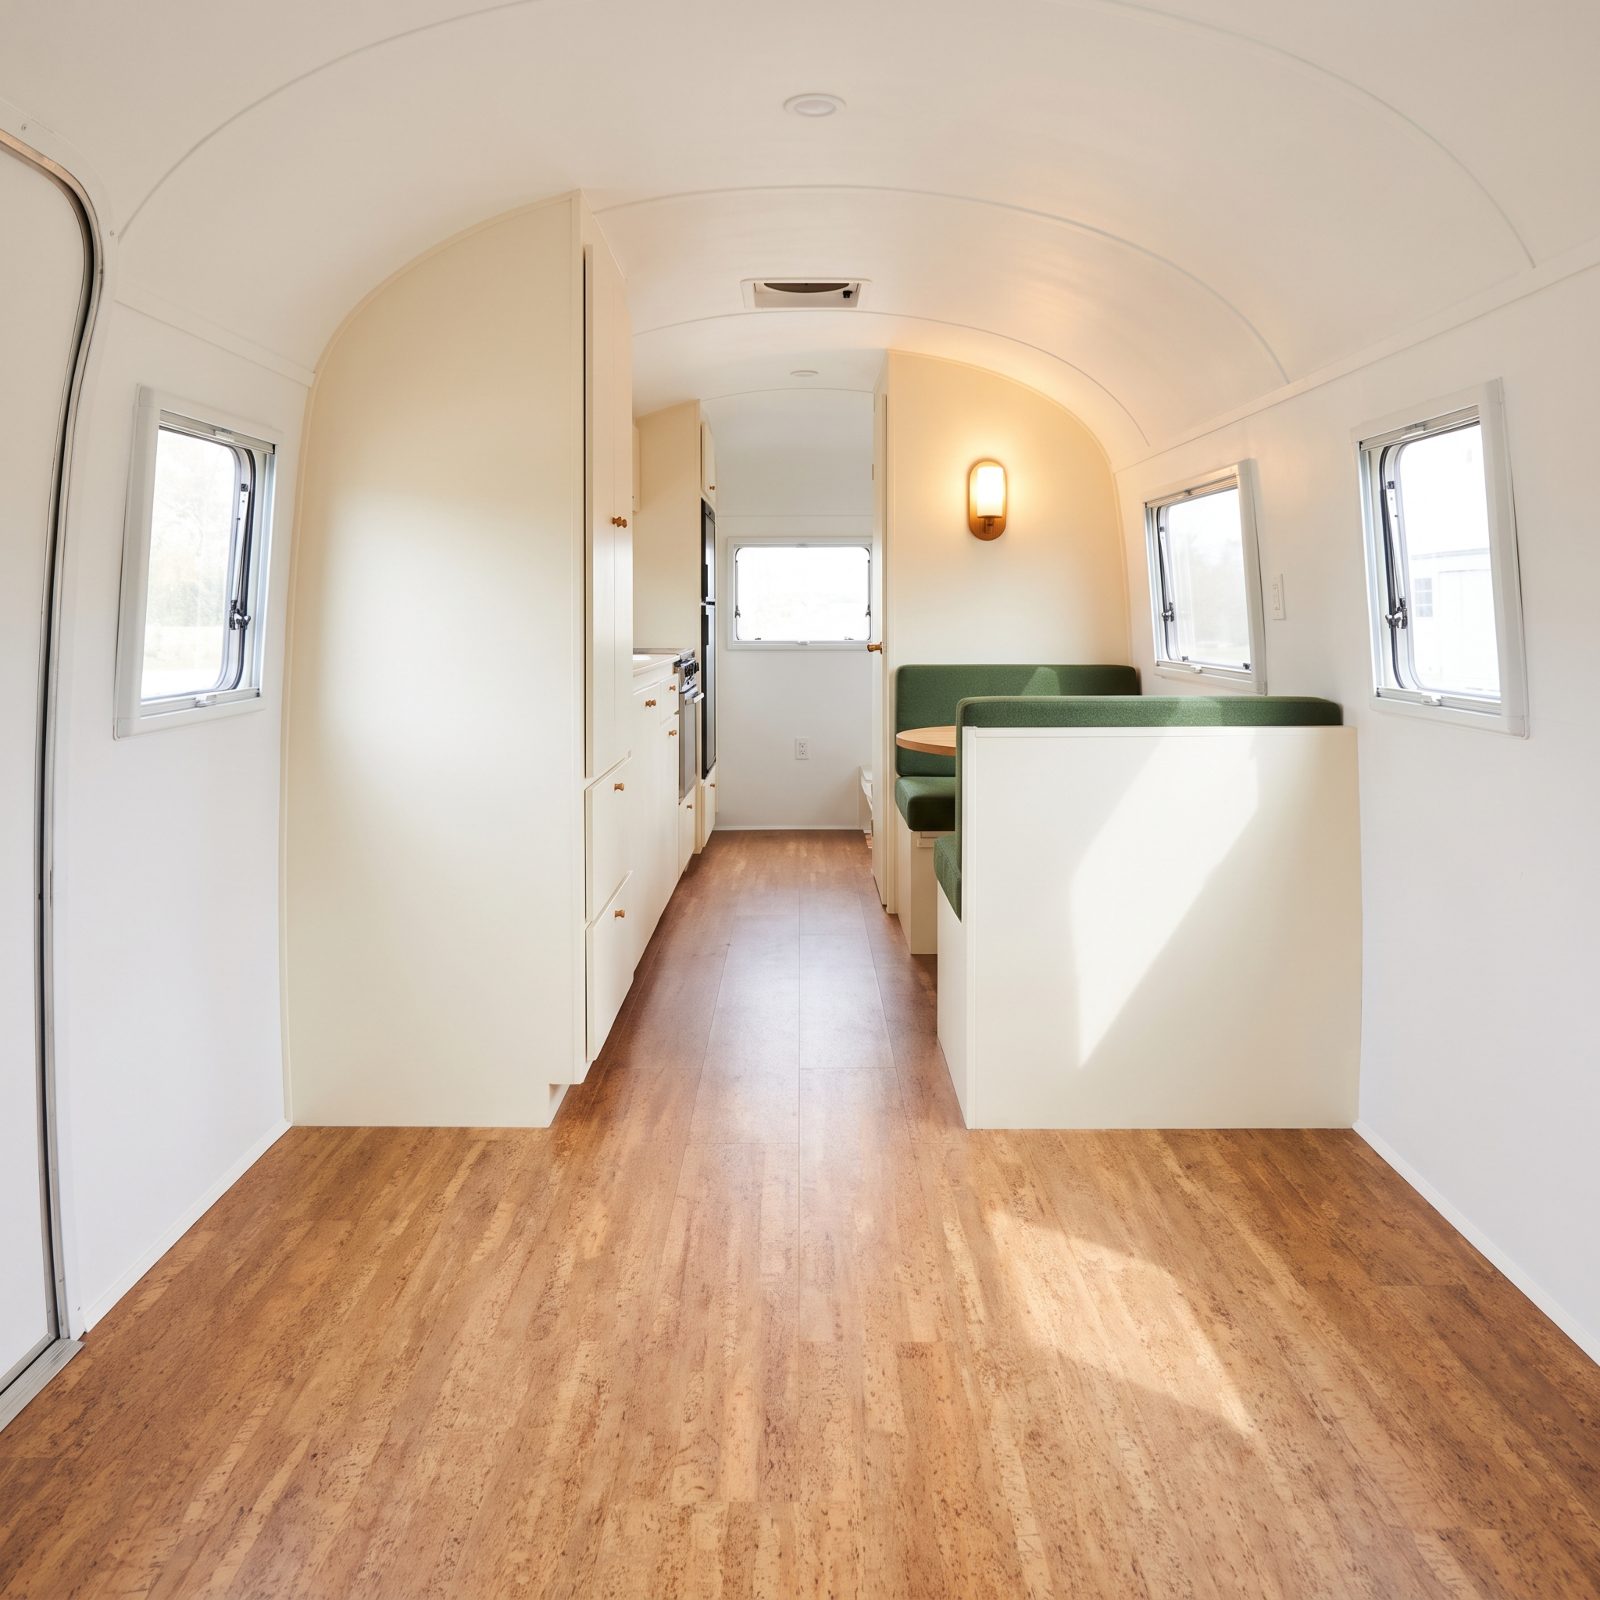
Scatter rugs feel cozy on paper. In practice they chop a small floor into three smaller pieces, and your eye stops at every edge instead of running the length of the rig.
Roll them up. A continuous floor, visible end to end, reads as one longer space because an unbroken line of flooring tells your brain the room is bigger than it is. Same reason designers run one material through an open-plan house.
Keep one small washable mat at the door for mud. That’s it.
5. Hang One Big Piece Instead of a Busy Gallery Wall
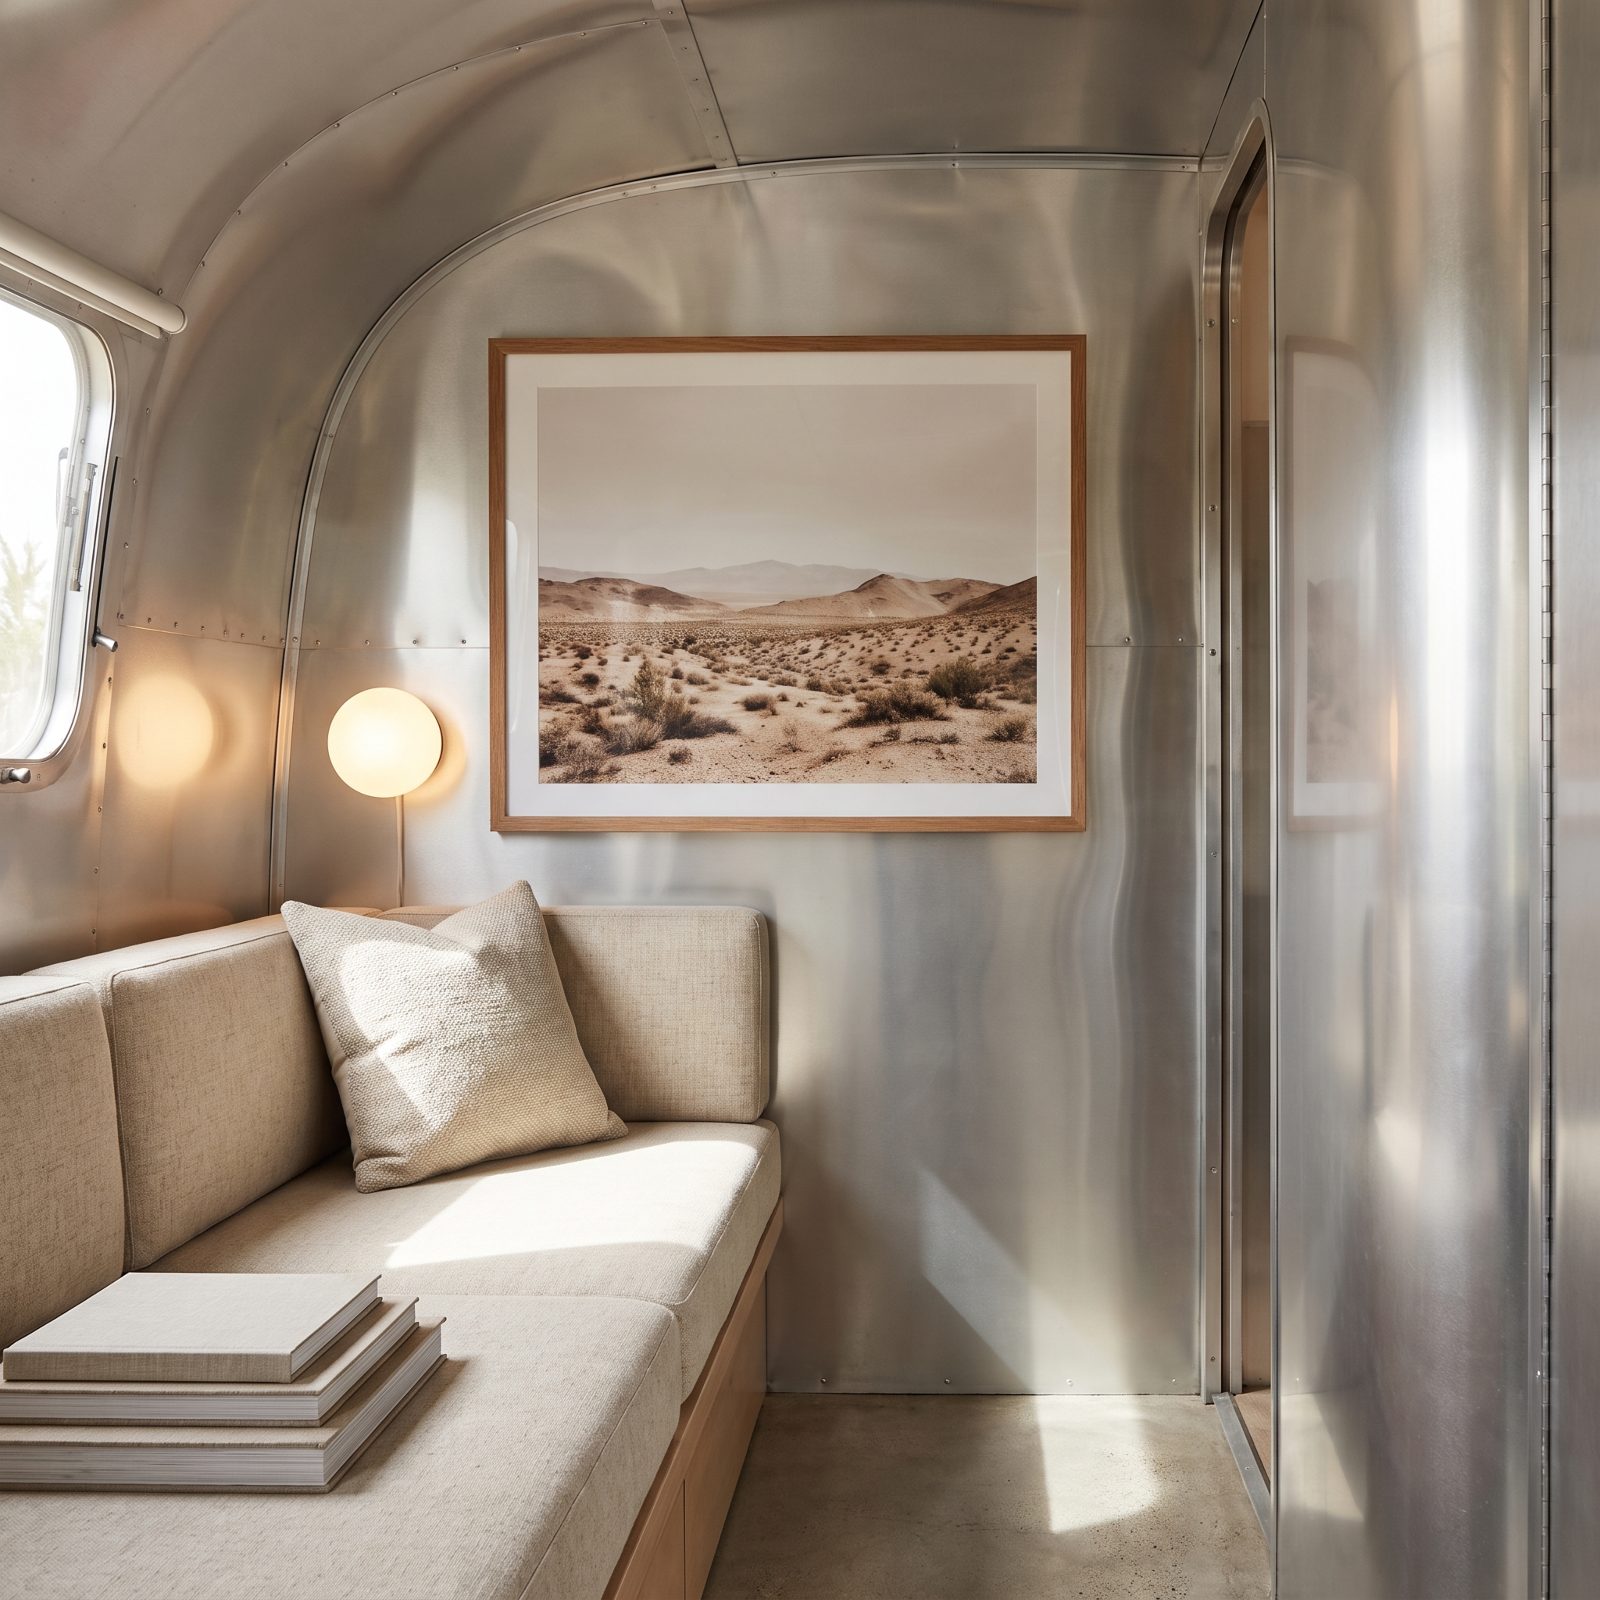
A gallery wall of fourteen little frames looks great in a Brooklyn apartment. Inside a trailer it looks like a flock of postage stamps had a disagreement, and every frame adds a rattle waiting to happen on the highway.
Hang one piece. A single large framed landscape print anchors the wall, gives the eye one place to rest, and makes the whole area feel deliberate instead of cluttered. One thing to secure, one thing to dust, one focal point. Use museum putty on the corners and it won’t drift an inch down a washboard road.
4. Drop the TV Into a Lift Cabinet When You’re Not Watching
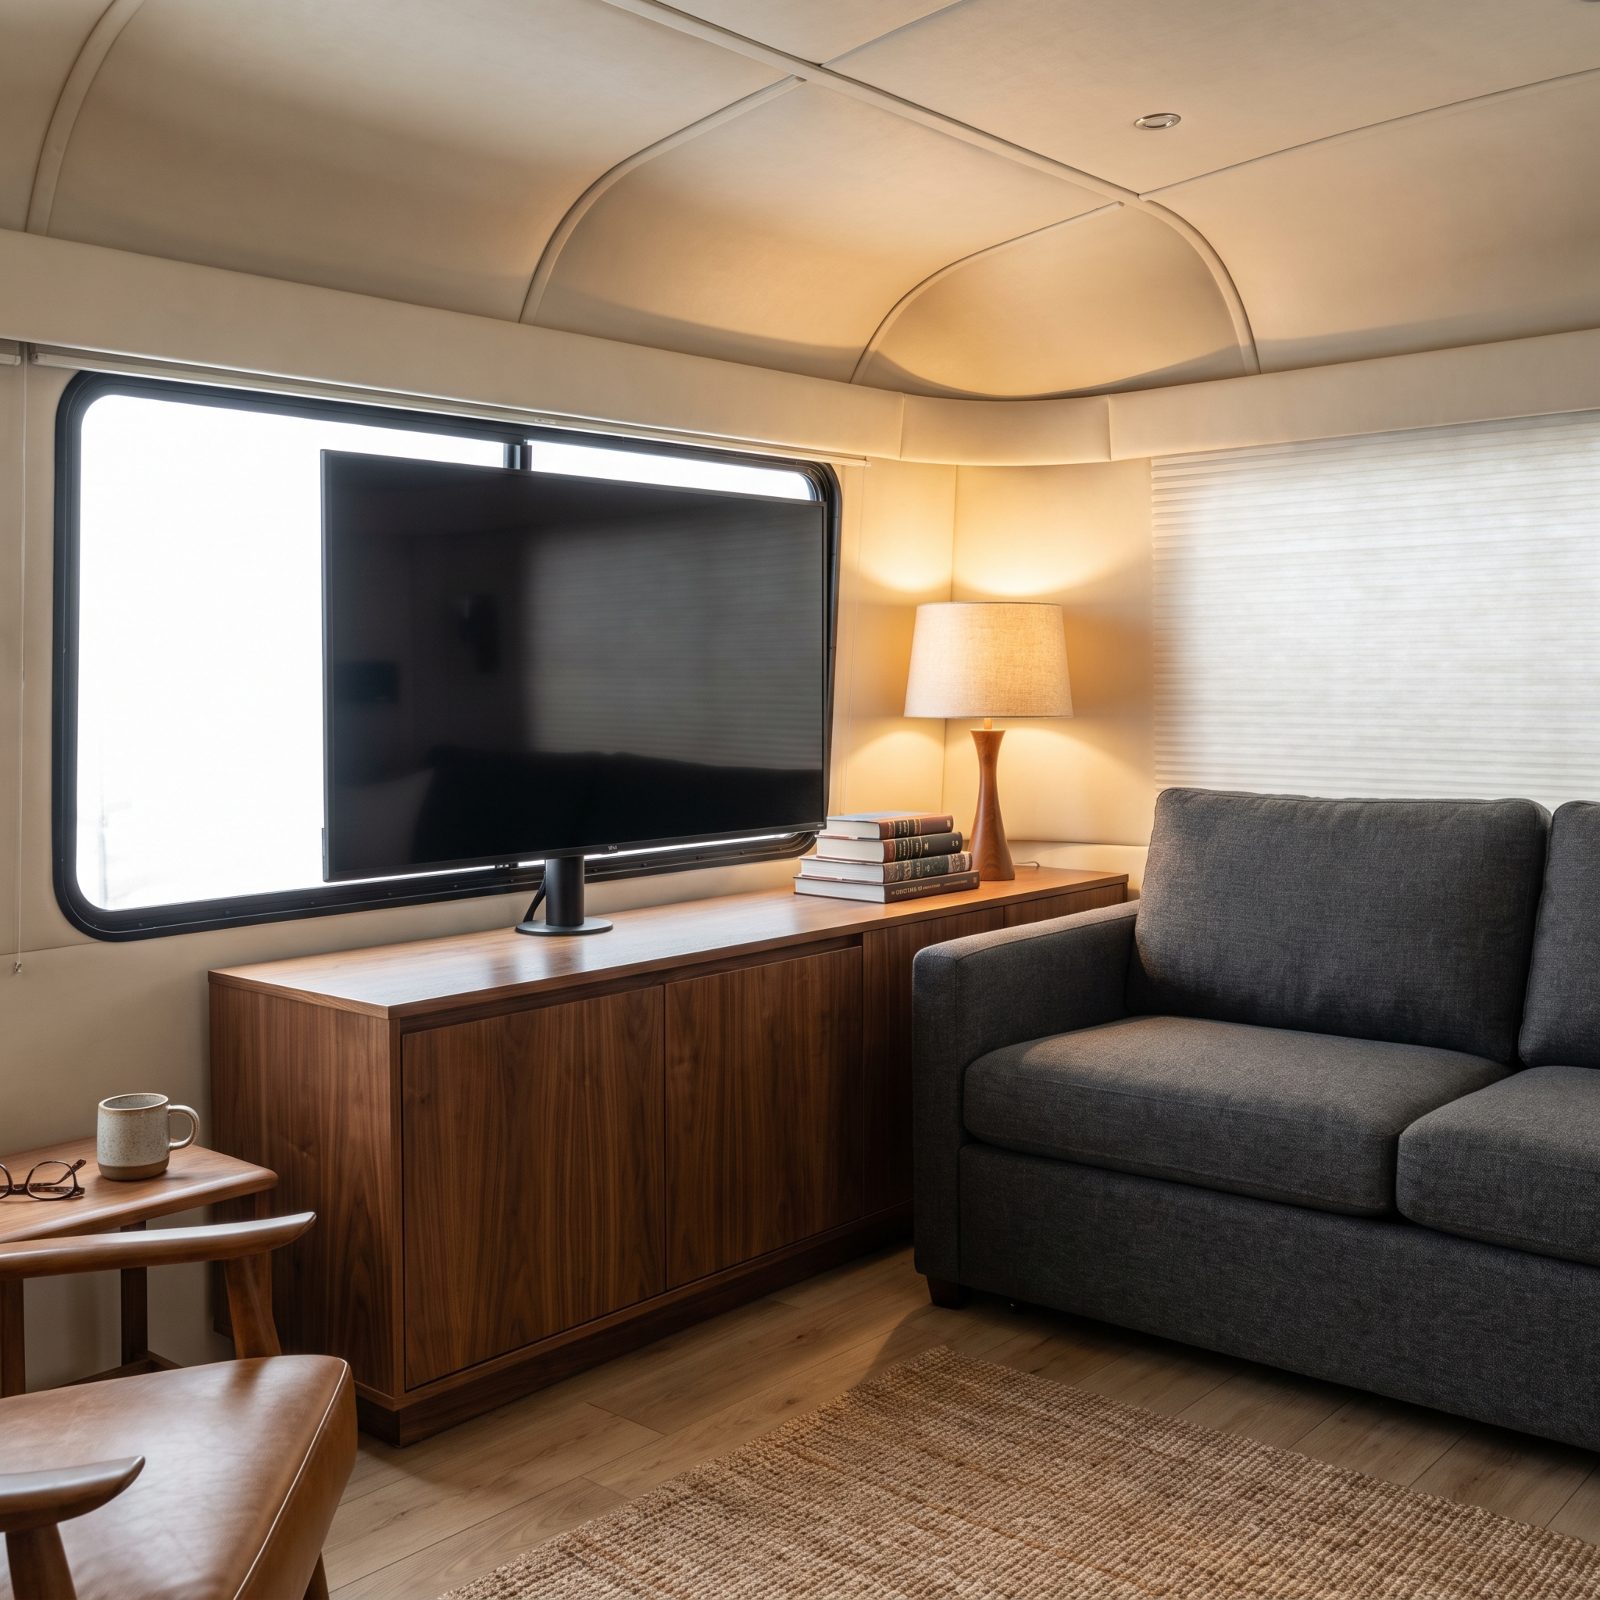
A television bolted to the wall is a black rectangle commanding the room whether it’s on or off. In a tight living area it drags every sightline toward a dead screen.
Tuck it into a lift cabinet. The TV lives inside a low credenza and rises on a motorized lift only when you want it, leaving a clean, flat surface and an open wall the rest of the day. Your eye travels across the whole space instead of parking on a dark slab of glass. Pop-up lift mechanisms have come way down in price, and the cabinet top doubles as counter when the screen’s stowed.
3. Run the Cords and Chargers Through Built-In Channels
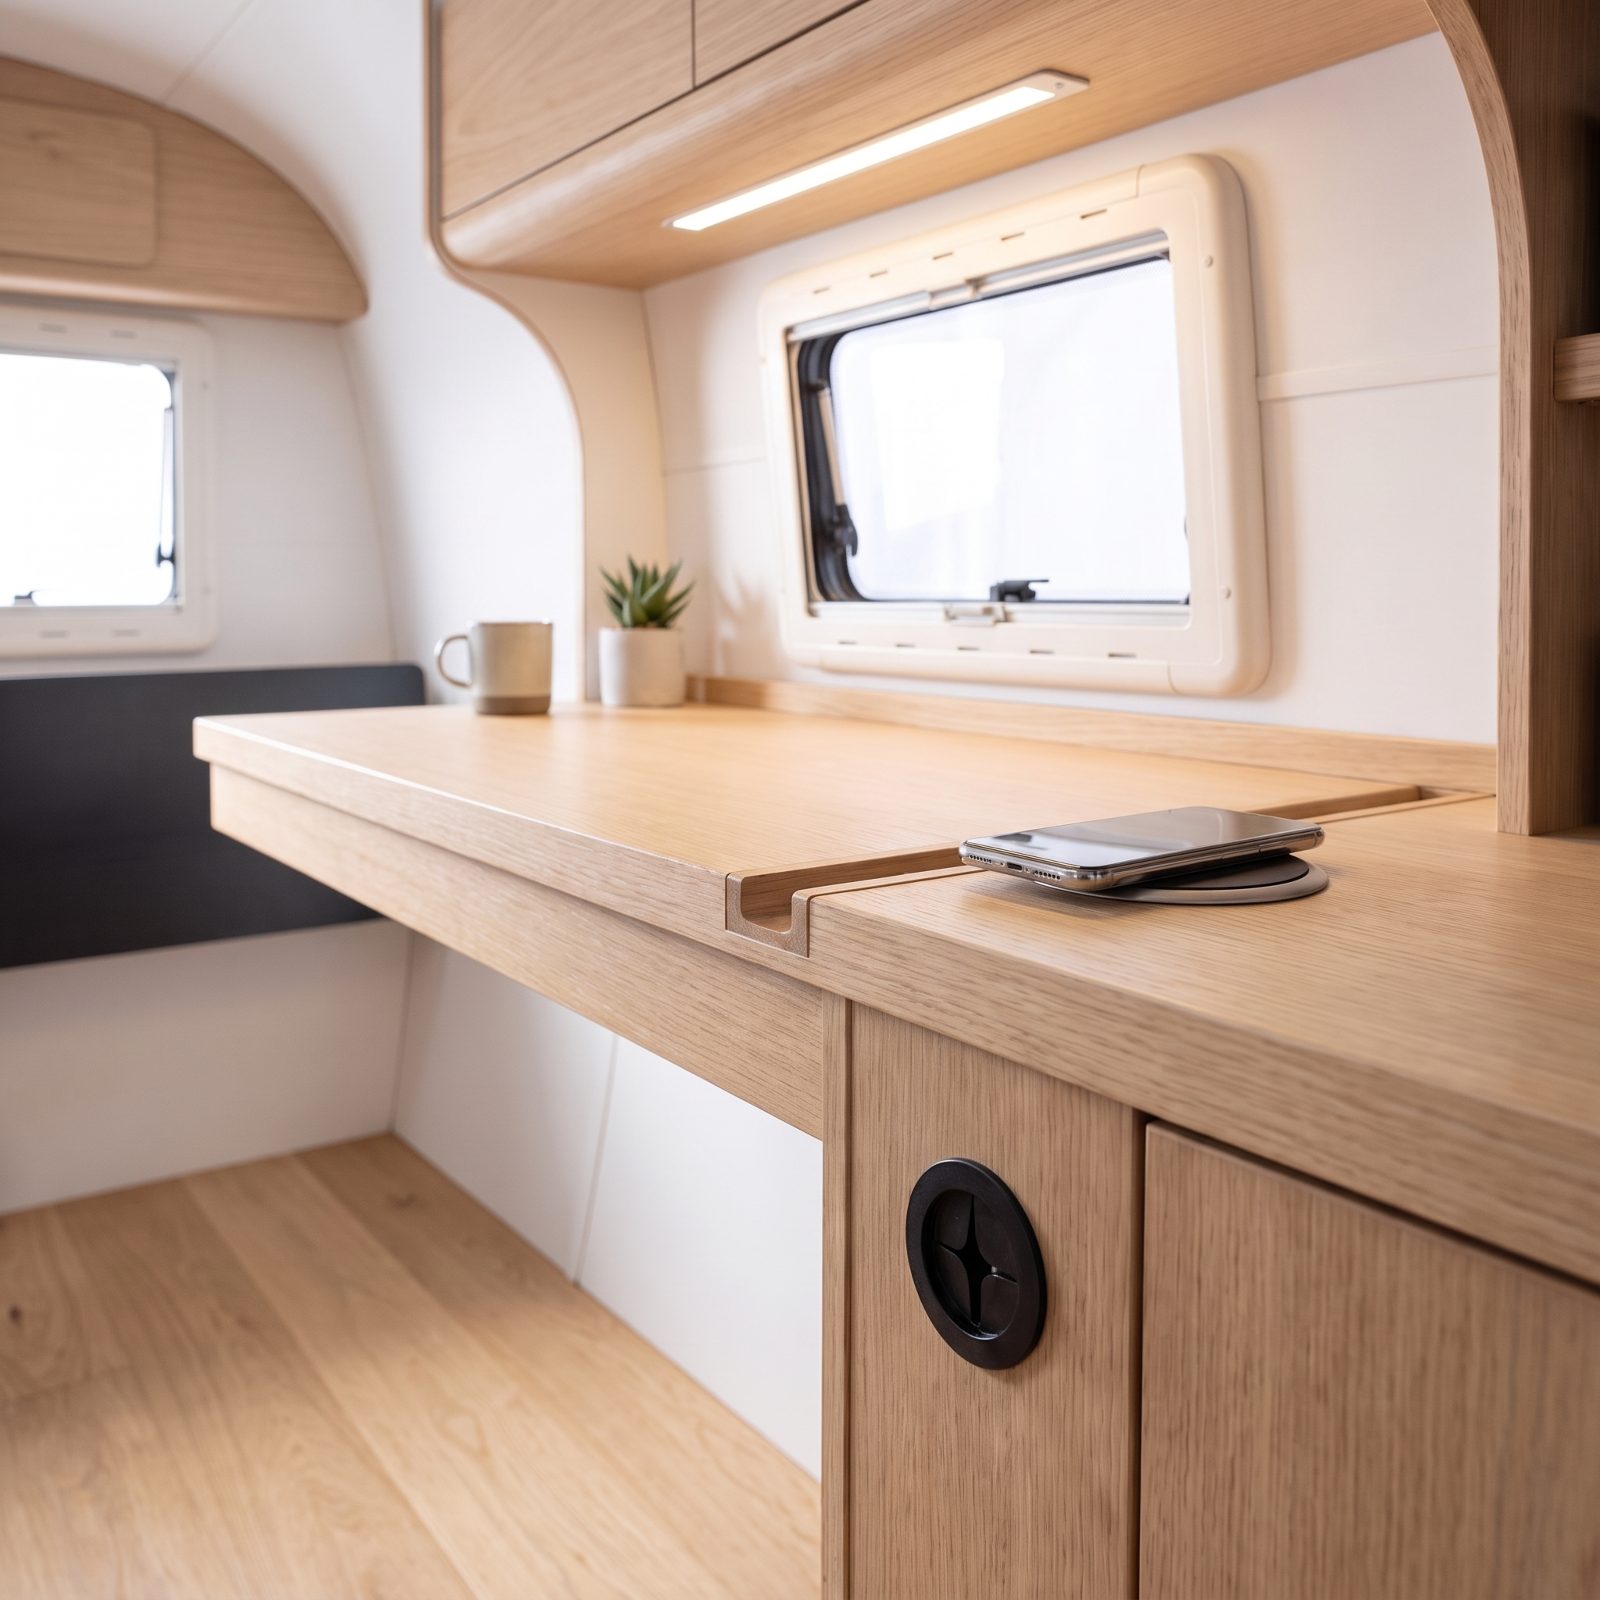
Cords are visual noise you stop seeing until a guest sees it for you. A nest of chargers snaking across the dinette makes a small space feel chaotic, and loose cables swing and tangle every time you move the rig.
Give them a channel. Route cables through a slot cut into the countertop edge, so the only thing left on the worktop is the device itself. Below the edge, tidy any slack with clips or raceway. Clear surfaces read as more space, every time. Add a black cable grommet on the cabinet face where the cords dive in. It gives the setup a clean, factory-built look.
2. Trade Freestanding Bins for Fitted Storage Behind Cabinet Fronts
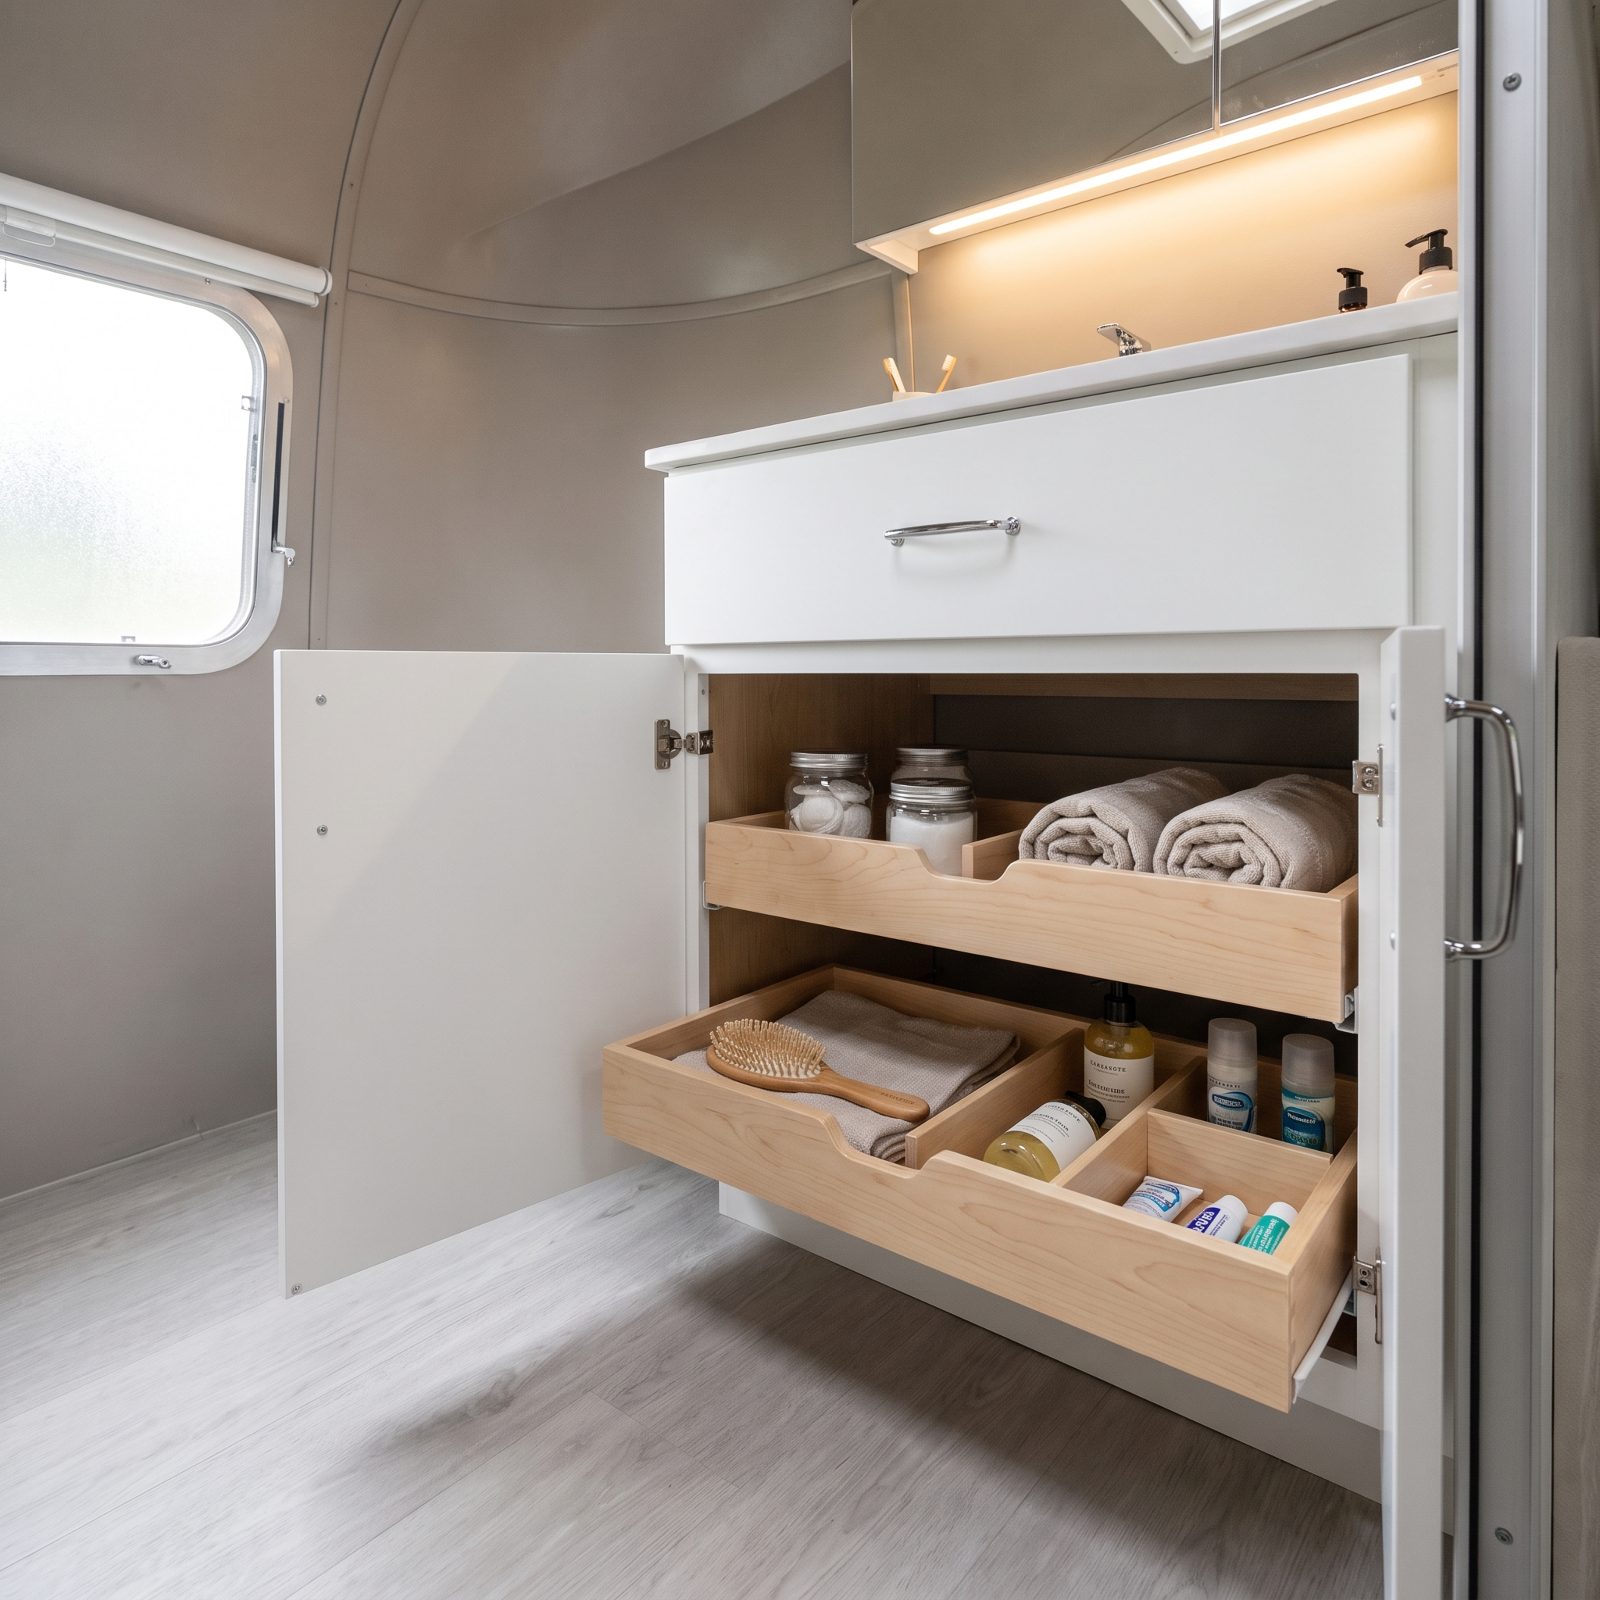
Freestanding bins are the compromise you reach for when you don’t want to build anything. Fair enough. But a stack of plastic tubs on the floor steals the walkway and slides around the second you hit a curve.
Move that storage behind a cabinet front. Fitted drawers and dividers inside existing cabinetry hold the same stuff, off the floor, where it belongs. The aisle opens back up, nothing rattles loose, and you stop stubbing your toe on the tote you keep meaning to deal with.
I ran plastic bins for two years telling myself it was temporary. It’s always temporary until you finally build the drawers. So build the drawers.
1. Fold the Bed Into Shallow Cabinetry With a Wall Bed
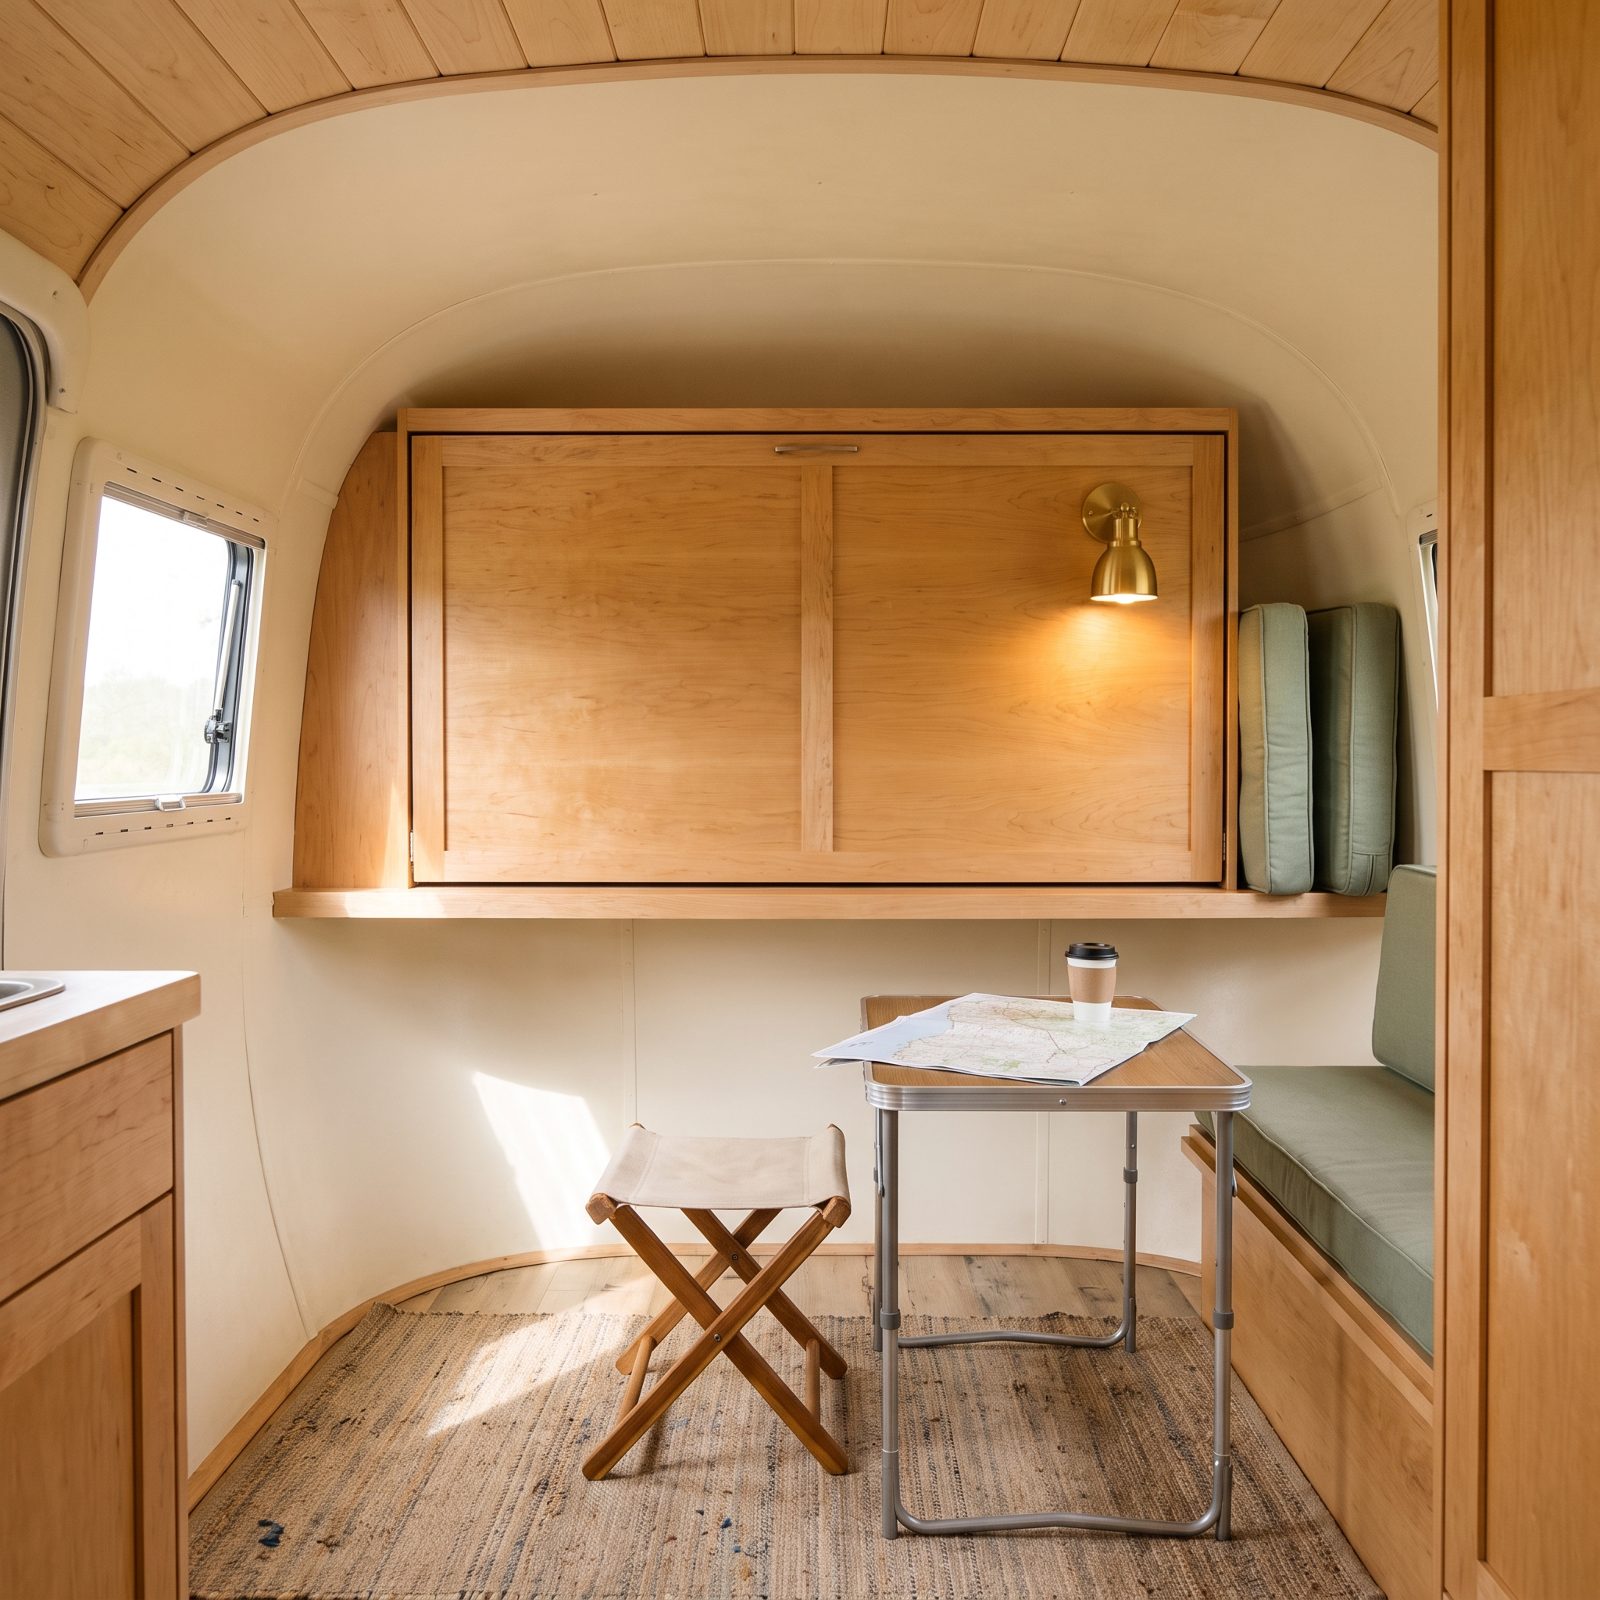
A permanent bed is a room you can only use lying down. It sits there all day being a bed, claiming the best real estate in the rig for the eight hours you’re actually asleep.
A wall bed gives the floor back. Fold it up into shallow cabinetry in the morning and the same square footage becomes a living room, an office, a place to do yoga without driving a knee into the wall. The face finishes as clean cabinet panels, so down it’s a bed and up it just reads as built-in storage.
The goal was never more square feet. It was more hours per square foot.
Modern gas-strut mechanisms do the heavy lifting, so raising and lowering it takes one hand and no grunting. That matters more as the years go on, and there’s no shame in planning for it. Just good sense.