
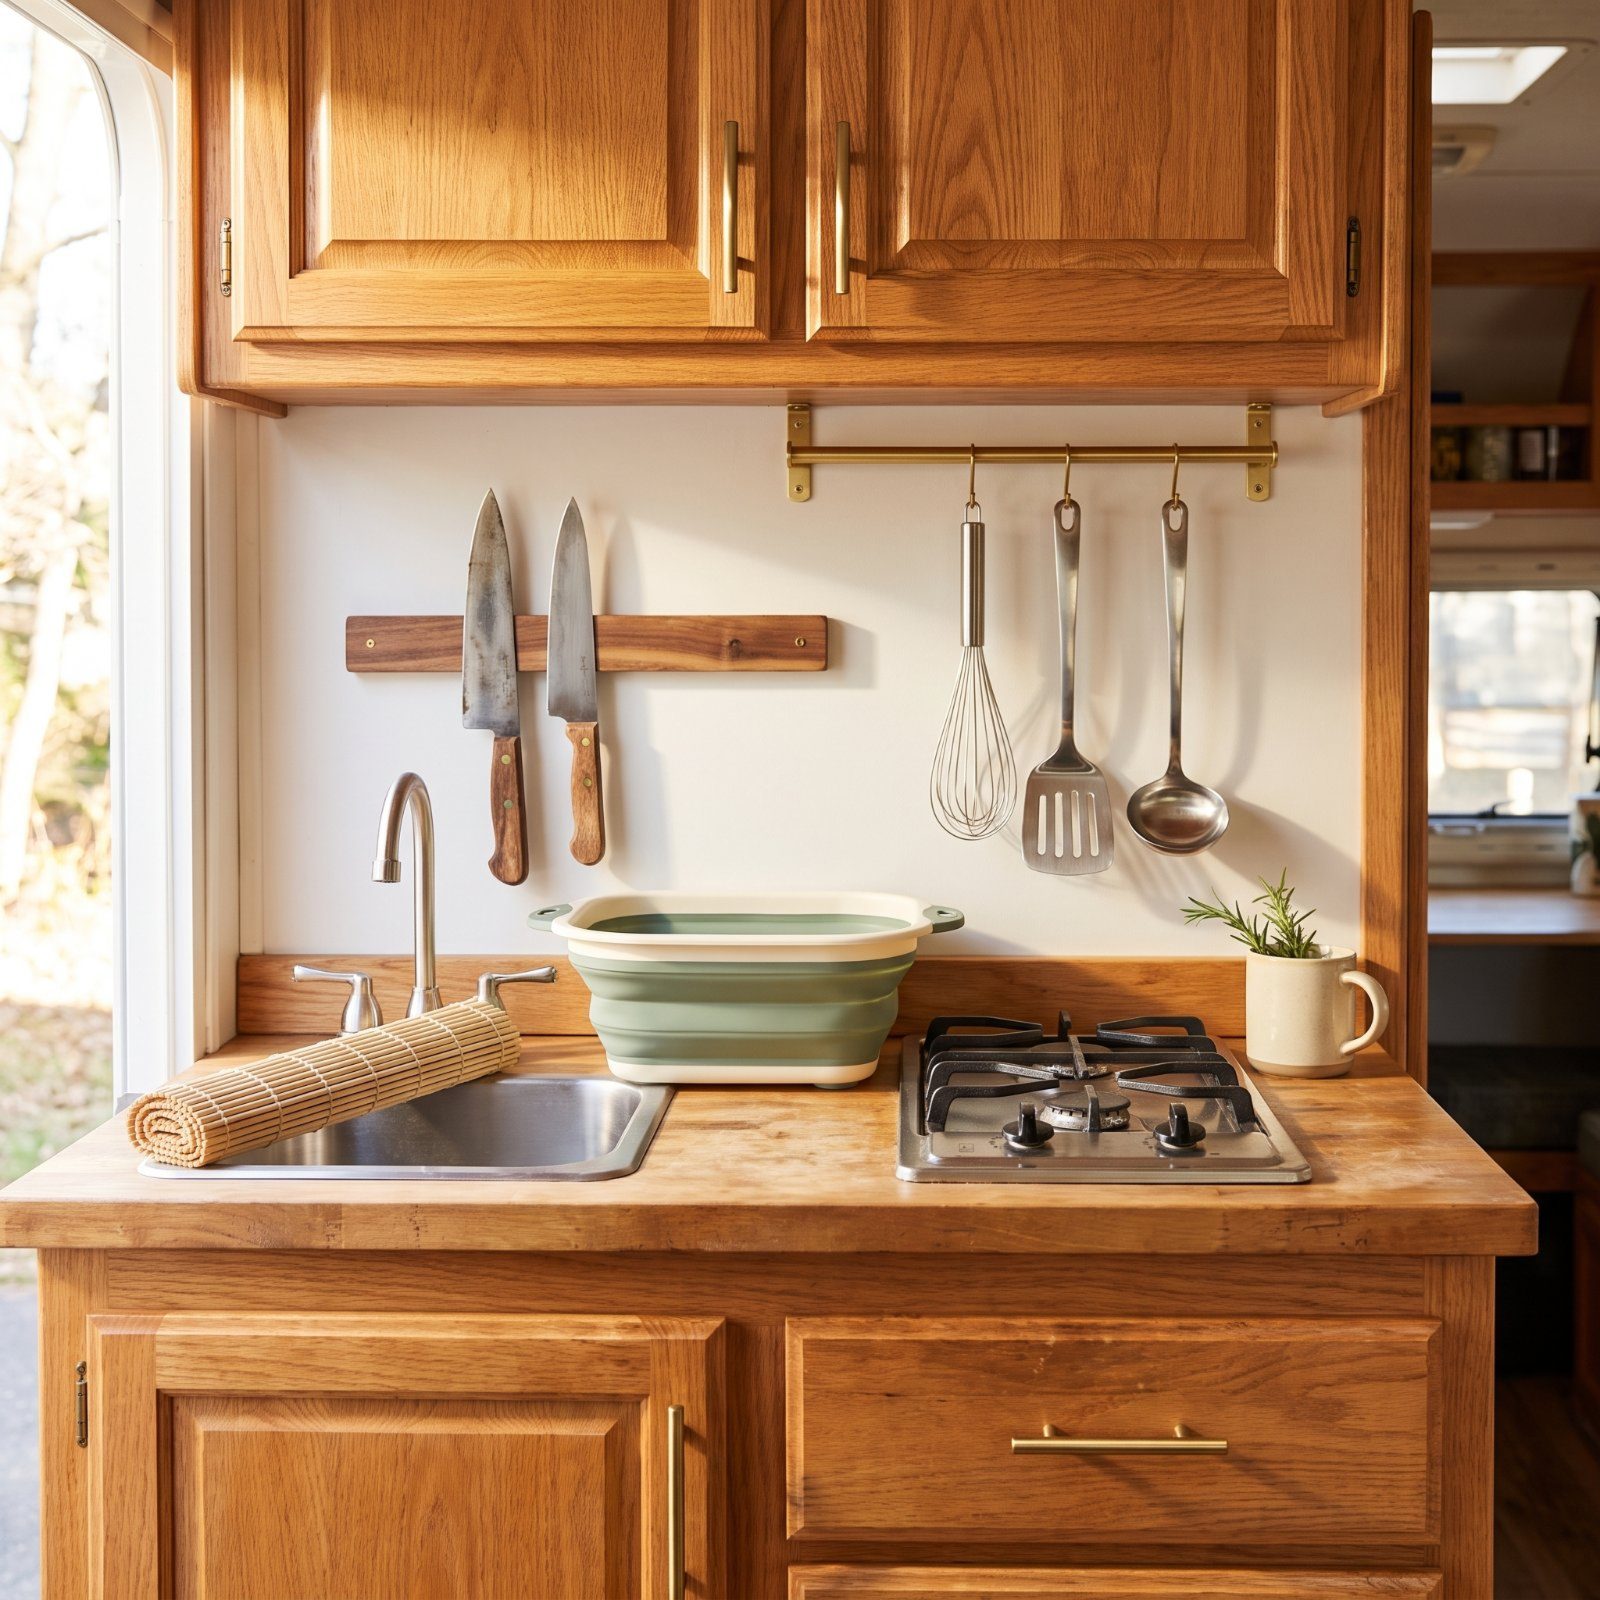
You learn a lot about a kitchen when the whole thing is the length of your arm. You set down a cutting board and suddenly there’s nowhere left for the pepper grinder. The pan lives in the oven because the cabinet is full, and the water glass balances on the edge of the sink while the counter does six jobs at once. An RV galley doesn’t need to be bigger to work better — it needs to stop wasting the space it already has. These ten upgrades are the ones we come back to, trip after trip.
47. Install a Roll-Up Sink Cover That Doubles as Counter Space
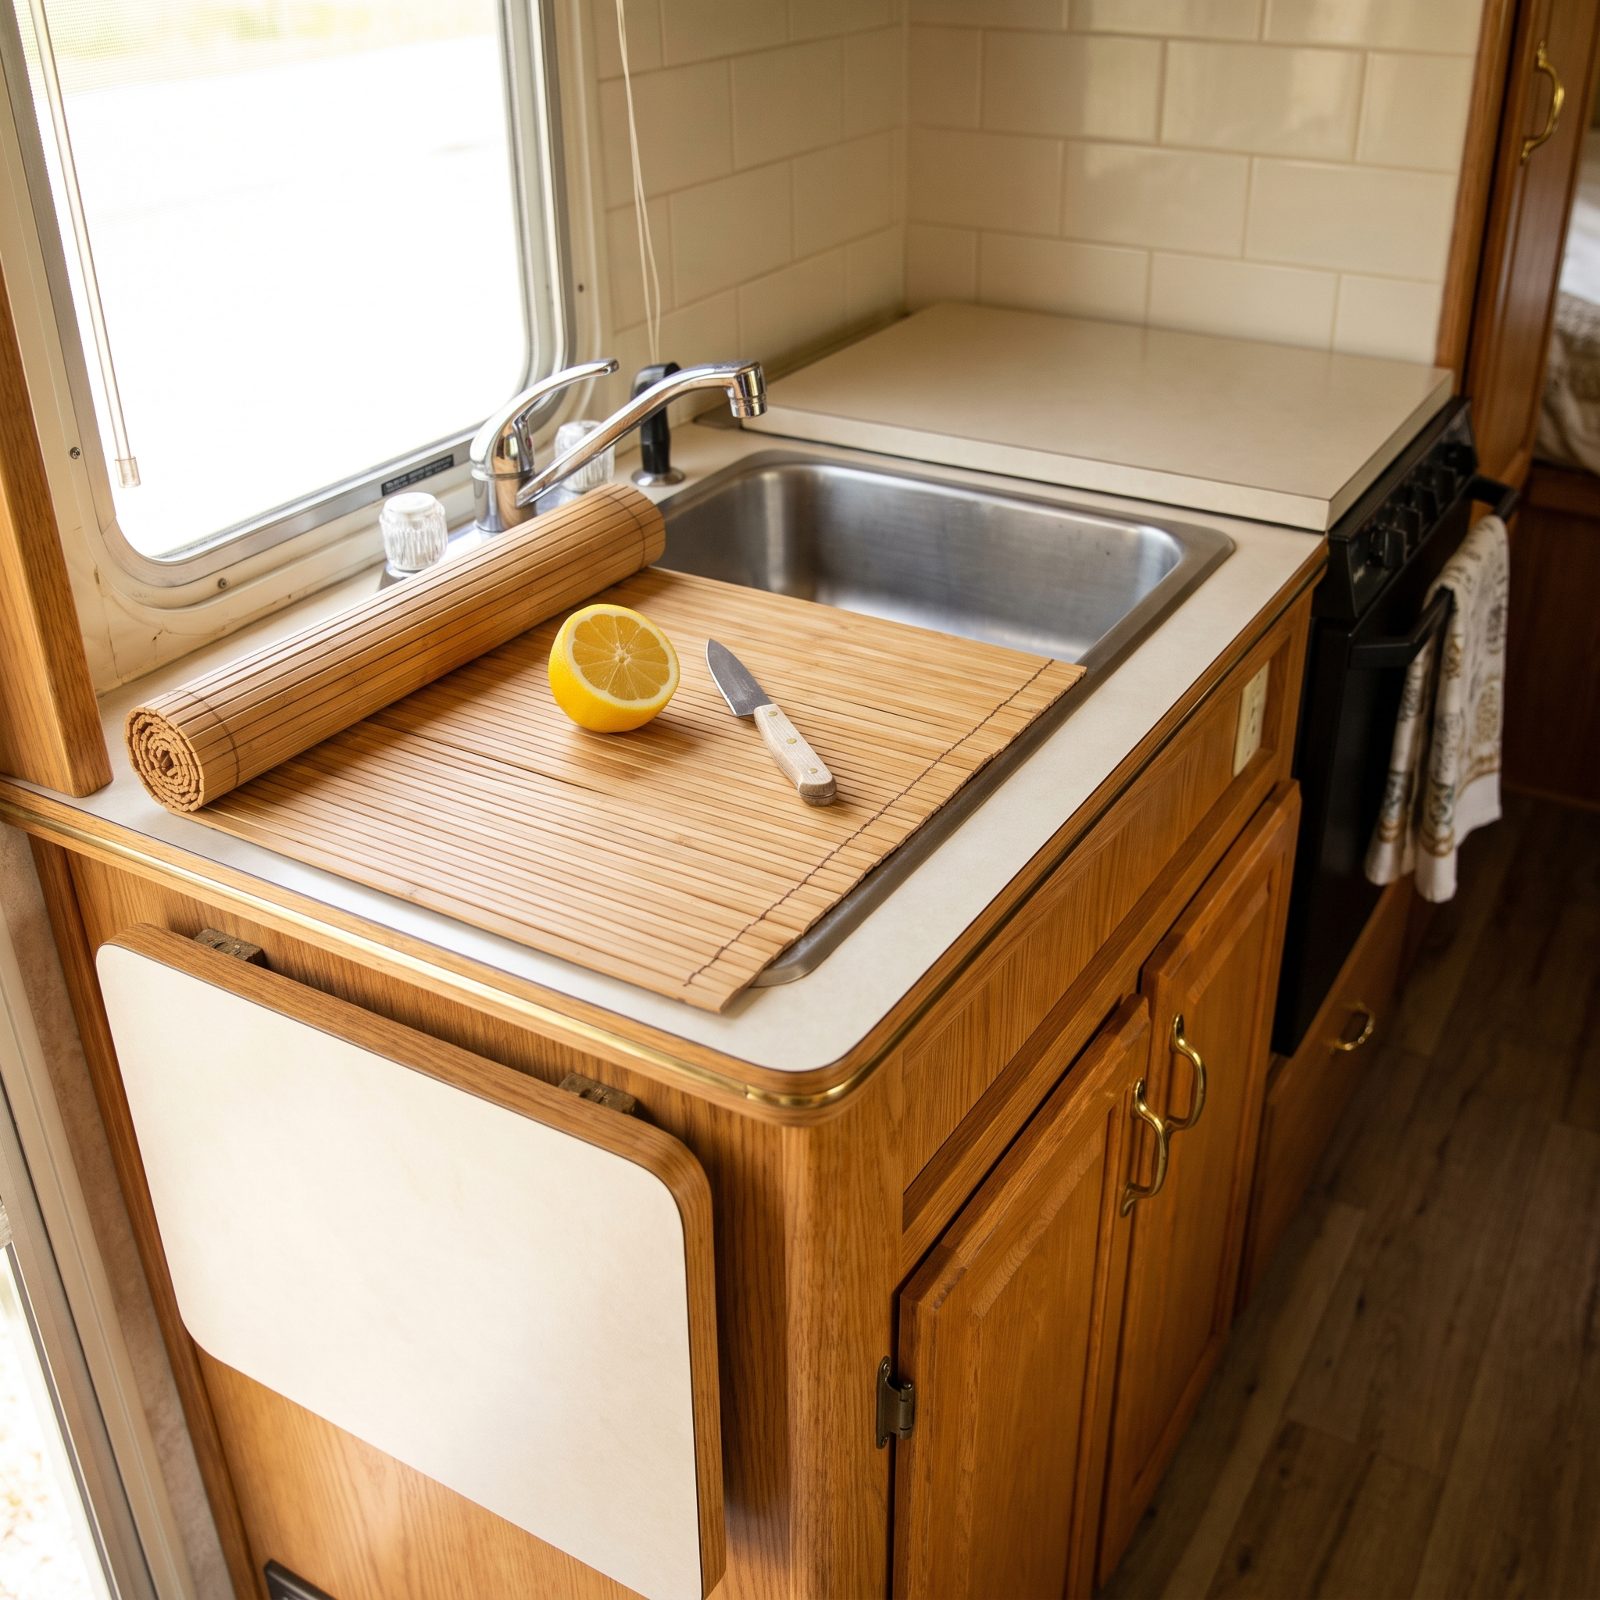
A rolled bamboo cover pulls off the simplest trick in the galley: it turns a hole full of water into a solid surface. In most RVs the sink is the single biggest flat space you’ve got, and it goes unusable the second a pot lands in it.
Roll it out, chop on it, roll it back when you need to rinse. Bamboo ones run around twenty to thirty dollars and weigh almost nothing. Here’s what nobody tells you — measure your actual basin, not the rim. Sinks taper, and a cover sized for the opening drops straight in.
46. Add a Flush-Fitting Cover Over the Cooktop
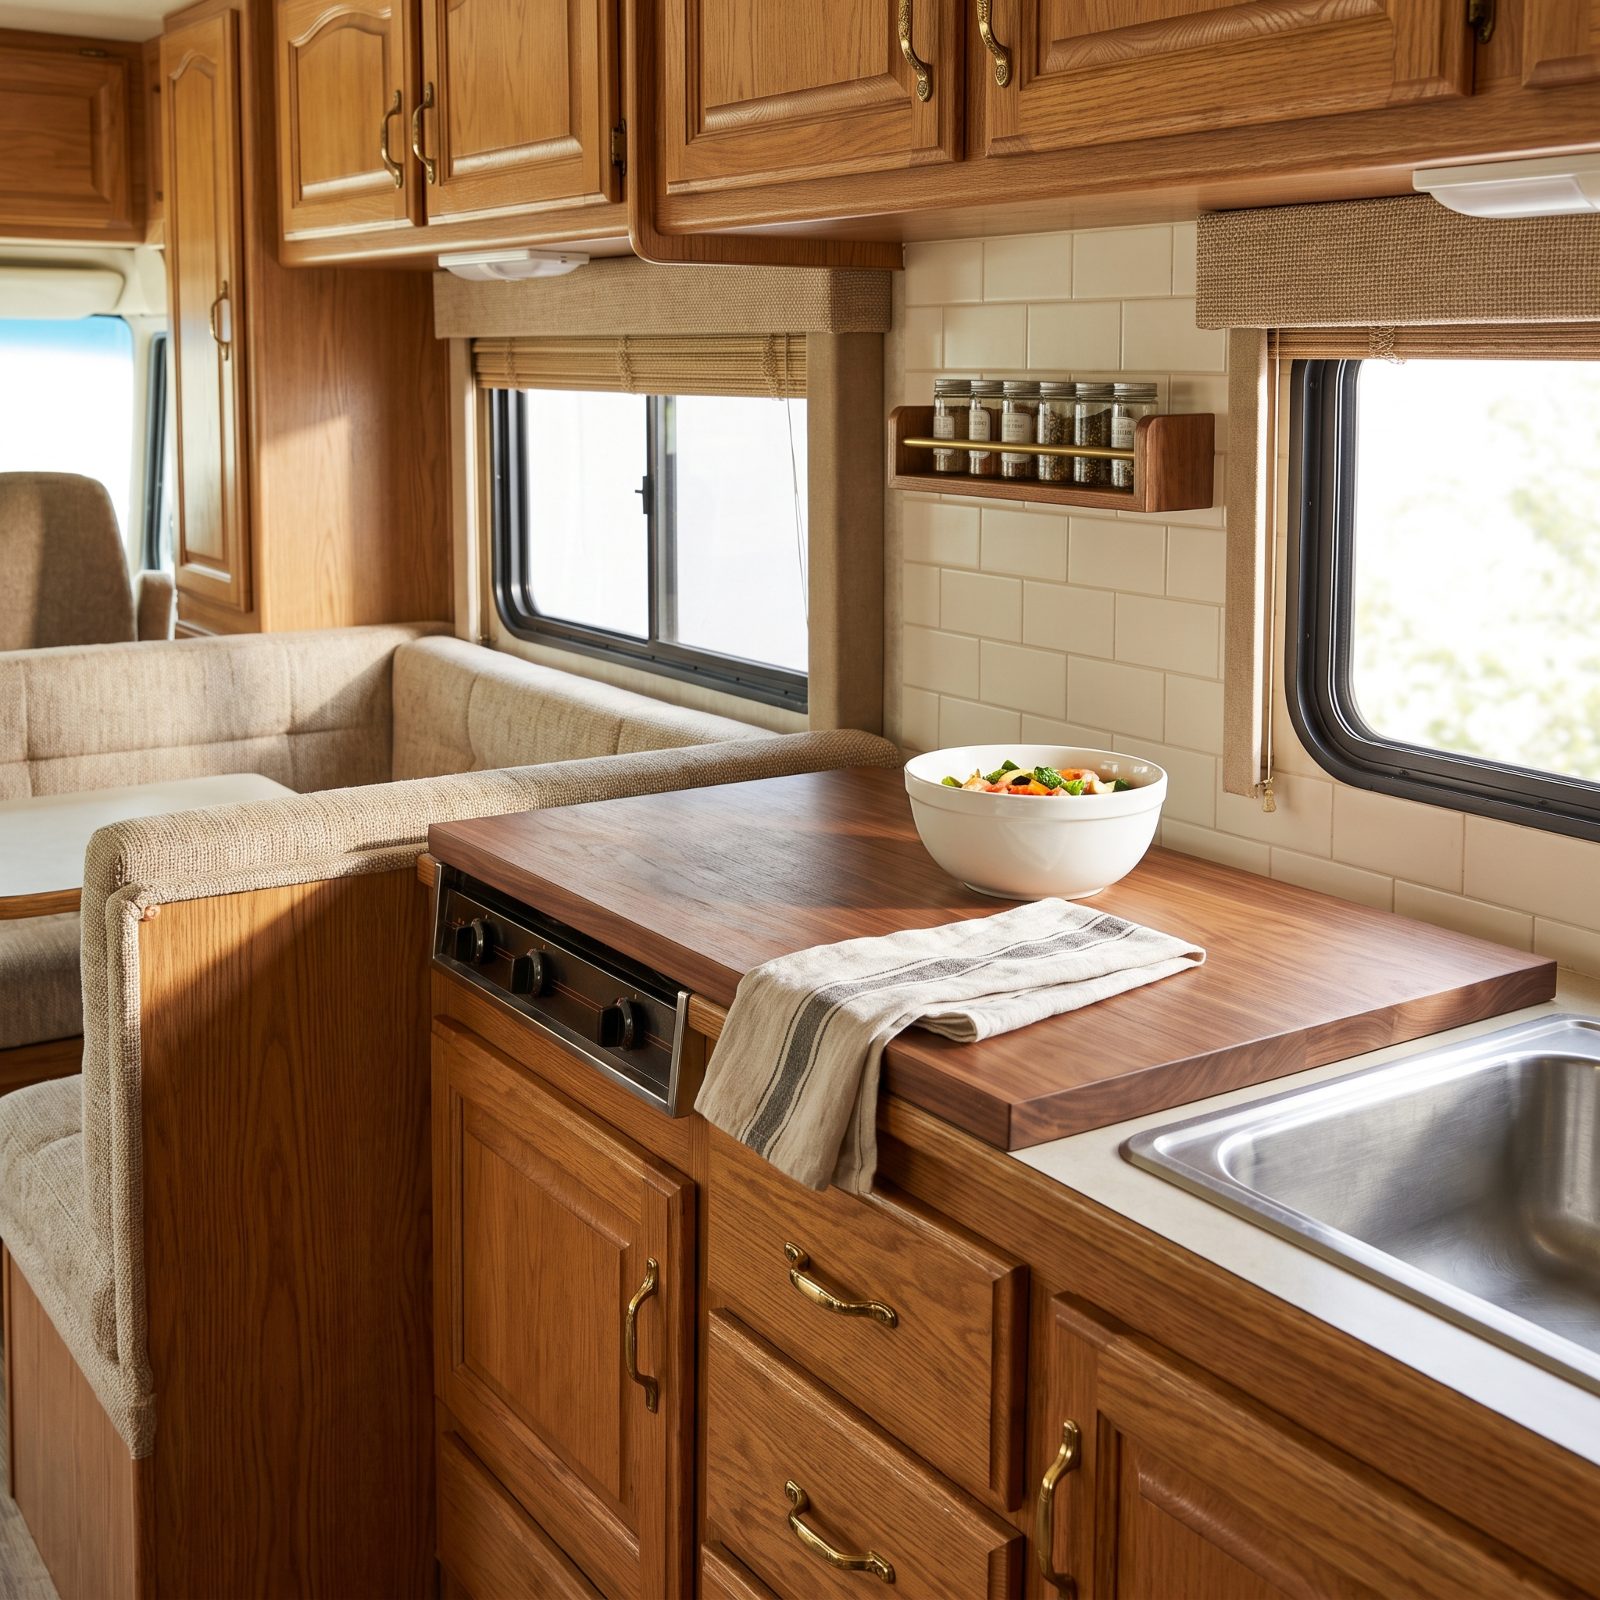
Your stove is flat real estate going to waste every hour you aren’t cooking. A hinged or lift-off cover sits over the burners and hands you back that whole strip of counter.
Some rigs come with one from the factory — usually a thin piece of trim that rattles. A solid wood or stainless cover reads like counter and feels like counter. Just build yourself a habit: cover comes off before the burner comes on. I learned that the hard way with a scorched cutting board, and the smell hangs around for days.
45. Slide a Pull-Out Prep Board Beneath the Counter
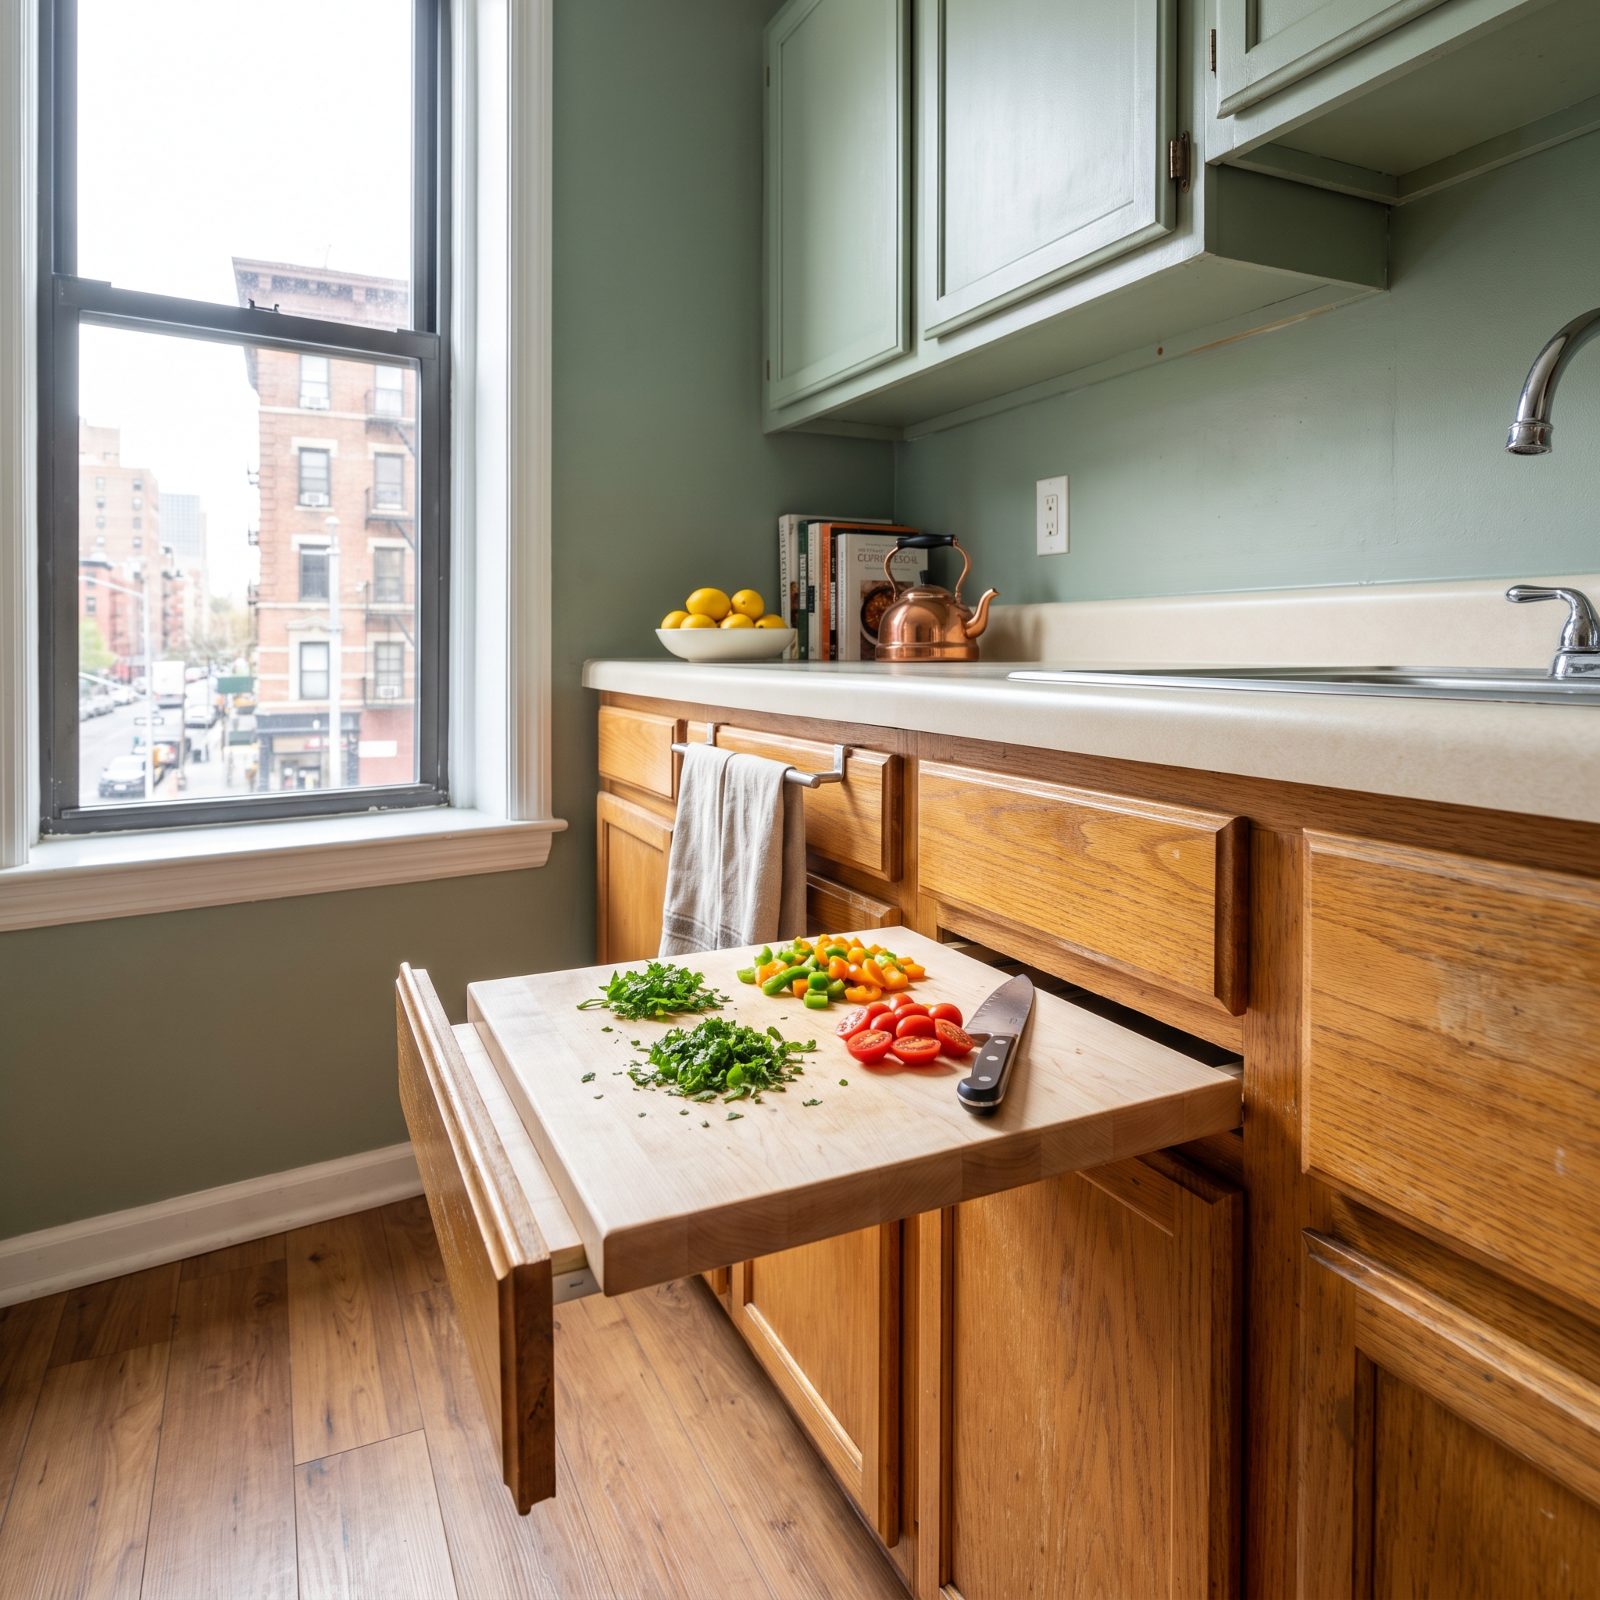
The gap under a counter lip is usually just air. A pull-out prep board slides into that slot and stretches your work surface into the walkway only when you need it, then vanishes when you push it back.
You can buy drawer-slide kits for under forty dollars, or retrofit a slim board on ball-bearing glides if you’re handy. The payoff? You get to prep facing the window instead of hunched over the sink.
44. Use a Collapsible Basin That Disappears After Washing Up
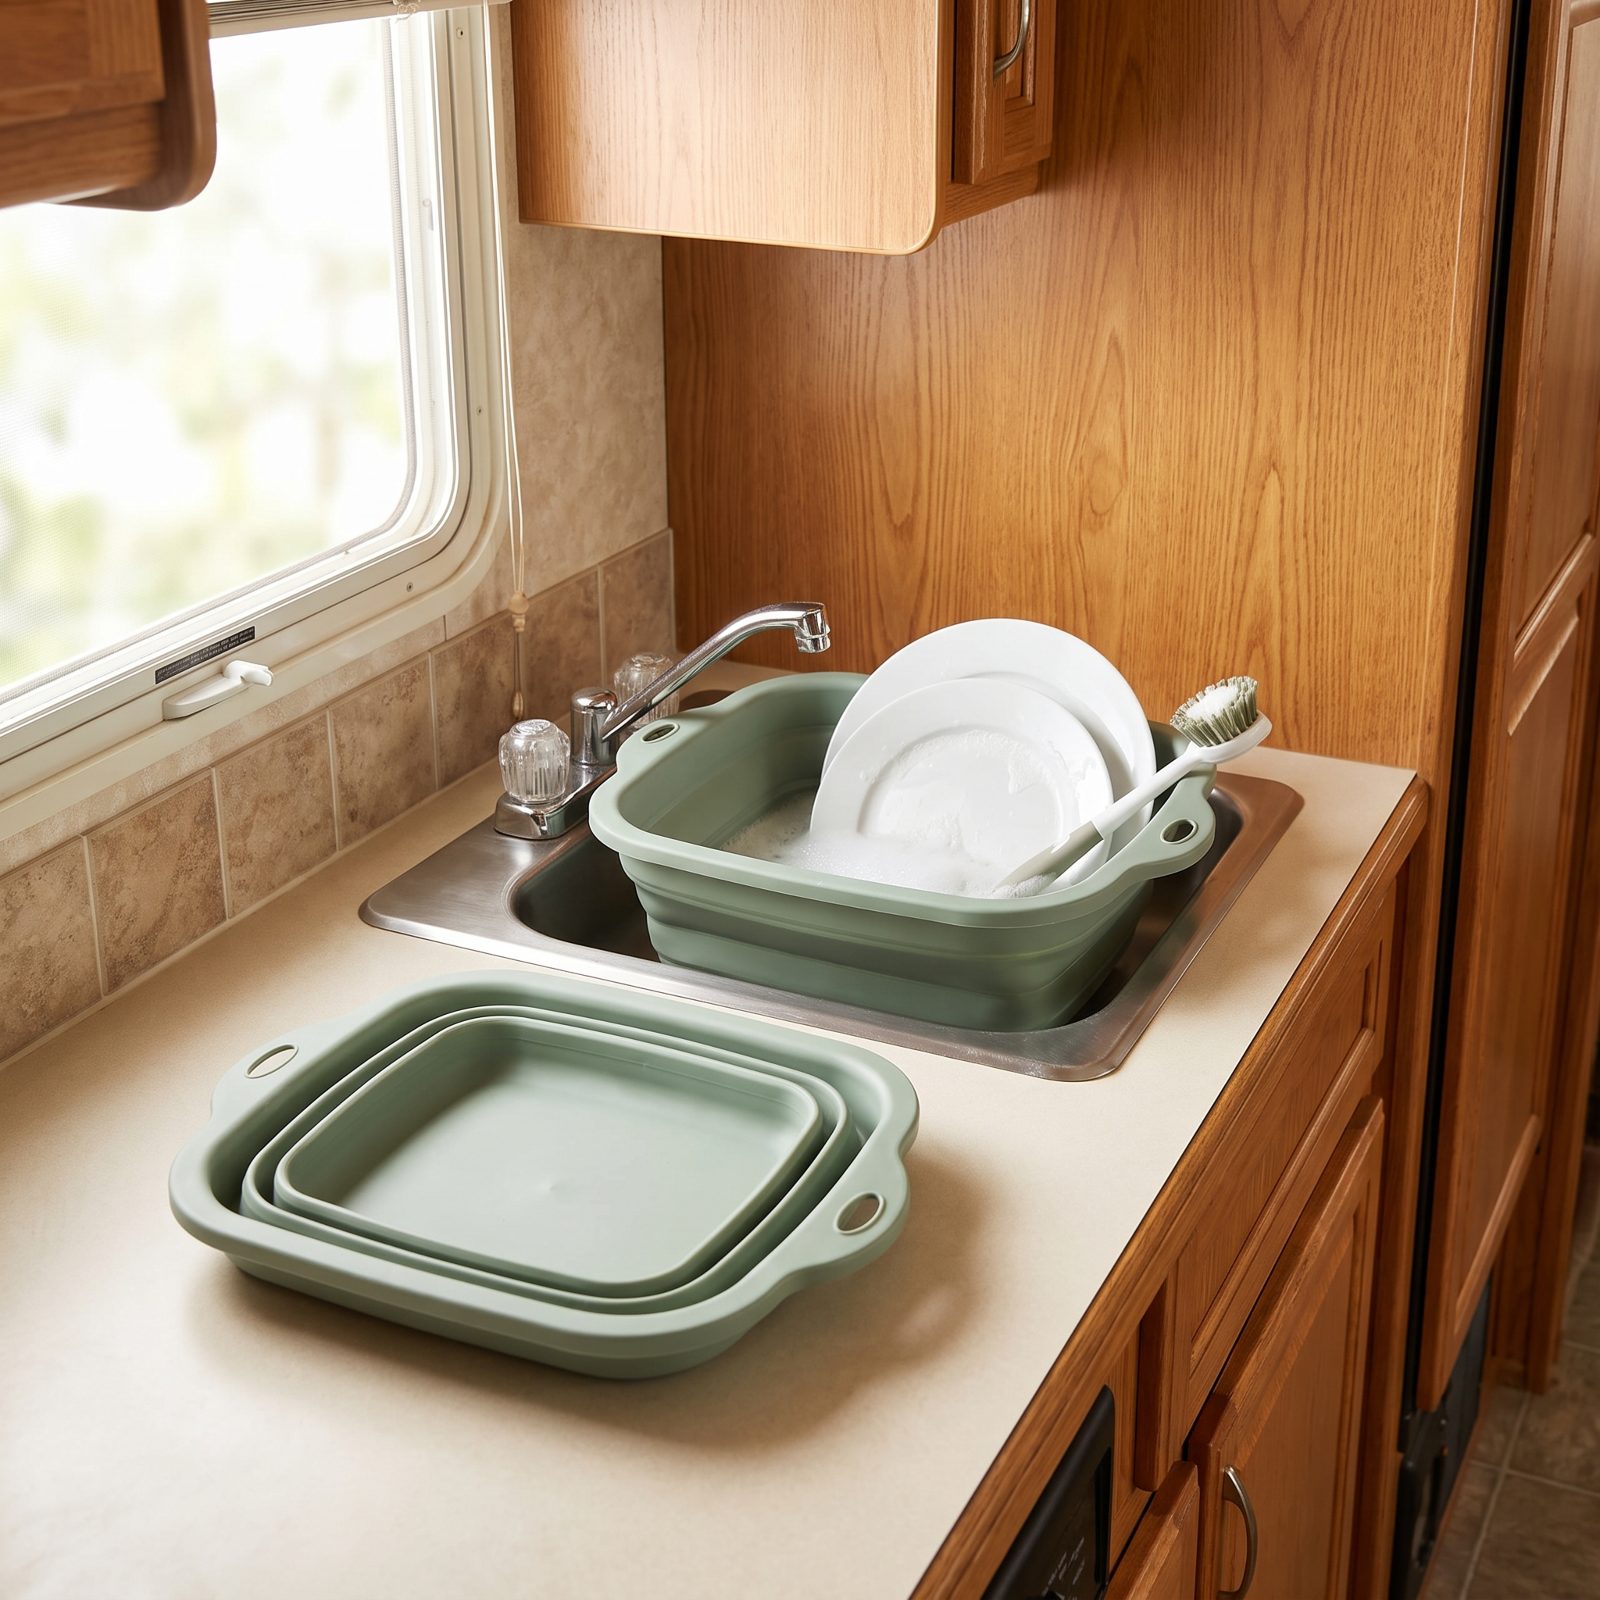
Washing up in an RV sink means standing water sloshing around every turn. A sage green collapsible basin holds your wash water inside the sink, drains in one tip, then folds down to an inch thick and slides behind the fridge.
They run ten to twenty dollars and last for years, as long as you keep them clear of a hot pan. Dump the gray water responsibly, obviously. Best part: you wash dishes with a fraction of the water you’d burn running the tap, which matters enormously when you’re boondocking off a fixed tank.
43. Hang a Slim Magnetic Knife Strip on the Backsplash
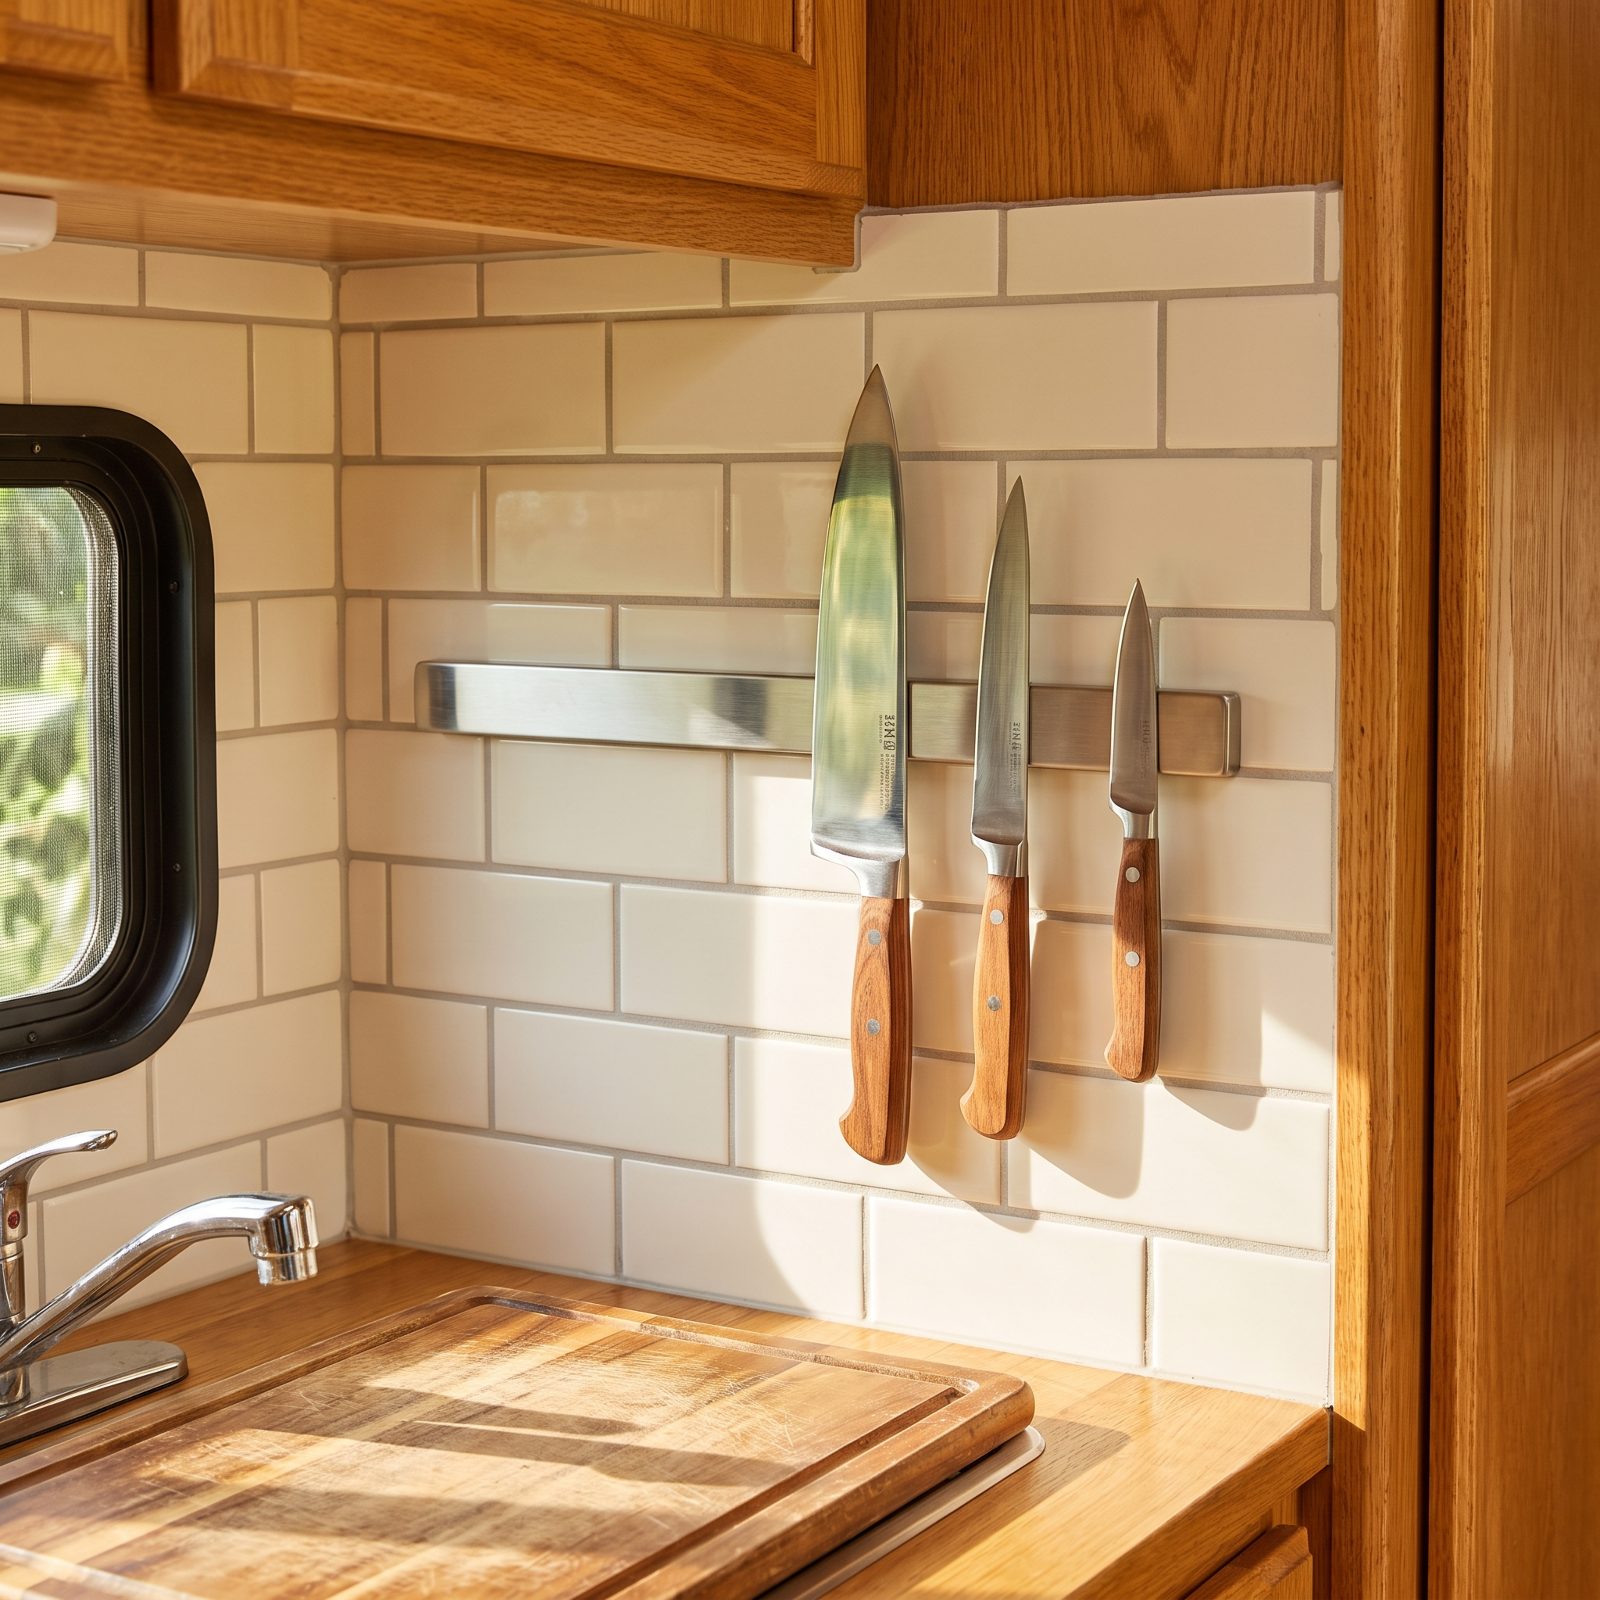
A knife block eats counter and topples the first time you hit a pothole. Mount a magnetic strip on the backsplash instead — your blades come off the counter and up where you can grab them one-handed.
Put it low enough to reach, high enough that nothing swings into it. On a bumpy road a strong magnetic strip grips knives better than you’d expect, but a bungee or a small lip across the front buys you peace of mind on washboard gravel.
42. Attach a Magnetic Spice Rack to the Refrigerator Side
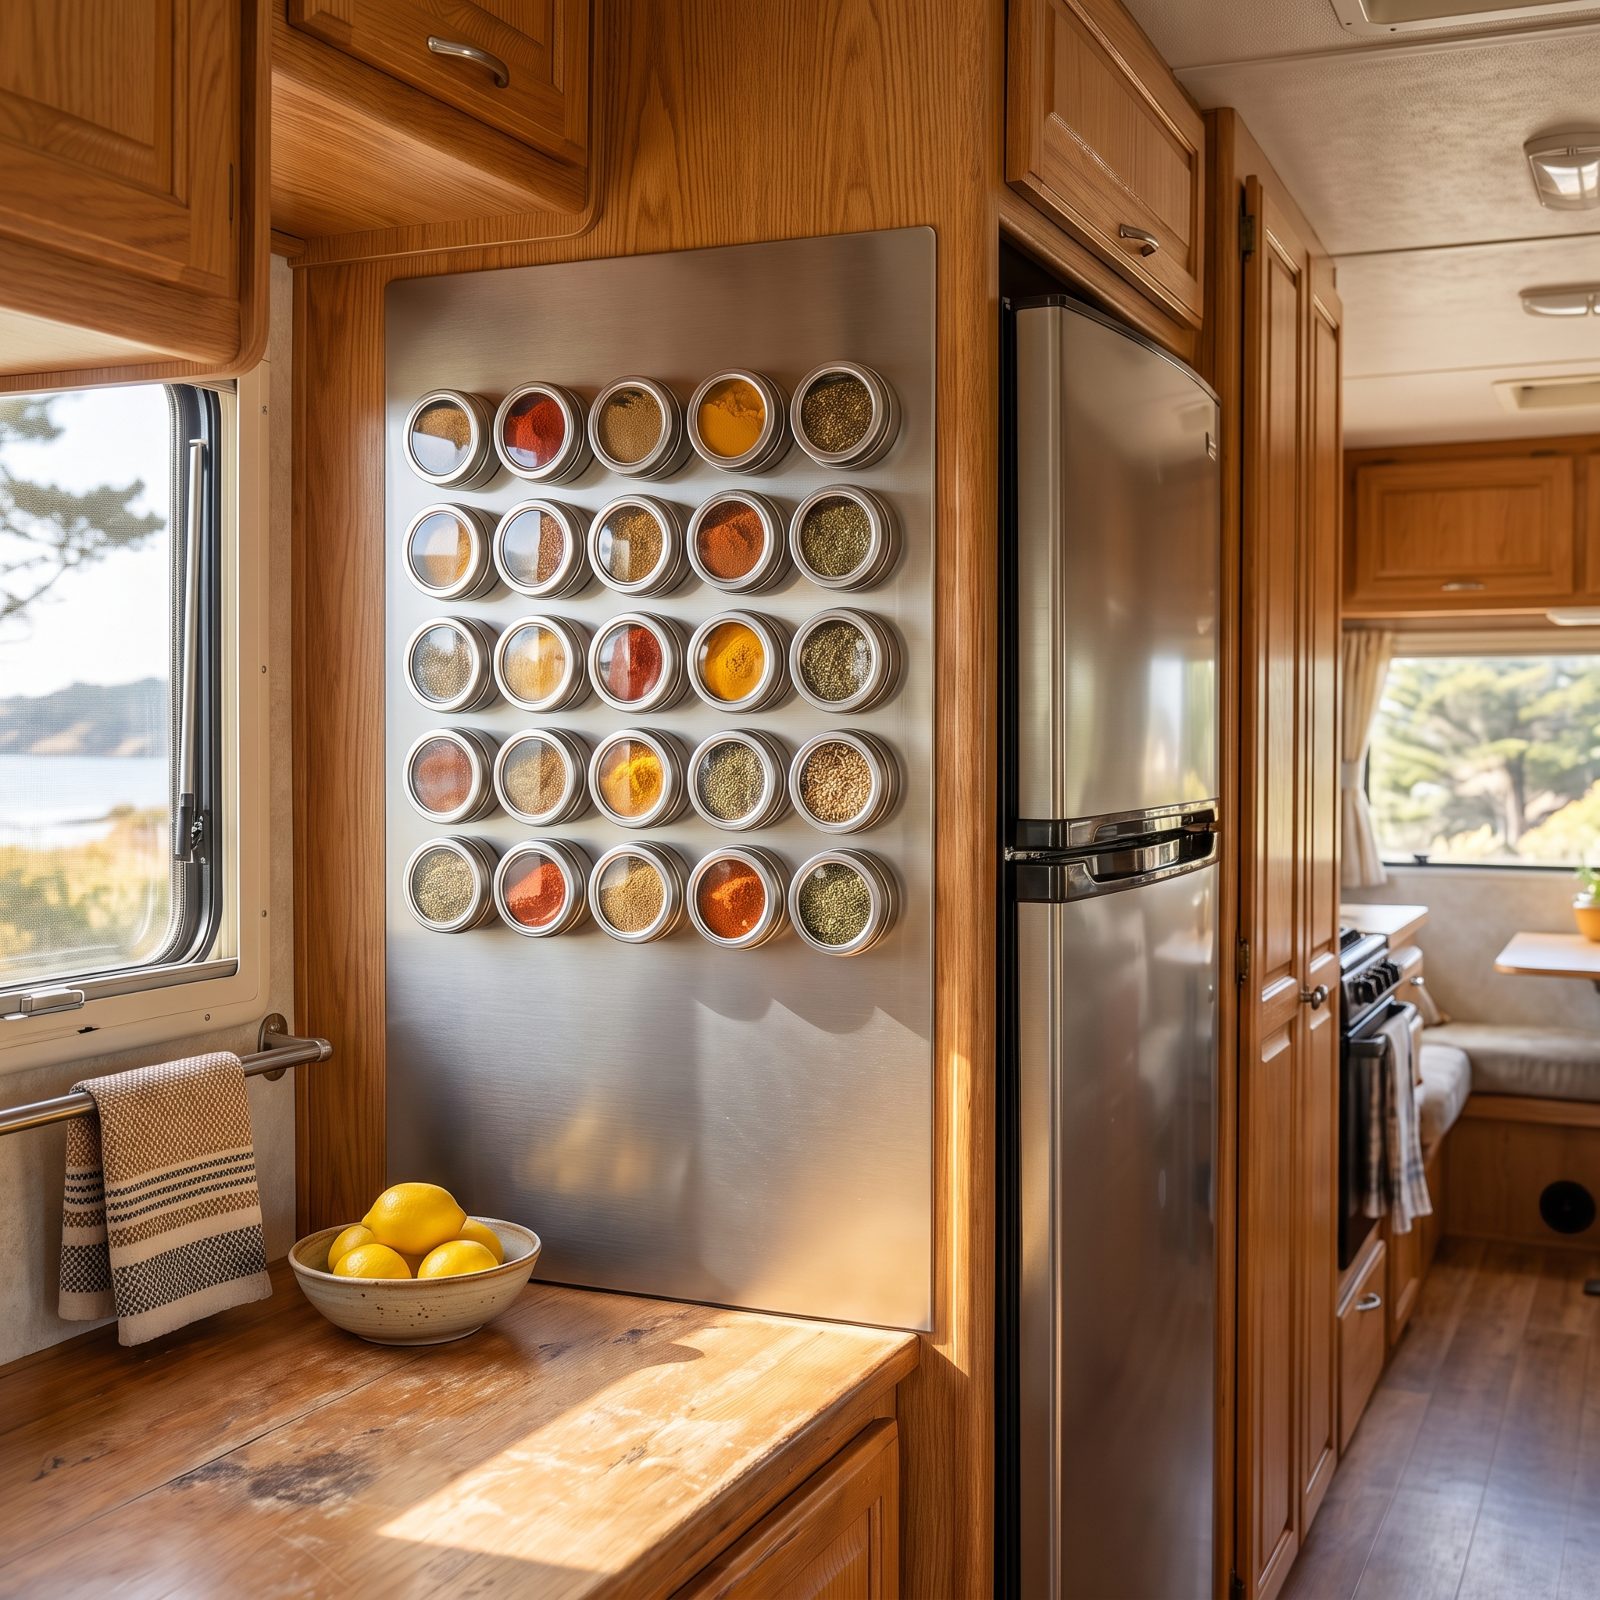
The flat side of your fridge is dead vertical space, and spices are the thing most likely to tip over and roll under the dinette.
Magnetic tins with clear tops stick to that panel, free up a whole shelf, and let you read labels at a glance. A starter set of a dozen runs around twenty-five dollars.
41. Mount a Rail-and-Hook System for Everyday Utensils
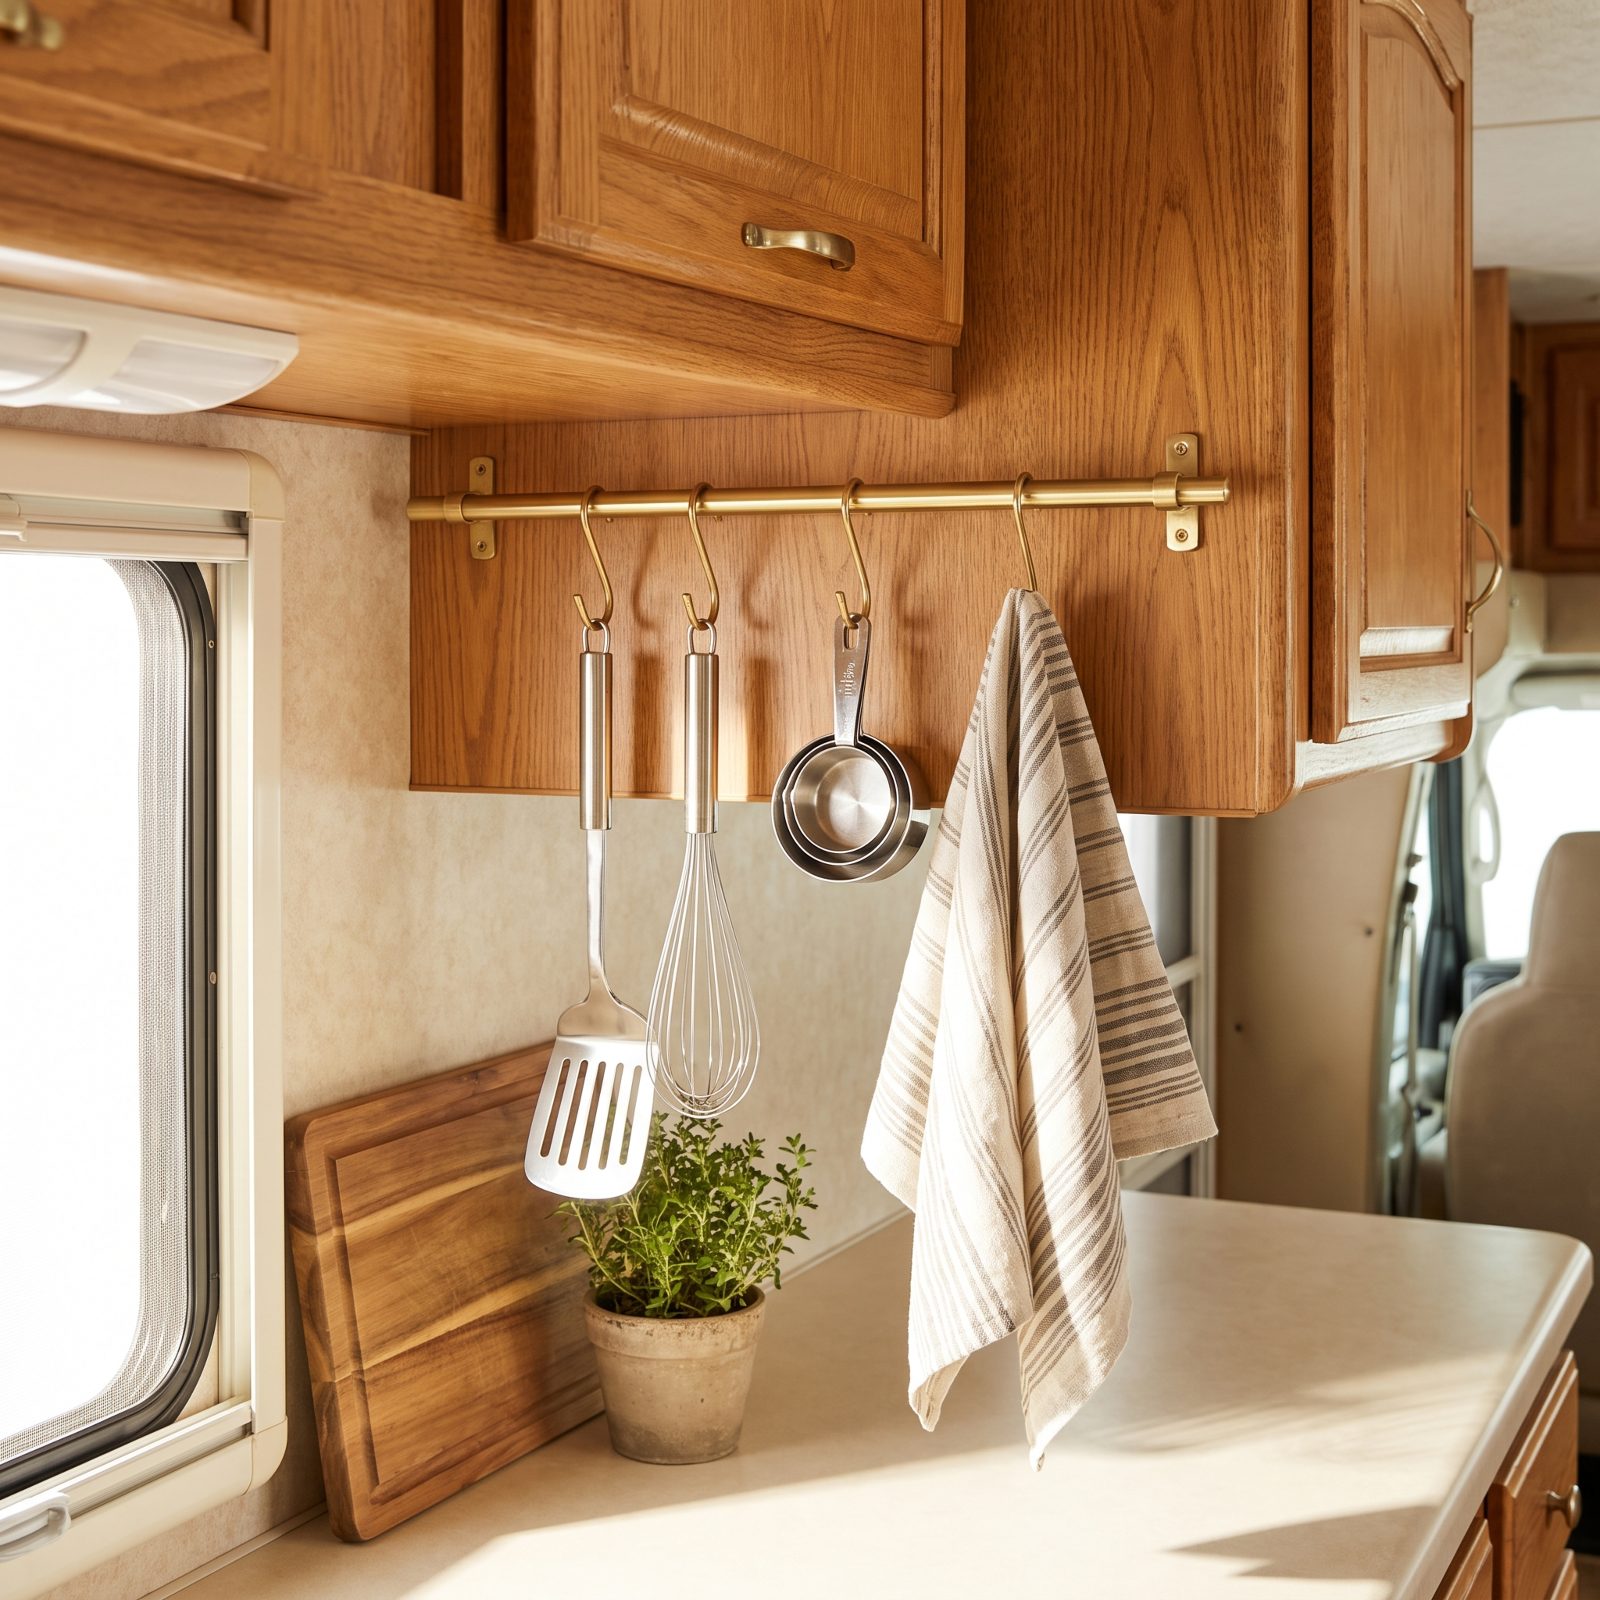
Utensil drawers in an RV are a tangle you dig through one-handed while something boils over. A brushed brass rail with hooks along the dead strip under your upper cabinet puts the spatula, the whisk, and the tongs right where your eyes land.
Hang the five tools you actually reach for daily. Everything else can stay in the drawer. The S-hooks swing on rough roads, so clip the hook ends or go with a locking gate if the clatter drives you up the wall. It will.
40. Turn the Sink Cabinet Door Into Cleaning-Supply Storage
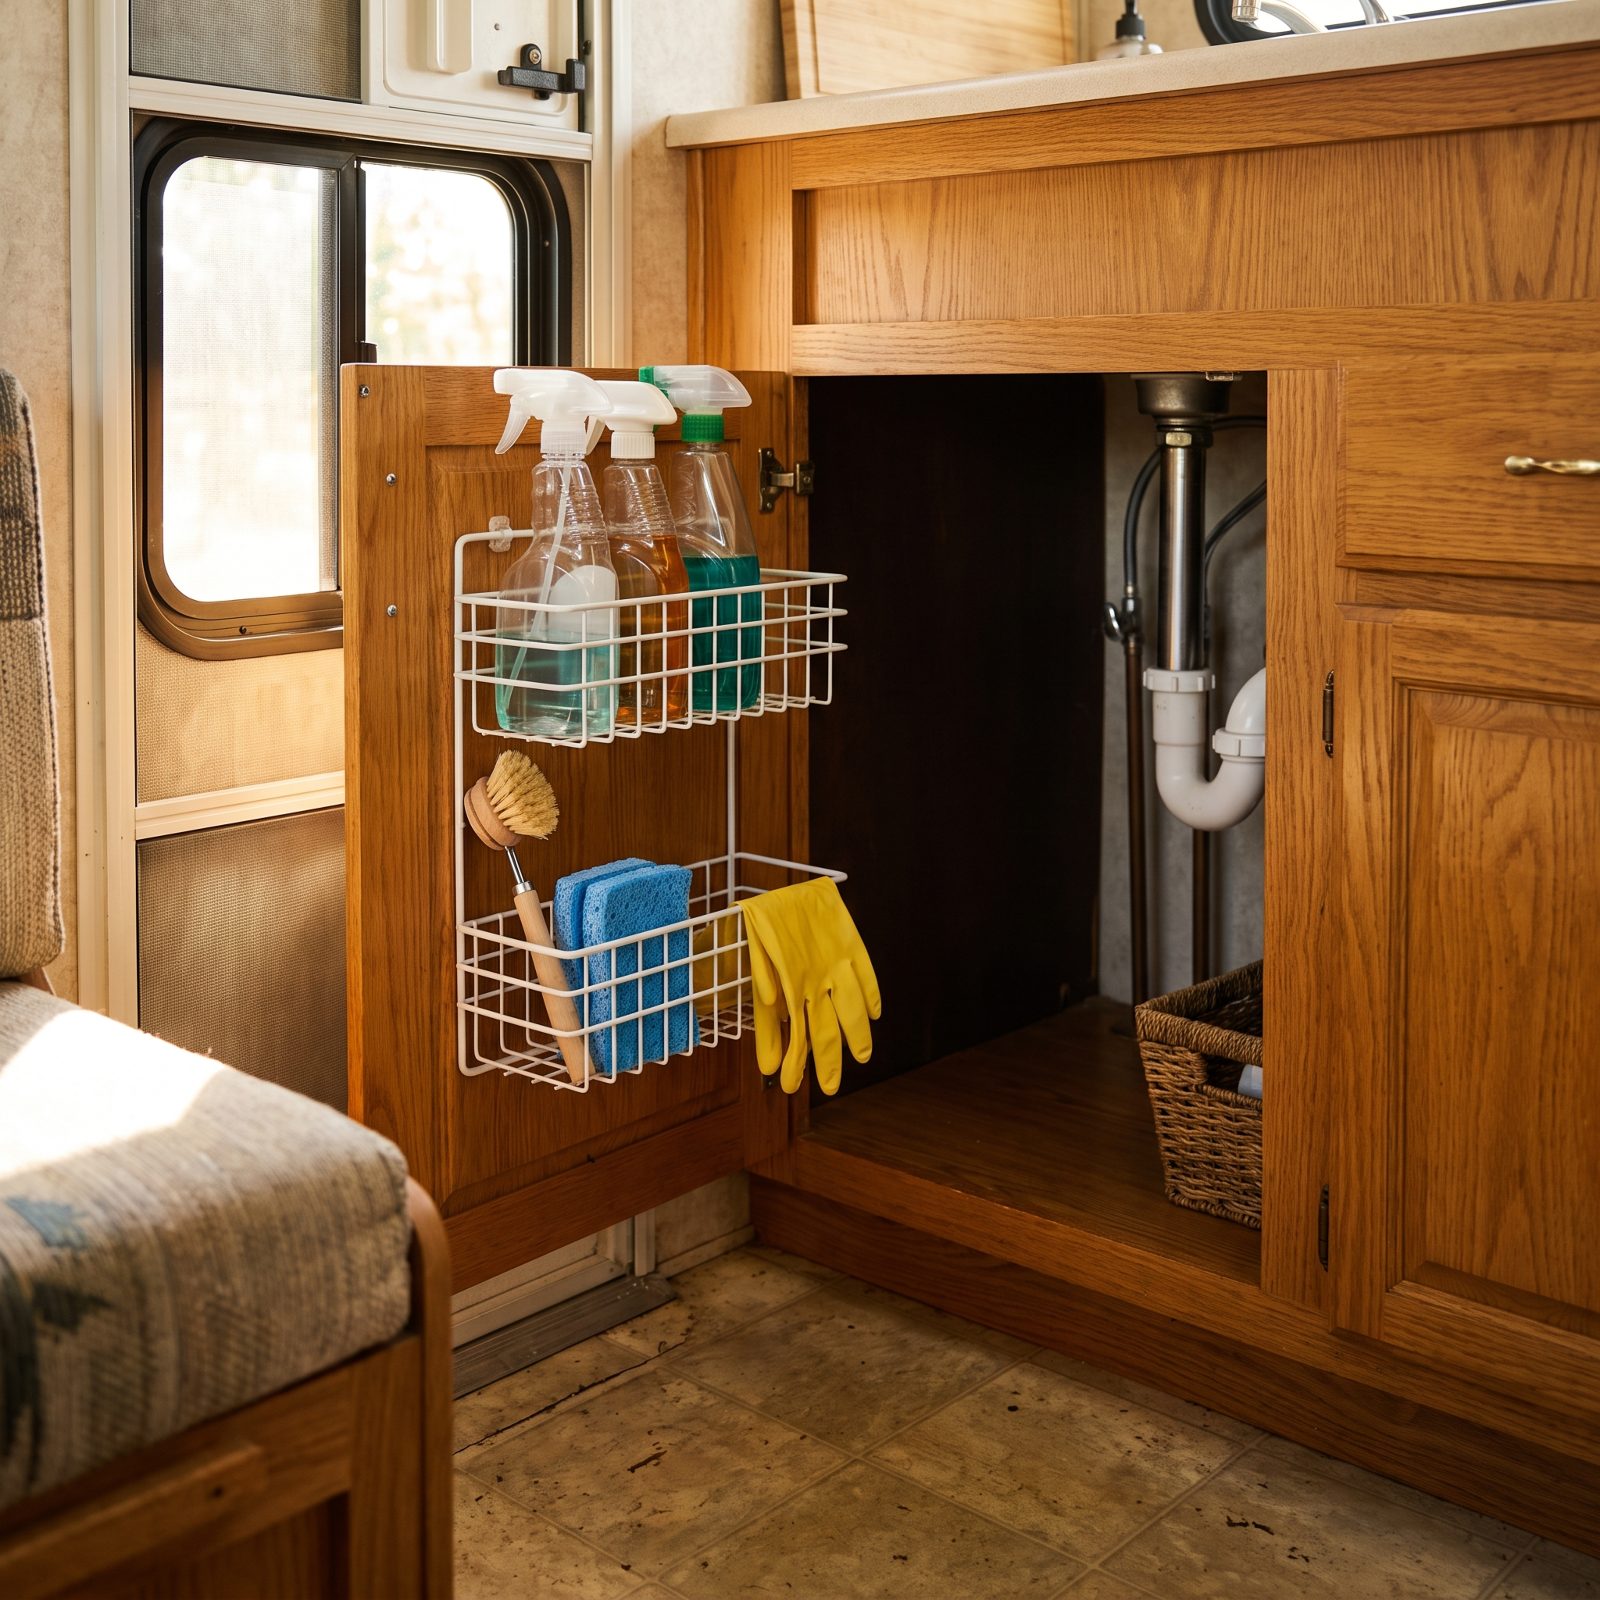
The inside of your under-sink door is the most wasted square foot in the whole rig. Clip or stick an organizer there for spray bottles, the dish brush, and gloves, and you clear the cabinet floor for everything that won’t hang.
Don’t overload it, though. Heavy bottles swinging on the door stress the hinge every single time you drive. Lightweight supplies up top, anything with real weight stays down on the cabinet floor.
39. Add a Toe-Kick Drawer Beneath the Base Cabinets
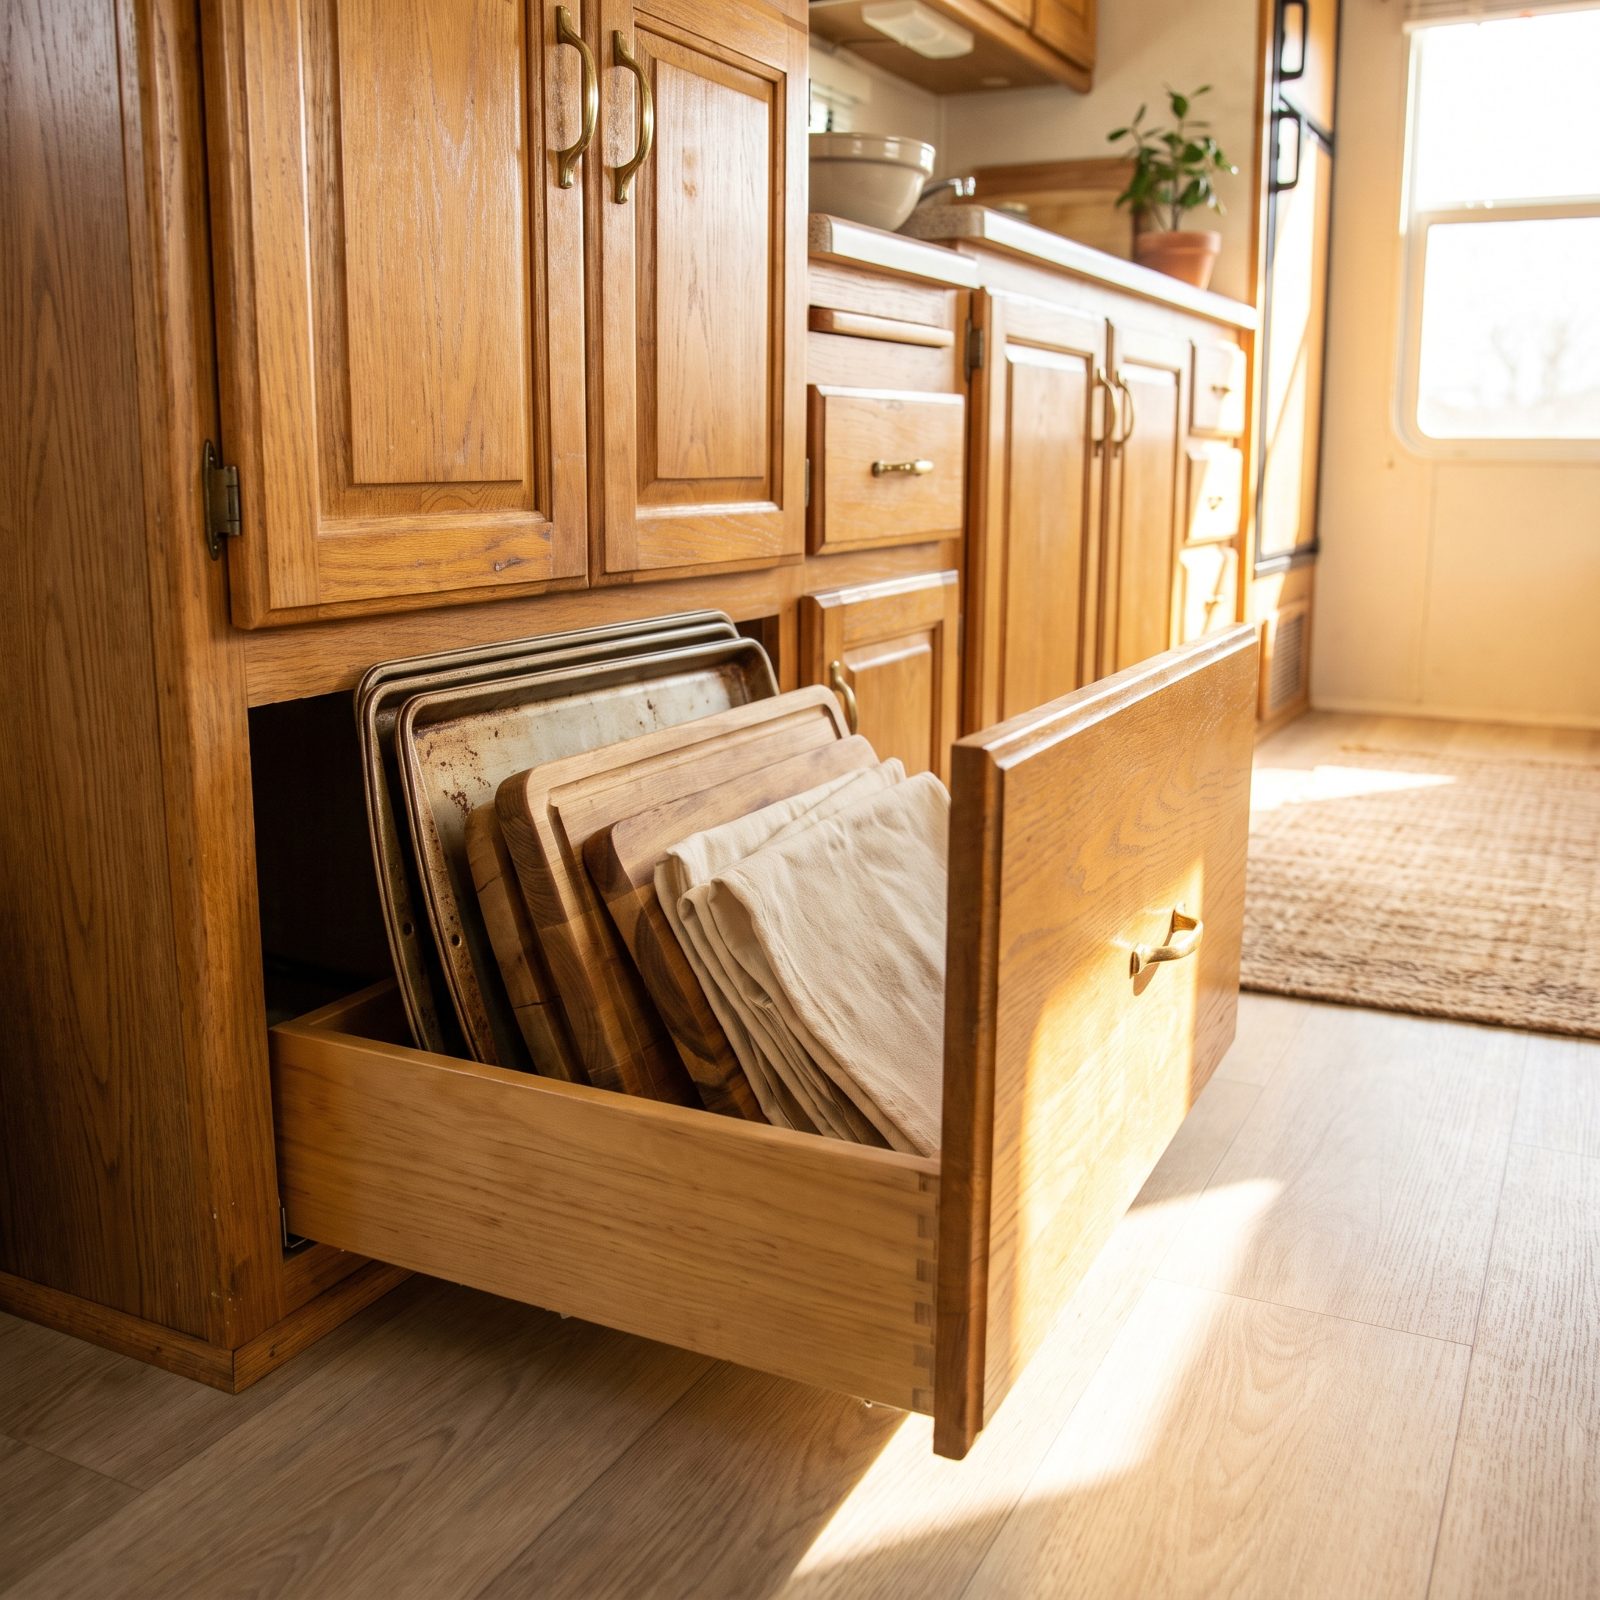
That blank recessed panel at the bottom of your cabinets — the toe kick — is hollow behind it. A shallow drawer there swallows all the flat stuff that never has a home: baking sheets, cutting boards, placemats, the pizza pan.
Fair warning, this is a real project, not a weekend afternoon, and it goes easier on rigs with cabinets built on a frame rather than molded in one piece. But a few inches of floor-level storage is a few inches you weren’t using for anything.
38. Install Narrow Pull-Out Storage Beside the Refrigerator
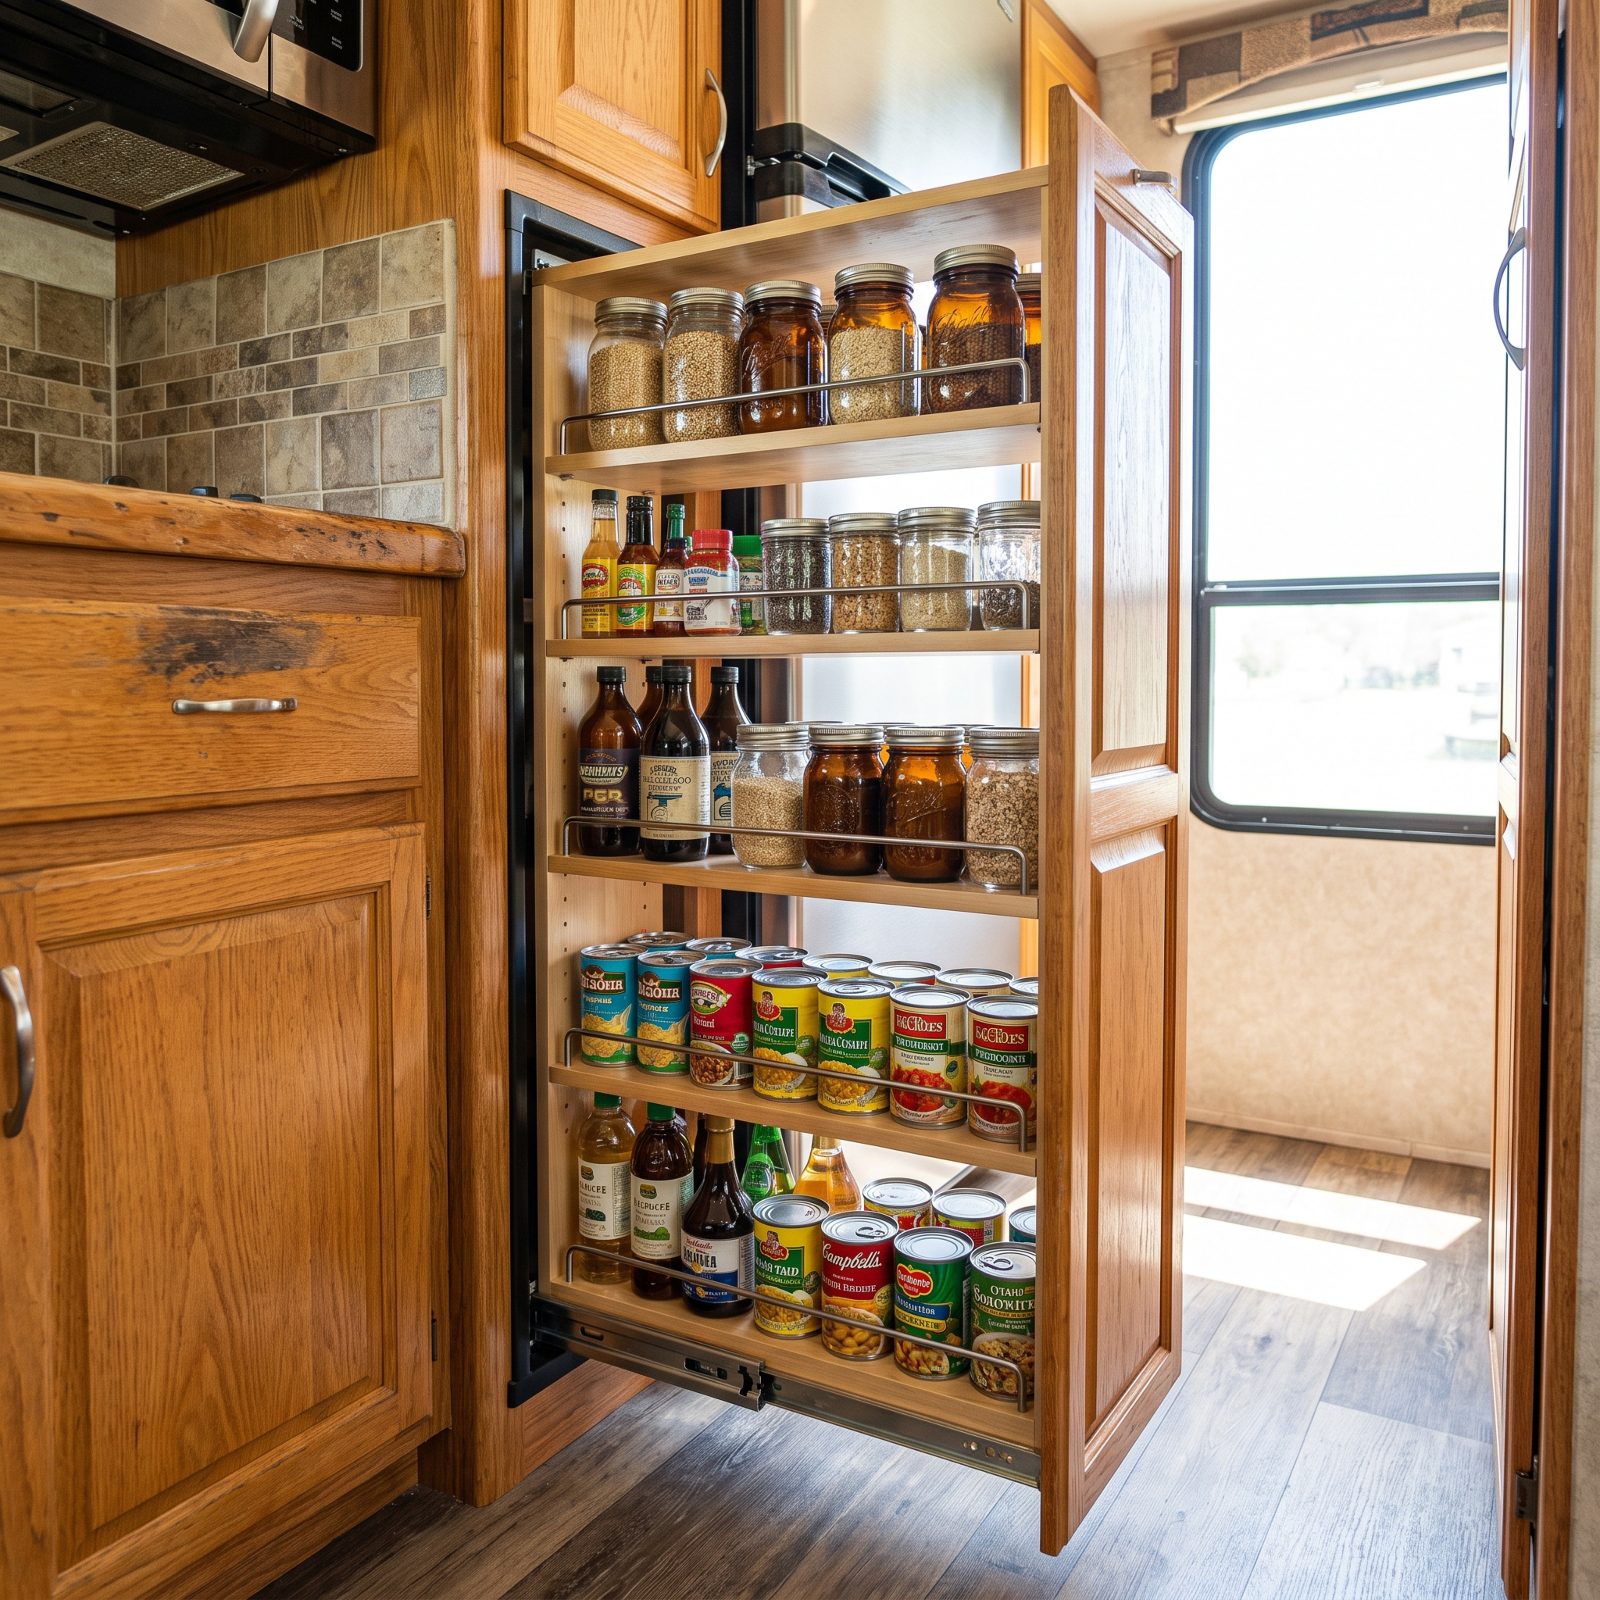
There’s almost always a three or four inch gap jammed beside the fridge — wide enough to lose a spatula down and nothing more. A narrow roll-out pantry on glides fills it and converts that dead slot into tiered storage for jars, spice bottles, and cans.
Buy a ready-made slim unit or build one to fit. Lip the shelves so nothing launches on a hard brake. It’s startling how much a four-inch slice holds once it’s vertical and on wheels. That gap was mocking you the whole time.
37. Convert a False Drawer Front Into a Tip-Out Tray
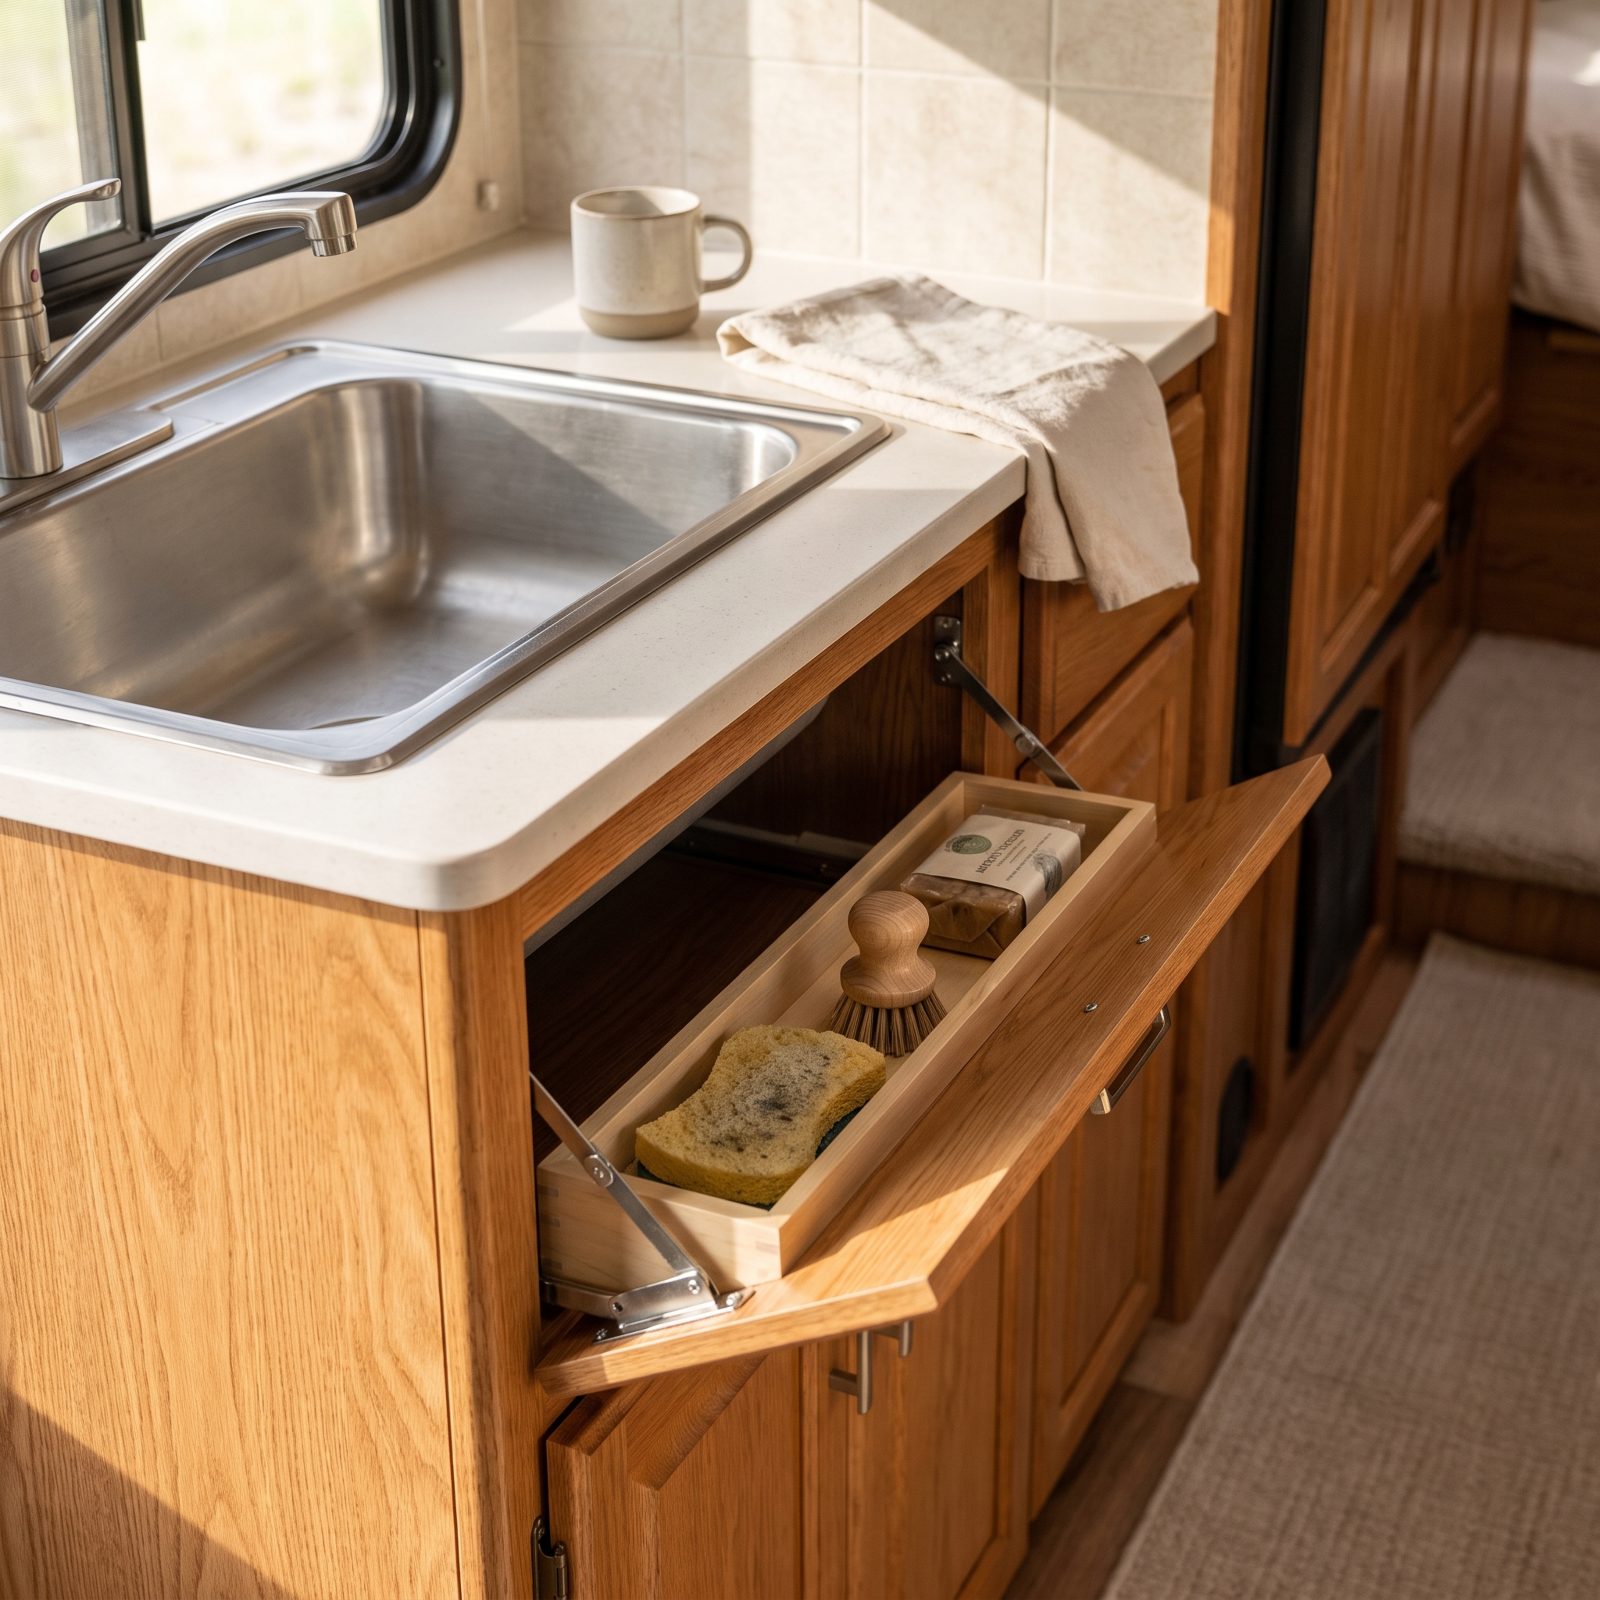
That little panel in front of your sink isn’t holding anything — it’s covering pipes and pretending to be a drawer. Pop it off, add a pair of tip-out hinges and a shallow tray, and suddenly you’ve got a home for sponges, the scrub brush, and whatever used to live wet and lonely on the counter.
A tip-out kit runs around fifteen to twenty-five bucks. Here’s the catch nobody mentions, though: measure your clearance behind the panel first, because P-traps eat more room than you’d expect. I skipped that step once and the tray wouldn’t close. Lesson learned, tray returned, pride dented.
36. Use Stackable Clear Bins Inside Deep Cabinets
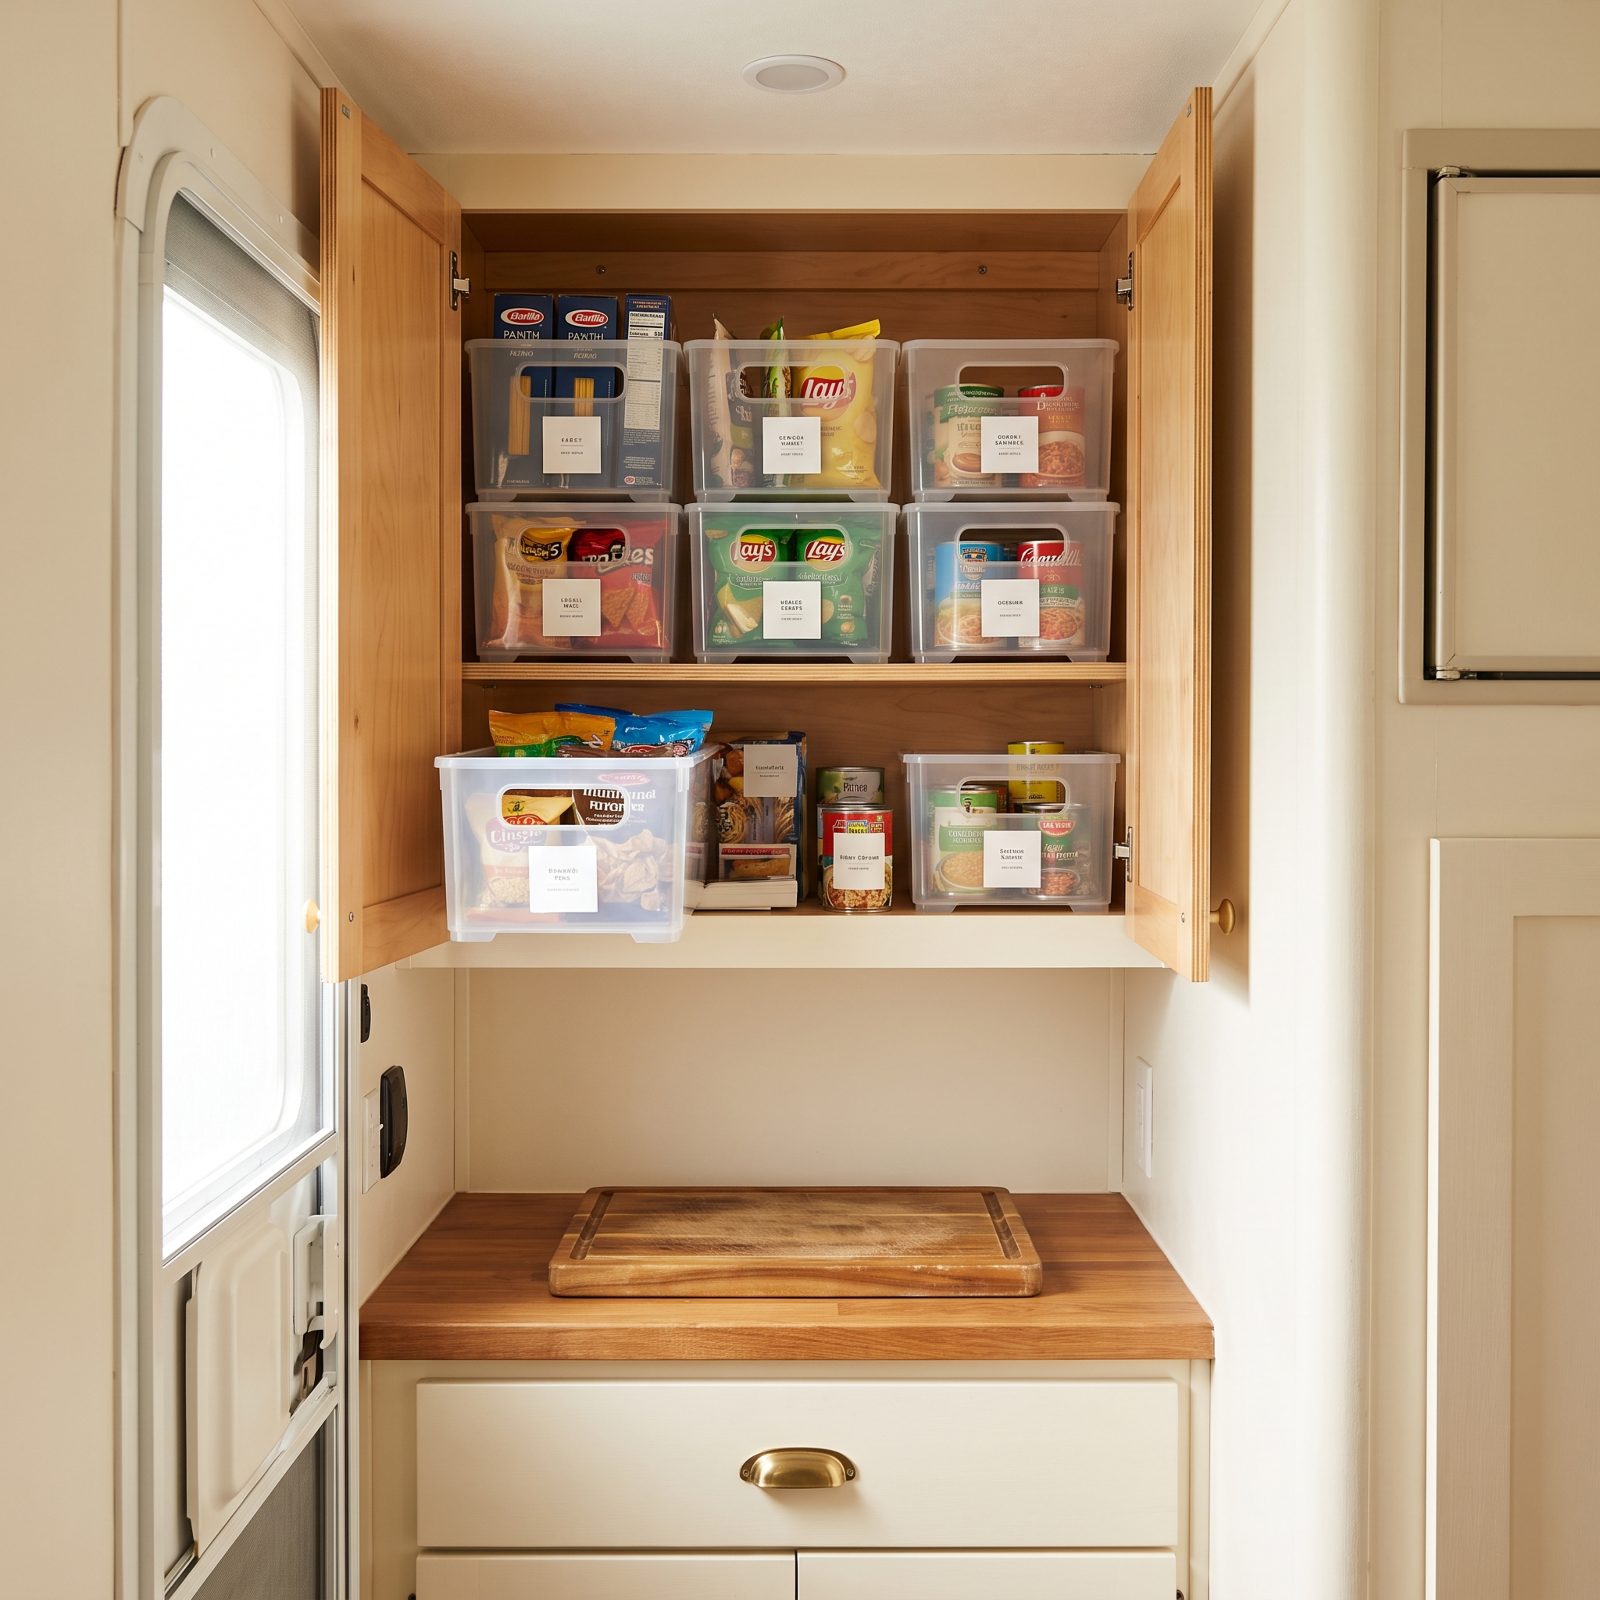
Deep RV cabinets are where groceries go to disappear. You buy a second jar of peanut butter because the first one migrated to the dark back corner and swore it never existed. Clear stackable bins fix that nonsense — pull the whole bin forward, grab what you need, slide it back.
Stackable matters more than clear, honestly. Vertical space in a deep cabinet is the real win, and bins that lock together won’t avalanche when you brake for a deer. Get the ones with a cutout handle on the front face.
35. Add Vertical Dividers for Cutting Boards and Baking Sheets
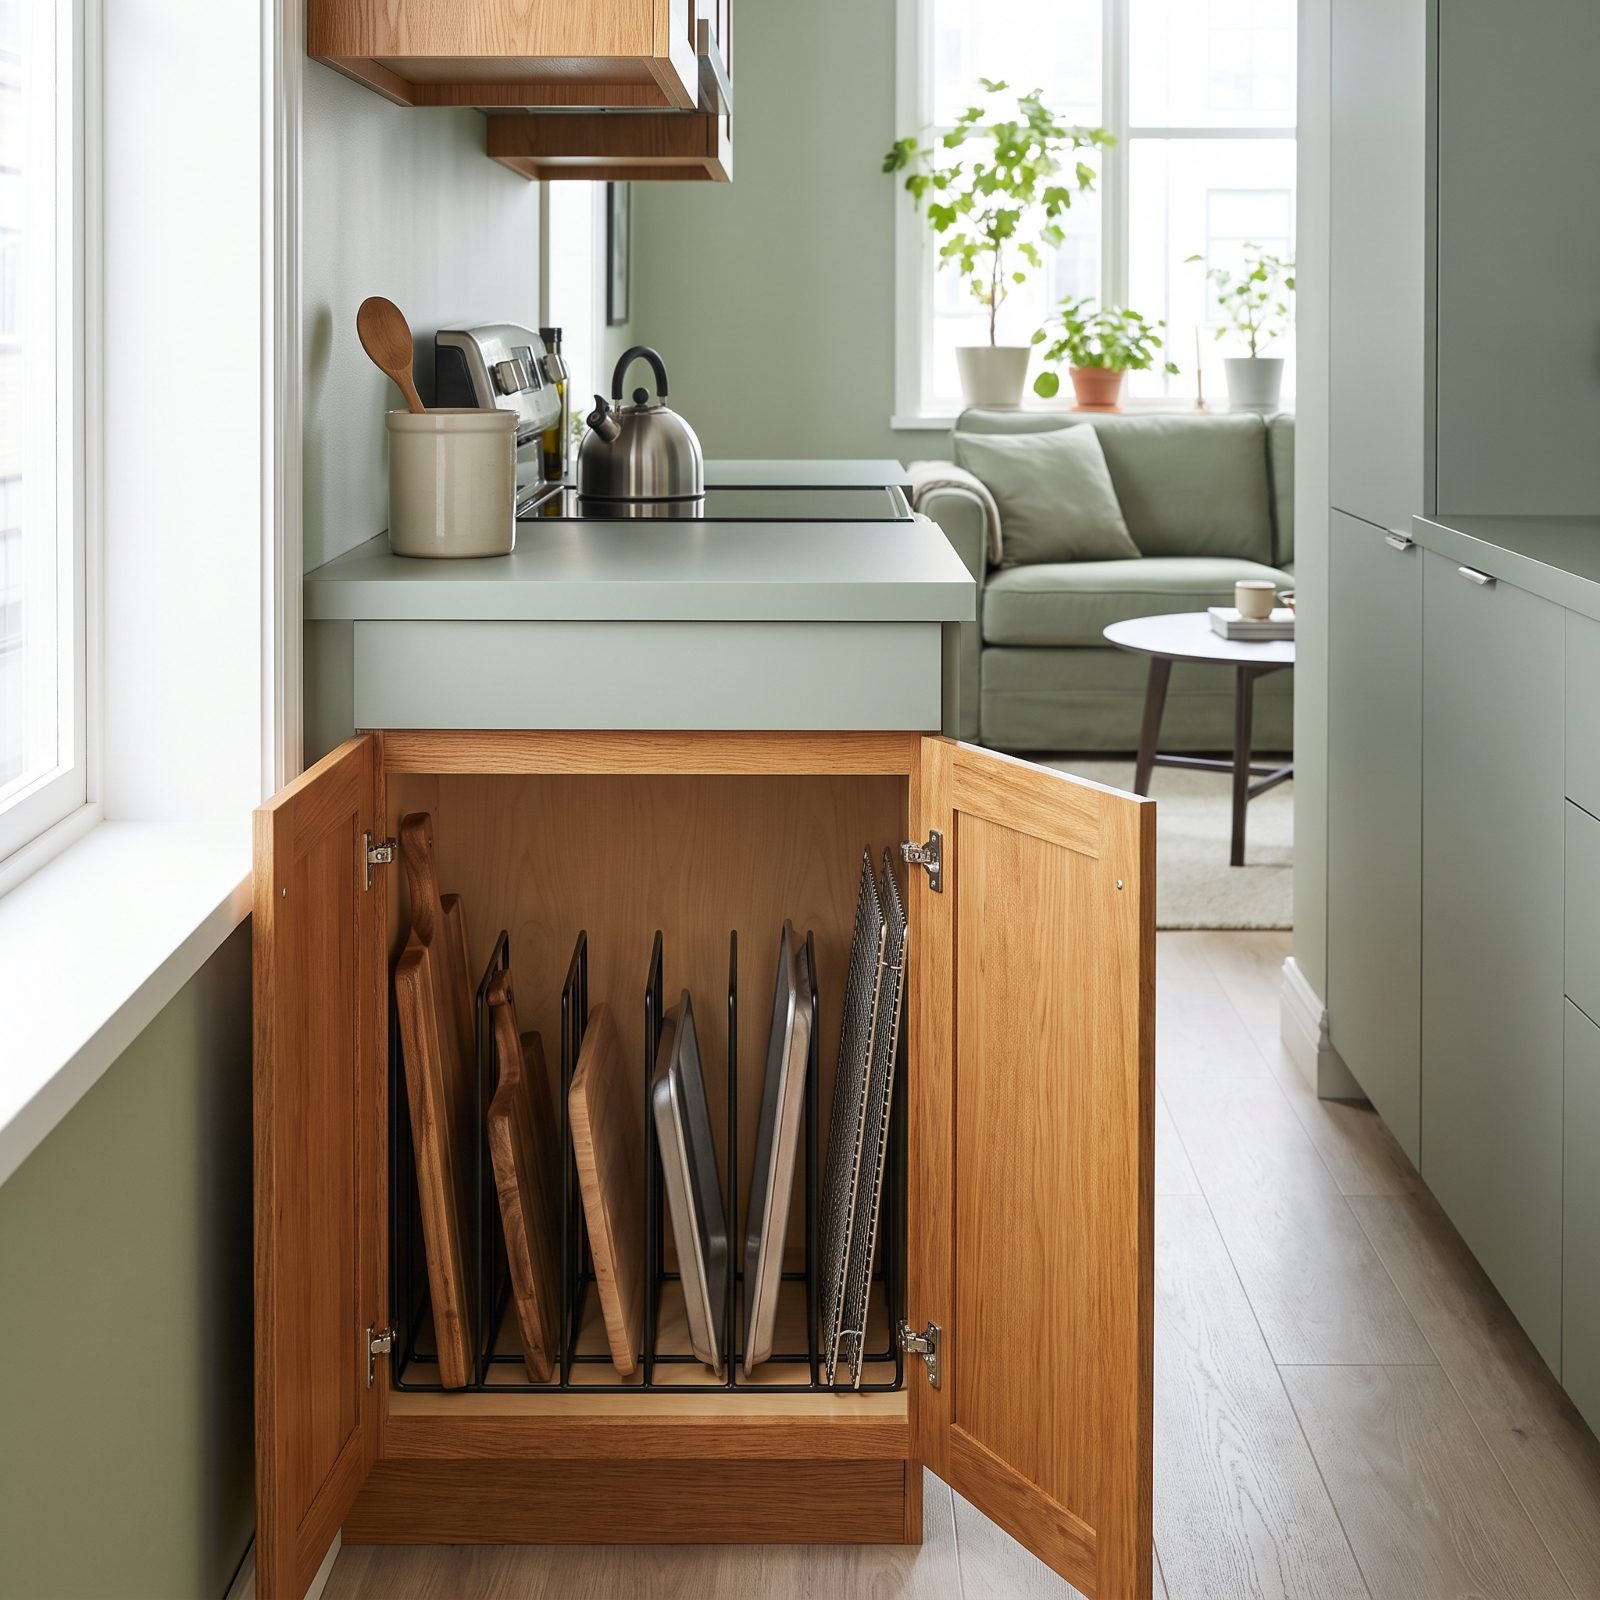
Flat things stacked flat are a slow-motion disaster. You want the small cutting board, but it’s under the roasting pan, which is under the baking sheet, which is under the pizza stone you forgot you packed. Everything comes out so one thing can.
Stand them on edge instead. An expandable divider set turns a useless vertical slot into a filing system for anything flat. Grab one board, the rest stay put.
34. Install Tiered Shelf Risers for Cans and Mugs
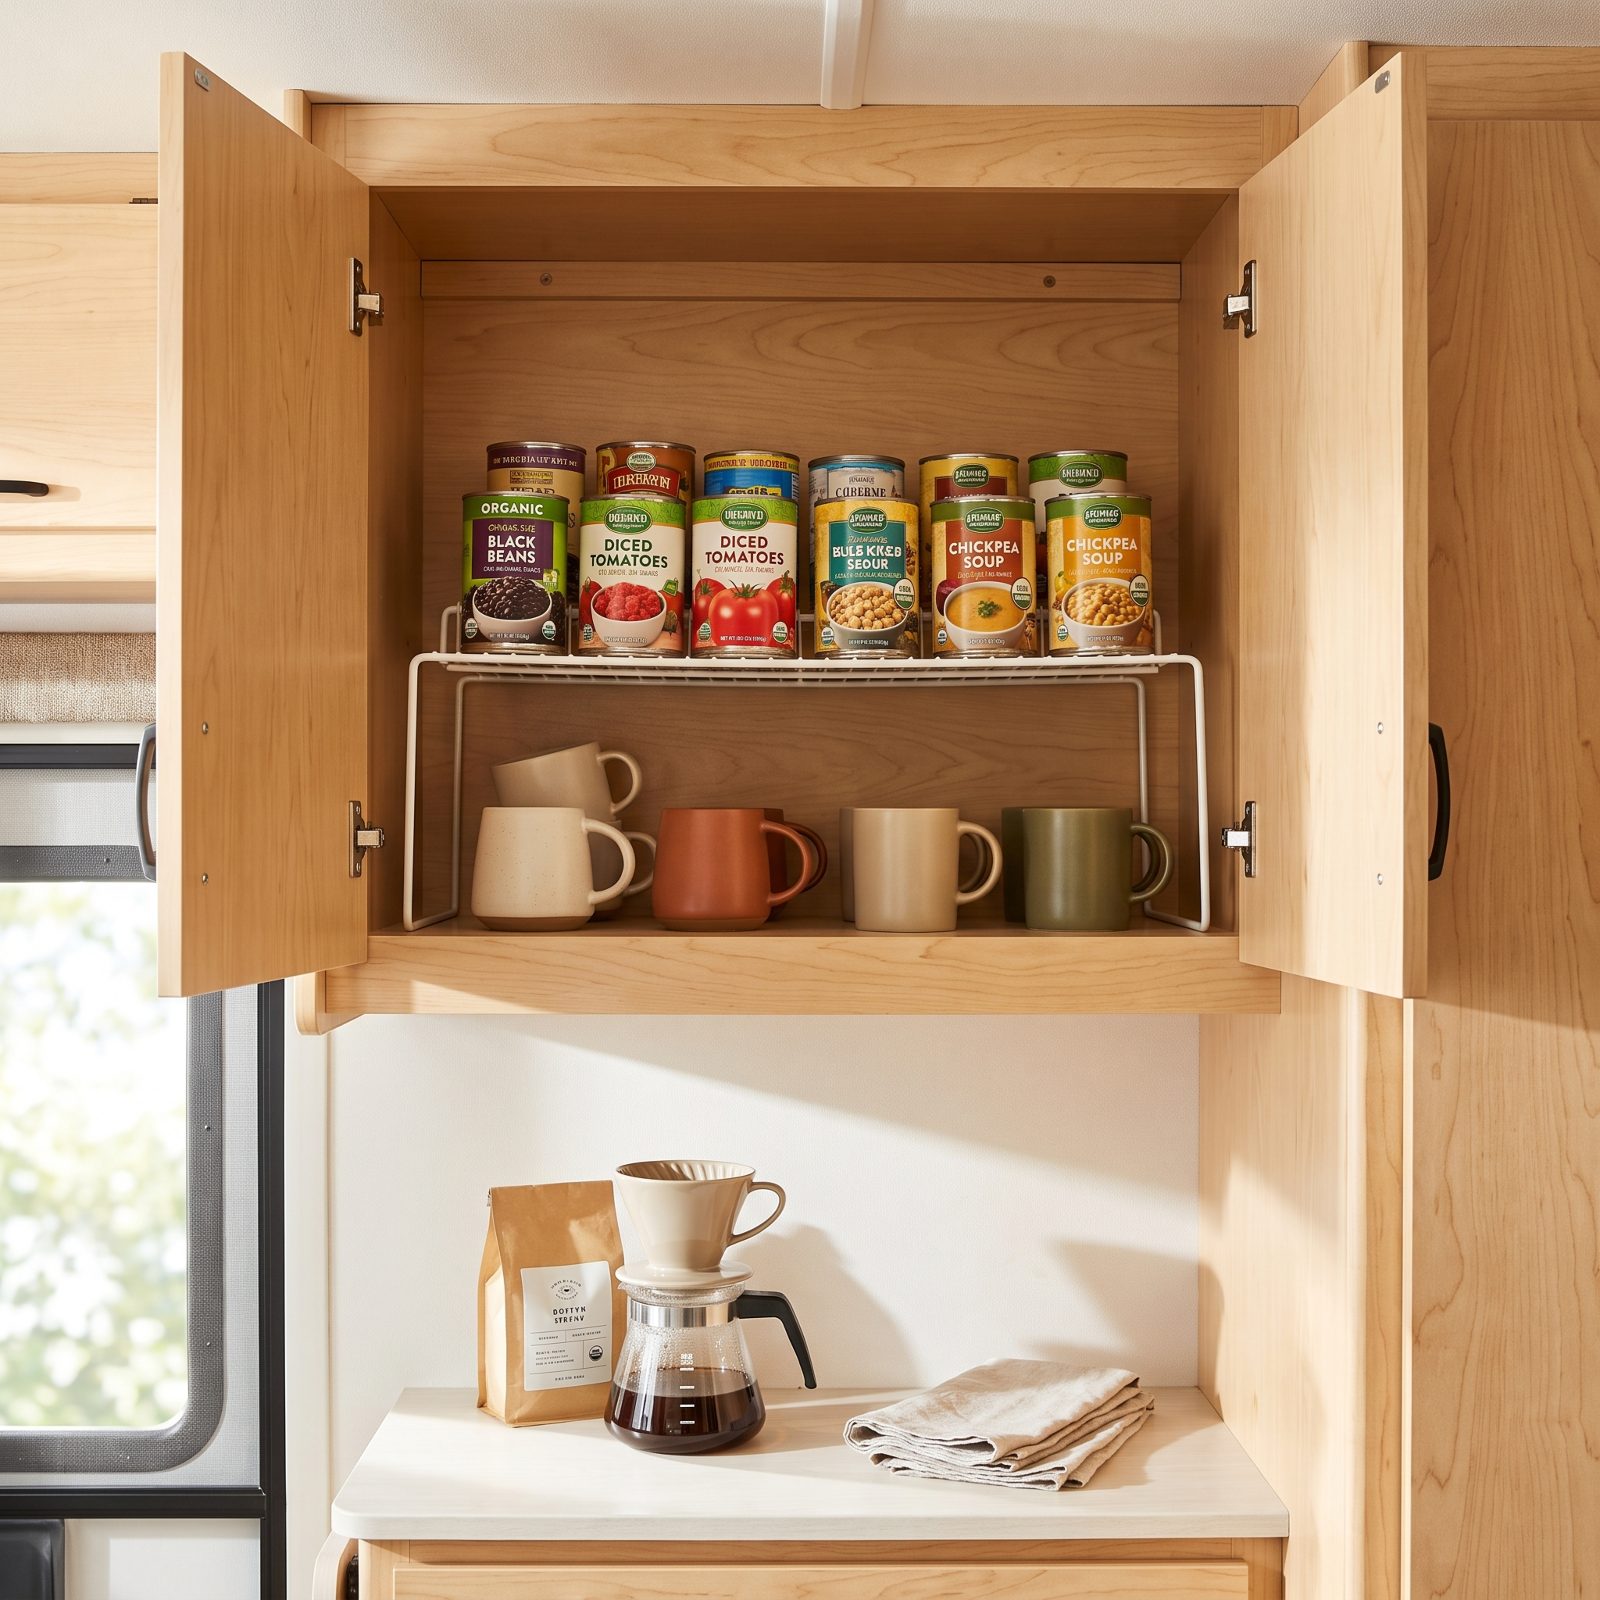
Half the height of an RV cabinet shelf is dead air — a single layer of cans and eight inches of nothing above them. A tiered riser reclaims that air for a back row you can actually see.
It also solves the mug problem. Front row sits low, back row steps up, and you stop playing Jenga every morning before coffee. Cheap risers are flimsy wire that flexes under weight, so spend the extra few dollars for the sturdier step shelf. Your canned chili is heavier than it looks.
33. Fit Pull-Out Wire Baskets Into Lower Cabinets
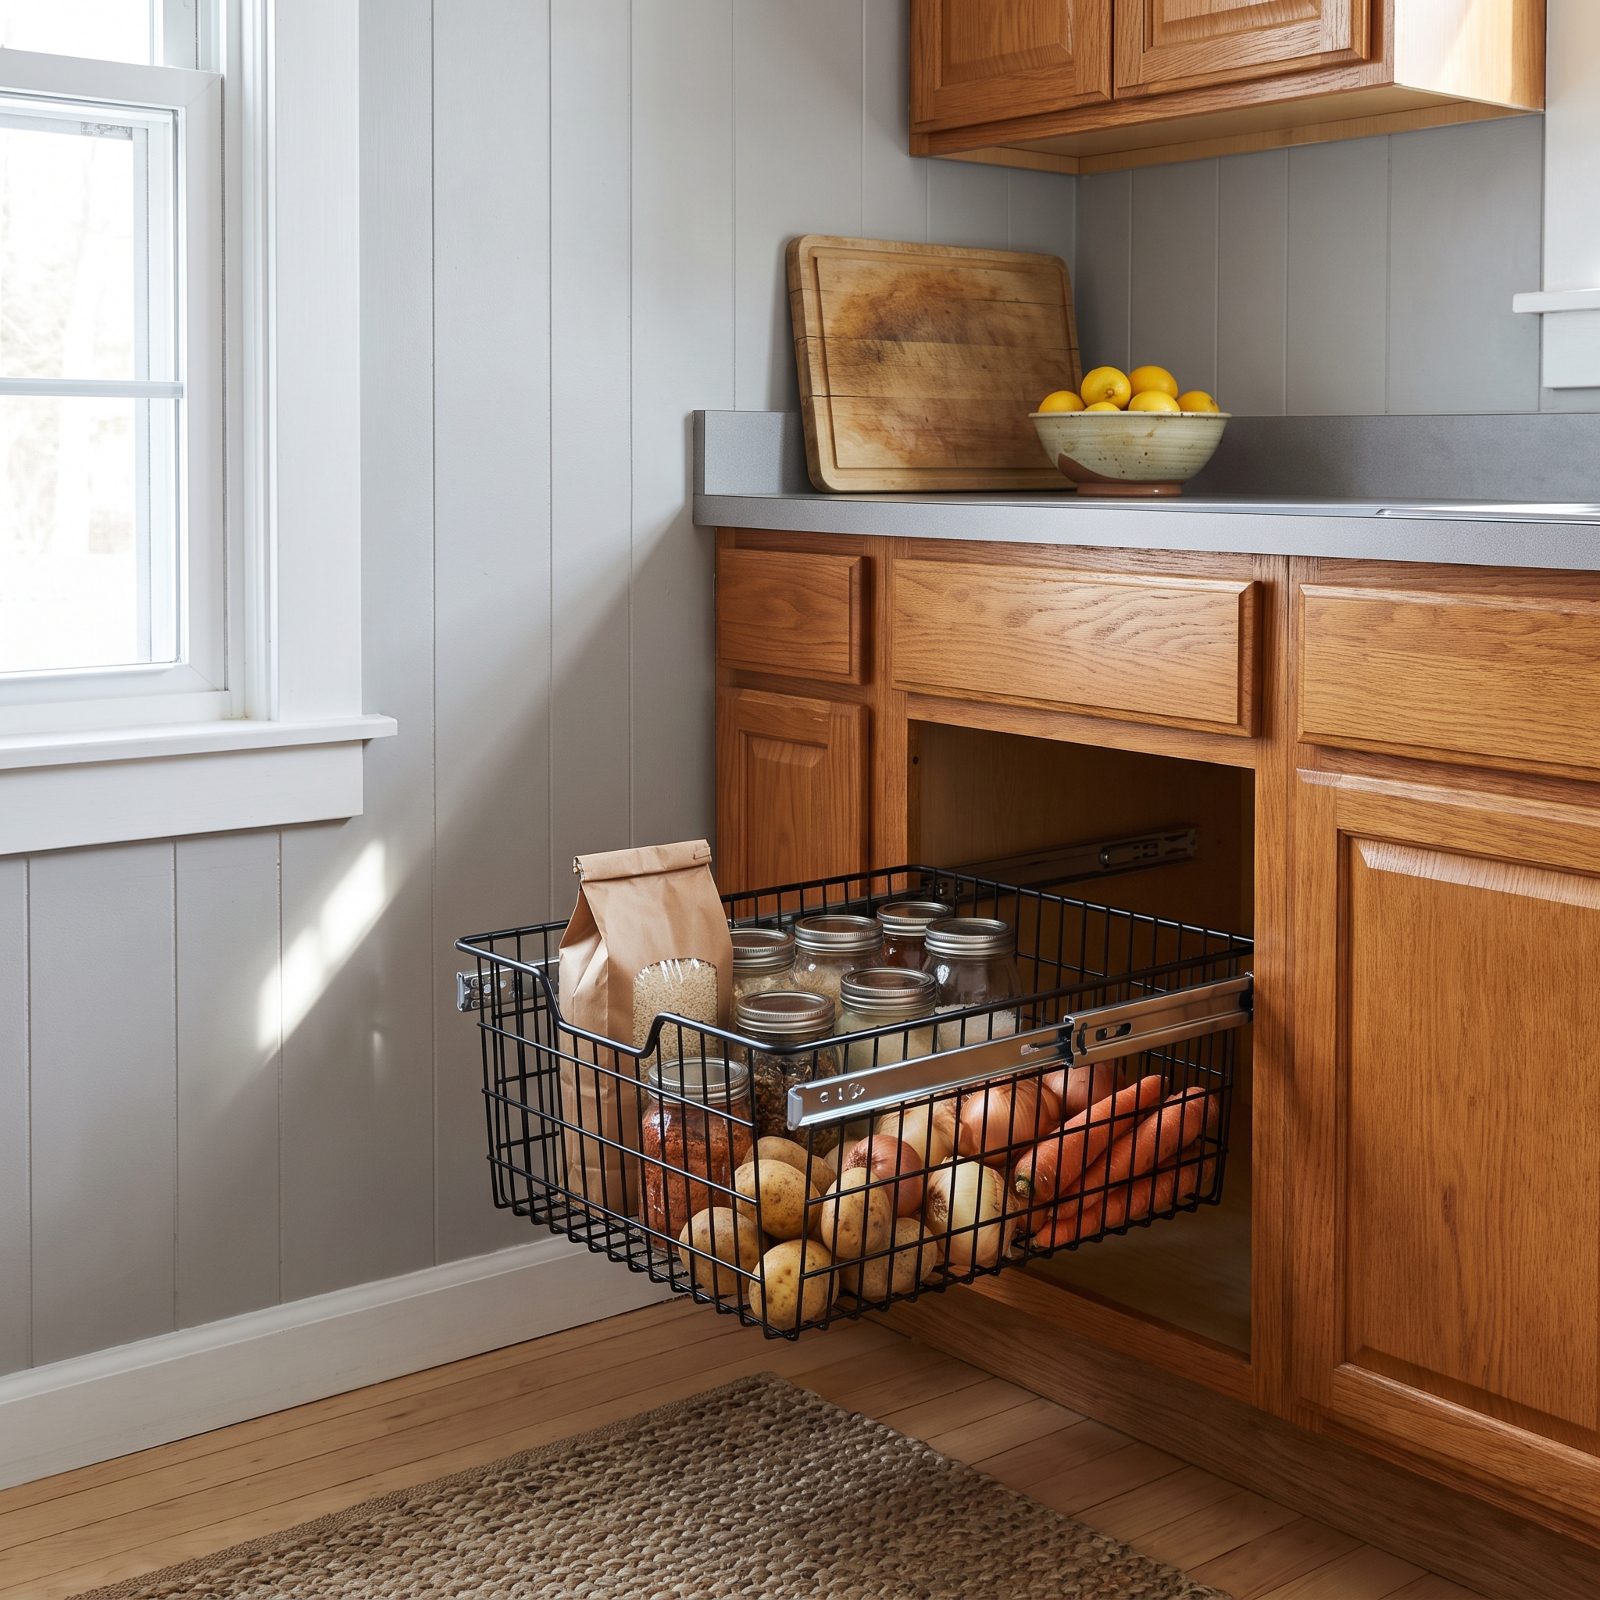
Getting into a low RV cabinet is basically a yoga pose. You’re on your knees, head in the cabinet, arm fishing blind for the thing in back. A pull-out wire basket on rails brings the back to you.
These run thirty to sixty dollars depending on the slide quality, and that’s exactly where the money matters — cheap slides sag under a loaded basket and jam. Load it with the heavy stuff anyway, cans and root vegetables, because keeping weight low in the rig helps your handling too.
32. Use Under-Shelf Baskets to Capture Wasted Cabinet Space
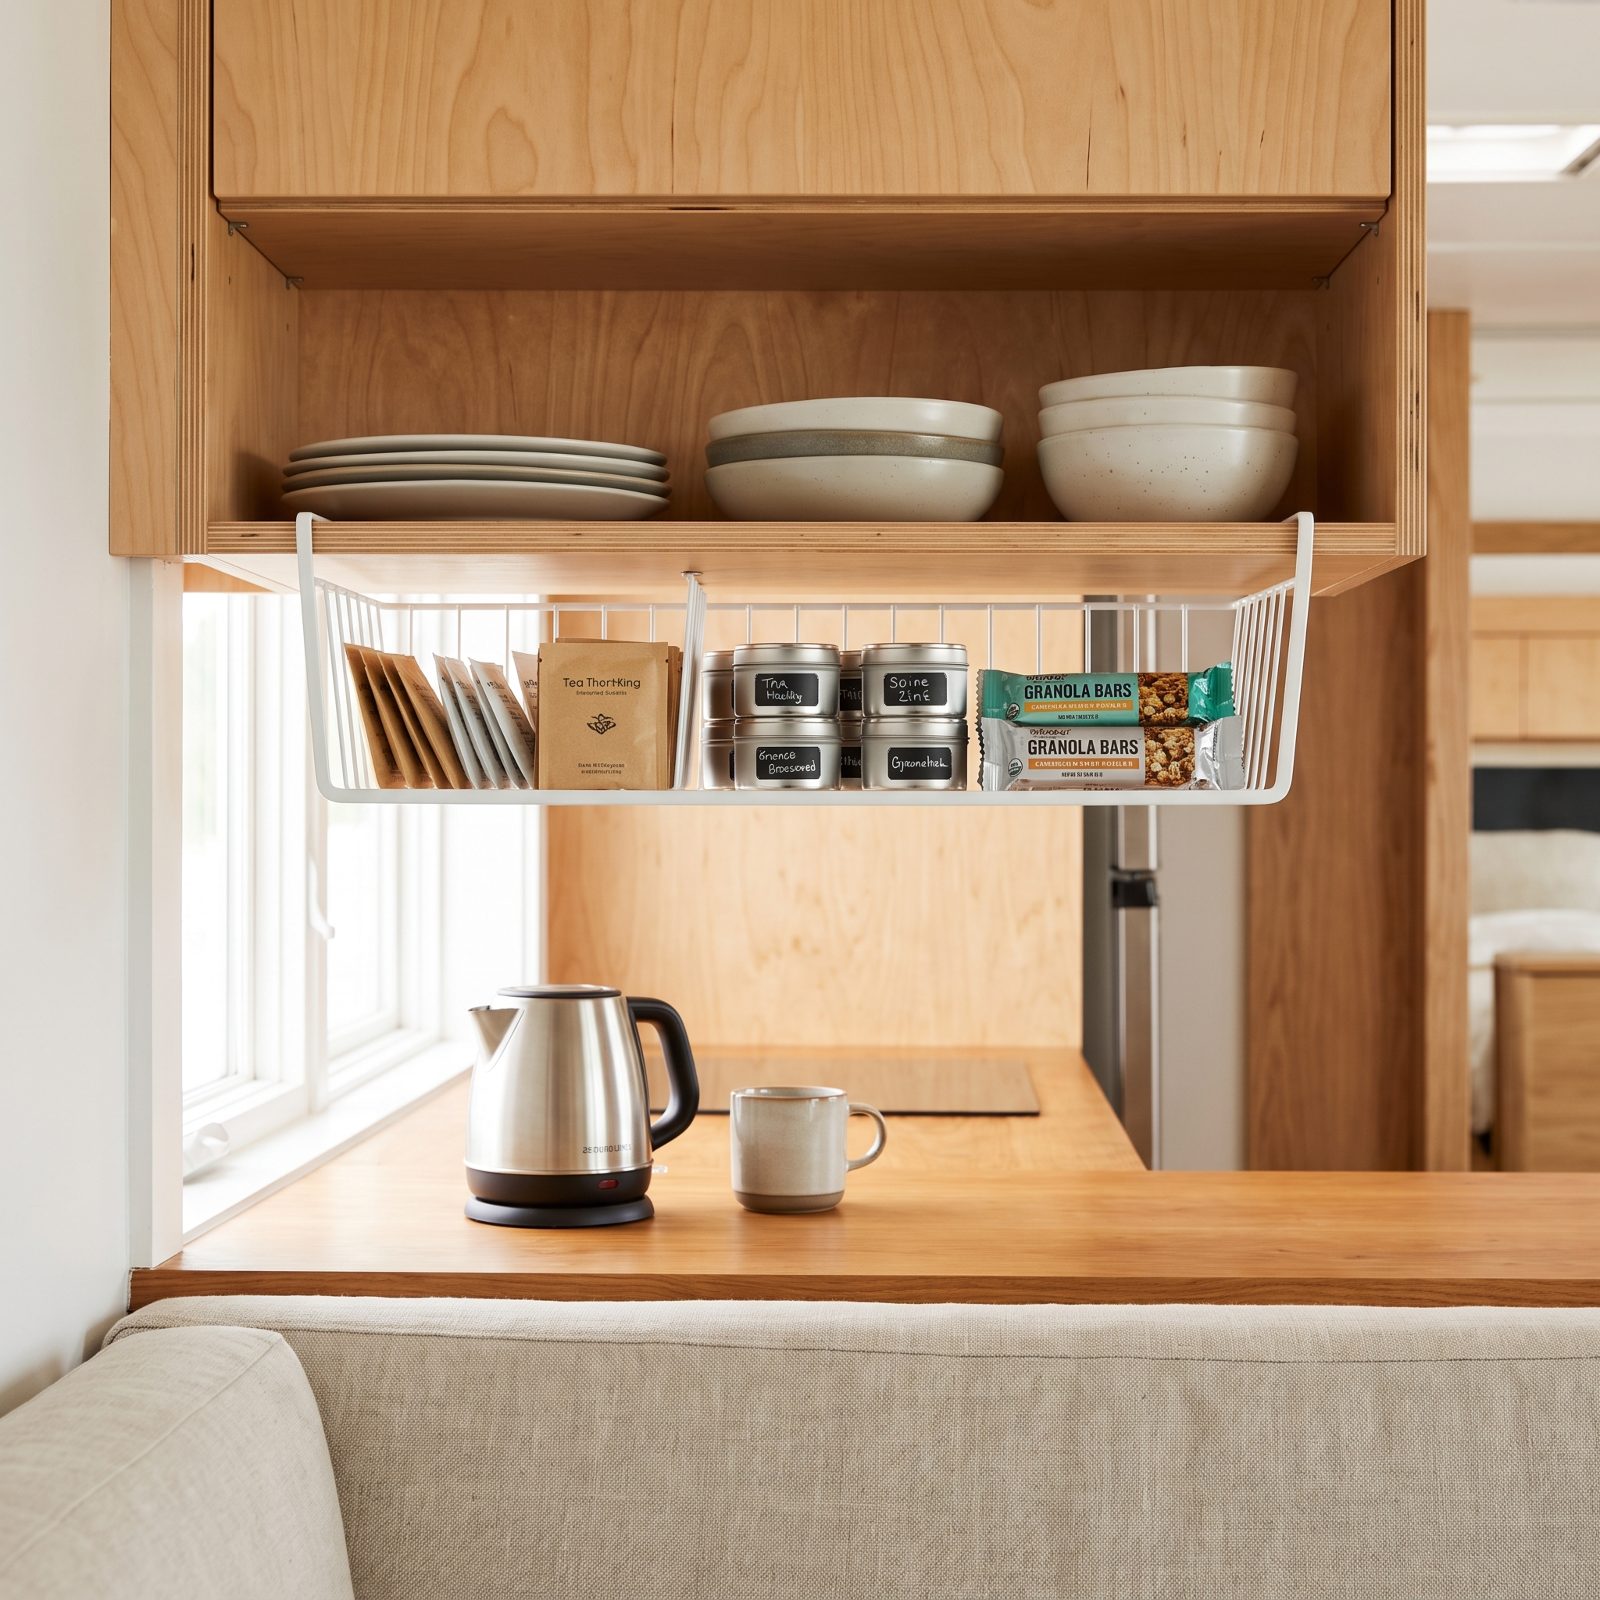
Look under any fixed cabinet shelf. See that gap between the bottom of the shelf and the tops of your plates? That’s prime storage you’re wasting on nothing.
An under-shelf basket hooks right over the shelf lip and hangs into that gap. No tools, no drilling, a few bucks each. I keep tea, spice tins, and snack bars in mine — the light stuff that doesn’t mind swinging a little on a bumpy road. Don’t load it heavy or it’ll pop off the lip at the worst possible moment.
31. Add a Lazy Susan to an Awkward Corner Cabinet
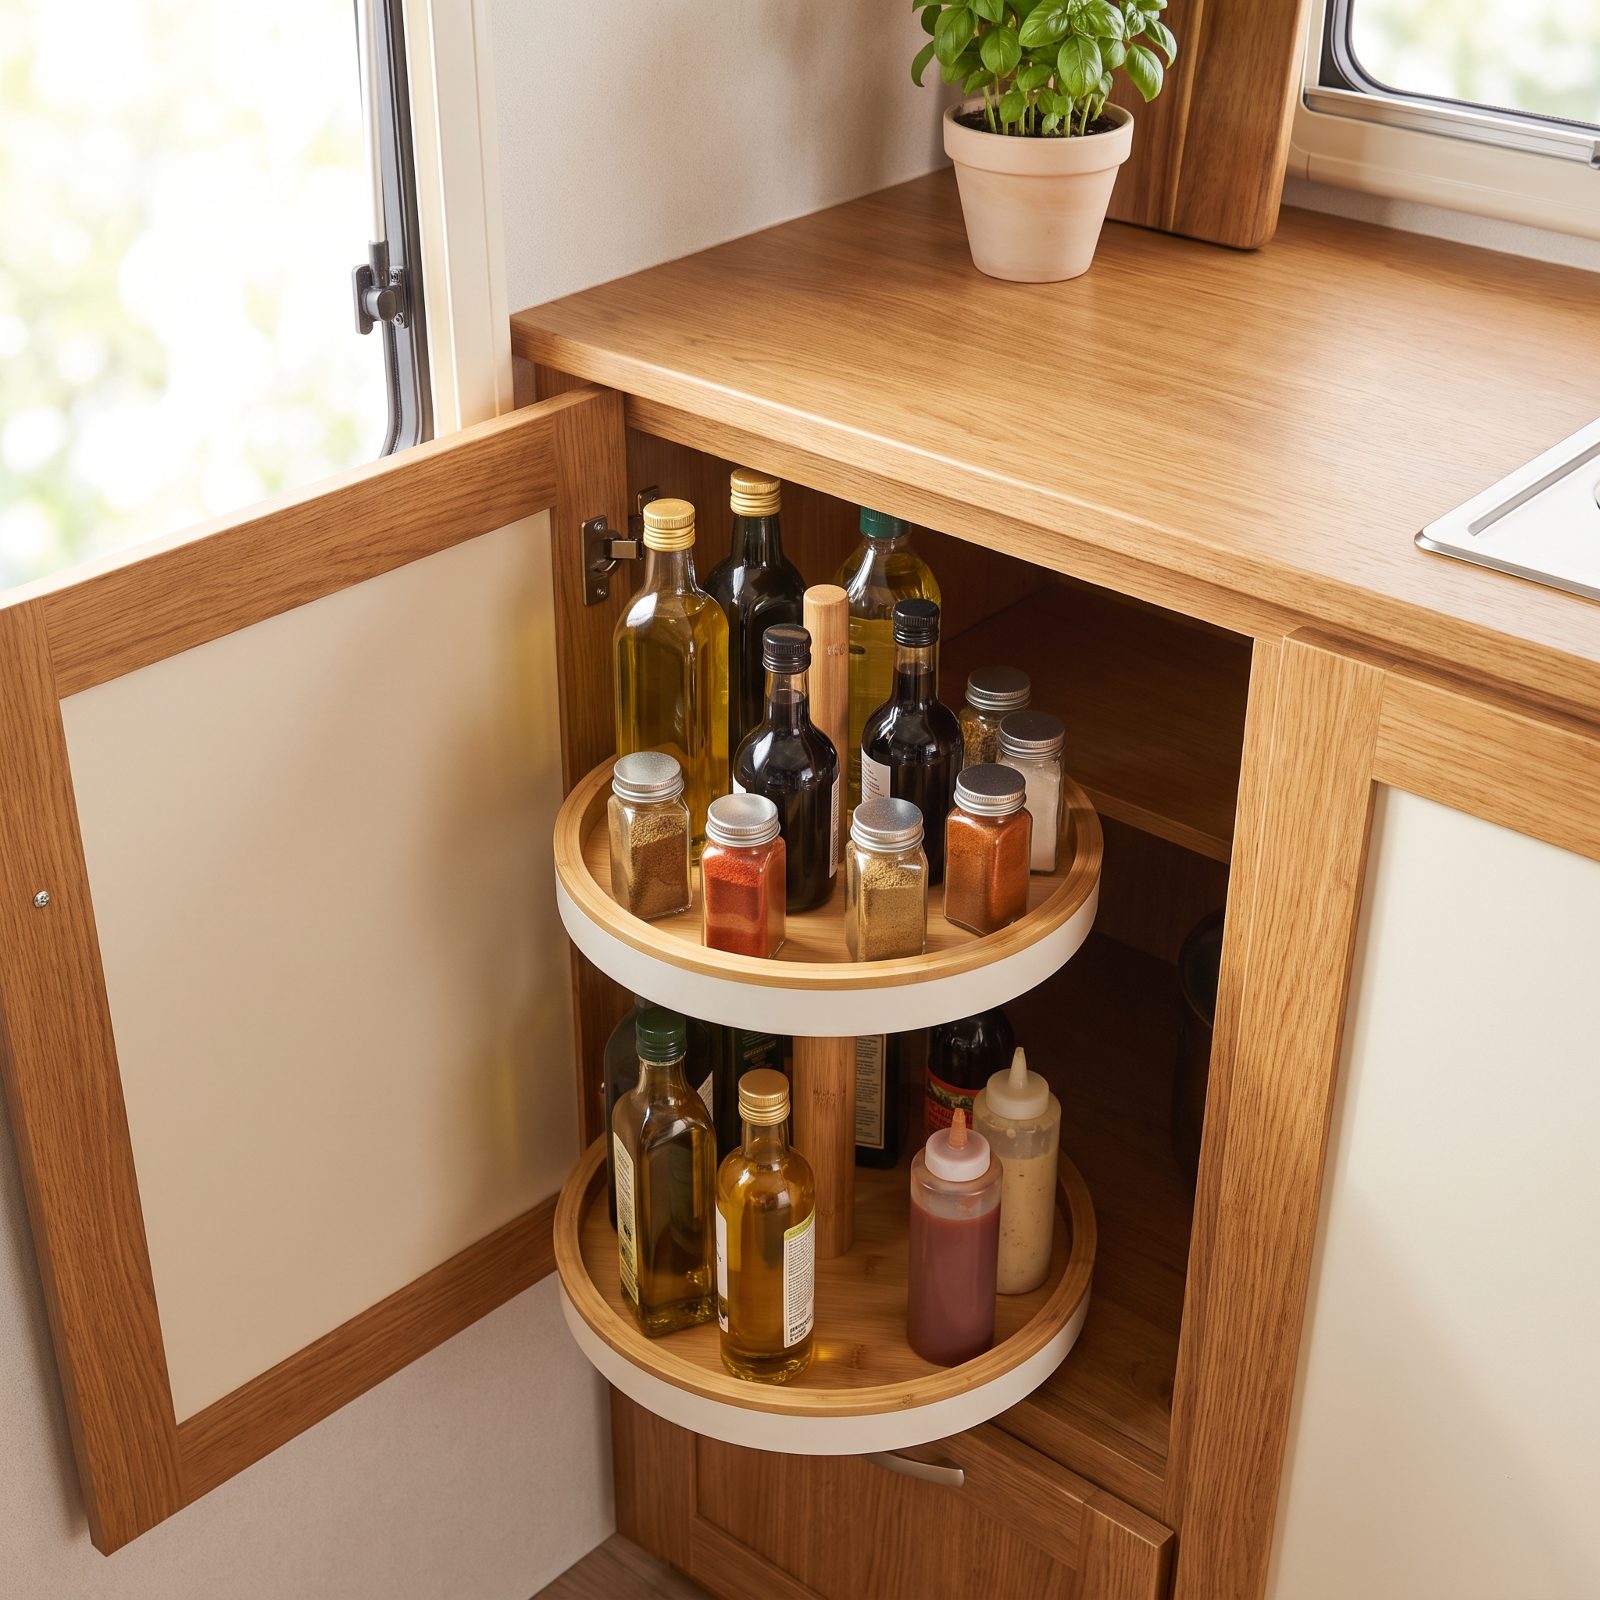
Corner cabinets are where organization goes to die. The opening is small, the cavity is huge, and anything past the first row might as well be in another zip code.
A lazy Susan turns that black hole into a carousel. Spin it, grab the olive oil, spin it back. Go two-tier if the height allows, and measure your cabinet opening before you buy — a turntable wider than your door is a sad, expensive lesson.
30. Mount a Slim Pantry Rack on the Entry-Side Wall
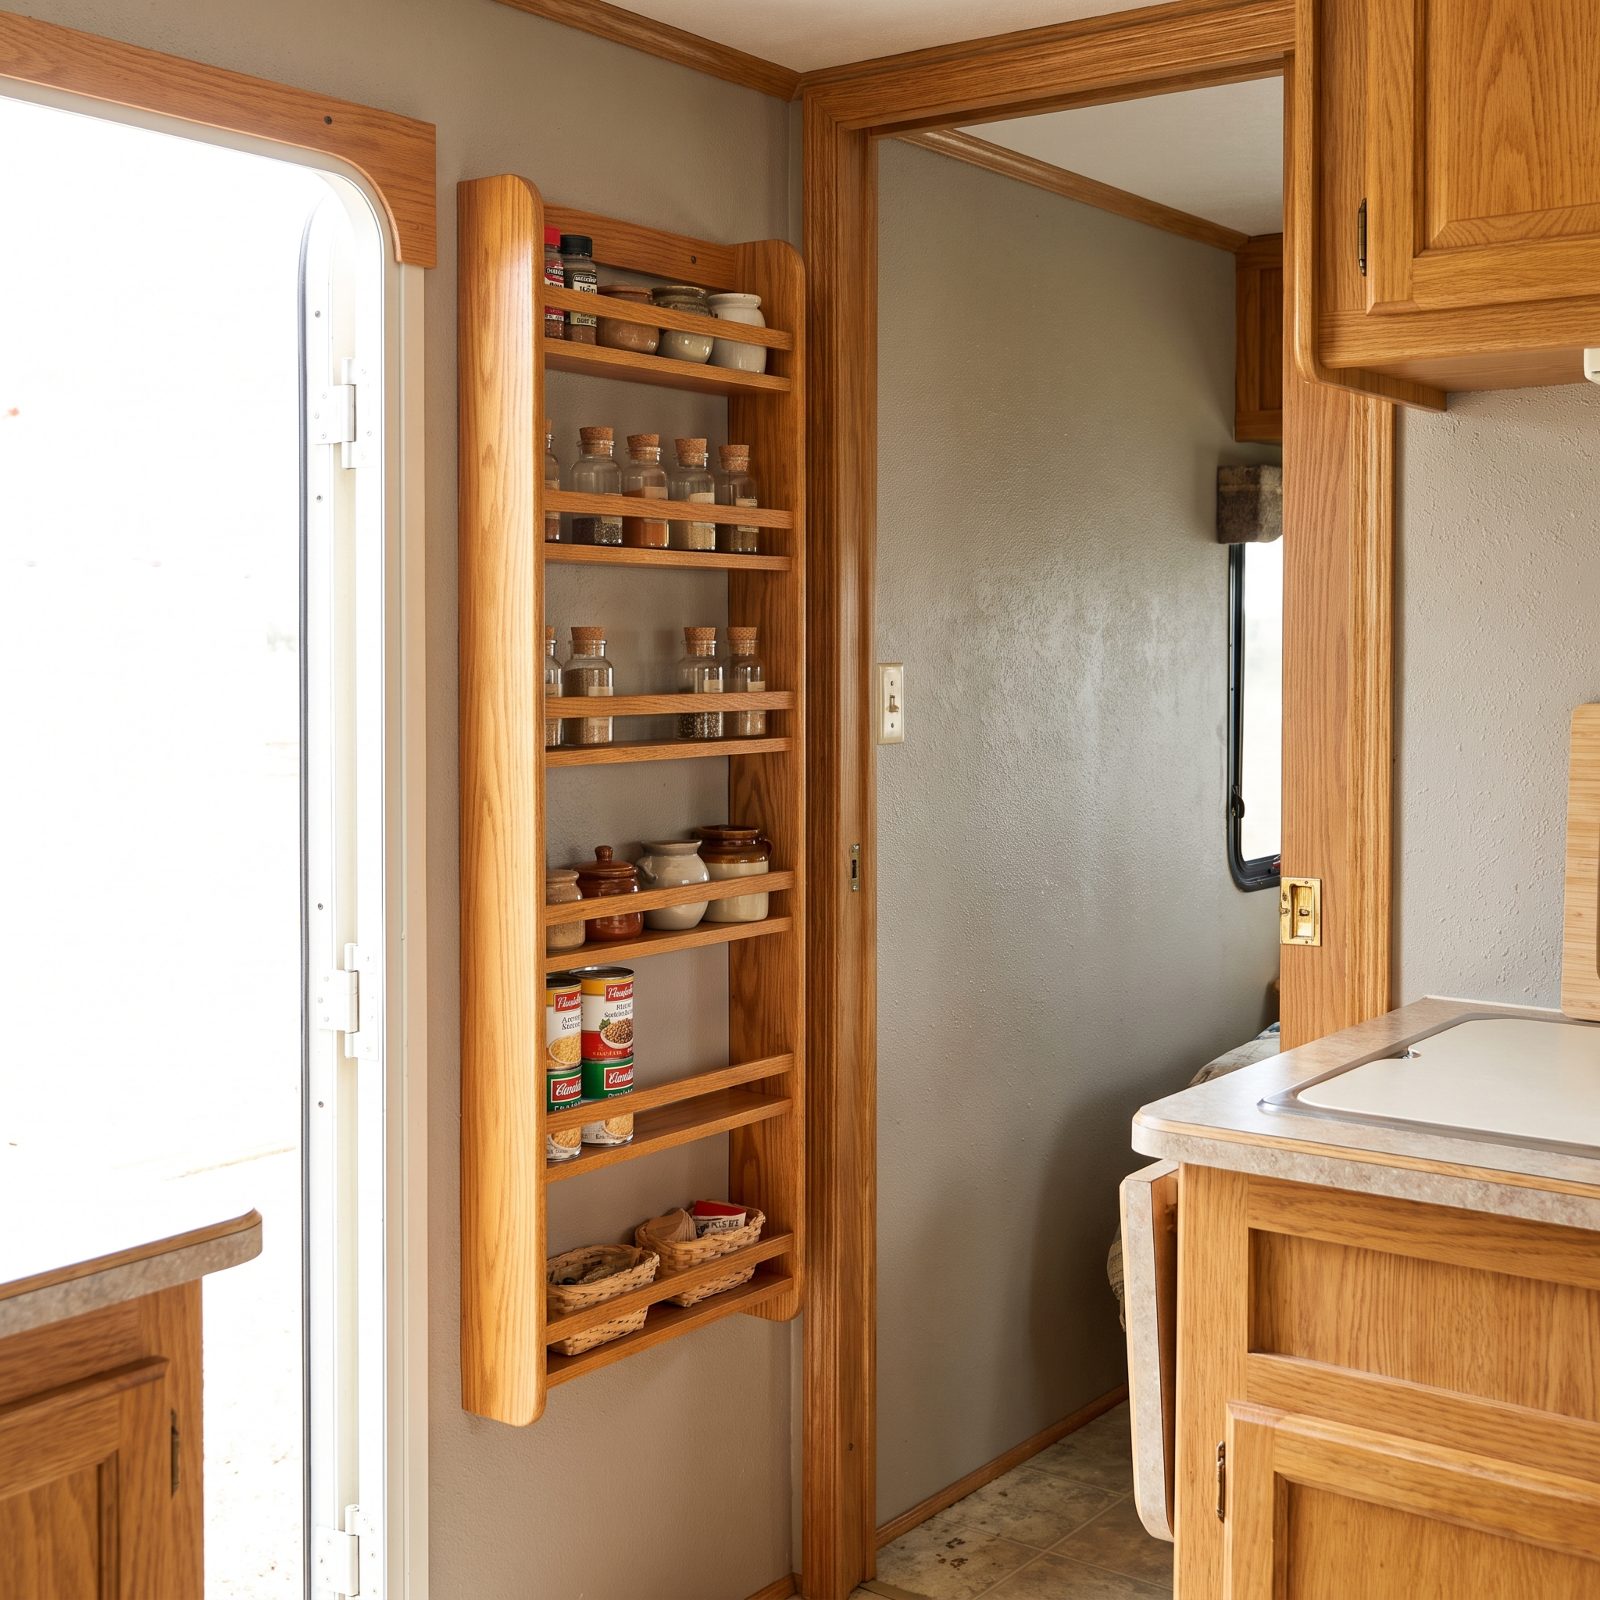
There’s always a blank strip of wall near the door — the one you brush past a hundred times a day and never think about. Four inches of depth is all you need to turn it into a spice and canned-goods pantry.
A slim rack adds real storage without stealing walkway, which in an RV is the whole game. Mount it into a stud or a solid frame member, not just the paneling. Then add a thin retaining lip or bungee across the front so your paprika doesn’t launch on the first mountain pass.
29. Install a Tension-Rod Shelf Above the Sink
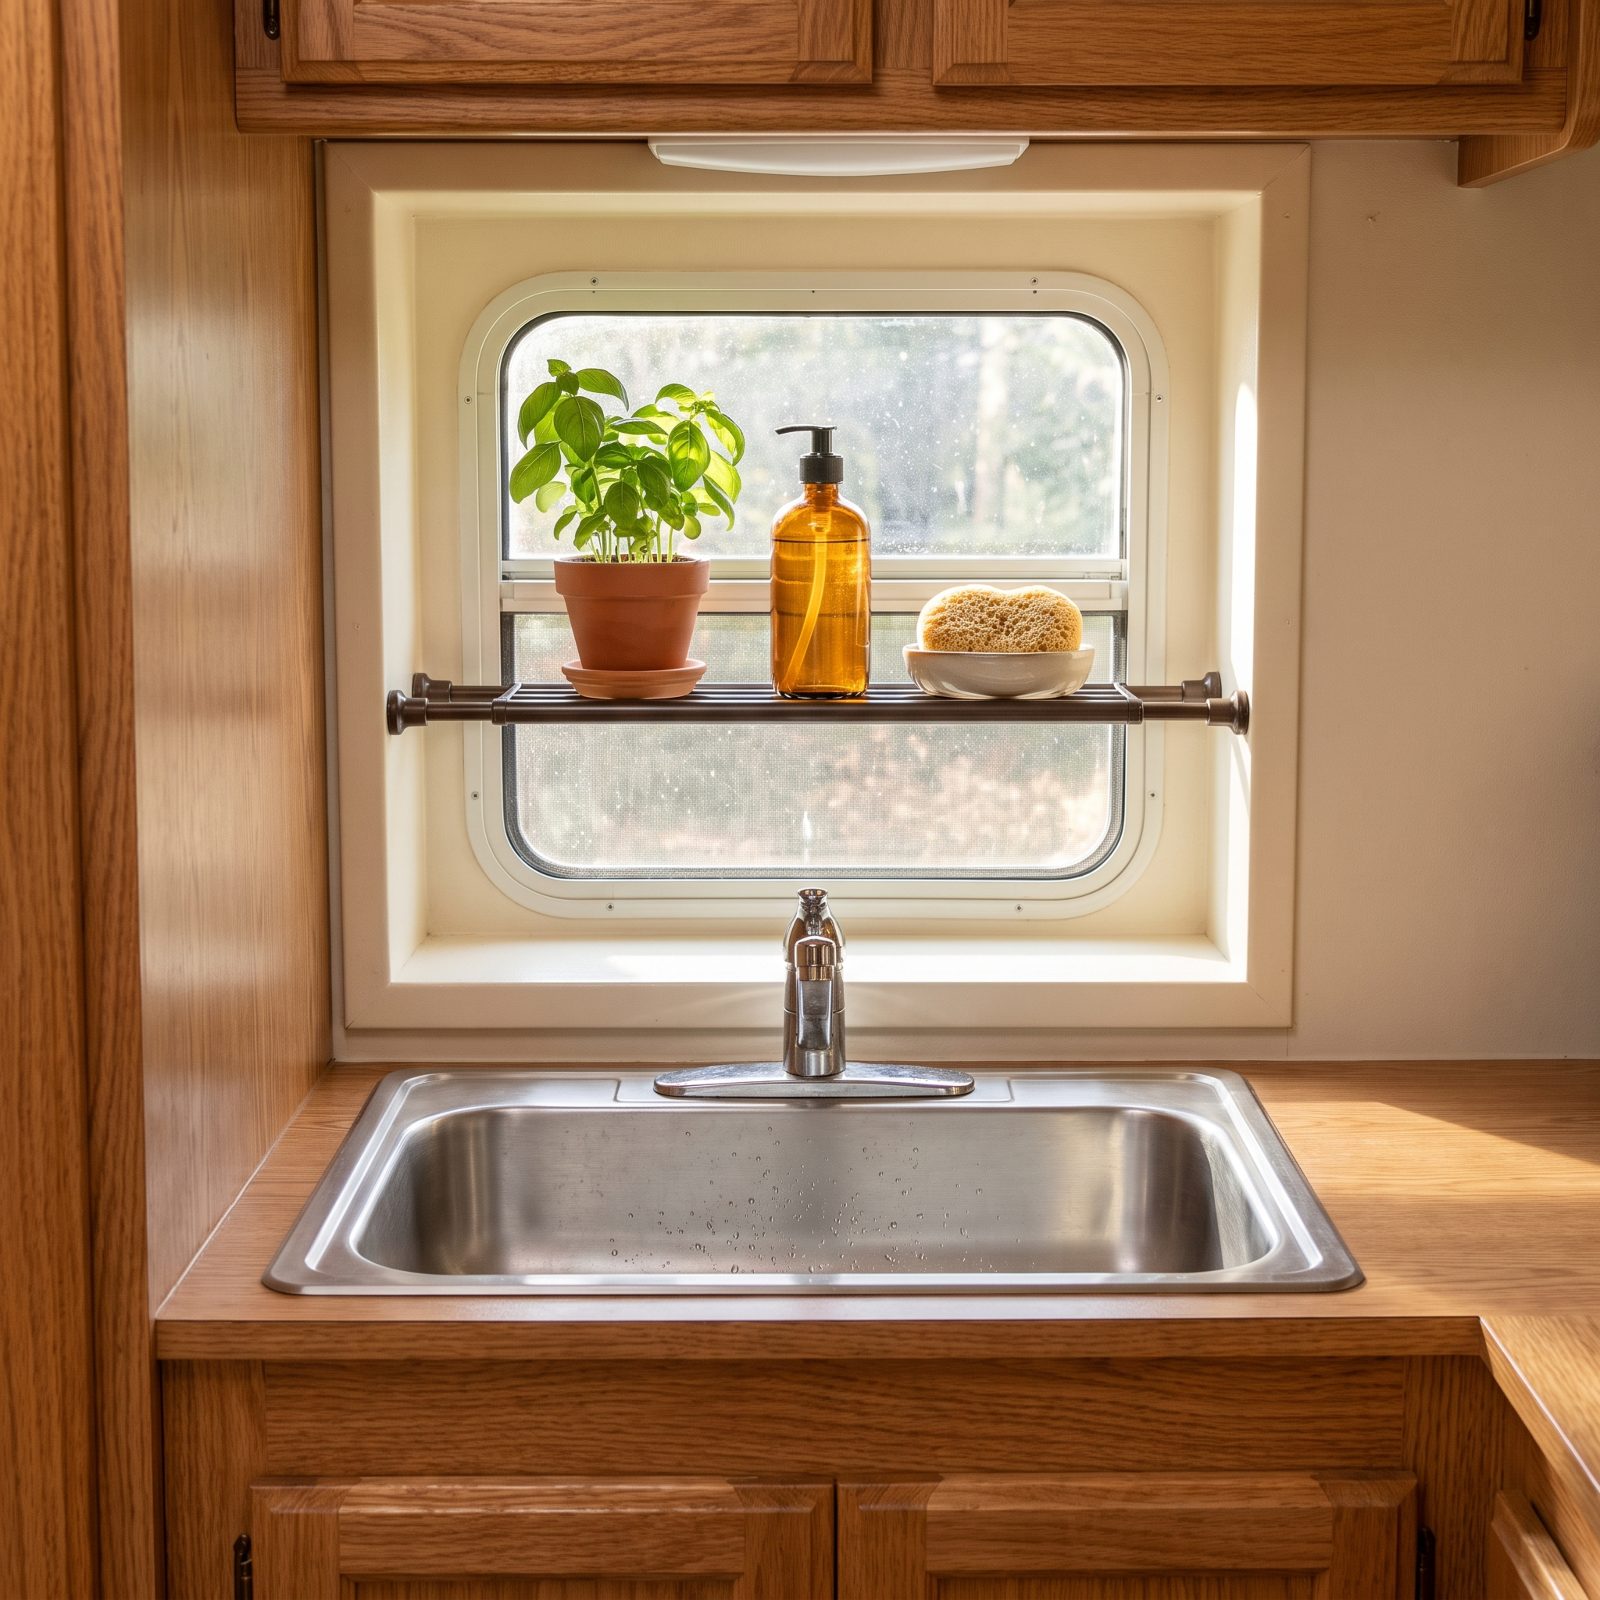
The window recess over your sink sits empty, and it’s the most reachable spot in the whole galley. Wedge a tension rod across it, add a light shelf, and you’ve got a soap-and-sponge perch that frees the counter completely.
No drilling — which matters a lot when you’re nervous about putting holes in an RV wall. Just make sure the recess walls are solid enough to hold the tension, and keep what you put up there light. A tension rod is holding, not bolted, and gravity plus washboard gravel will test it eventually.
28. Store Pot Lids Upright in a Cabinet-Door Organizer
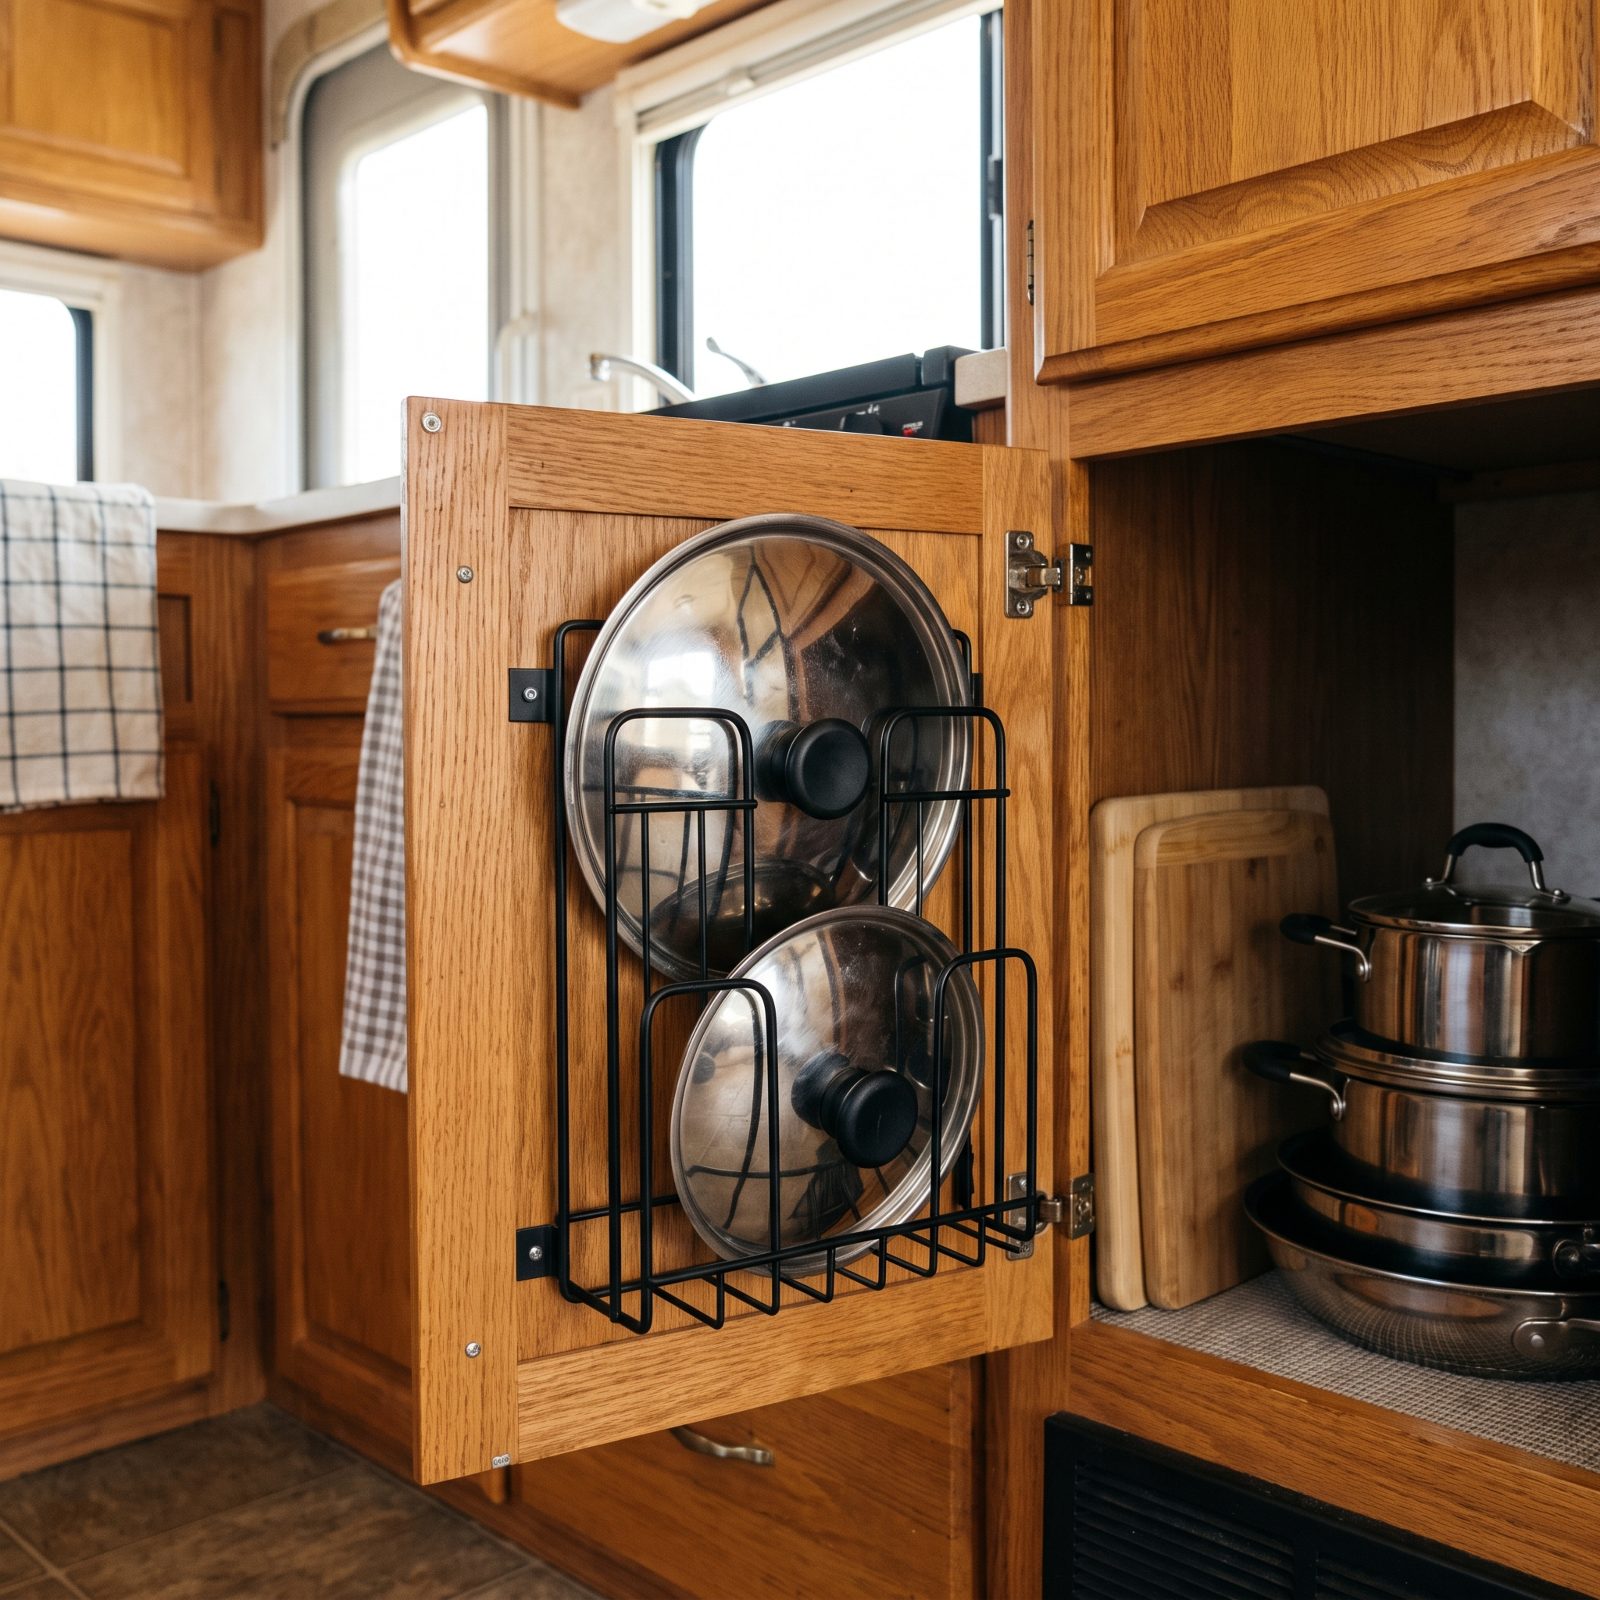
Pot lids are the worst roommates in the cabinet. They slide, they clang, they refuse to stack with anything, and they’re the one thing rattling at two in the morning when you’re parked and desperate to sleep.
Mount a wire organizer to the inside of the cabinet door and stand the lids upright where they belong. Pots nest cleanly in back, lids hang out of the way, and that maddening metallic clatter on bumpy roads finally quits. Small fix, outsized peace.
27. Nest Collapsible Cookware in One Compact Cabinet
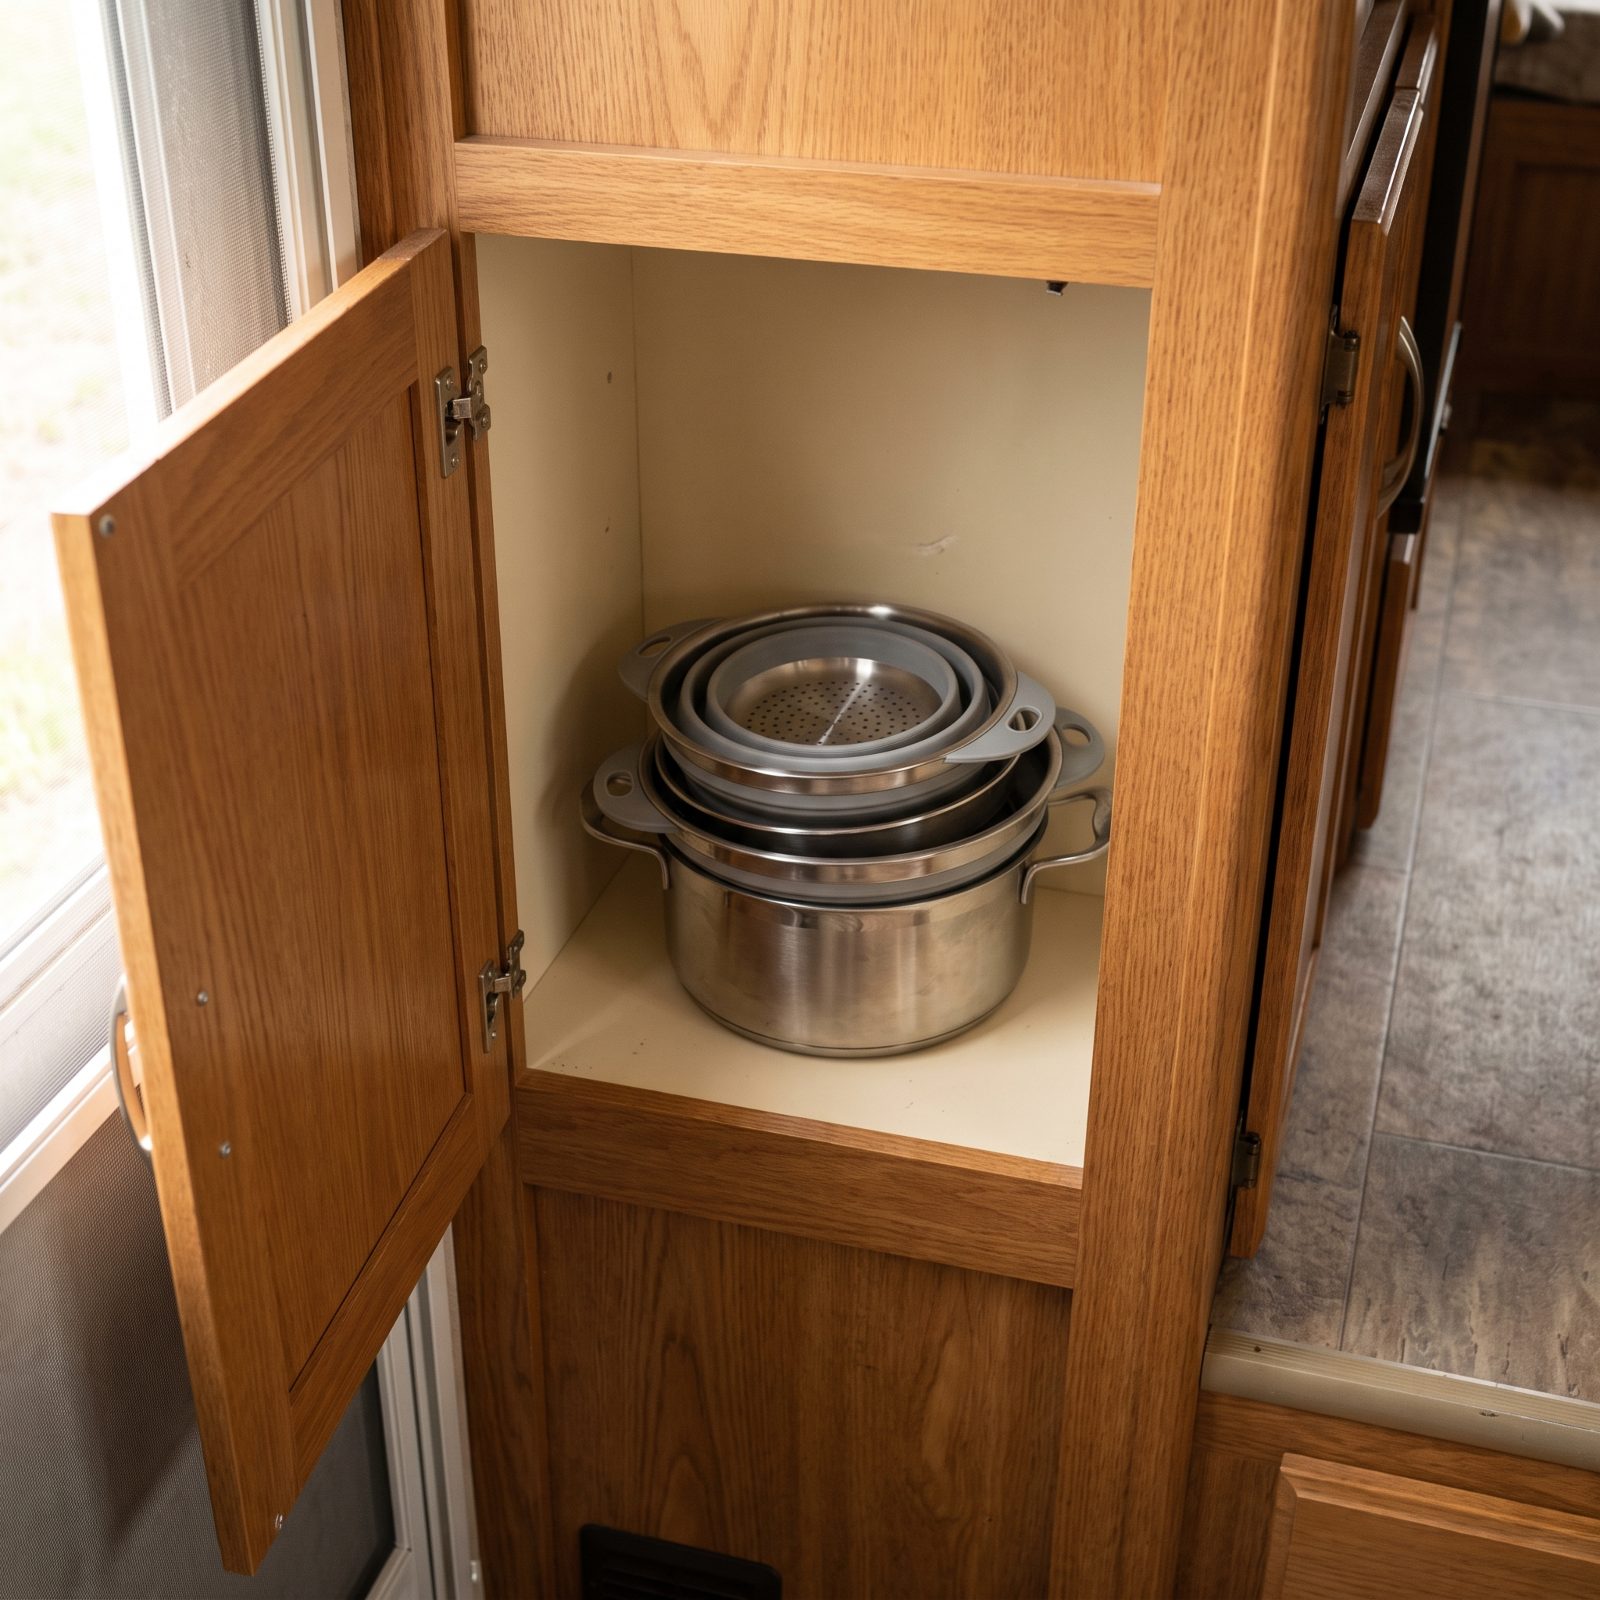
A full pot of pasta water doesn’t care that the pot collapses. The silicone sides flex, but the base is solid steel and it boils like any other. That’s the part people won’t believe until they cook with one.
A nested set folds down to about the height of a stack of dinner plates, which turns three cabinets into one and stops the pots from clanging every time you take a corner too fast.
I resisted these for years because I figured they’d feel flimsy. They don’t. Just pay for a set with a heavy encapsulated base — the dollar-store versions scorch.
26. Swap Round Canisters for Square Airtight Containers
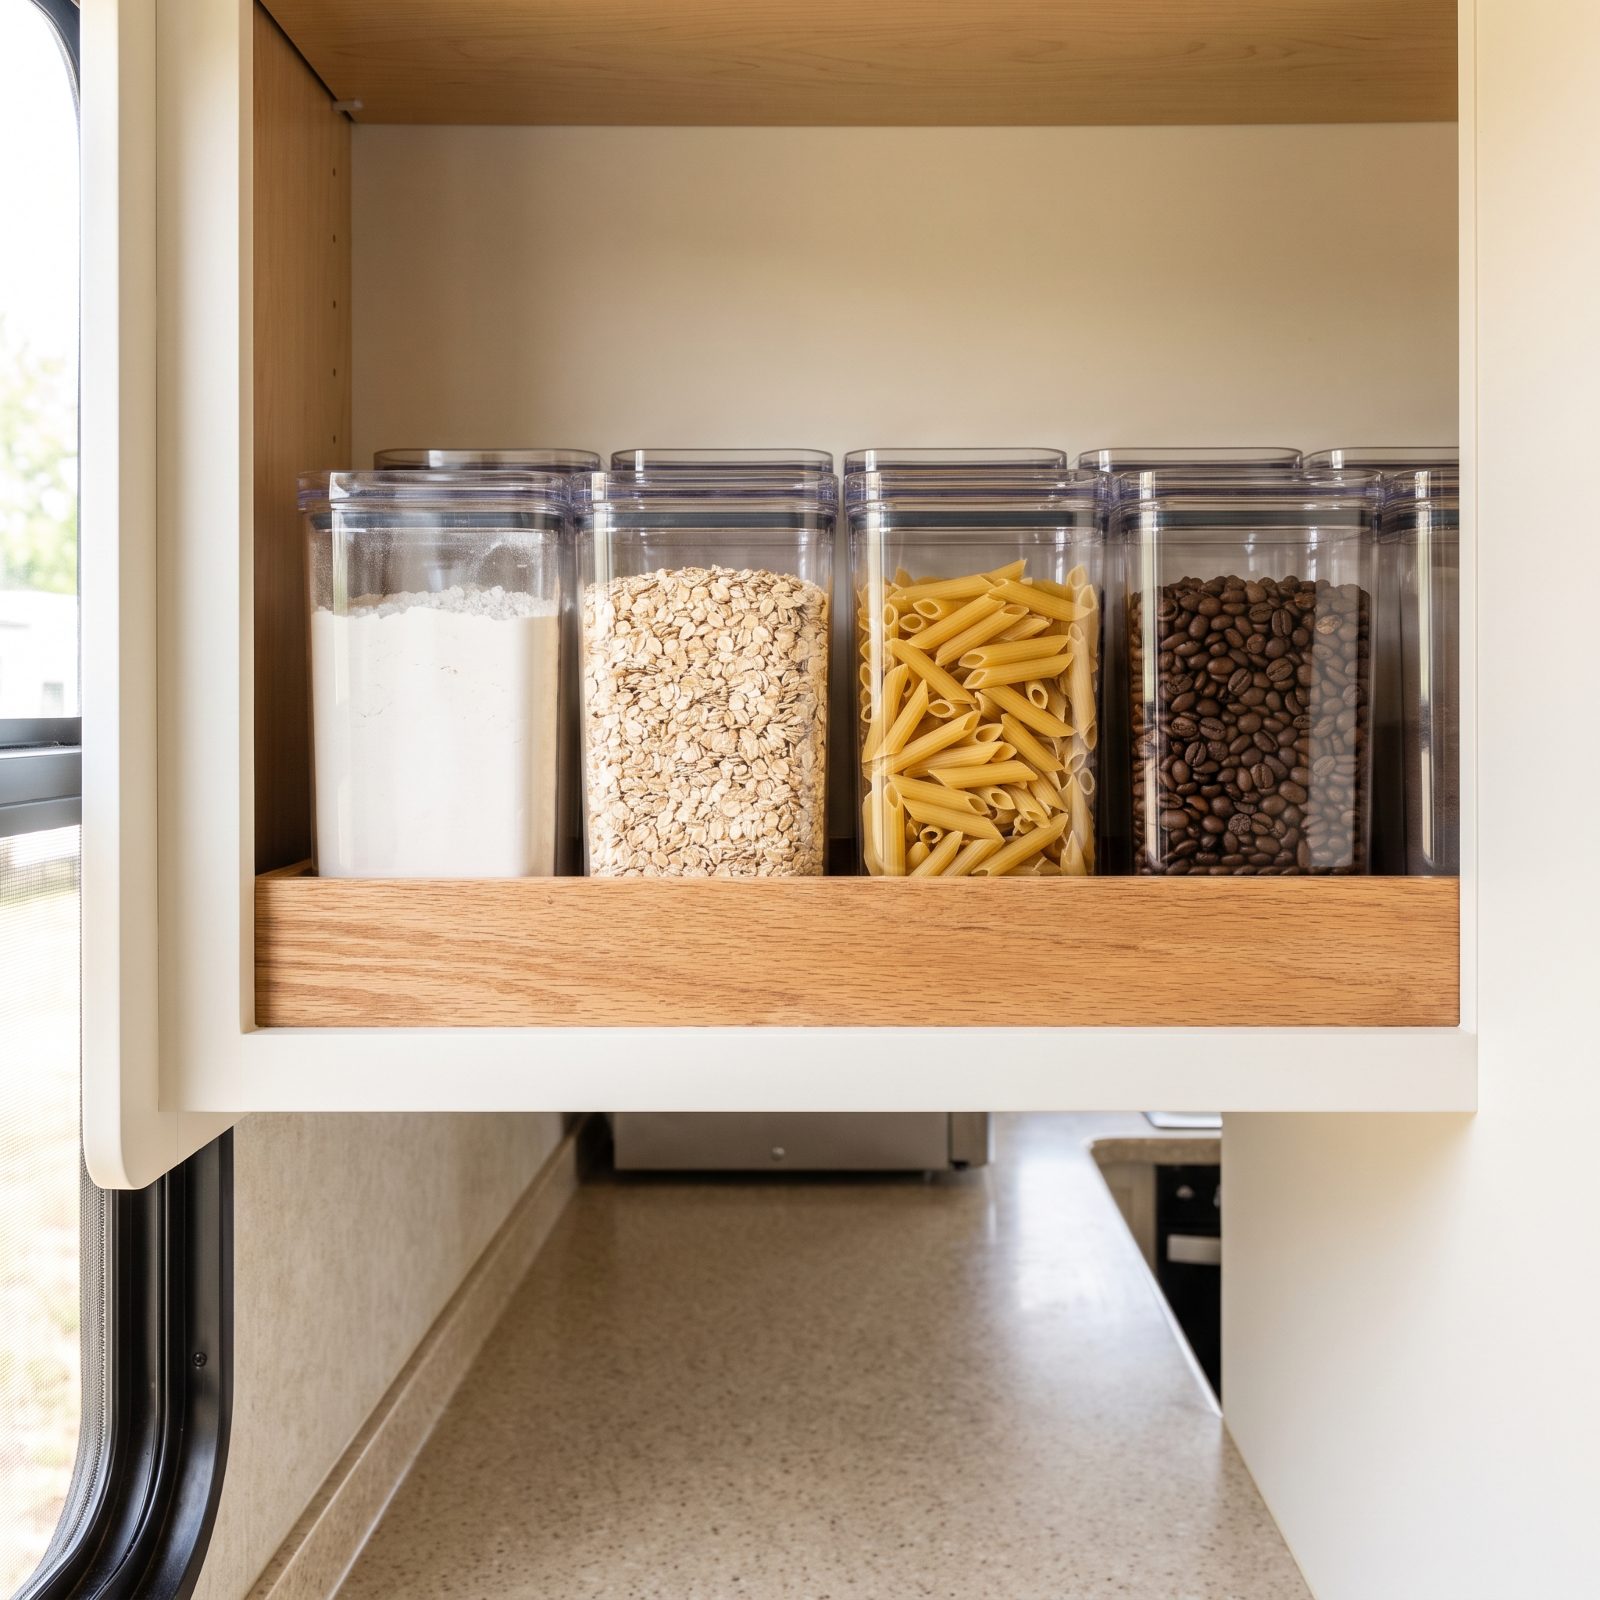
Round containers waste the corners. Line four up on a shelf and you’ve got four little triangles of dead air sitting there doing nothing, while square ones tile together like bricks.
On a 10-inch RV shelf that’s the difference between fitting four jars and fitting six. The airtight lids earn their keep too — nothing stays crisp in a rig that swings between a hot afternoon and a cold night.
25. Install a Pegboard Inside the Pantry Door
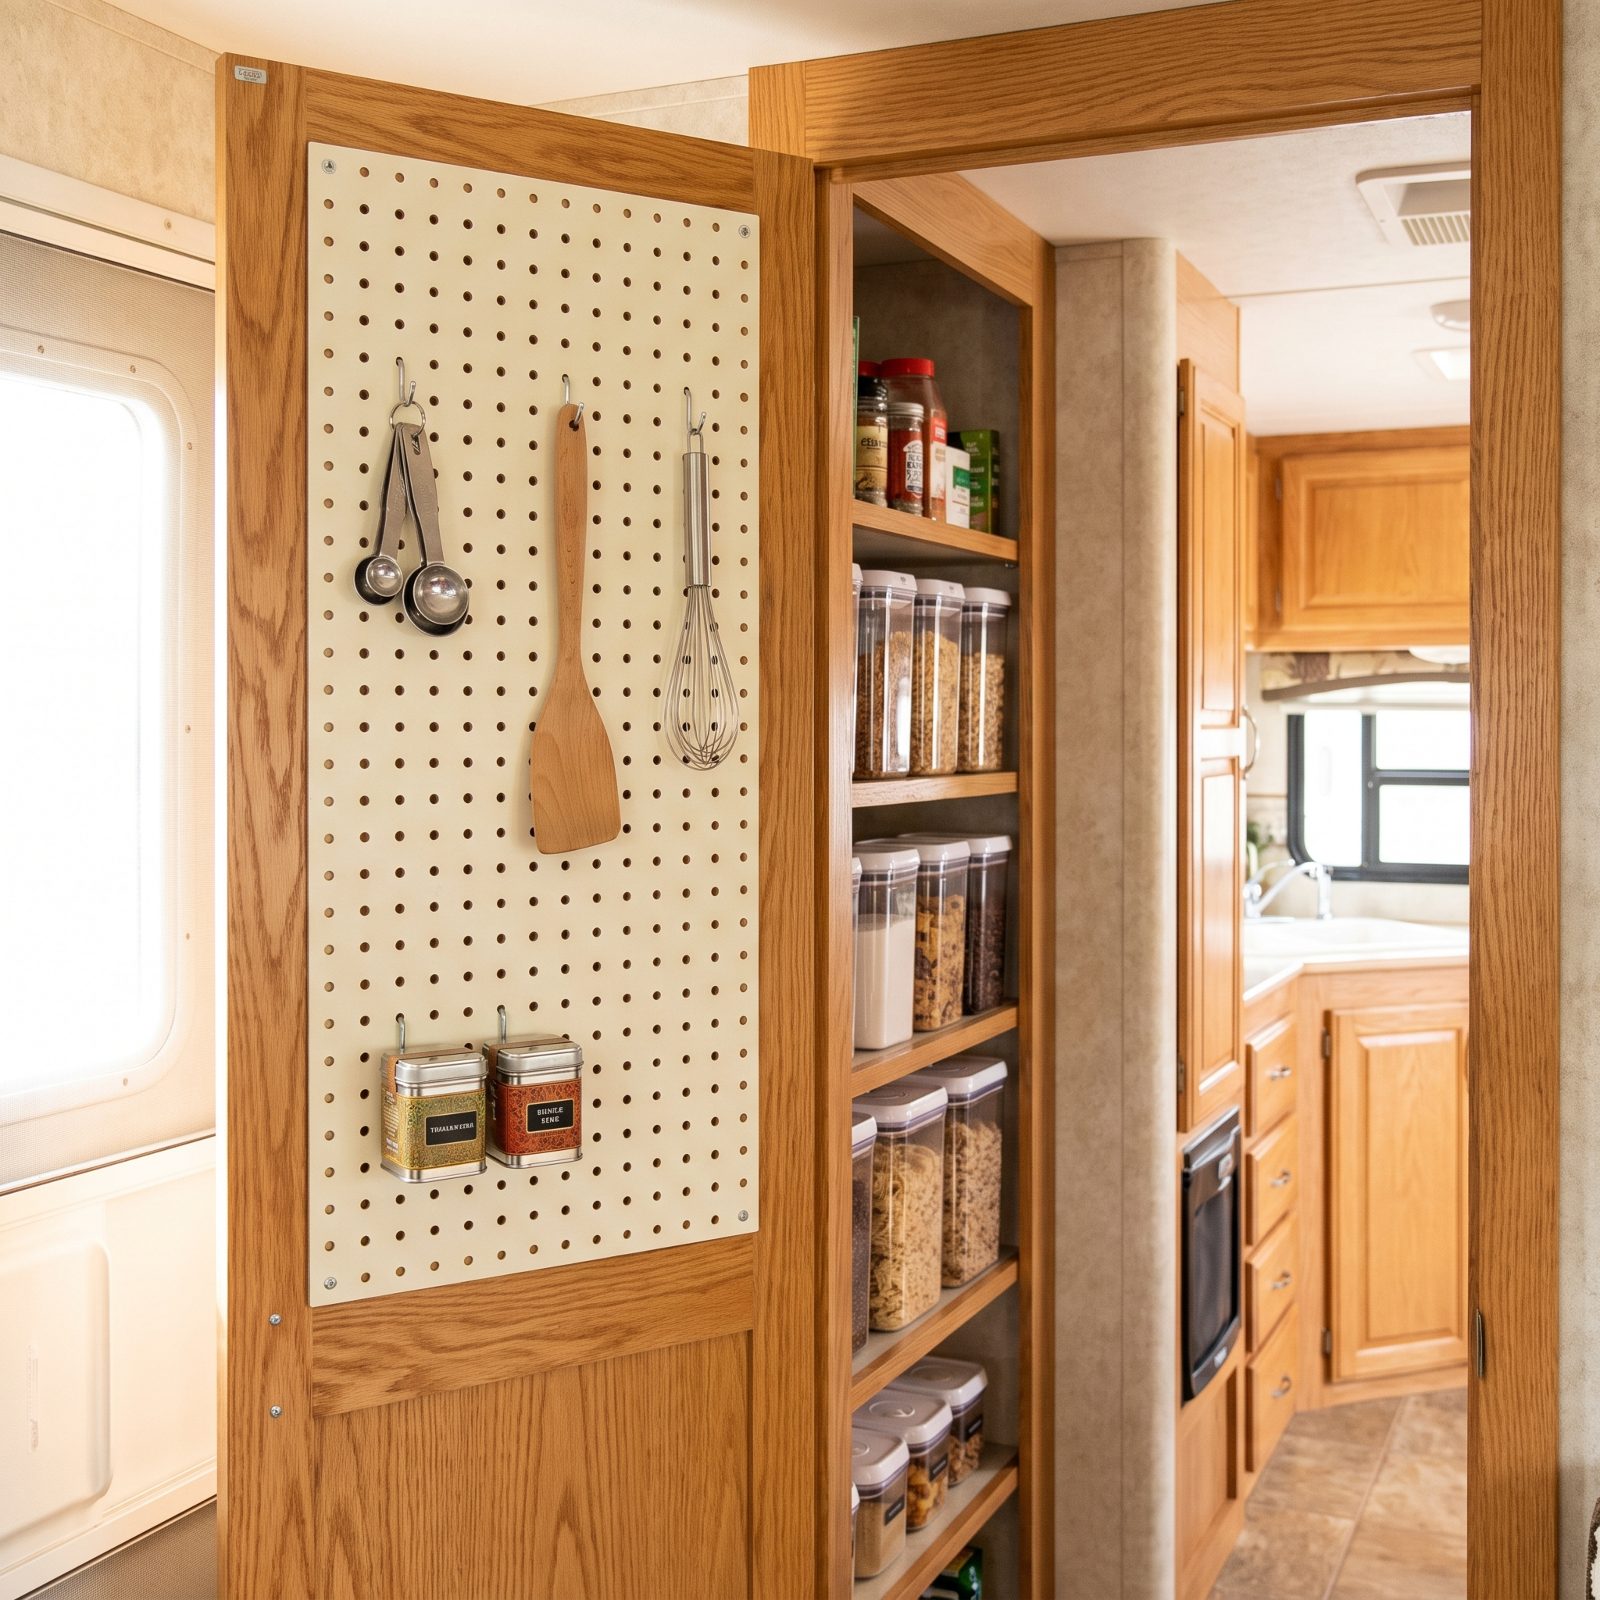
The back of your pantry door is doing nothing right now. Prime real estate, wasted.
Screw a slim pegboard to the inside and it’ll hold measuring spoons, a whisk, a spatula, all the little tools that rattle loose in a drawer. Everything hangs flat so the door still closes clean. You’re basically pulling storage out of thin air.
Use short screws and check what’s on the other side first. Nobody wants a screw tip poking through the front of a cabinet they just paid to finish.
24. Replace Several Countertop Appliances With One Multicooker
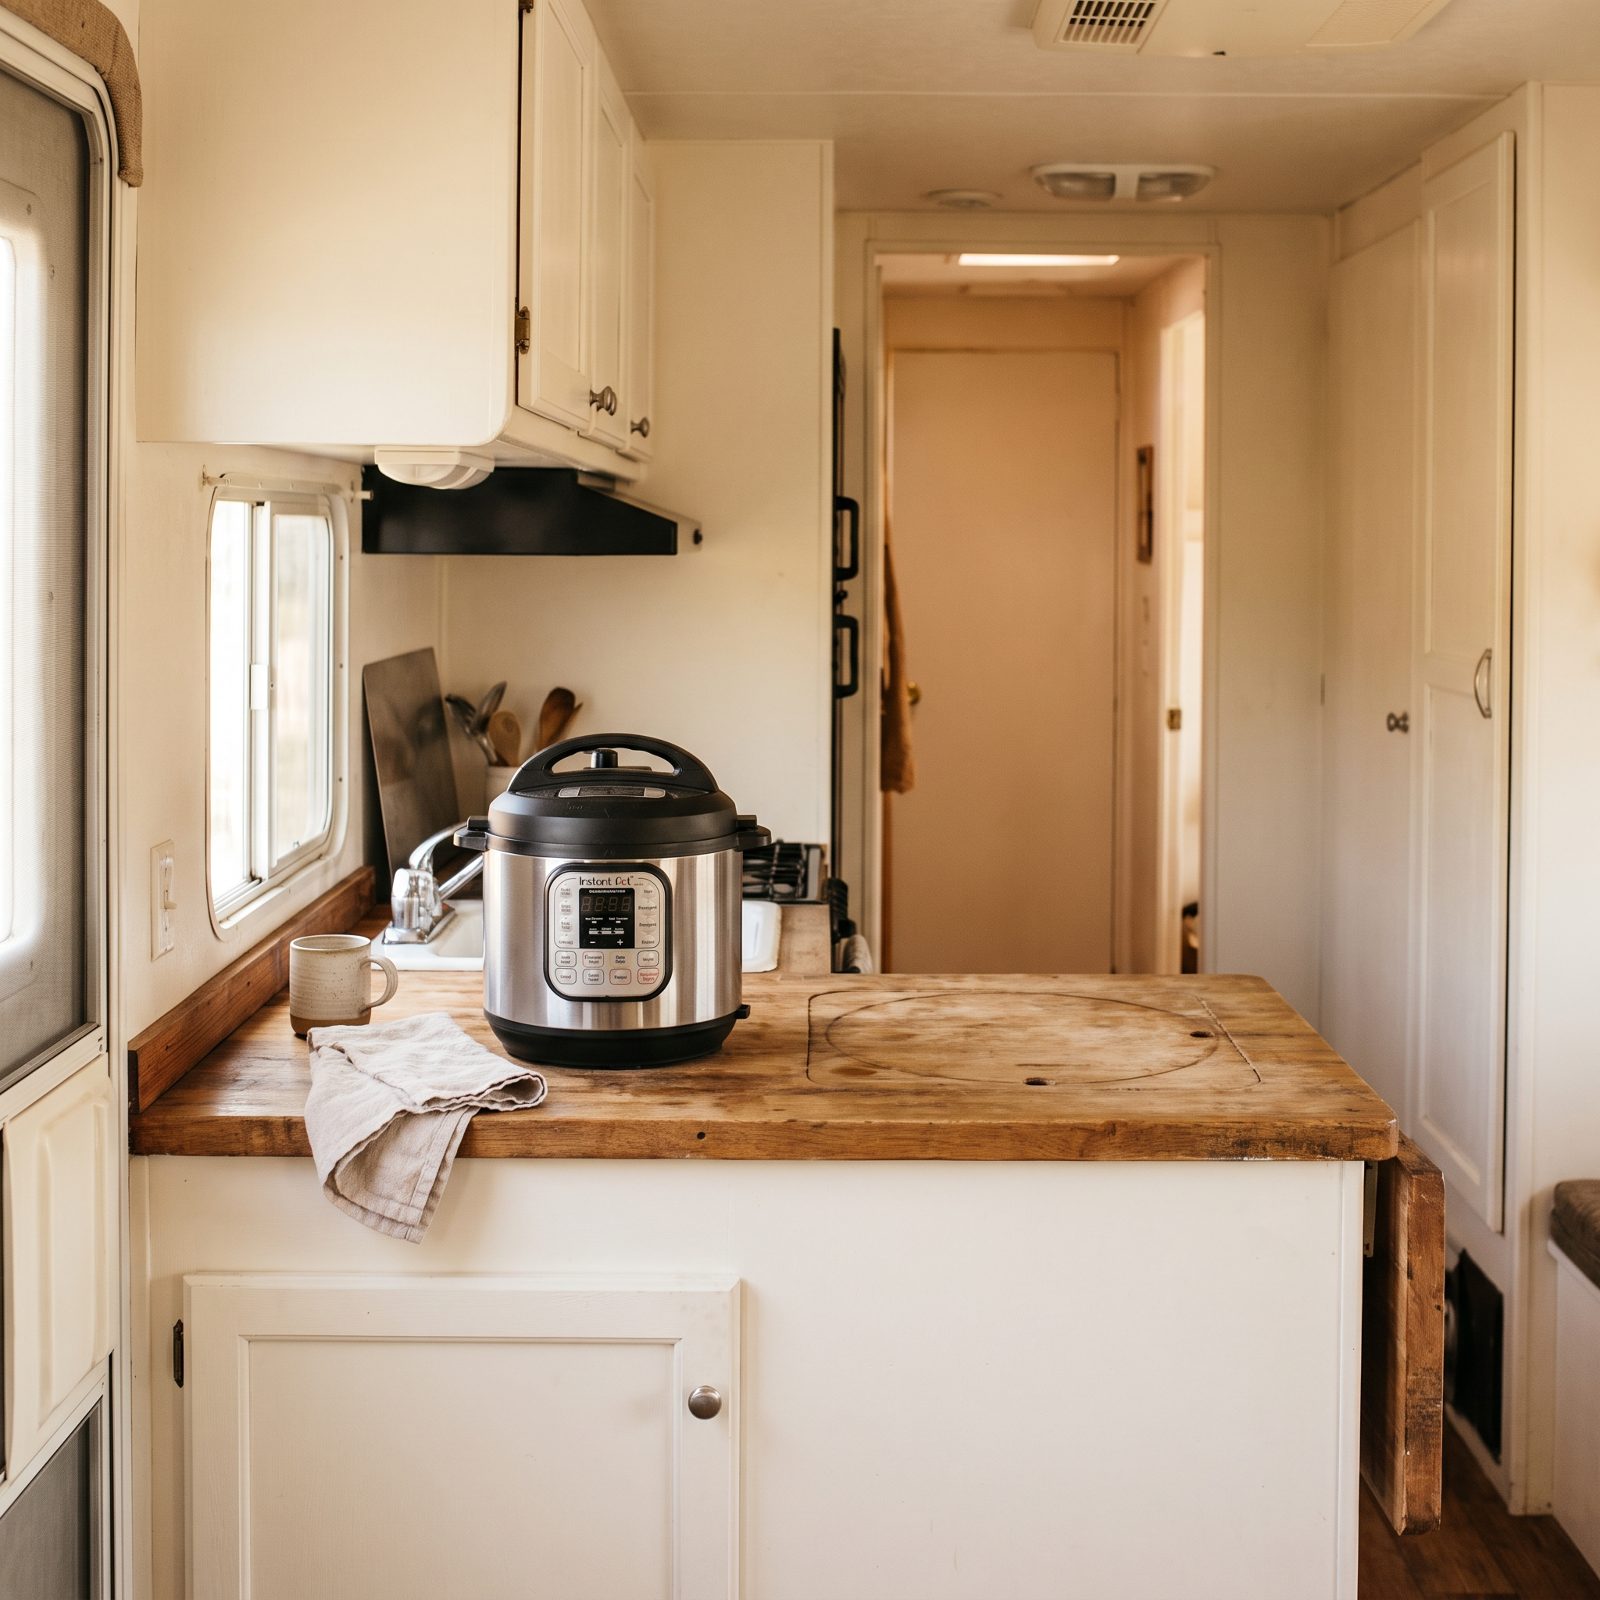
A multicooker does the job of the rice cooker, the slow cooker, the steamer, and the pot you’d otherwise simmer in. One box, four jobs, three fewer things rolling around in a cabinet.
But the real win is counter space. In a galley where the usable counter is about the size of a cutting board, putting even one appliance back into storage changes how the whole kitchen feels to work in. You get room to actually chop something.
23. Choose a Kettle That Collapses Flat
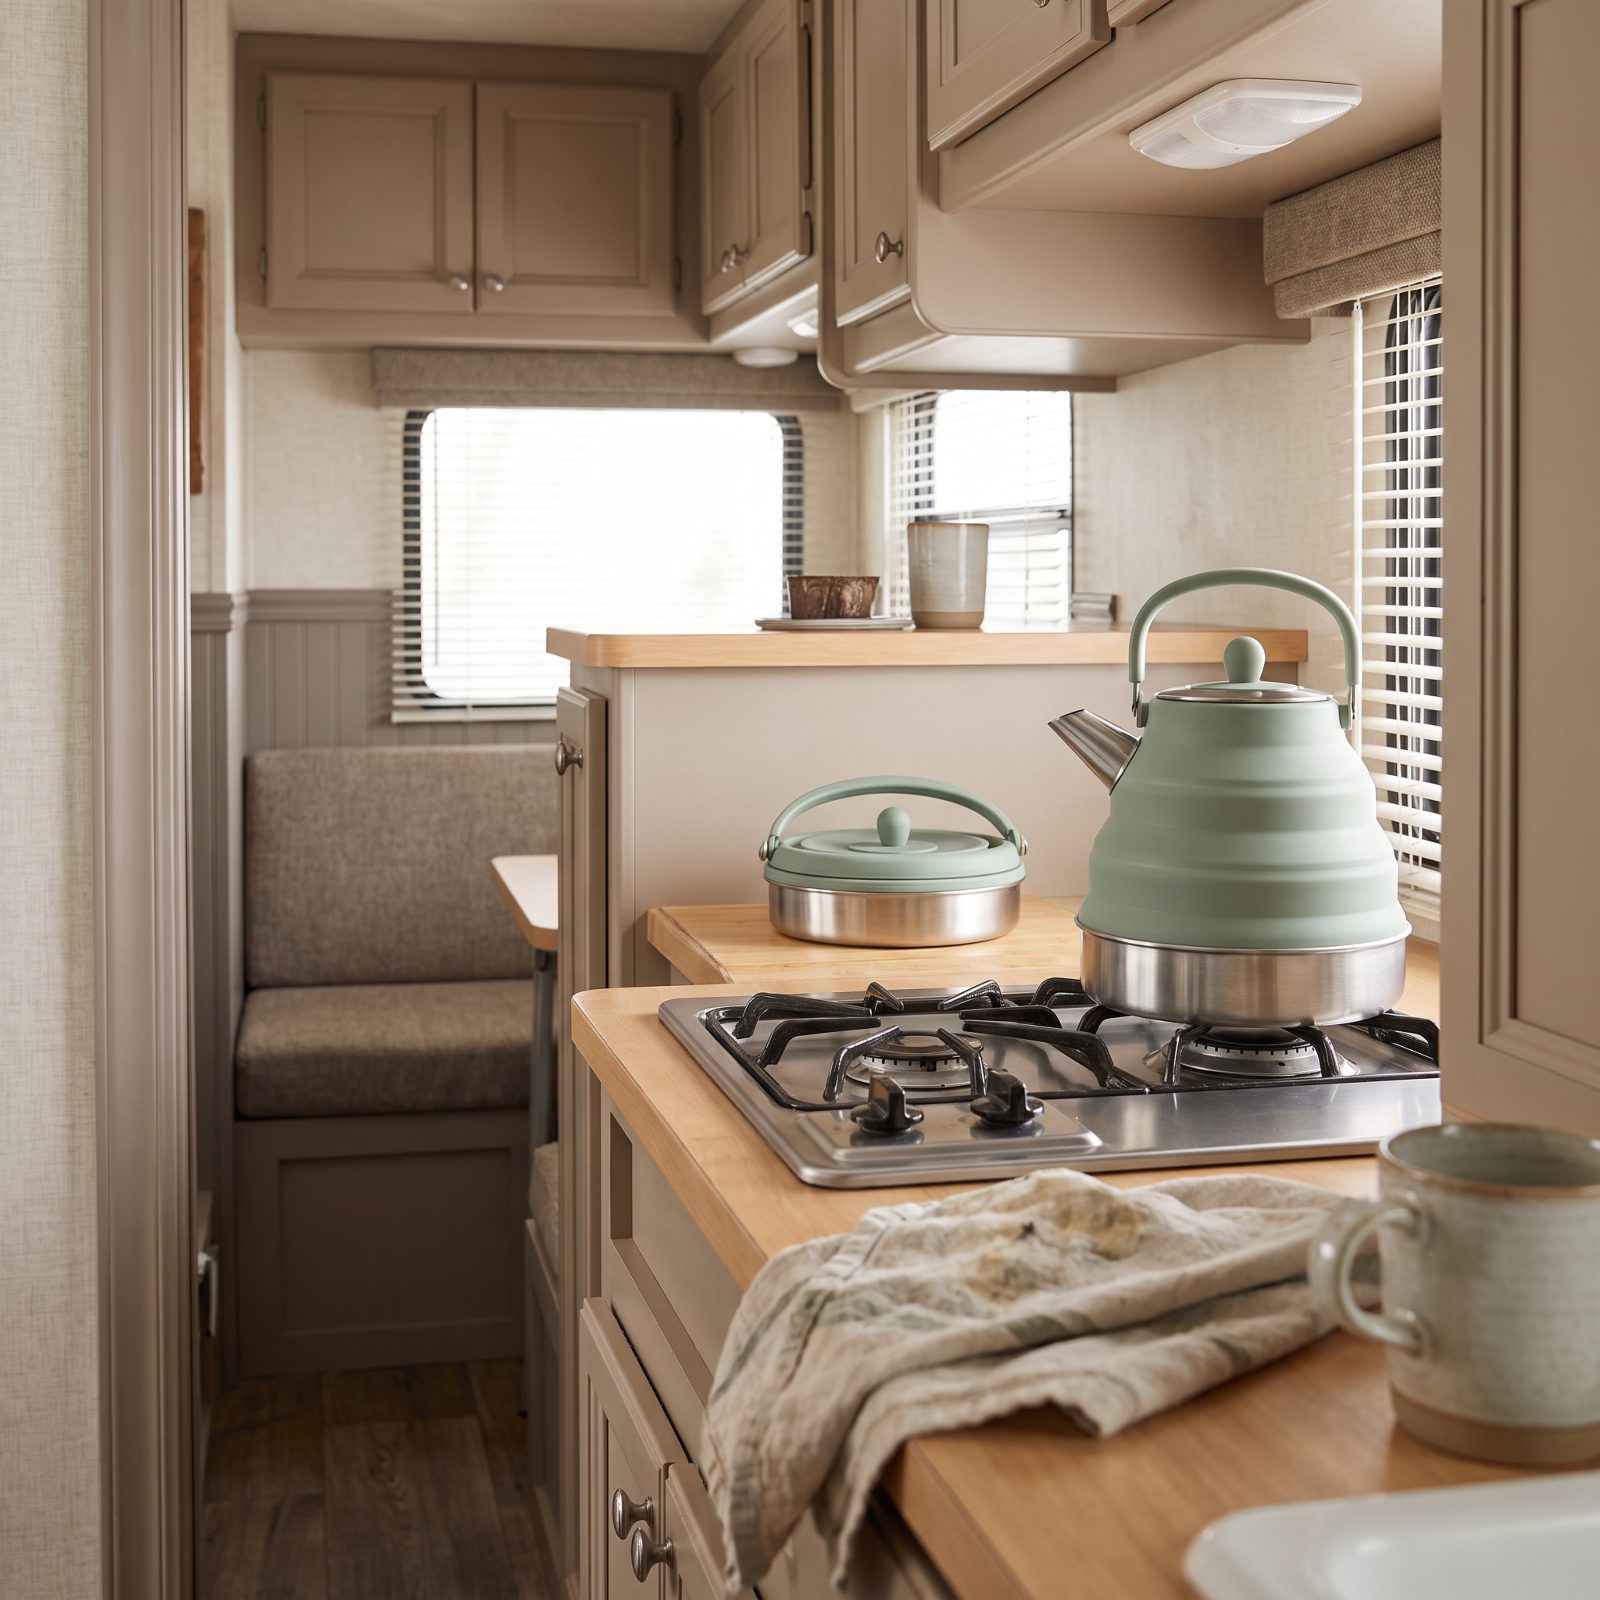
A standard kettle takes up a whole cupboard slot and gives nothing back. A collapsible one folds down to a couple of inches tall and tucks in beside the pans.
Morning coffee, tea, a quick pour-over — it handles all of it. Just buy one with a stainless base instead of full silicone underneath. The all-rubber ones can hold a faint taste no matter how long you boil them. Learned that the hard way with a cheap one.
22. Add a Wall-Mounted Coffee Station
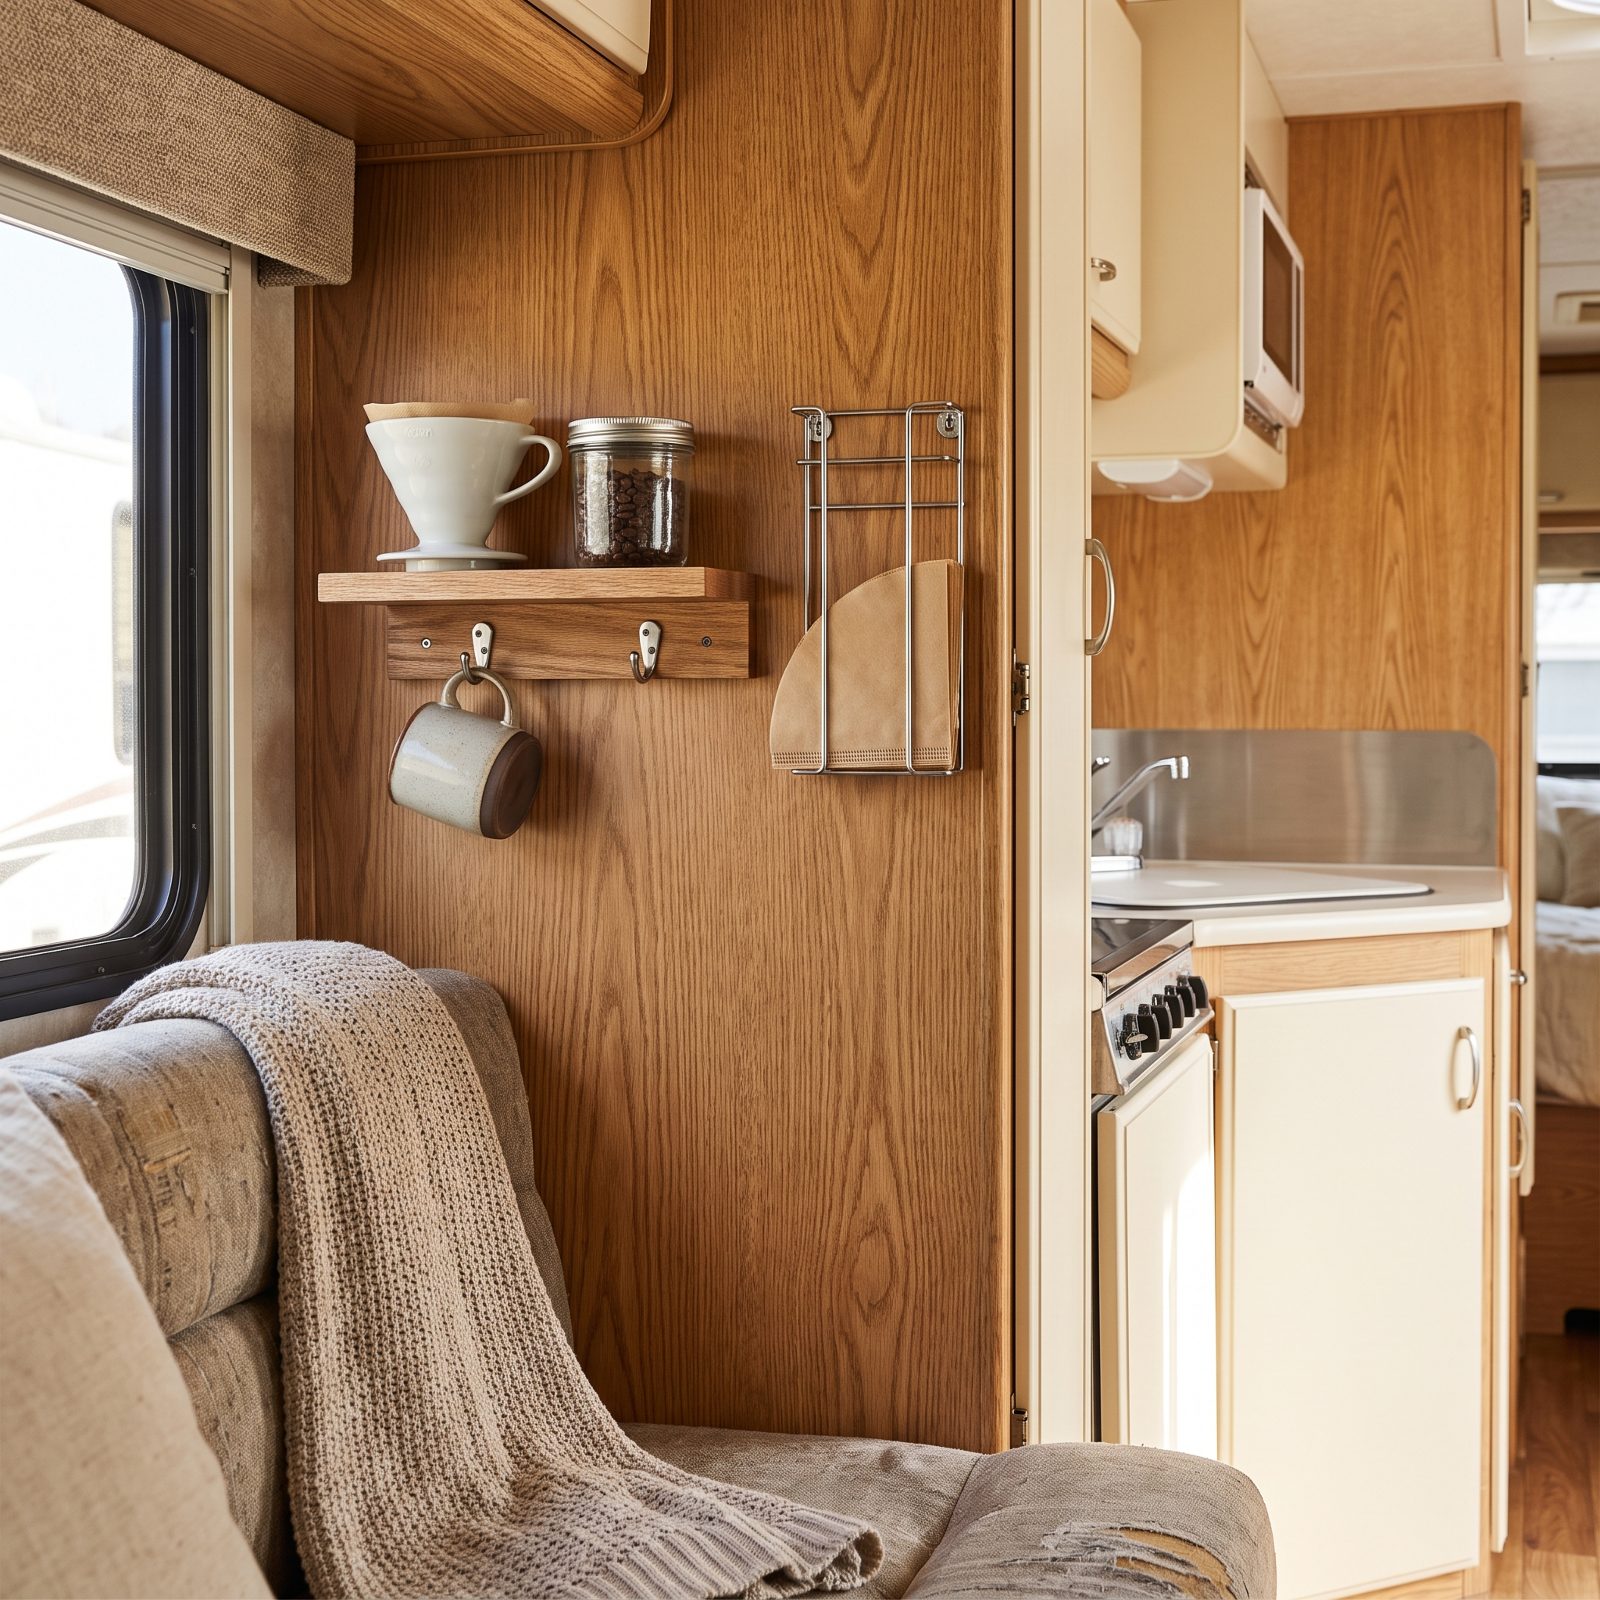
Coffee gear multiplies. The beans, the grinder, the filters, the mug, the dripper — all of it ends up sprawled across a counter you don’t have.
Mount it on the wall instead. A narrow shelf plus two mug hooks pulls the whole operation off your workspace and turns a bare patch of wall into the most-used corner of the rig.
And the quiet payoff: a defined station means you stop hunting for the grounds scoop every single morning. It’s always right there.
21. Store the Trash Can in a Sliding Cabinet Drawer
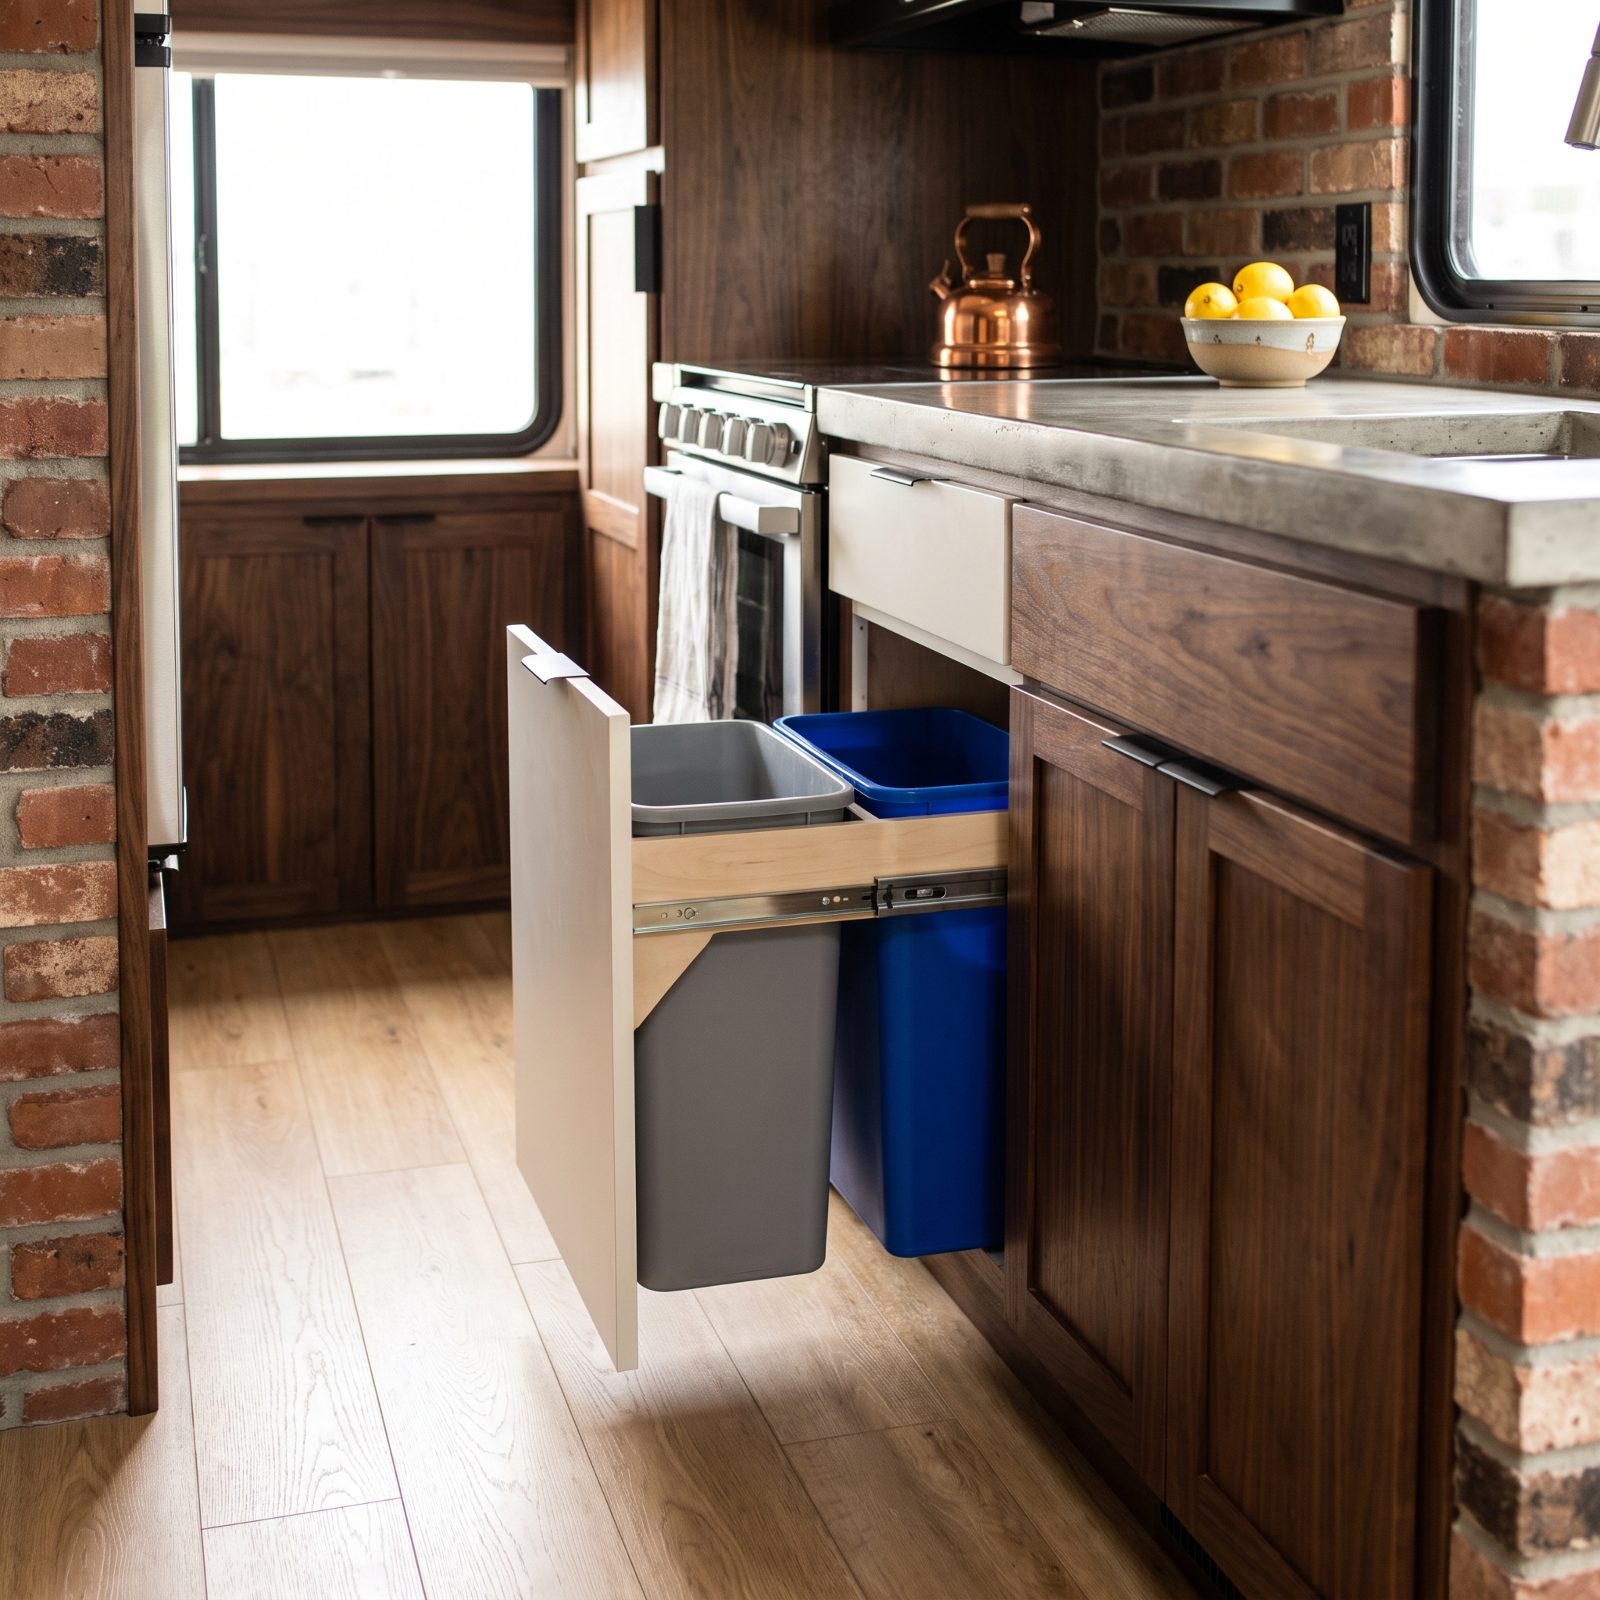
A freestanding trash can in an RV is a trip hazard and a floor hog, and it tips over the first time you brake hard.
Put it on a slide-out instead. A pull-out drawer mounted inside a lower cabinet hides the bin, frees the floor, and keeps the smell behind a door where it belongs. Fit a slim one, or two if you want recycling alongside. The galley floor is the one surface you can’t afford to lose, and this hands it back.
20. Replace Dark Cabinet Fronts With a Light Matte Finish
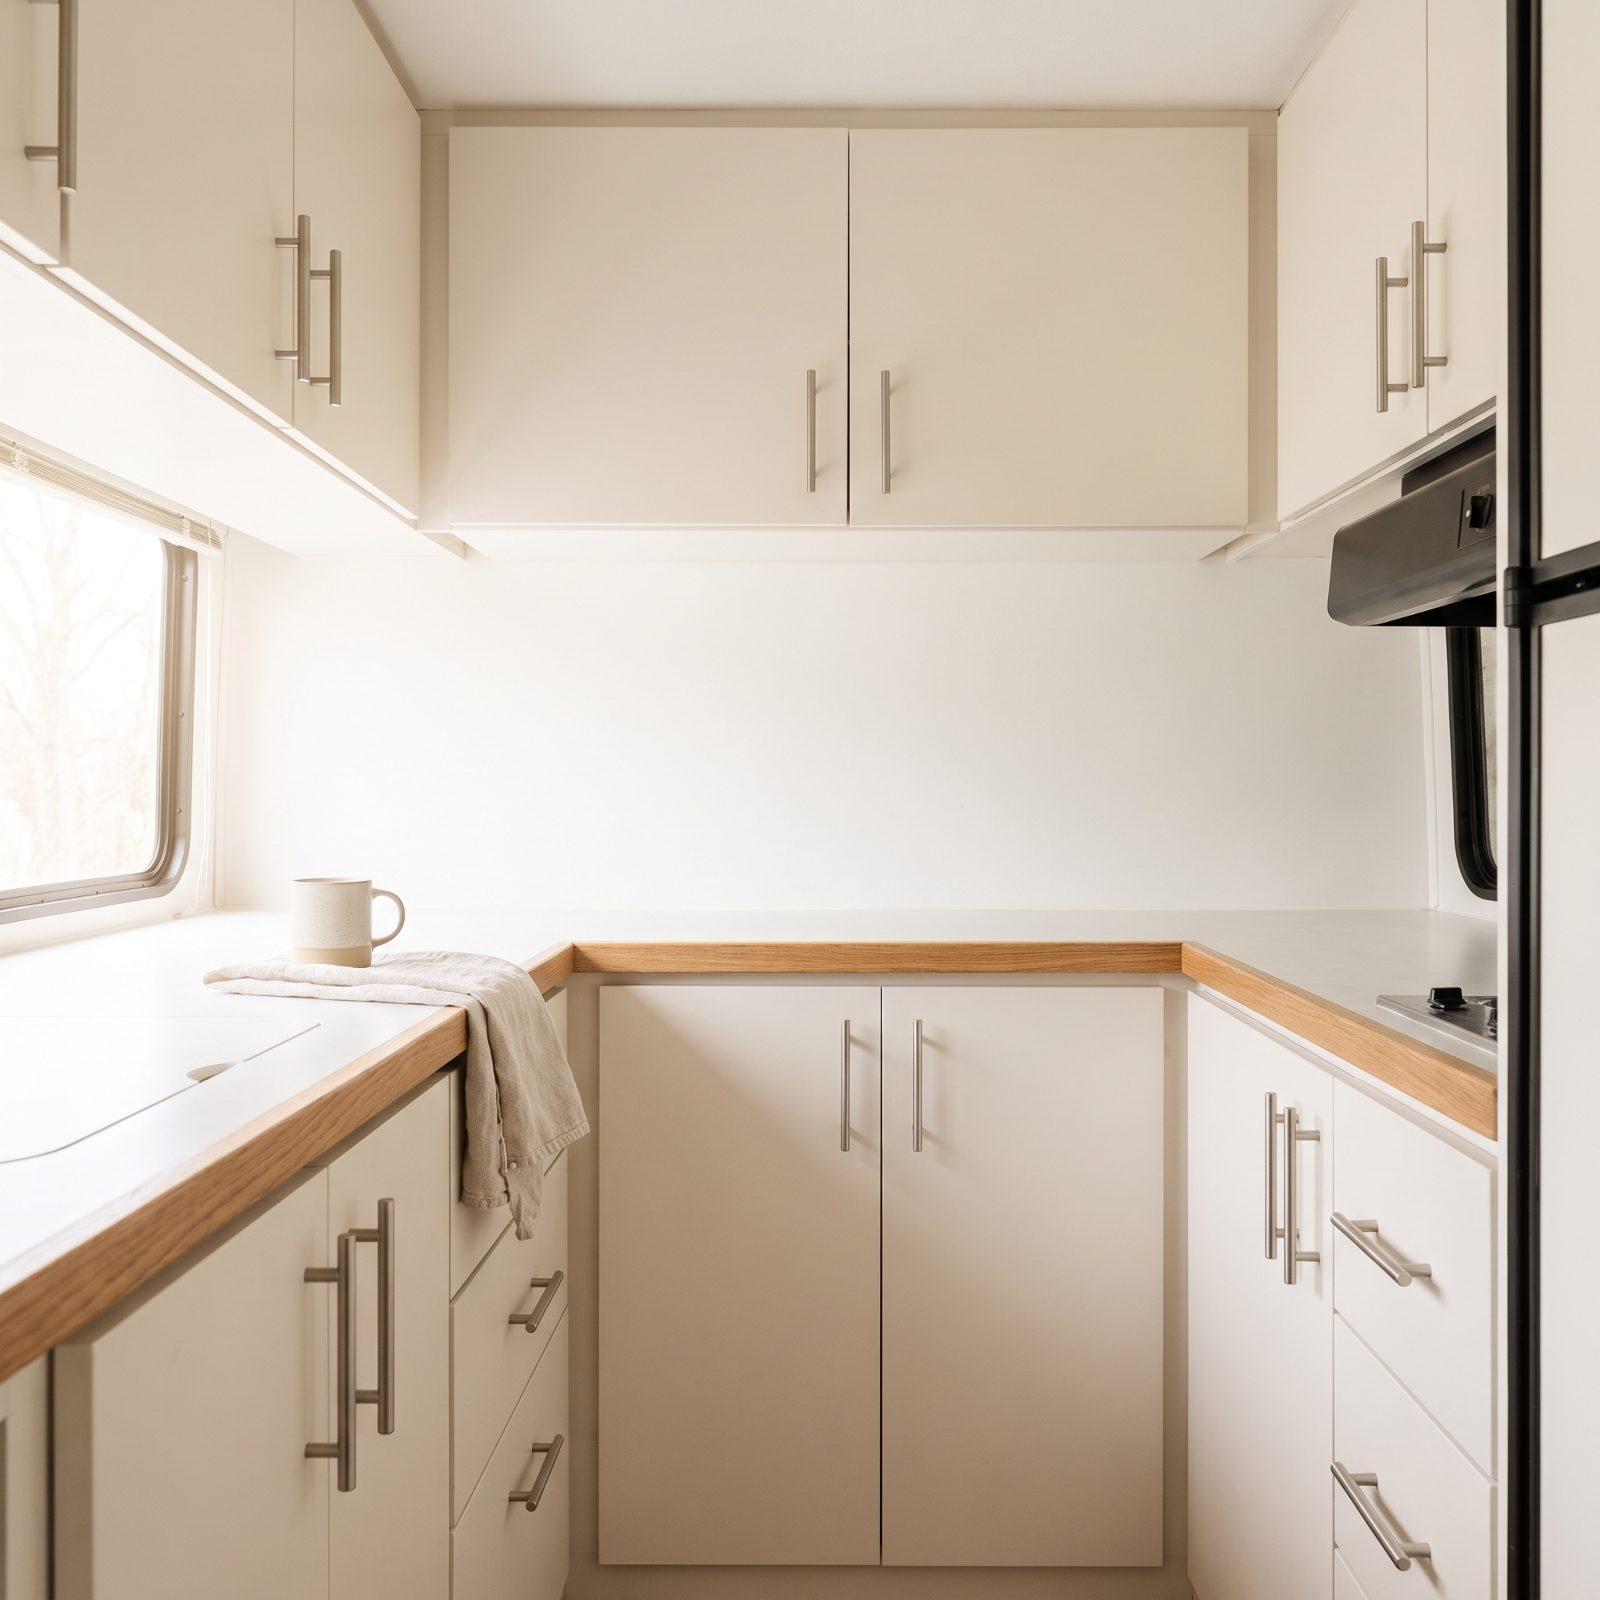
Most older rigs came wrapped in dark wood tones that swallow every bit of light. In a space this tight, it reads as a cave.
Switch the fronts to a light matte finish and the whole galley opens up. Not literally bigger — but your eye stops hitting a wall of brown and the room feels like it has air in it. Go matte over gloss, because gloss shows every greasy thumbprint from cooking.
19. Install One Continuous Mirrored Backsplash to Reflect the Galley
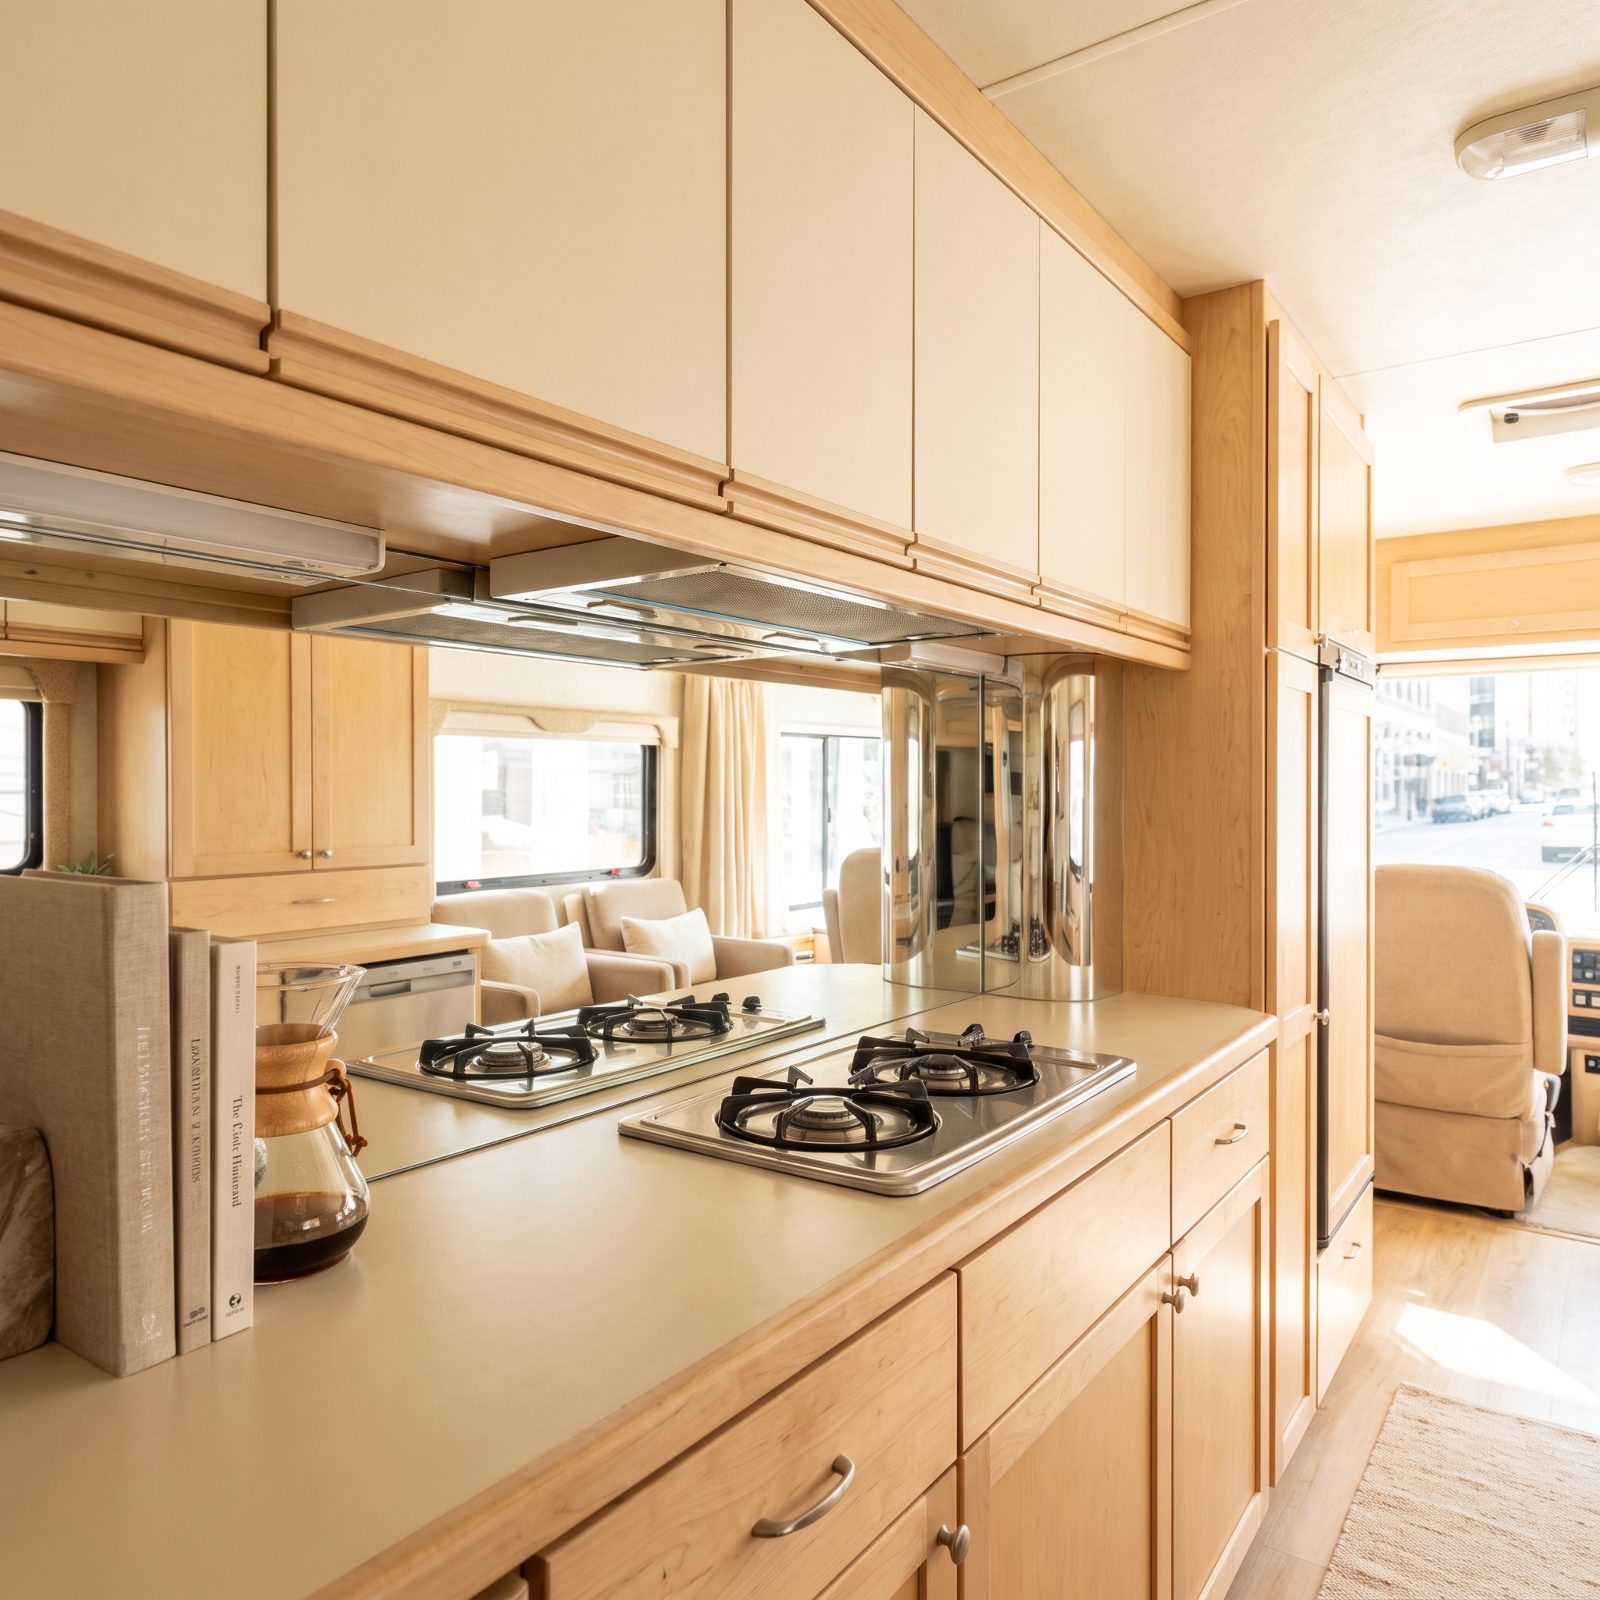
A mirror doesn’t make a room bigger. It makes your eye think it is, and in a galley that’s close enough.
Run one continuous mirrored strip behind the counter and it throws back the opposite wall, the window, the light, all of it. Suddenly there’s depth where a flat panel used to sit a foot from your nose.
Fair warning: you’ll see every splatter. Mirror shows grease like nothing else, so this only works if you’re willing to wipe it down. If you cook messy and clean never, skip it. No judgment.
18. Run LED Strip Lighting Beneath Every Upper Cabinet
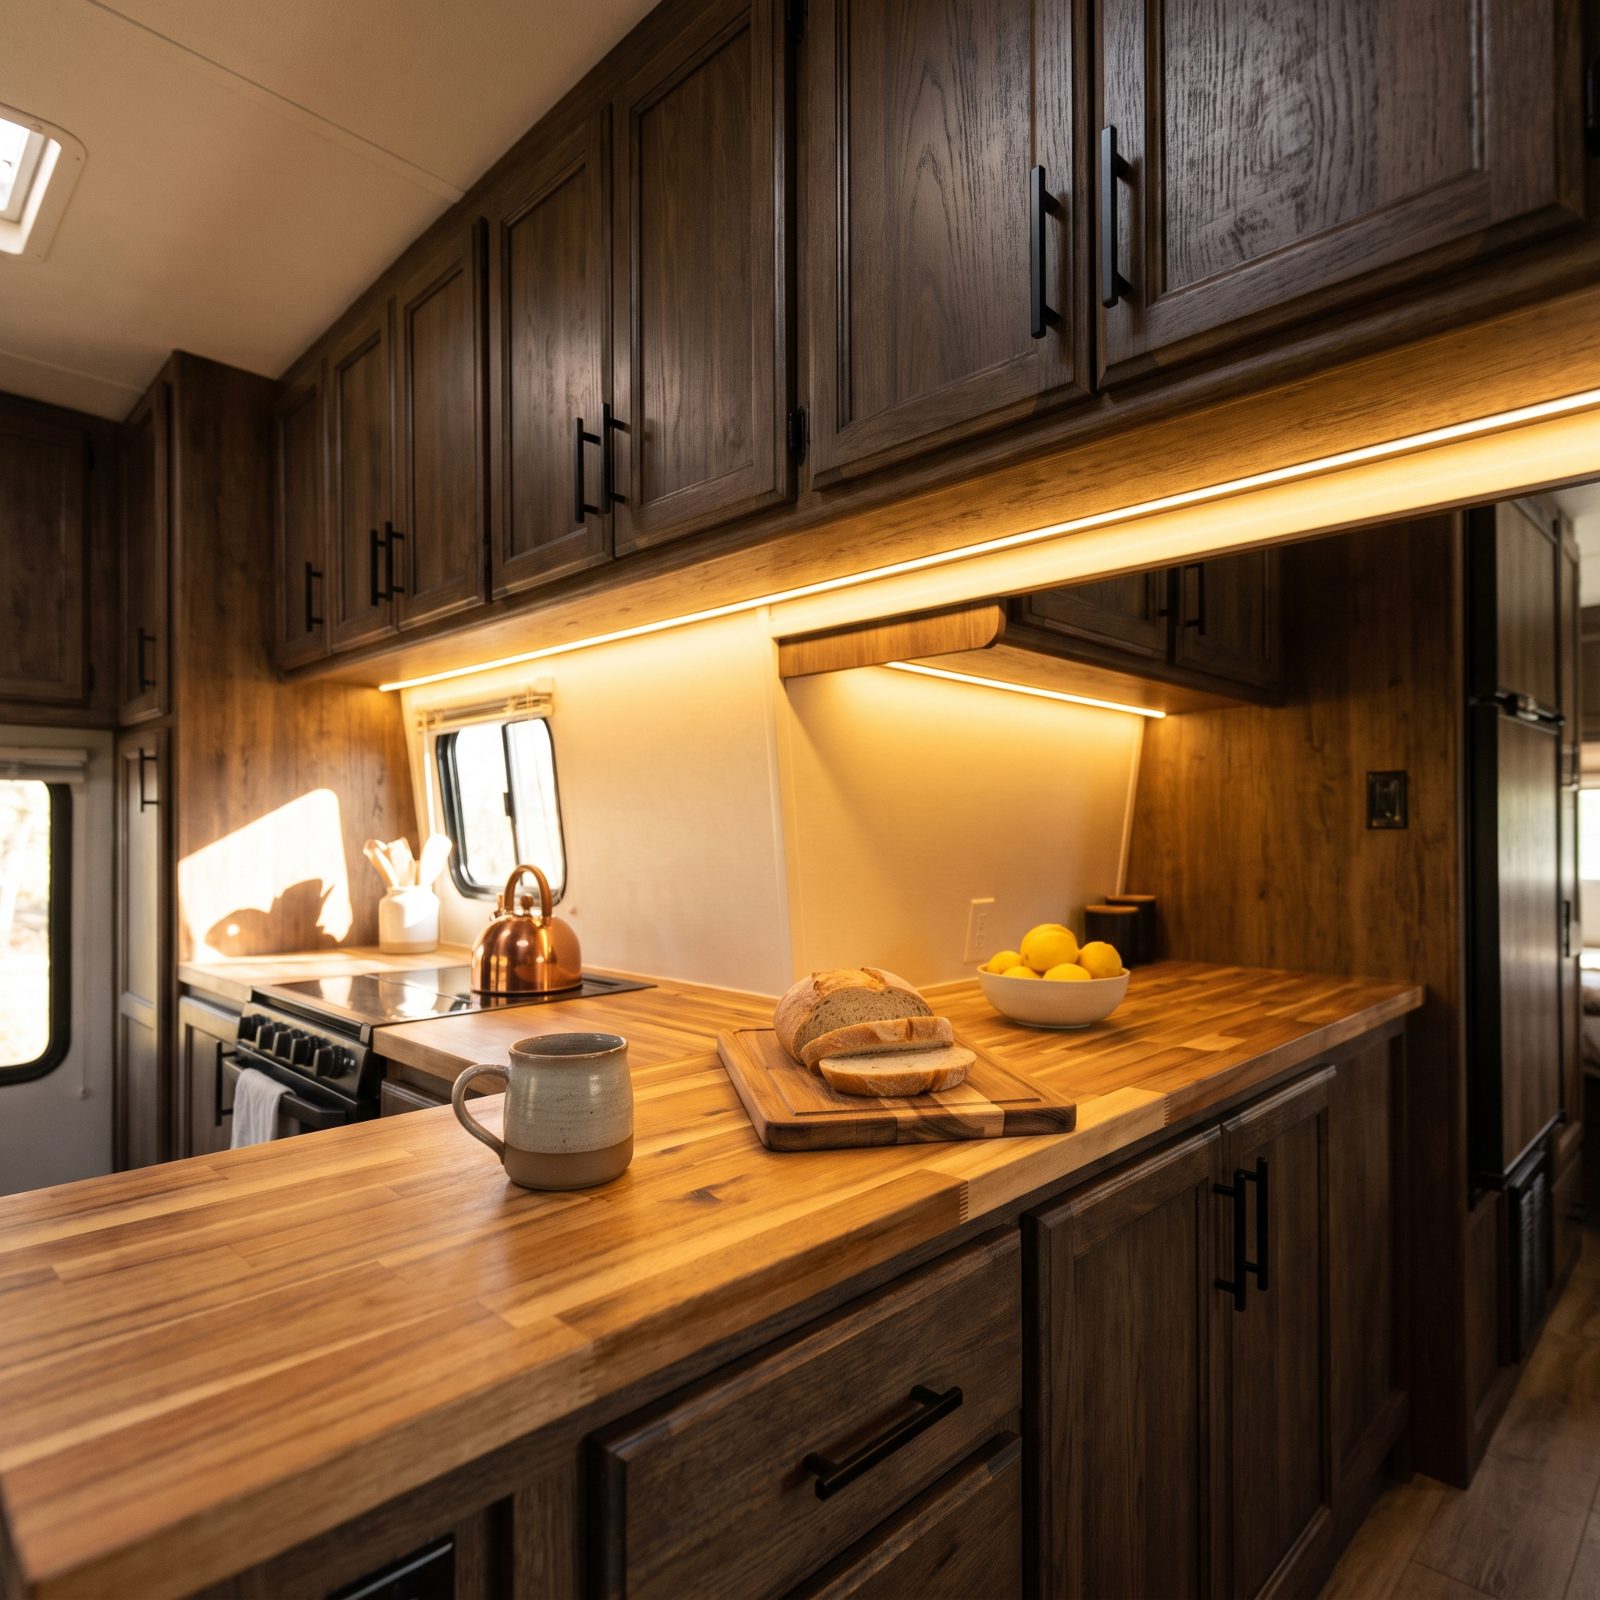
The overhead light in most RVs sits behind you when you’re at the counter, so you end up chopping in your own shadow. Annoying every single time.
Stick an LED strip under the upper cabinets and the counter lights itself — no shadows, no squinting. A warm-white strip (around 2700K to 3000K) keeps the galley feeling cozy instead of operating-room cold. They run off 12V, draw almost nothing, and the peel-and-stick kind go up in an afternoon.
Best cheap upgrade on this whole list. The space doesn’t just look bigger. It finally looks finished.
17. Swap the Heavy Valance for a Minimal Roller Shade
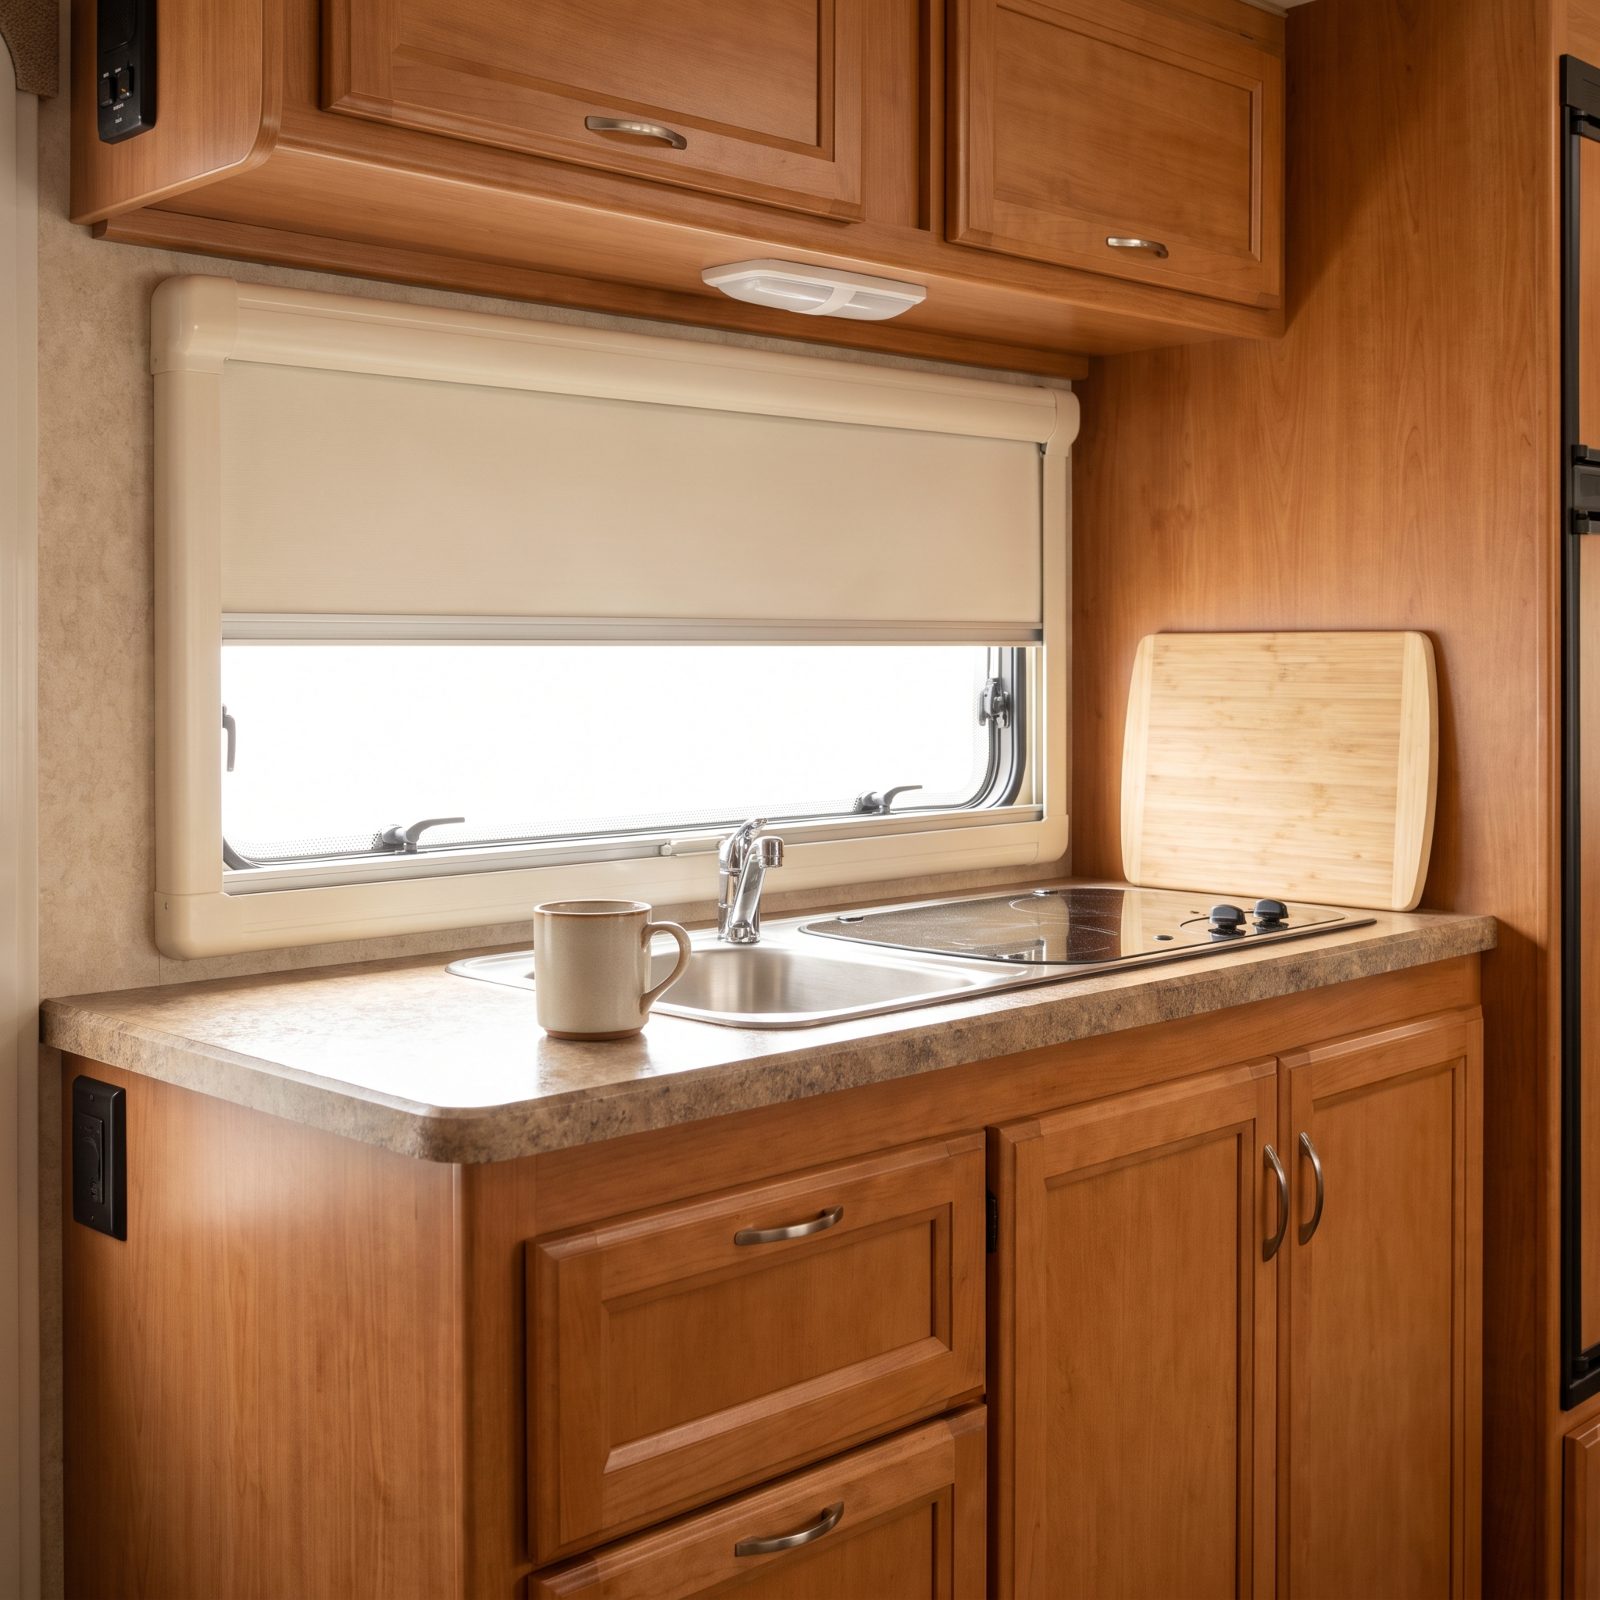
That pleated fabric valance is stealing light and inches you didn’t know you had. Most RV valances hang four to six inches below the window frame, cutting off daylight right where you prep food. A flat roller shade mounts tight to the top and rolls up into almost nothing.
The galley reads taller the second the fabric is gone. Pick a light cream roller shade, or go with a cordless blackout roller shade if you boondock and want real darkness. Cordless earns its keep. A dangling pull chain in a moving rig is a swinging annoyance by day two.
16. Trade the Opaque Divider for a Clear Splash Guard
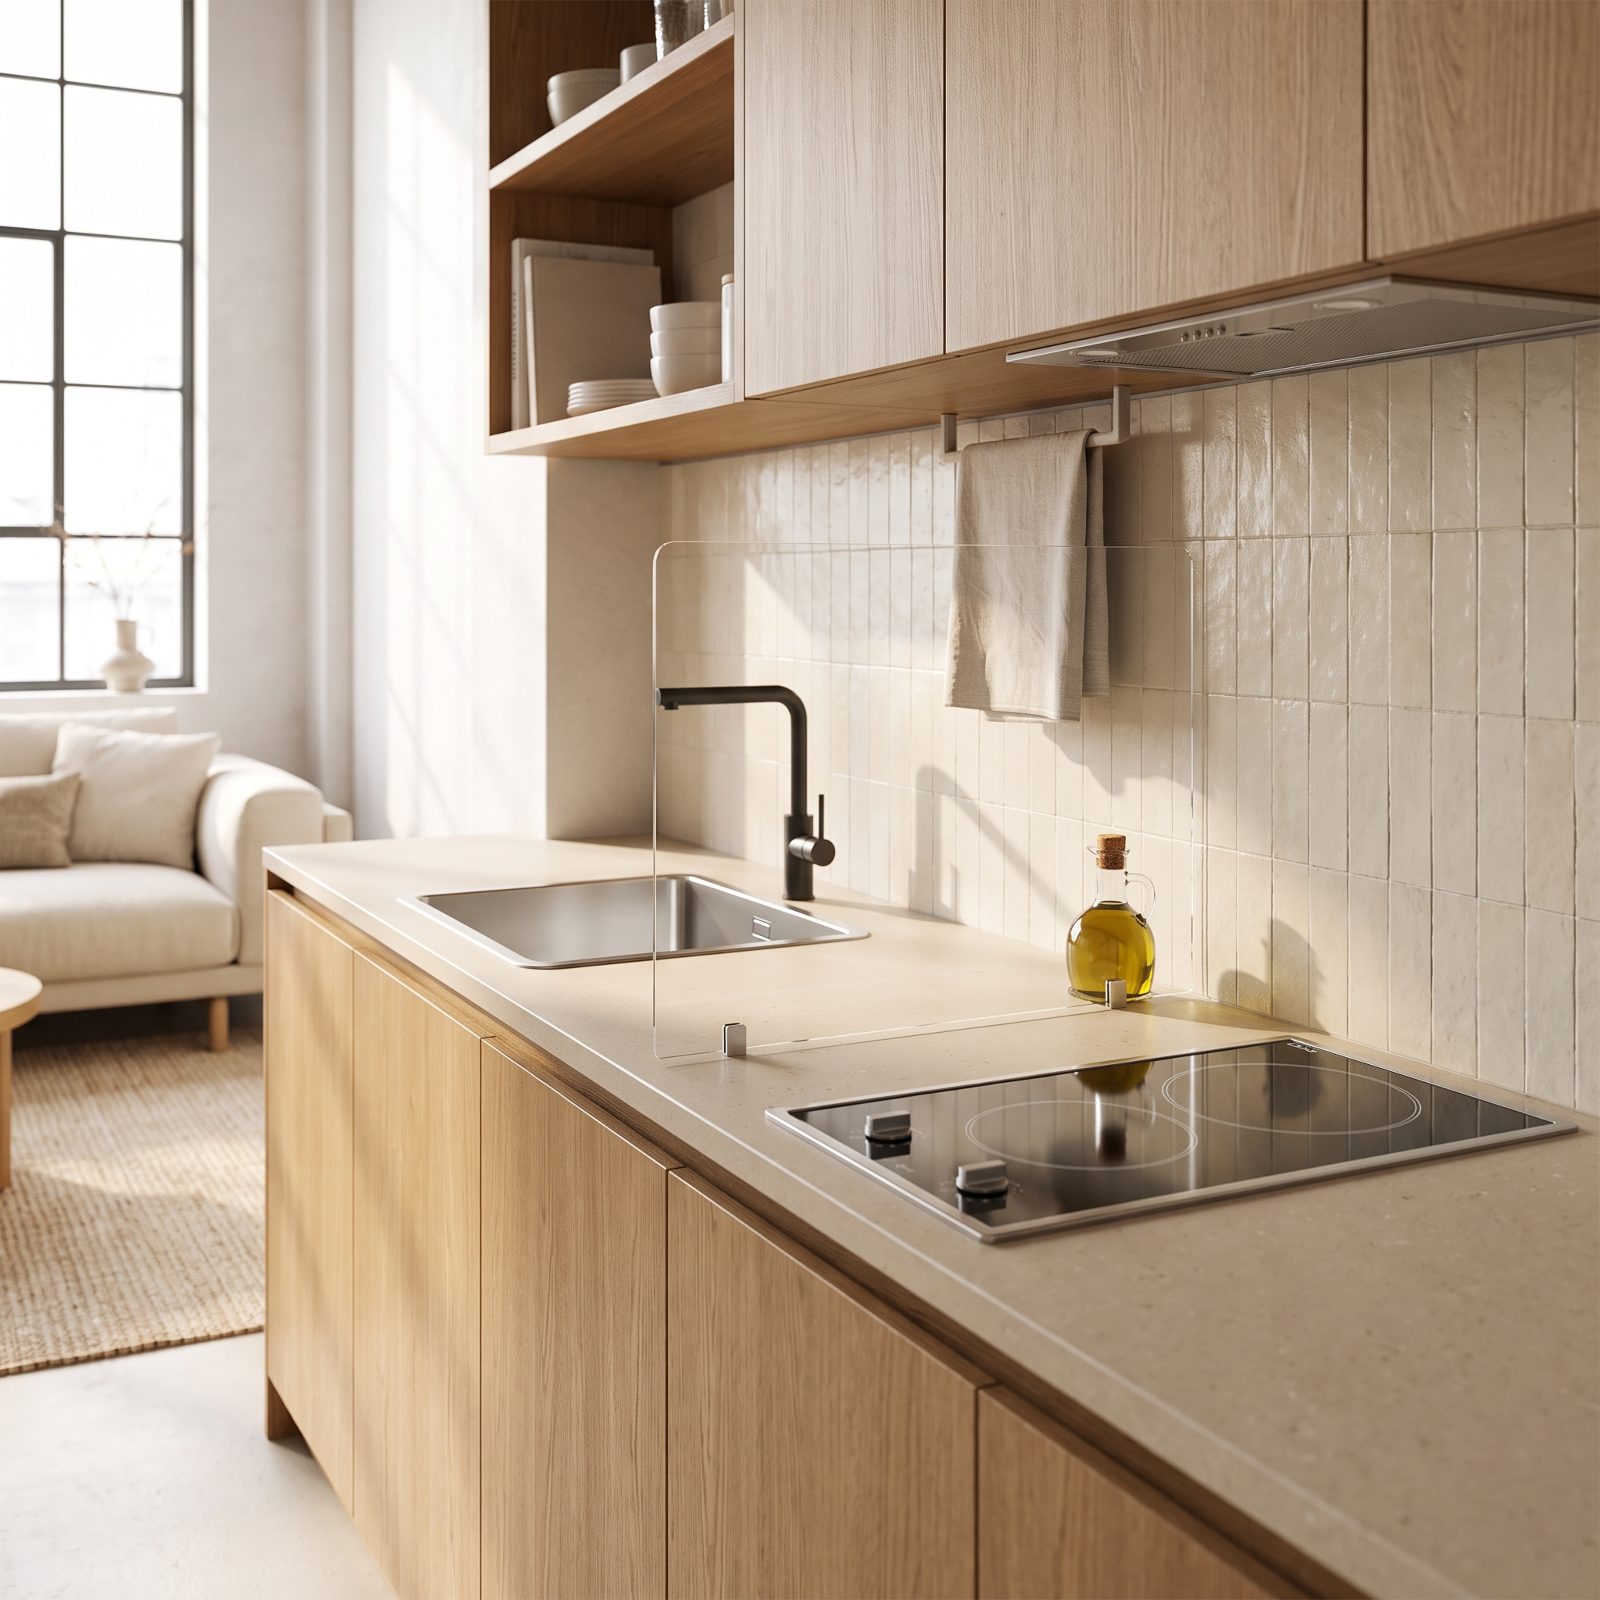
A solid divider between your sink and cooktop does one honest job: it blocks splatter. It also chops a tiny counter into two even tinier counters and throws a shadow across both.
A clear acrylic splash guard protects the same way without the visual wall. Light travels through it, and so does your eye. The run reads as one continuous surface instead of two cramped zones. A simple clear acrylic splash guard costs a few dollars and wipes clean with one pass. I kept the old panel for a full season purely because it “came with the rig.” Bad reason to keep anything.
15. Swap the Bulky Faucet and Sprayer for a Slim Pull-Out Model
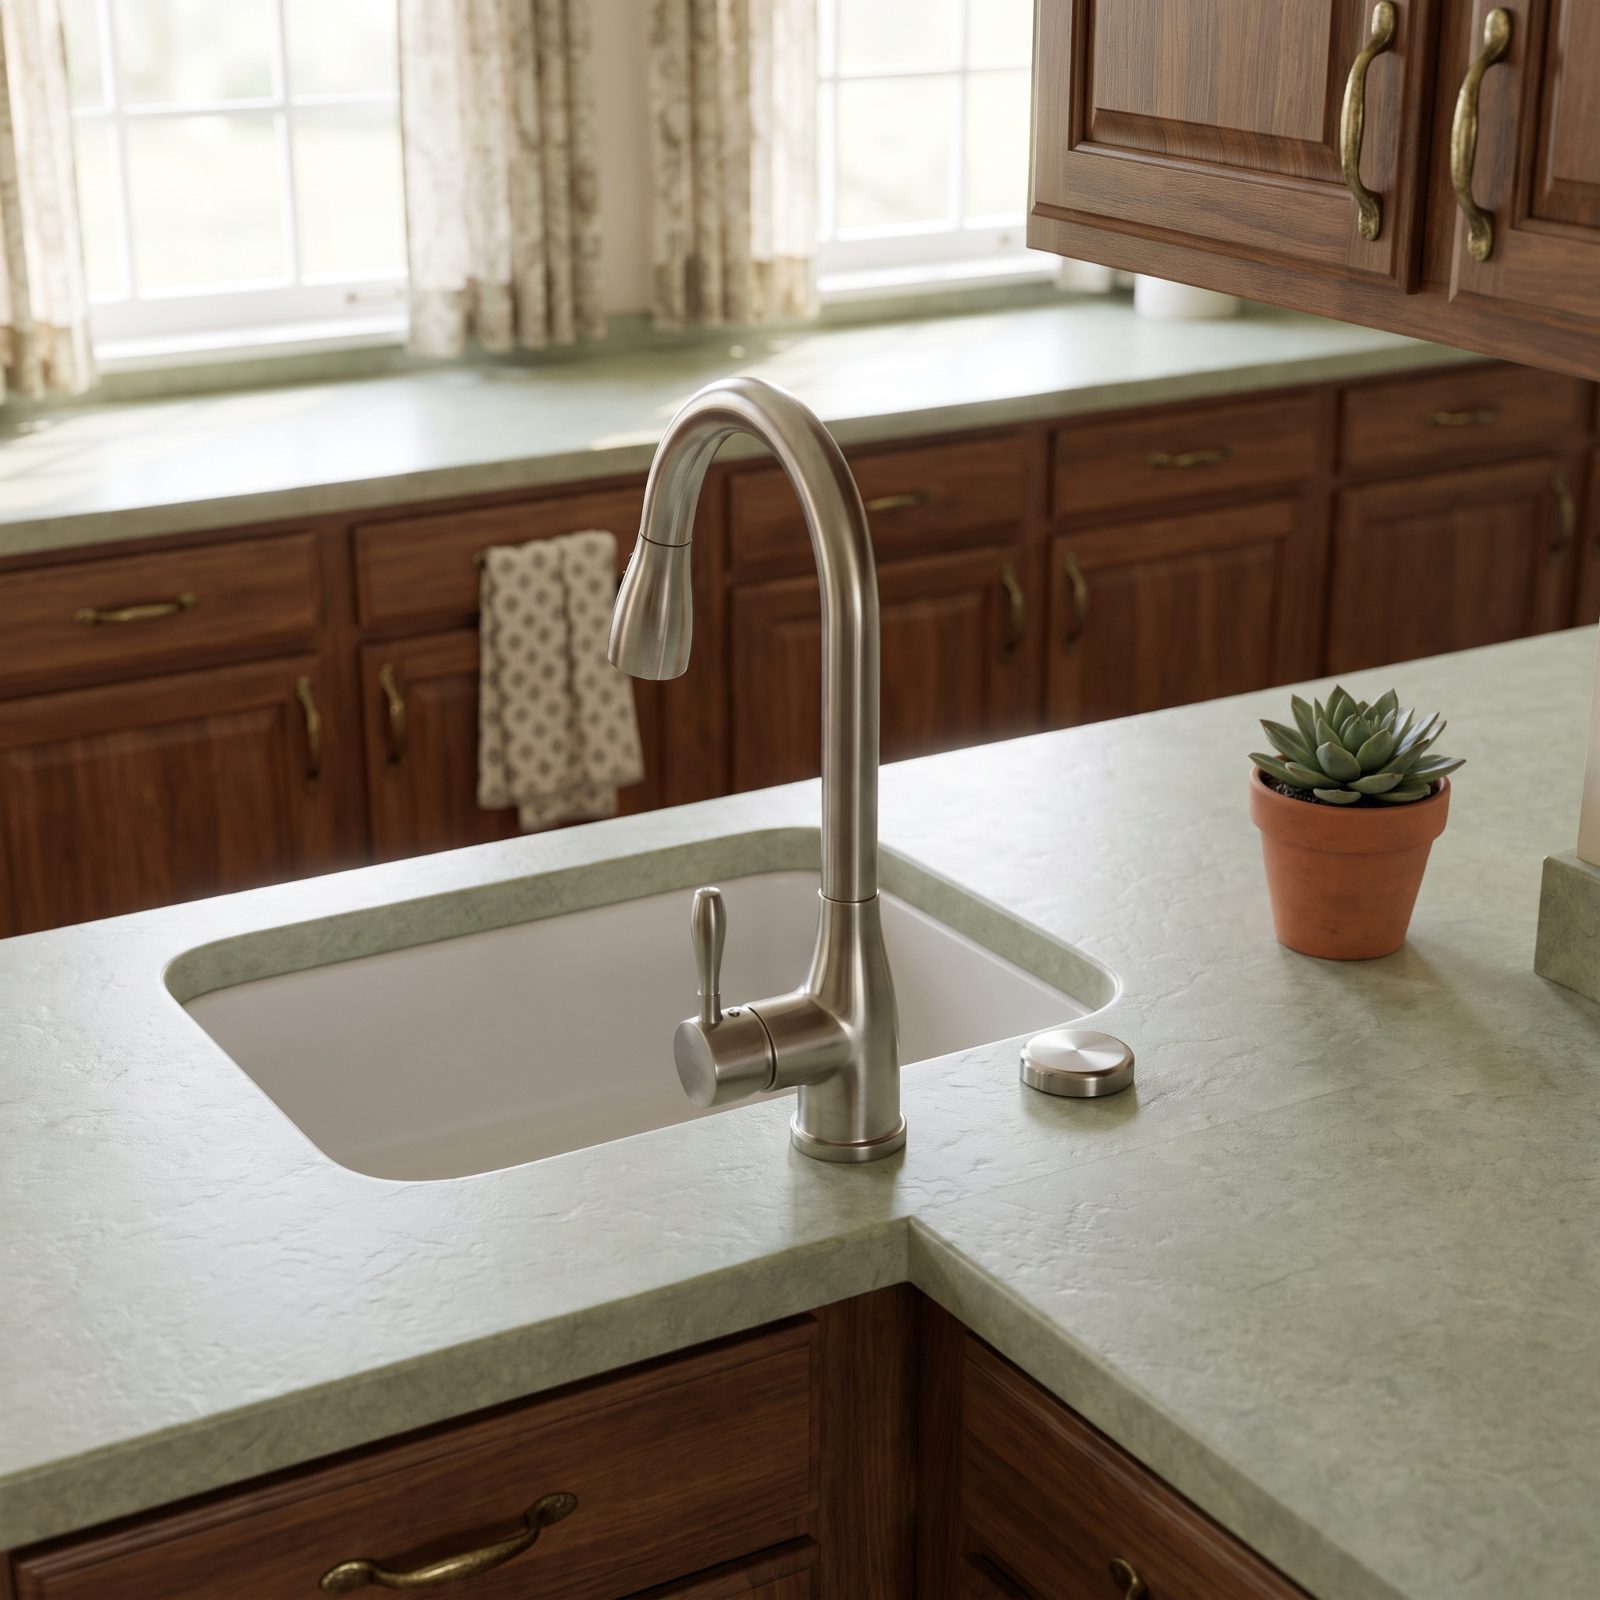
Two fixtures where one will do is the oldest waste in the galley.
Factory RVs love a tall arching faucet paired with a separate pull-out sprayer, which means two things eating counter real estate and two things that can leak. A slim pull-out faucet folds both jobs into one head. Rinse and spray come from the same wand, and the sprayer’s old mounting hole frees up for a cap or a soap pump.
Look for a low-profile brushed nickel pull-out faucet that clears your overhead cabinet when the spout is up. Measure first. A faucet that hits the cabinet door becomes a daily small misery.
14. Fit a Shallow Single Bowl in Place of a Divided Basin
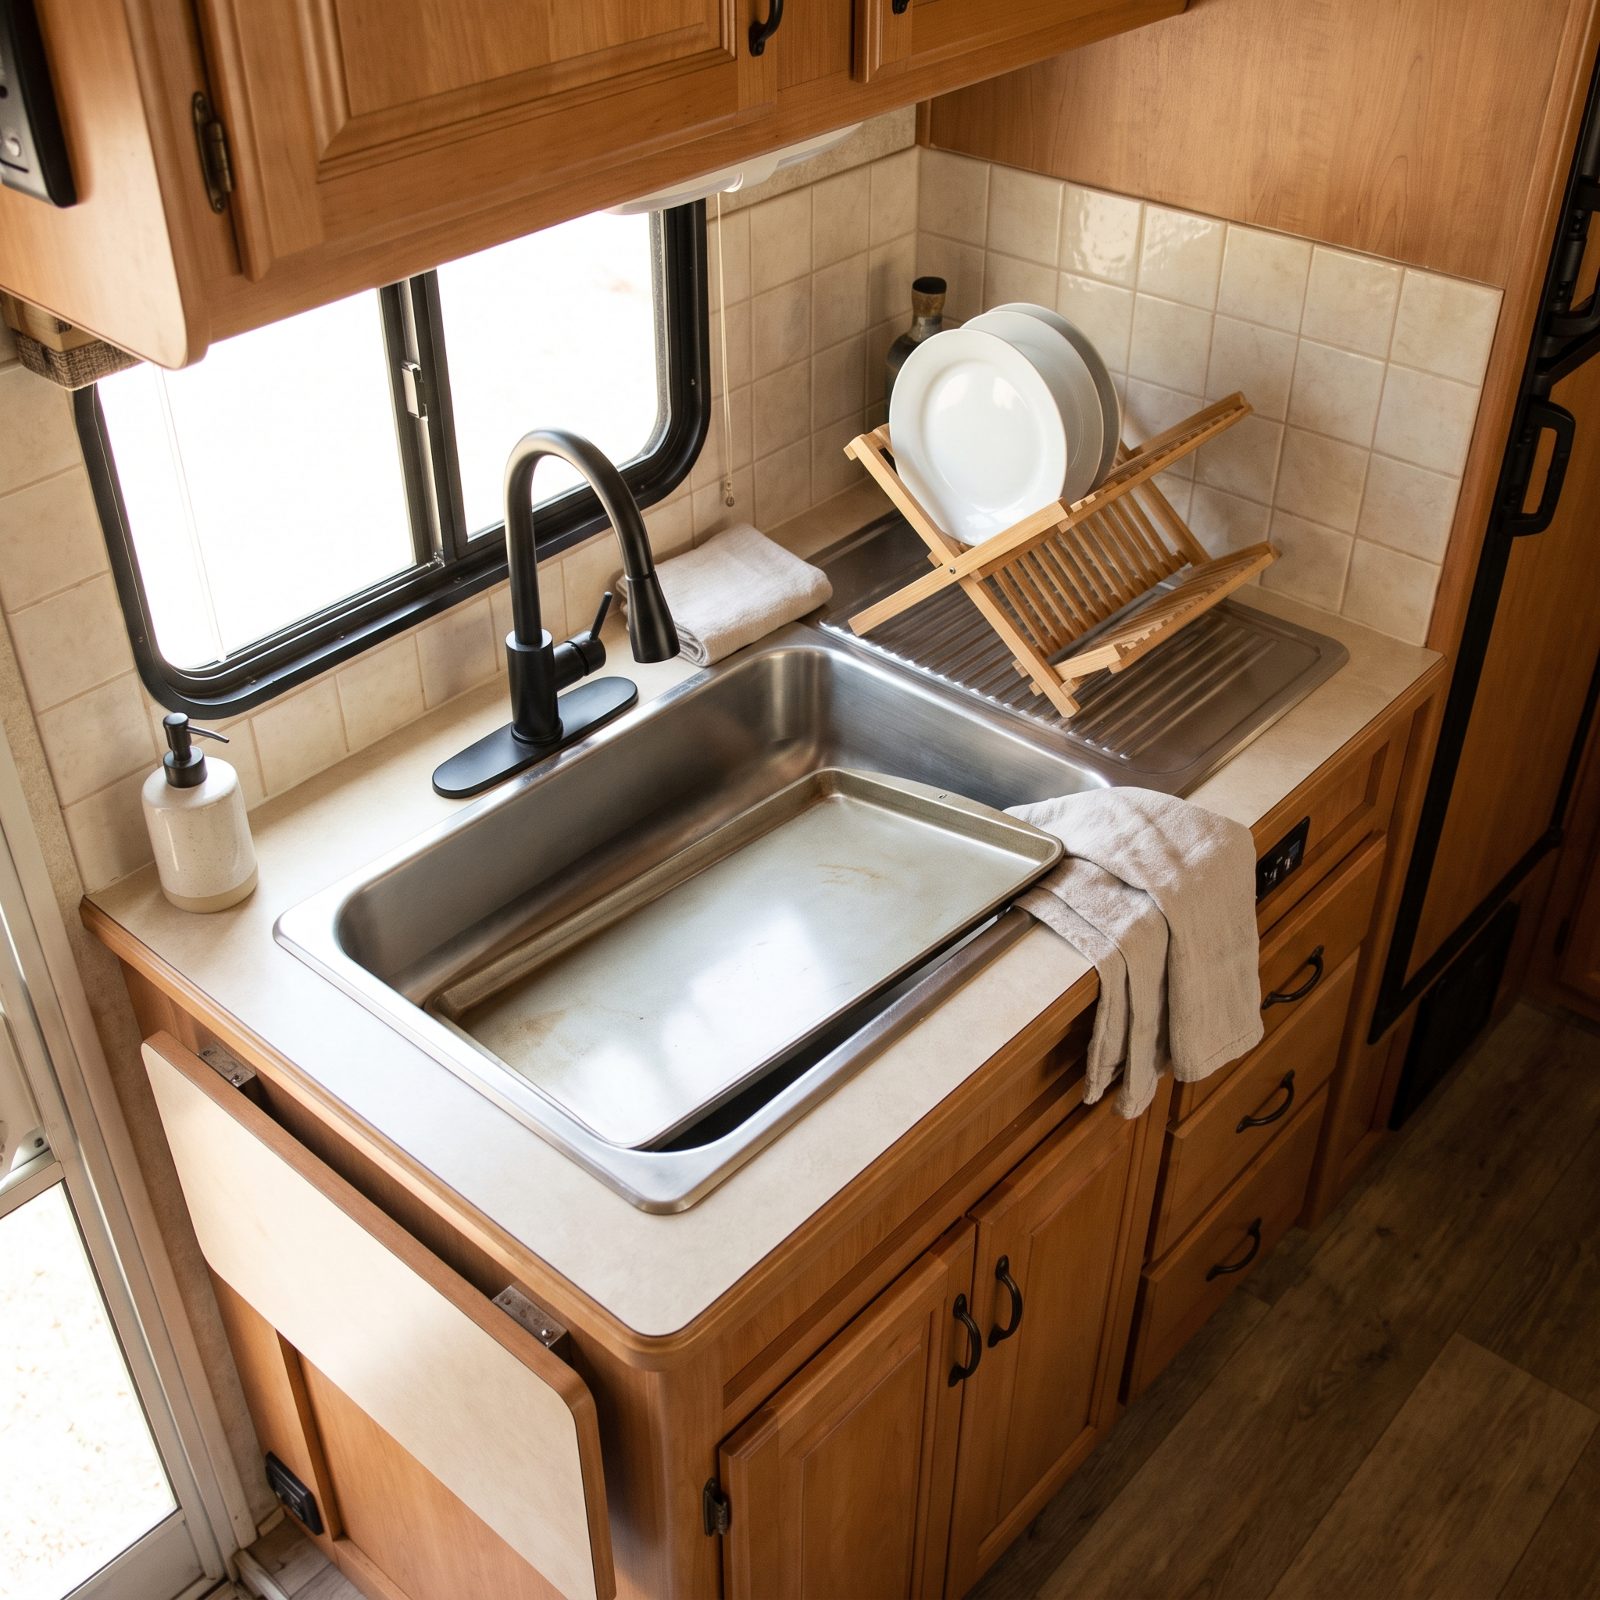
A divided RV sink gives you two bowls too small to be useful and a ridge in the middle that nothing fits across. Try washing a stock pot in one. You can’t.
One wide shallow basin changes the whole chore. A baking sheet lies flat, a big pot sits in the bottom, and a shallow bowl of around six or seven inches leaves cabinet room underneath where a deep sink would have swallowed it whole. That hidden space below the sink is where RV storage actually lives.
13. Switch to an Induction Hob You Store Away After Cooking
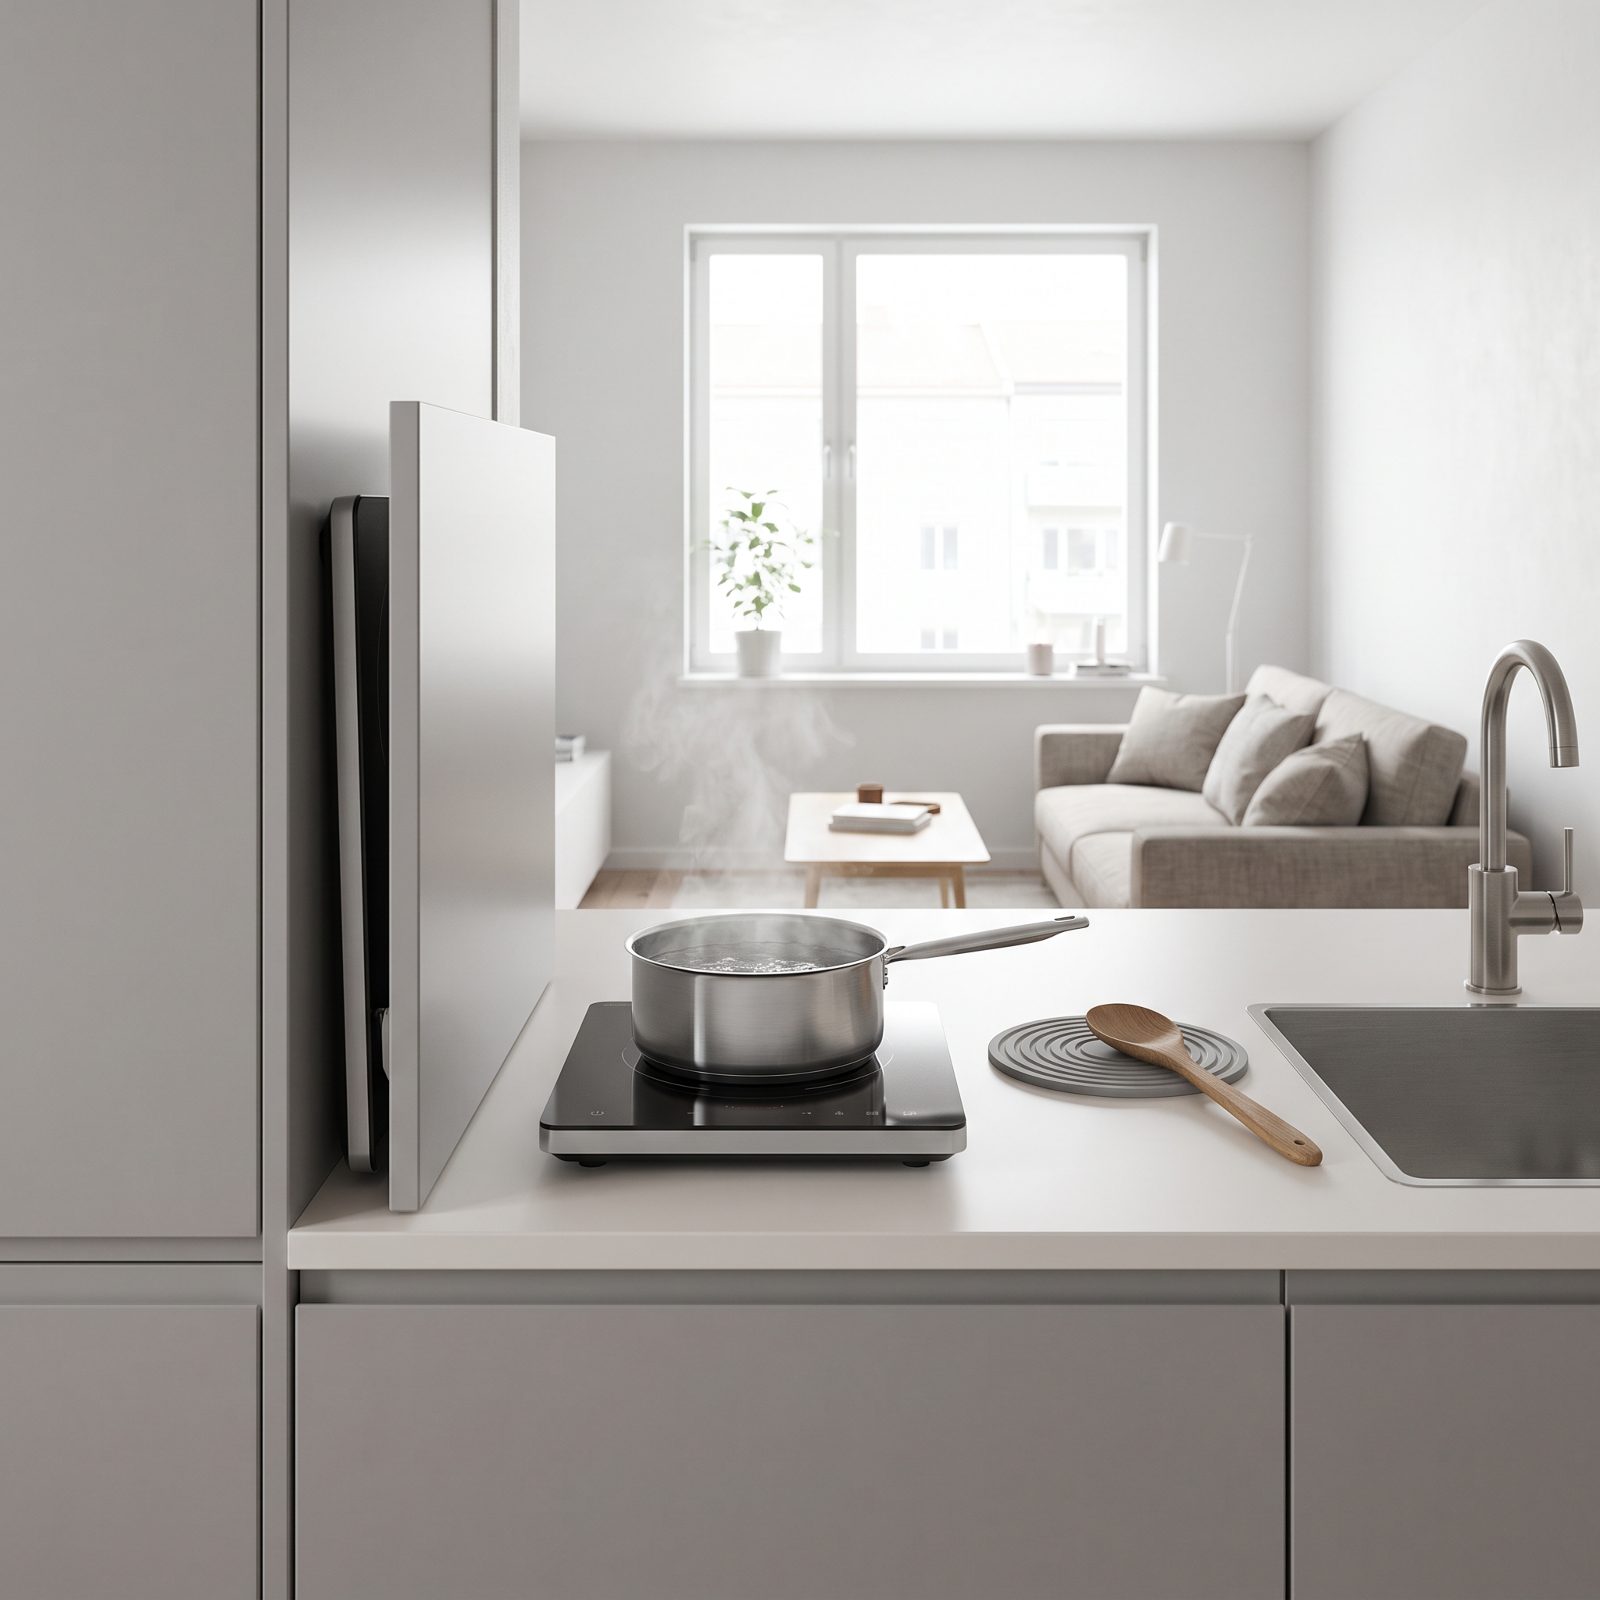
Nobody mentions this trade until their first winter trip: a built-in propane cooktop occupies that counter every single hour of every single day, whether you’re cooking or not. A portable induction hob only exists when you want it.
Cook, wipe it down, slide the thin slab into a cabinet or behind the backsplash, and your whole counter comes back. A single-burner portable induction cooktop runs on roughly 1,500 watts, so check your inverter and battery bank before committing. Off-grid, that’s a real draw. On shore power it’s nothing.
Bonus: induction doesn’t throw heat into the cabin the way a flame does. Come August, you’ll notice.
12. Install a Combination Convection Microwave
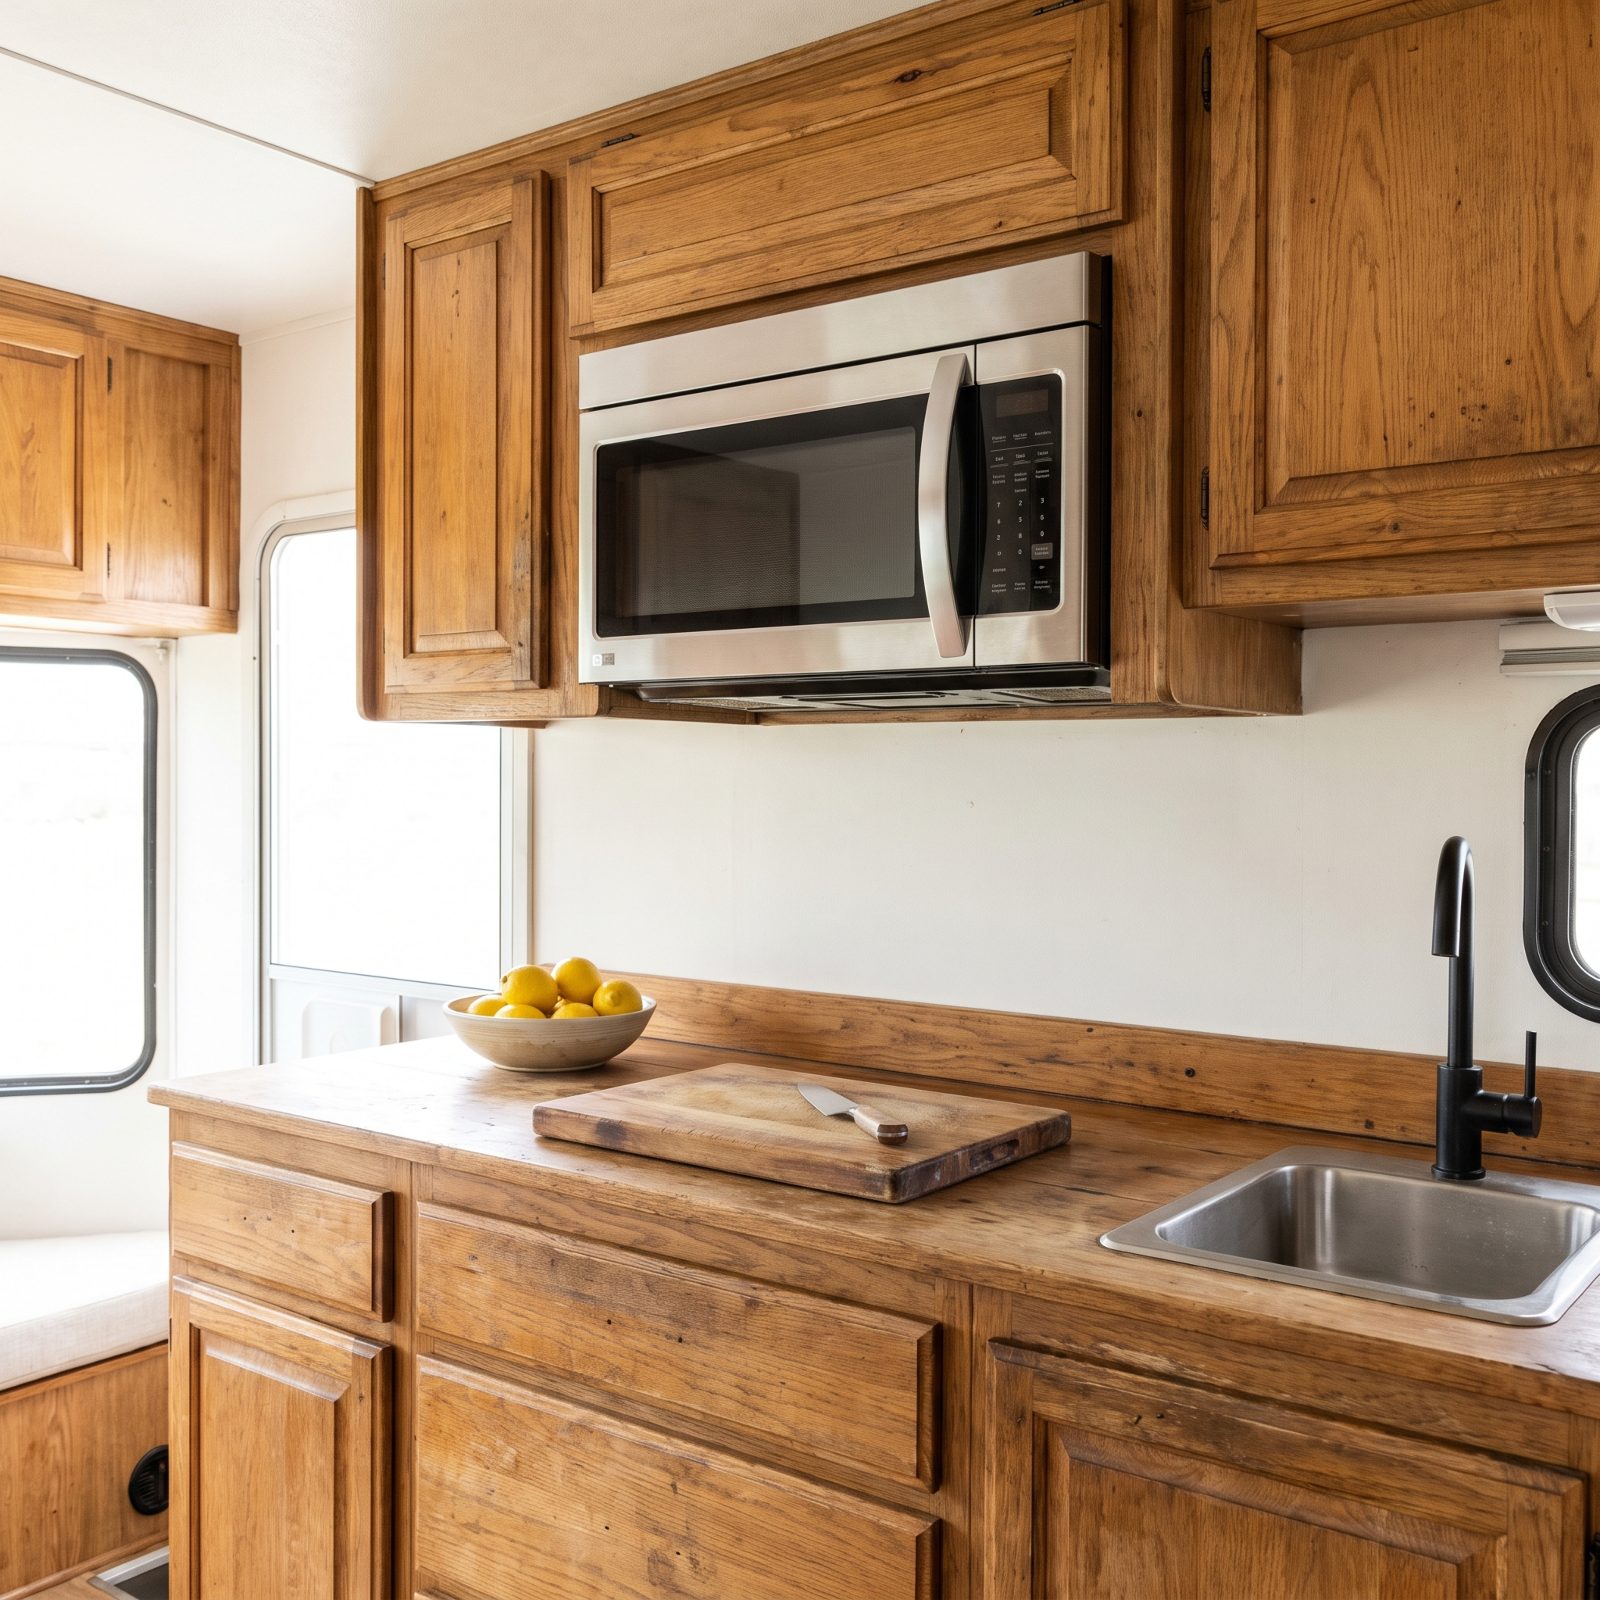
One box that microwaves, roasts, and bakes means you stop hauling around a separate toaster oven that never had a home. Combination convection units handle the reheats and the real cooking, so you can actually roast a chicken or bake in a rig that never came with an oven.
They cost more than a plain microwave and pull more power on convection mode. Worth knowing if you boondock. On the upside, you delete an appliance from the counter and claw back the shelf or drawer it used to crowd.
11. Add a Removable Window Shelf for Fresh Herbs
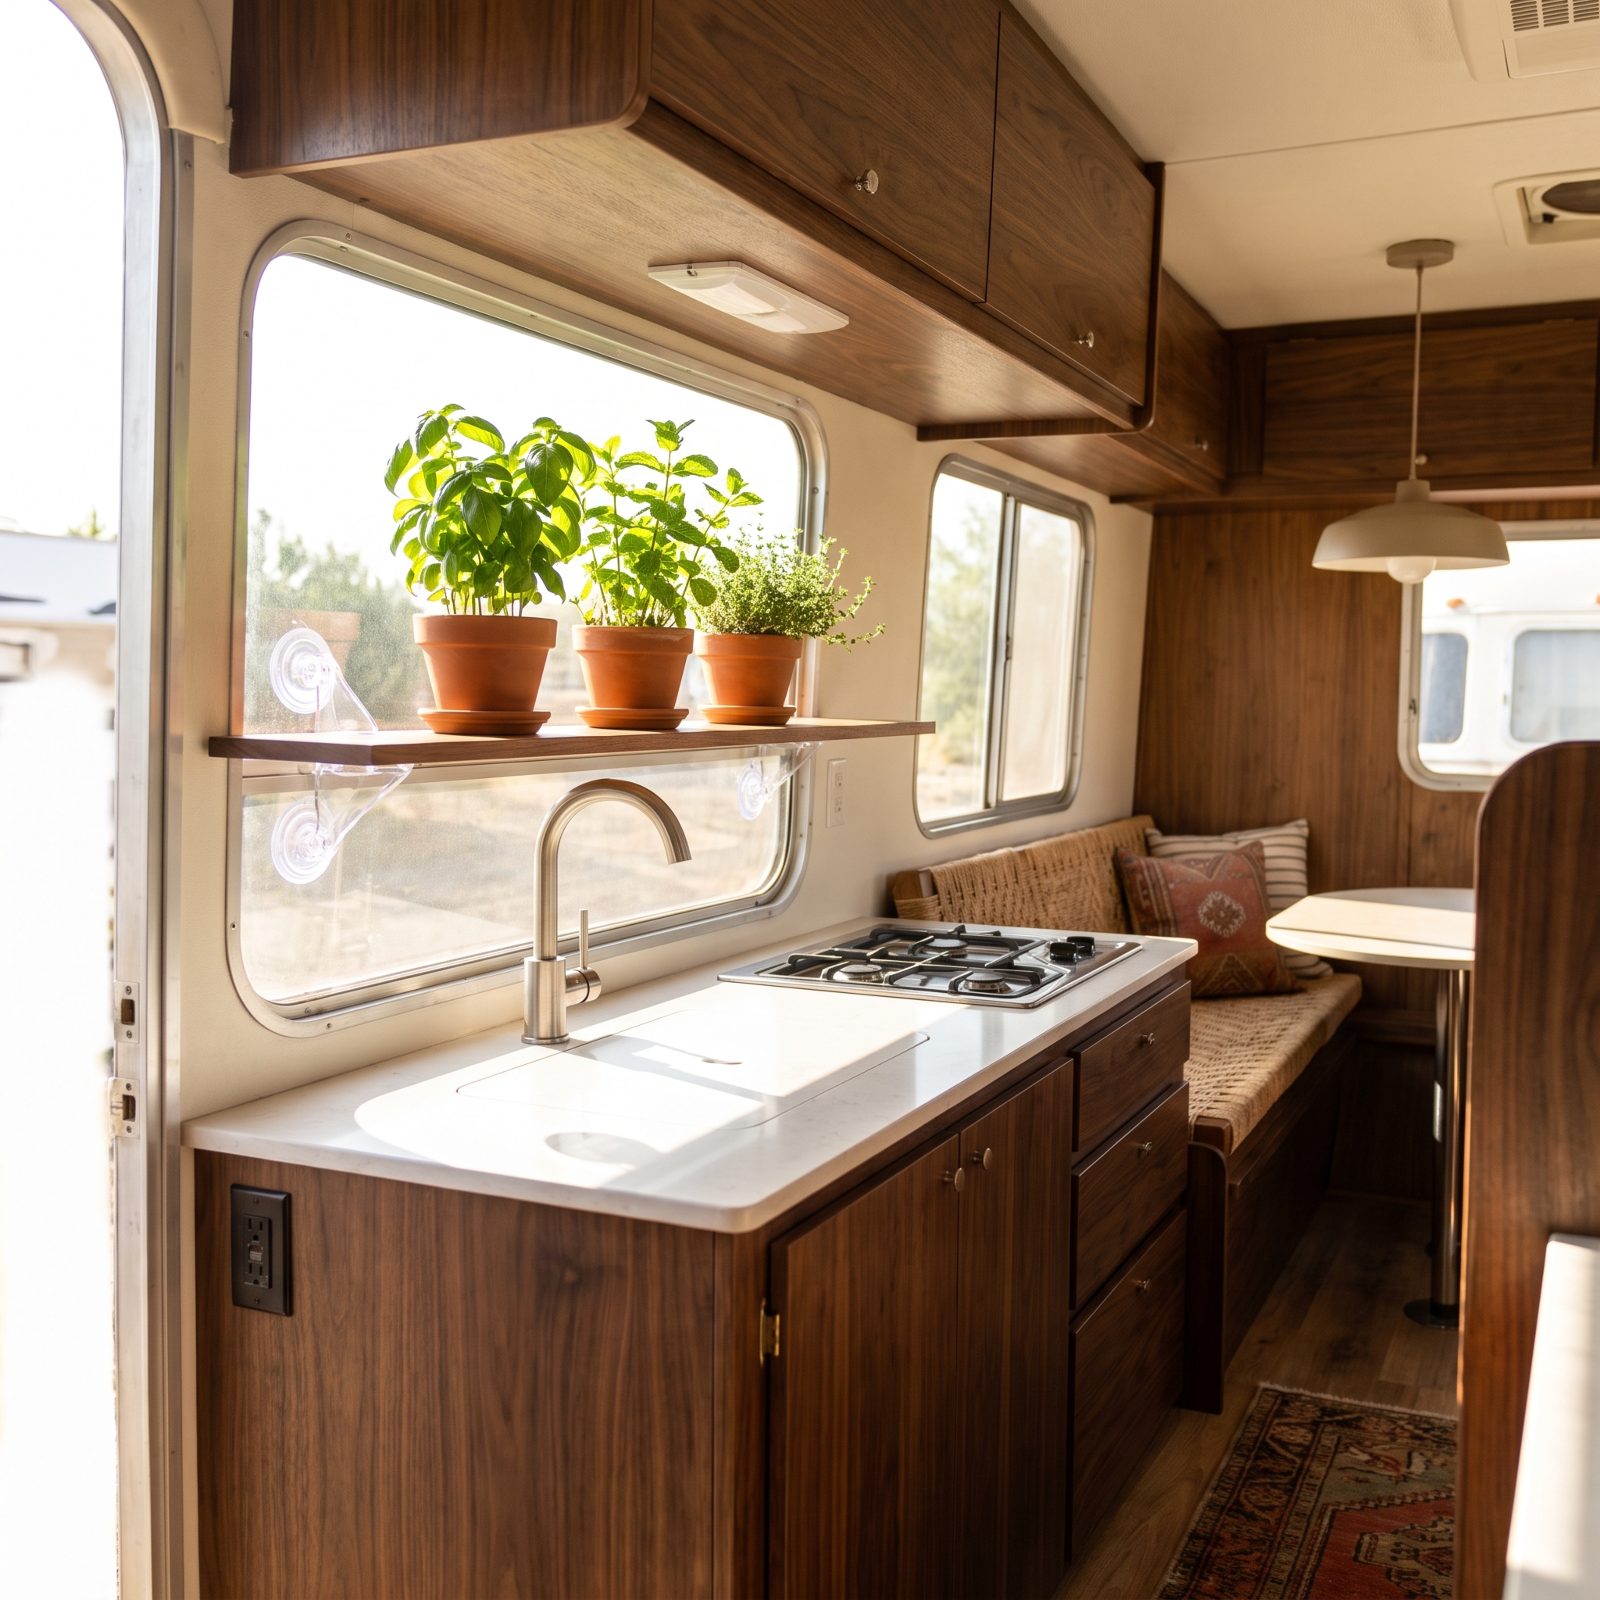
Your galley window is the one patch of real estate getting direct sun and doing absolutely nothing with it. A slim removable shelf across the glass turns it into a tiny herb garden that lives off counter space you don’t have anyway.
Basil, mint, thyme. Snip what you need, pack the shelf down for travel days. Use a tension-mount window shelf so there’s nothing to install and nothing permanent to regret. Keep the pots light and small. A heavy planter on a bracket turns into a projectile the first time you brake hard, and I’d rather you learn that from me than from your windshield.
10. Choose a Counter-Depth Fridge With a Flush Front
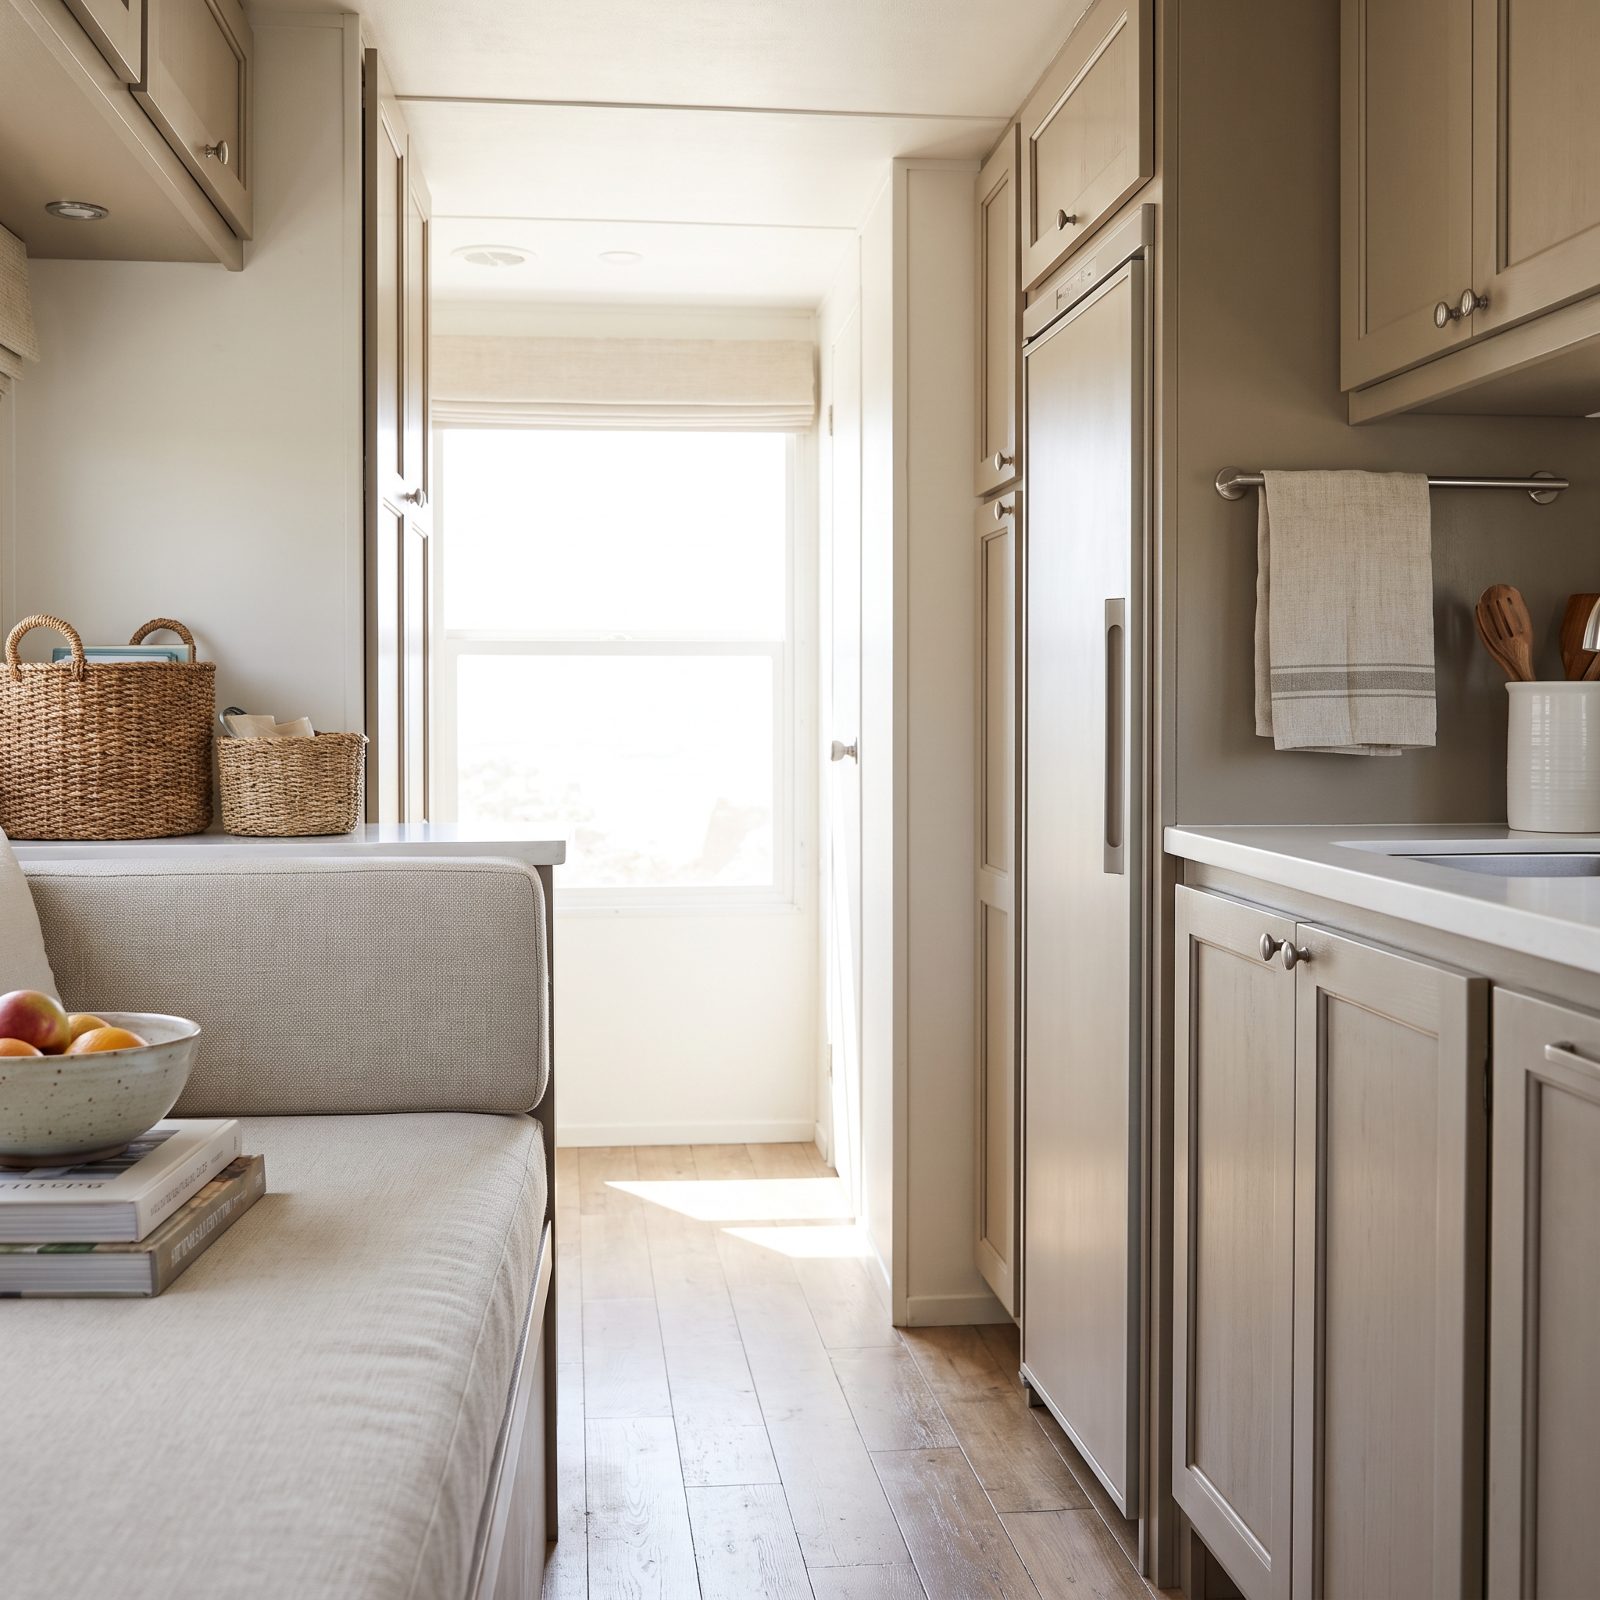
A fridge that sticks out two inches past your cabinets is the thing your hip finds every time you squeeze past.
A counter-depth model with a flush front sits in line with the cabinetry, so the whole galley wall becomes one smooth plane. Nothing juts. The aisle reads wider because your eye isn’t tracking a bump, and in a narrow rig those couple of inches are the difference between turning sideways and walking straight through.
Flush-front units with recessed handles also stop snagging pockets and dish towels. Small thing. You’ll feel it fifty times a day.
9. Reverse the Fridge Door for a Clearer Work Aisle
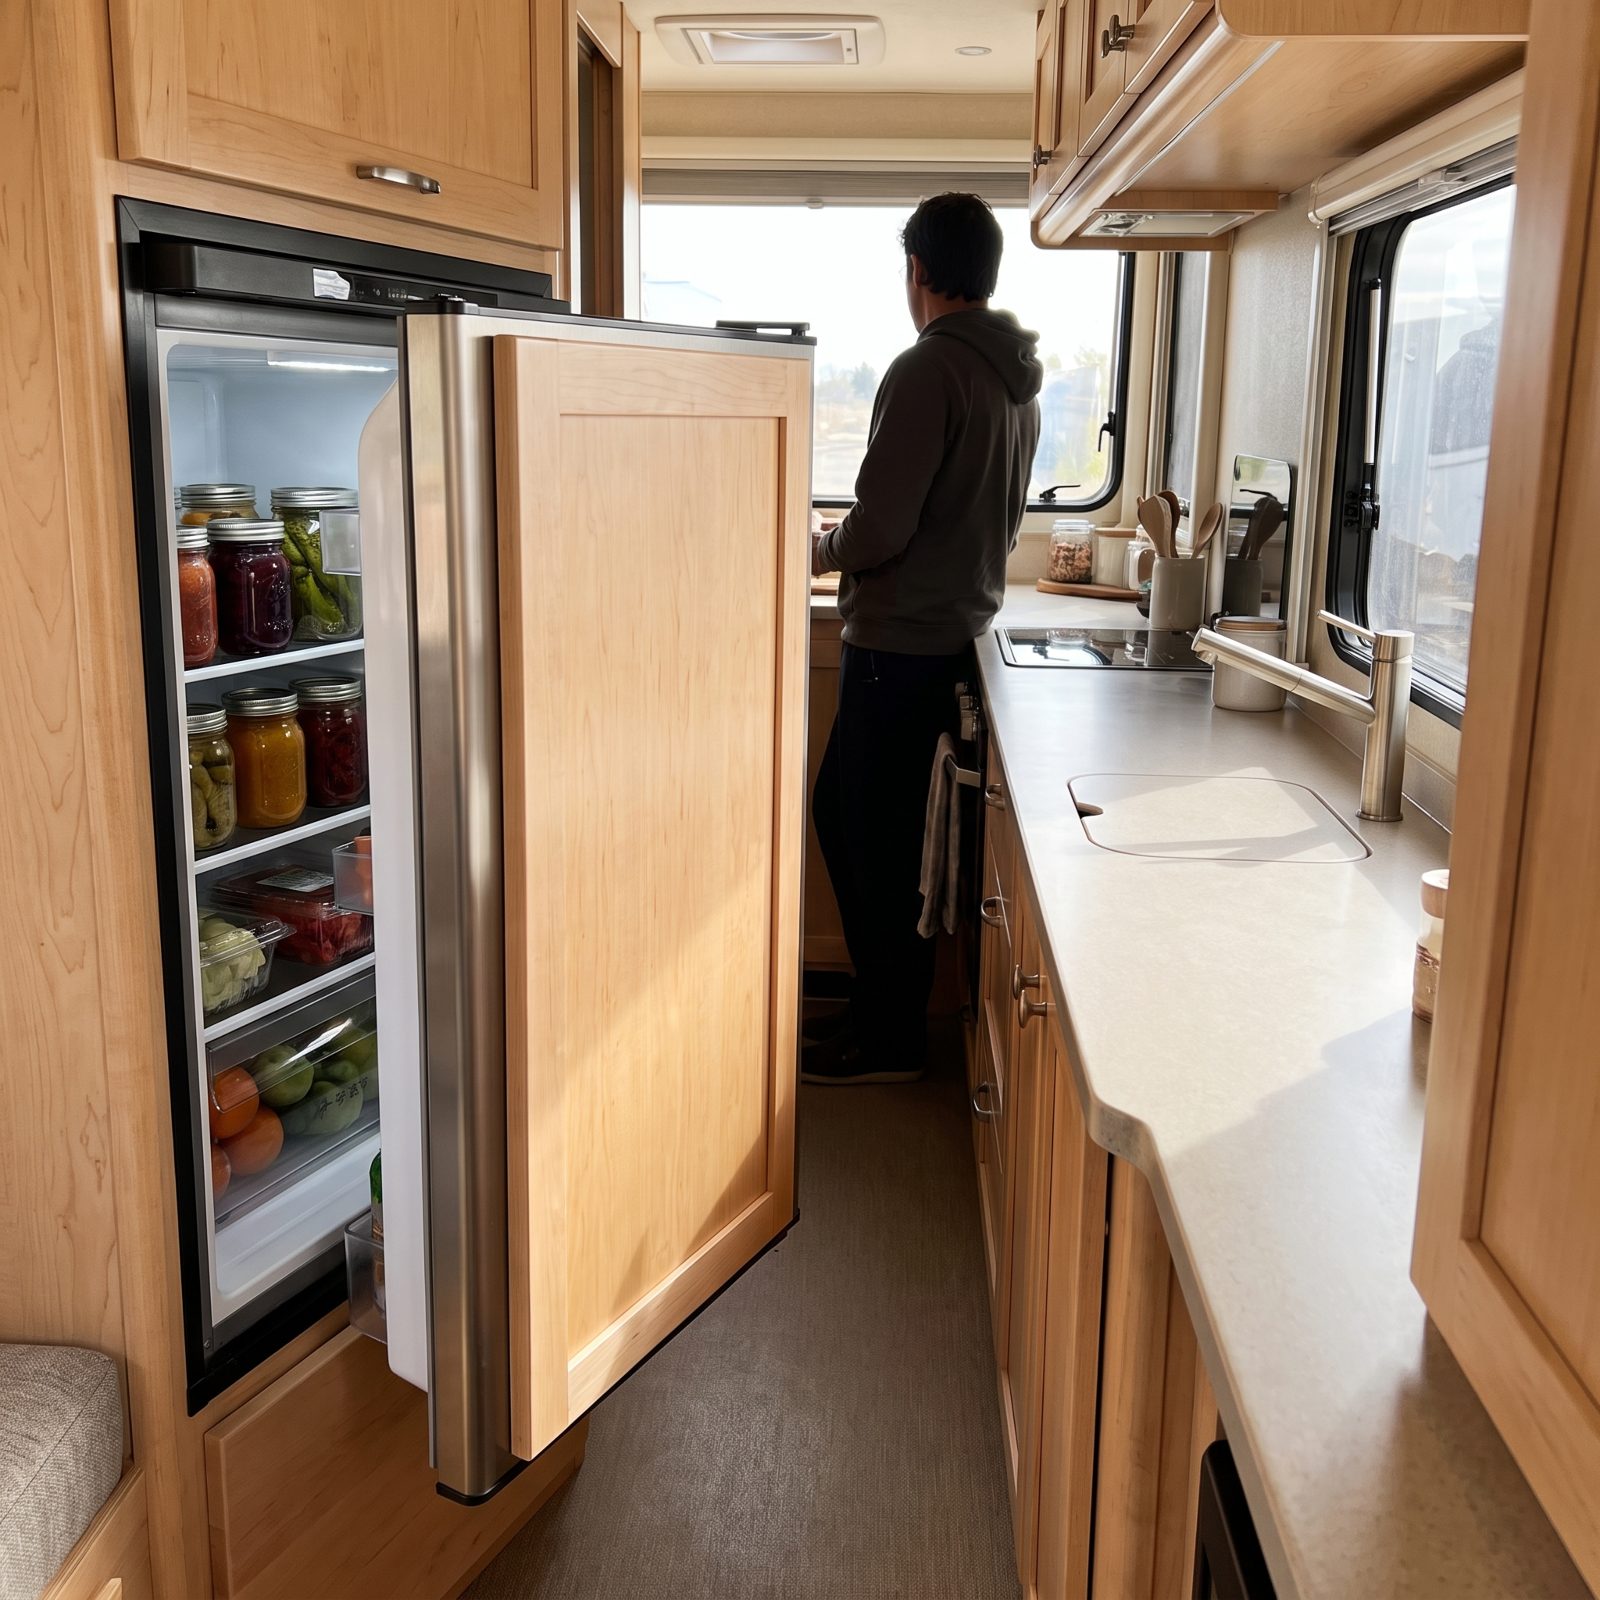
Most RV fridges let you move the hinge to the other side, and most owners never do. So they spend years working around a door that opens straight into the path between the counter and the cooktop.
Flip the hinge so the door swings toward a wall or a dead corner instead of the aisle. Now you can stand at the counter with the fridge open and not be trapped behind a slab of door. Costs nothing but an afternoon with a screwdriver.
8. Replace a Swinging Pantry Door With a Tambour Roll-Up
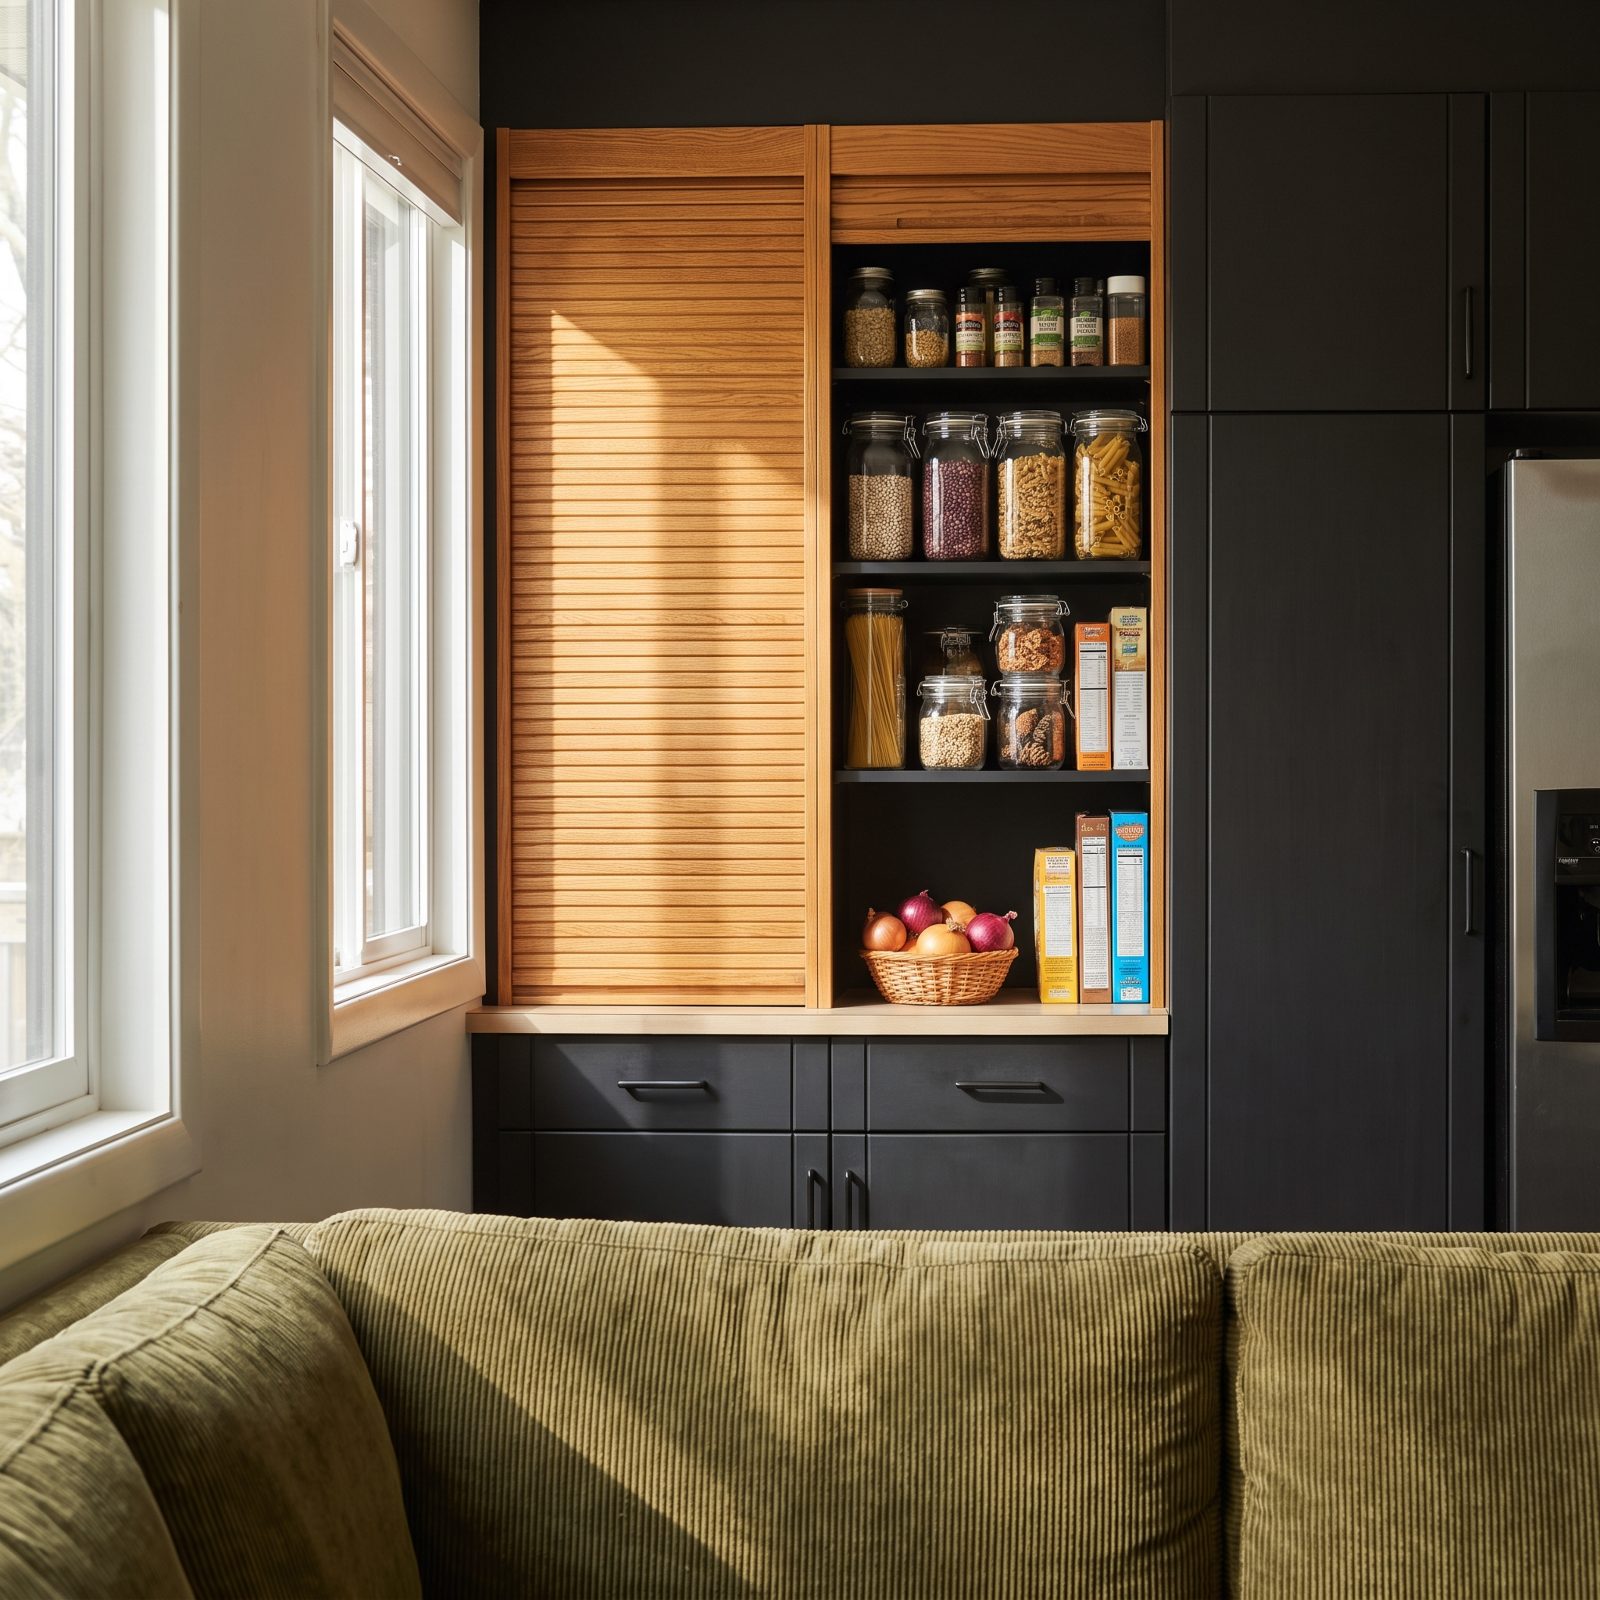
A swinging pantry door in a narrow galley is a hazard that eats the aisle every time you reach for the pasta. It blocks you, it blocks whoever’s behind you, and in a moving rig it wants to fly open.
A tambour door rolls up into the cabinet instead of out into the room. The slats curl away overhead, the aisle stays clear, and the whole thing latches tight for travel. Same mechanism as an old rolltop desk — a sturdy, century-old idea that somehow never made it standard in RVs. A wooden tambour door kit drops into most existing cabinet openings with patience and a level.
Honestly? This one did more for my galley than any faucet ever will. Go try it.
7. Swap Chunky Cabinet Knobs for Slim Edge Pulls
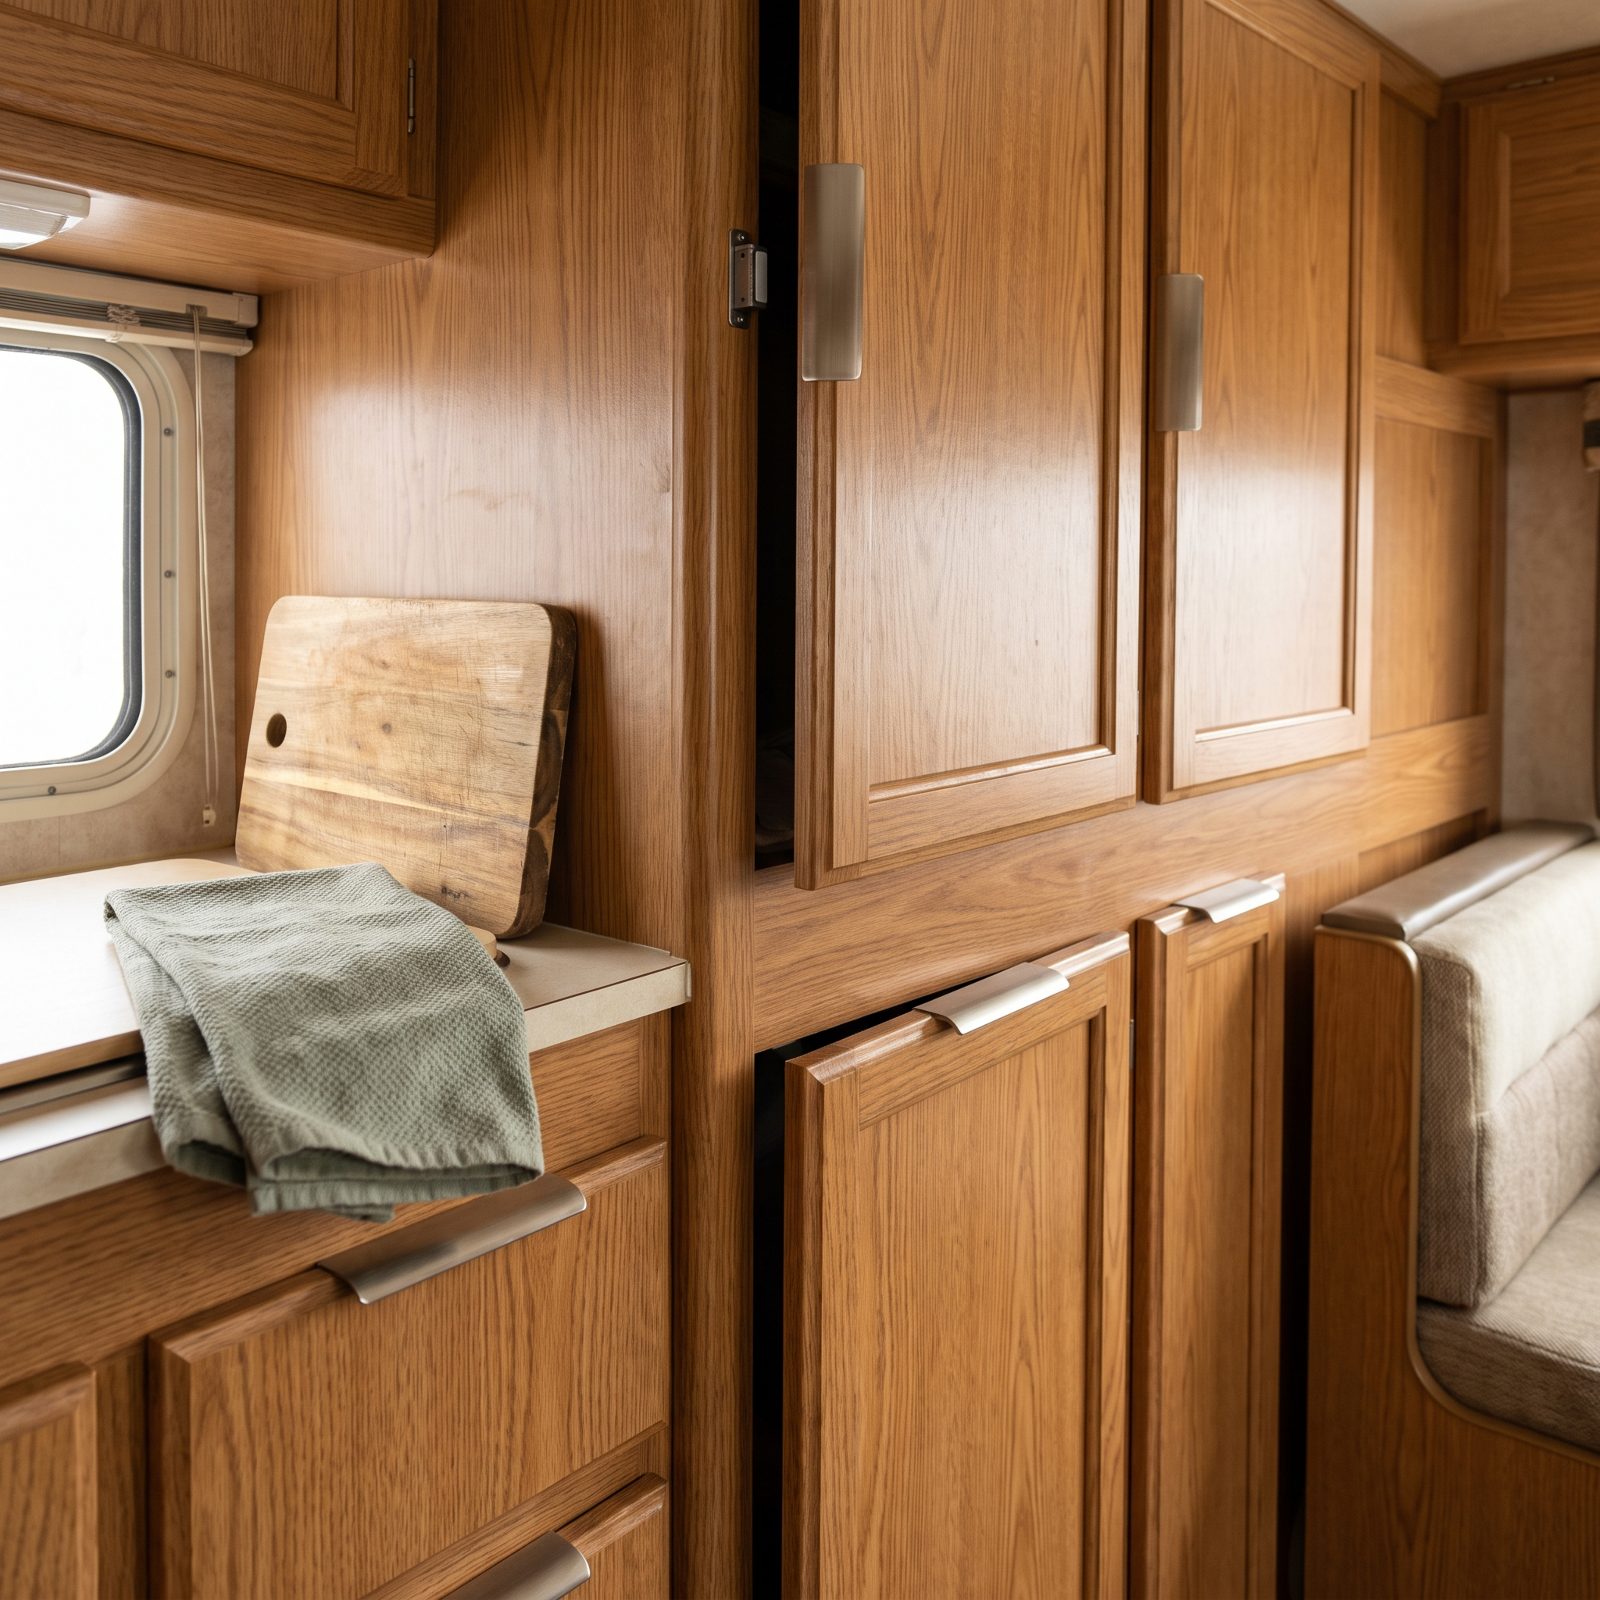
Knobs are hip-catchers. In a walkway maybe two feet across, a round knob sticking out an inch is the thing that snags your pocket every single time you squeeze past the sink. Slim edge pulls sit nearly flush, so the whole cabinet run reads as one clean plane instead of a bumpy obstacle course.
You can grab a set of brushed nickel edge pulls cheap, and most of the time they reuse the same screw holes. I ignored this one for years and wore a hole in a favorite shirt to prove it.
6. Mount a Fold-Flat Tablet Holder for Recipes
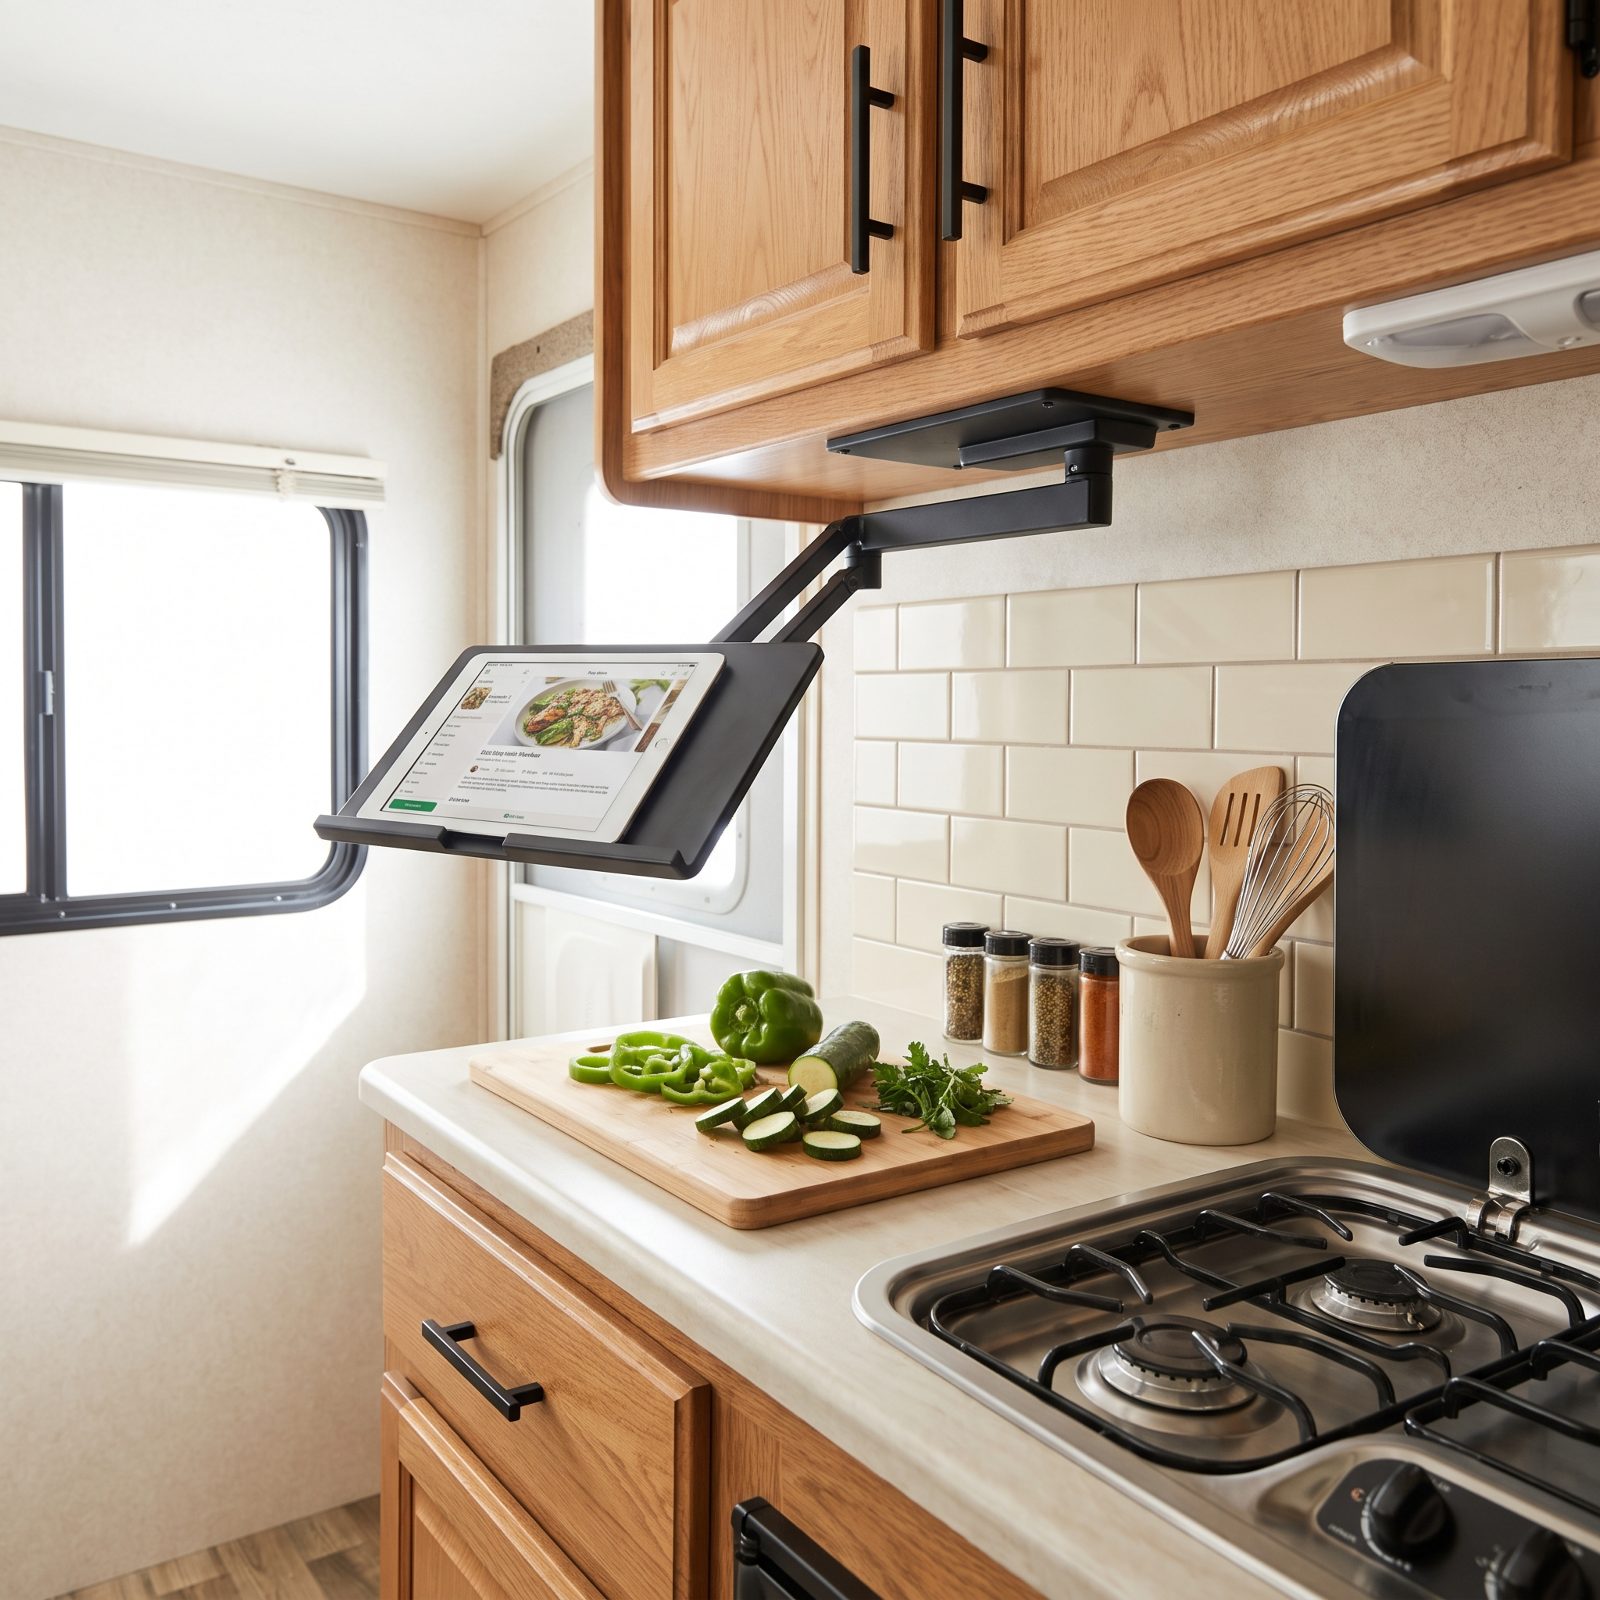
Your phone propped against the backsplash, the screen timing out mid-recipe, flour on the glass. You know the scene. A tablet holder that folds flat against the cabinet bottom when you’re done gets the screen up out of the splash zone and off your three square feet of counter.
The good ones swing on an articulating arm and tuck away to nothing. Want one that clamps or screws under an upper cabinet, not one that eats counter space — that defeats the whole point.
5. Build a Charging Drawer to Banish Cords From the Counter
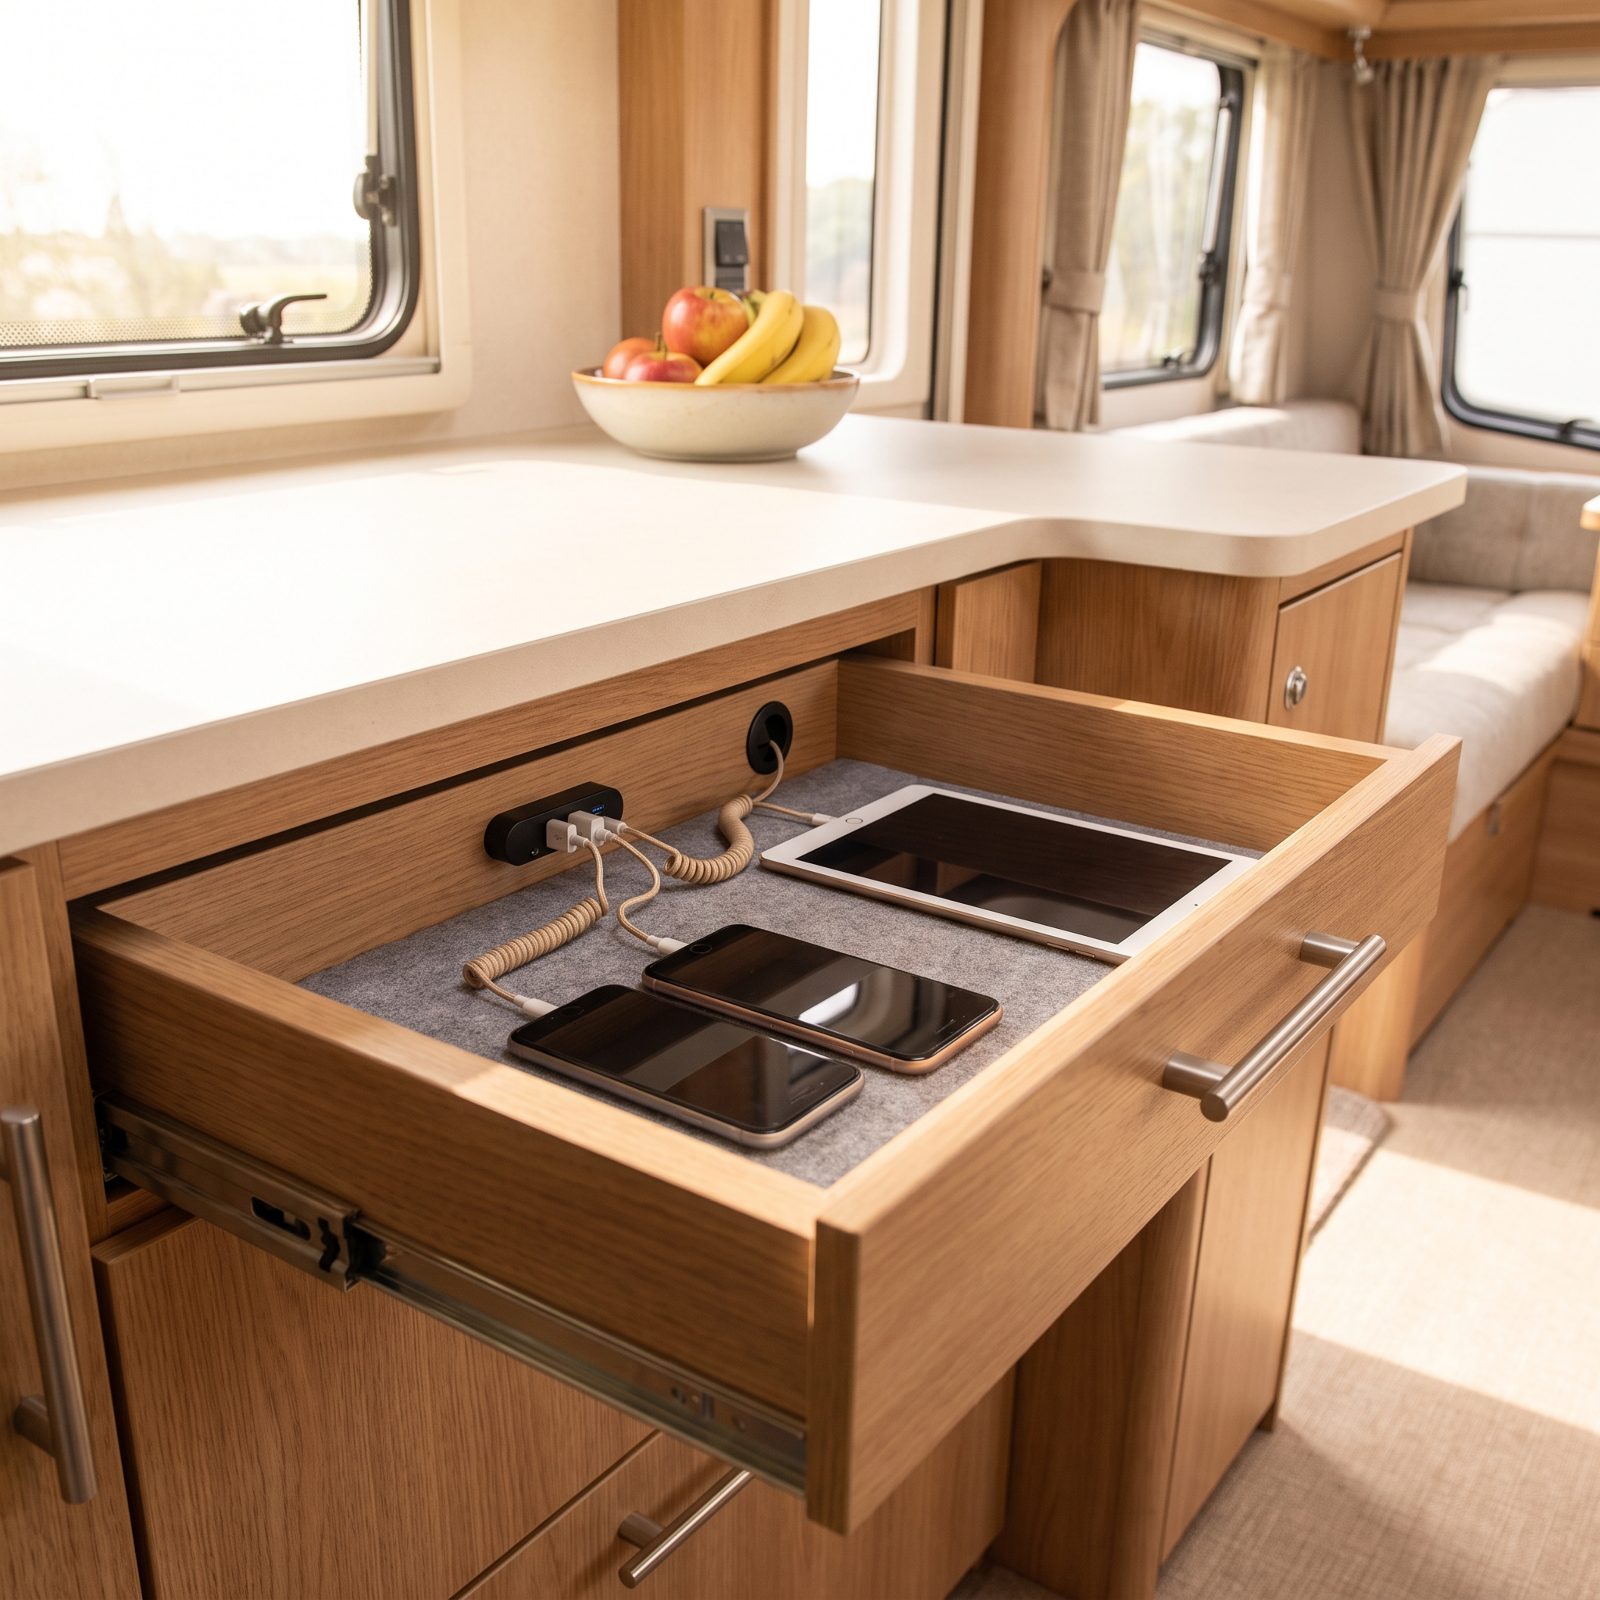
The counter is where cords go to breed. One charger becomes three, then a tangle you shove aside every time you cook. A charging drawer fixes it by moving the whole mess down and out of sight.
Run a short cable through a grommet at the back of a shallow drawer, drop in a small USB charging hub, and that drawer is now the dock. Phones charge flat on a felt mat. Close it up and the counter is yours again.
4. Install a Pop-Up Outlet That Retracts After Use
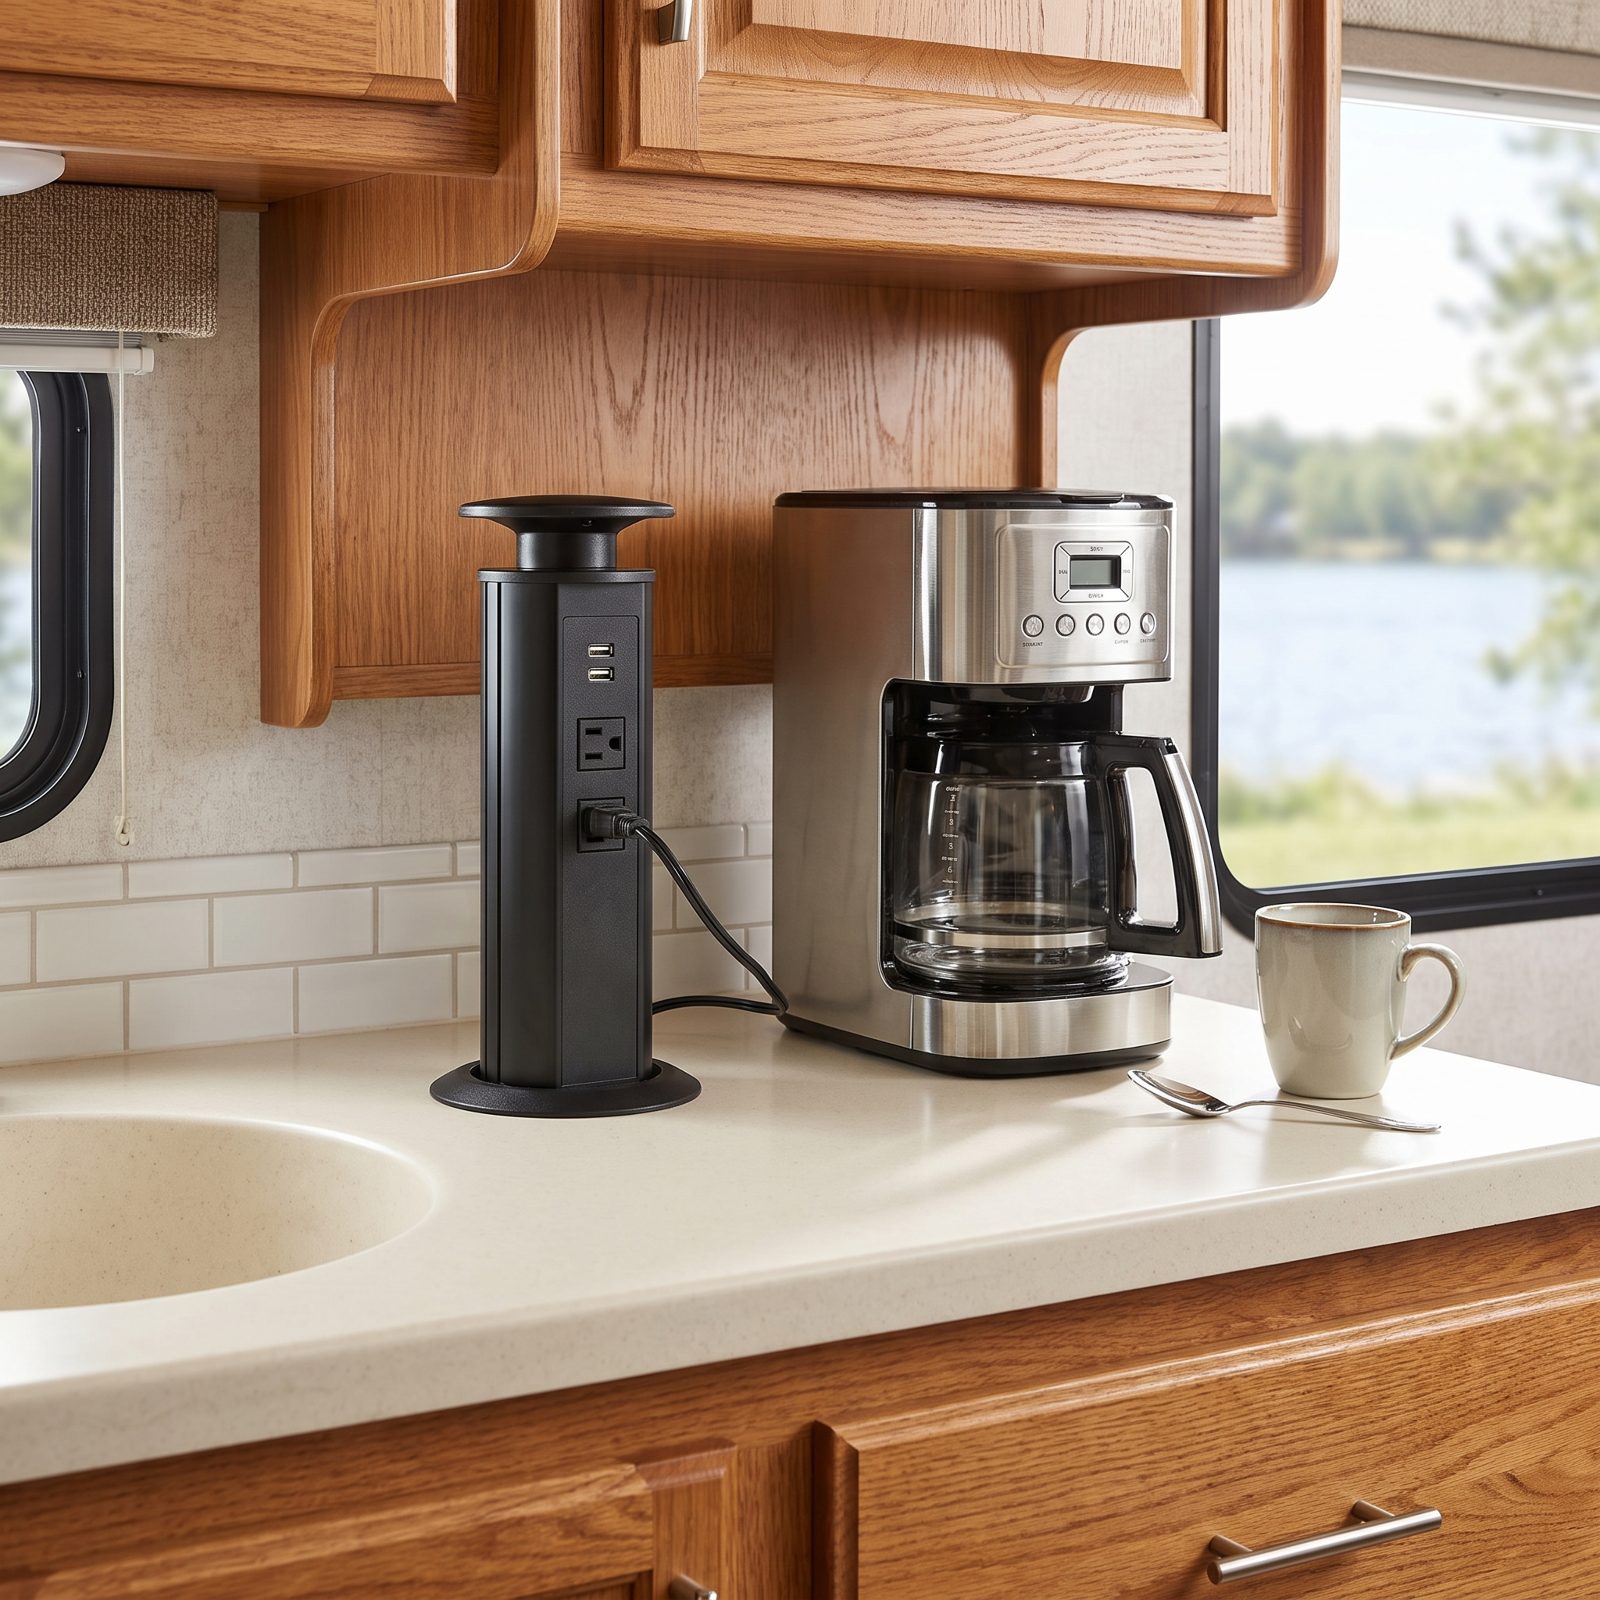
Wall outlets in an RV sit in dumb places. Behind the fridge, down low by your knees, never where you actually plug things in. A pop-up outlet lets you add power right at the prep counter, then push it back down flush when you’re done.
It’s a cylinder that recesses into the countertop. Press it, it rises with sockets and usually a couple of USB ports; press again, it drops back and your full counter returns. Wiring it is a job for someone comfortable with 120-volt work, so if that isn’t you, pay the person who is.
3. Roll a Slim Cart Into the Gap Nobody Uses
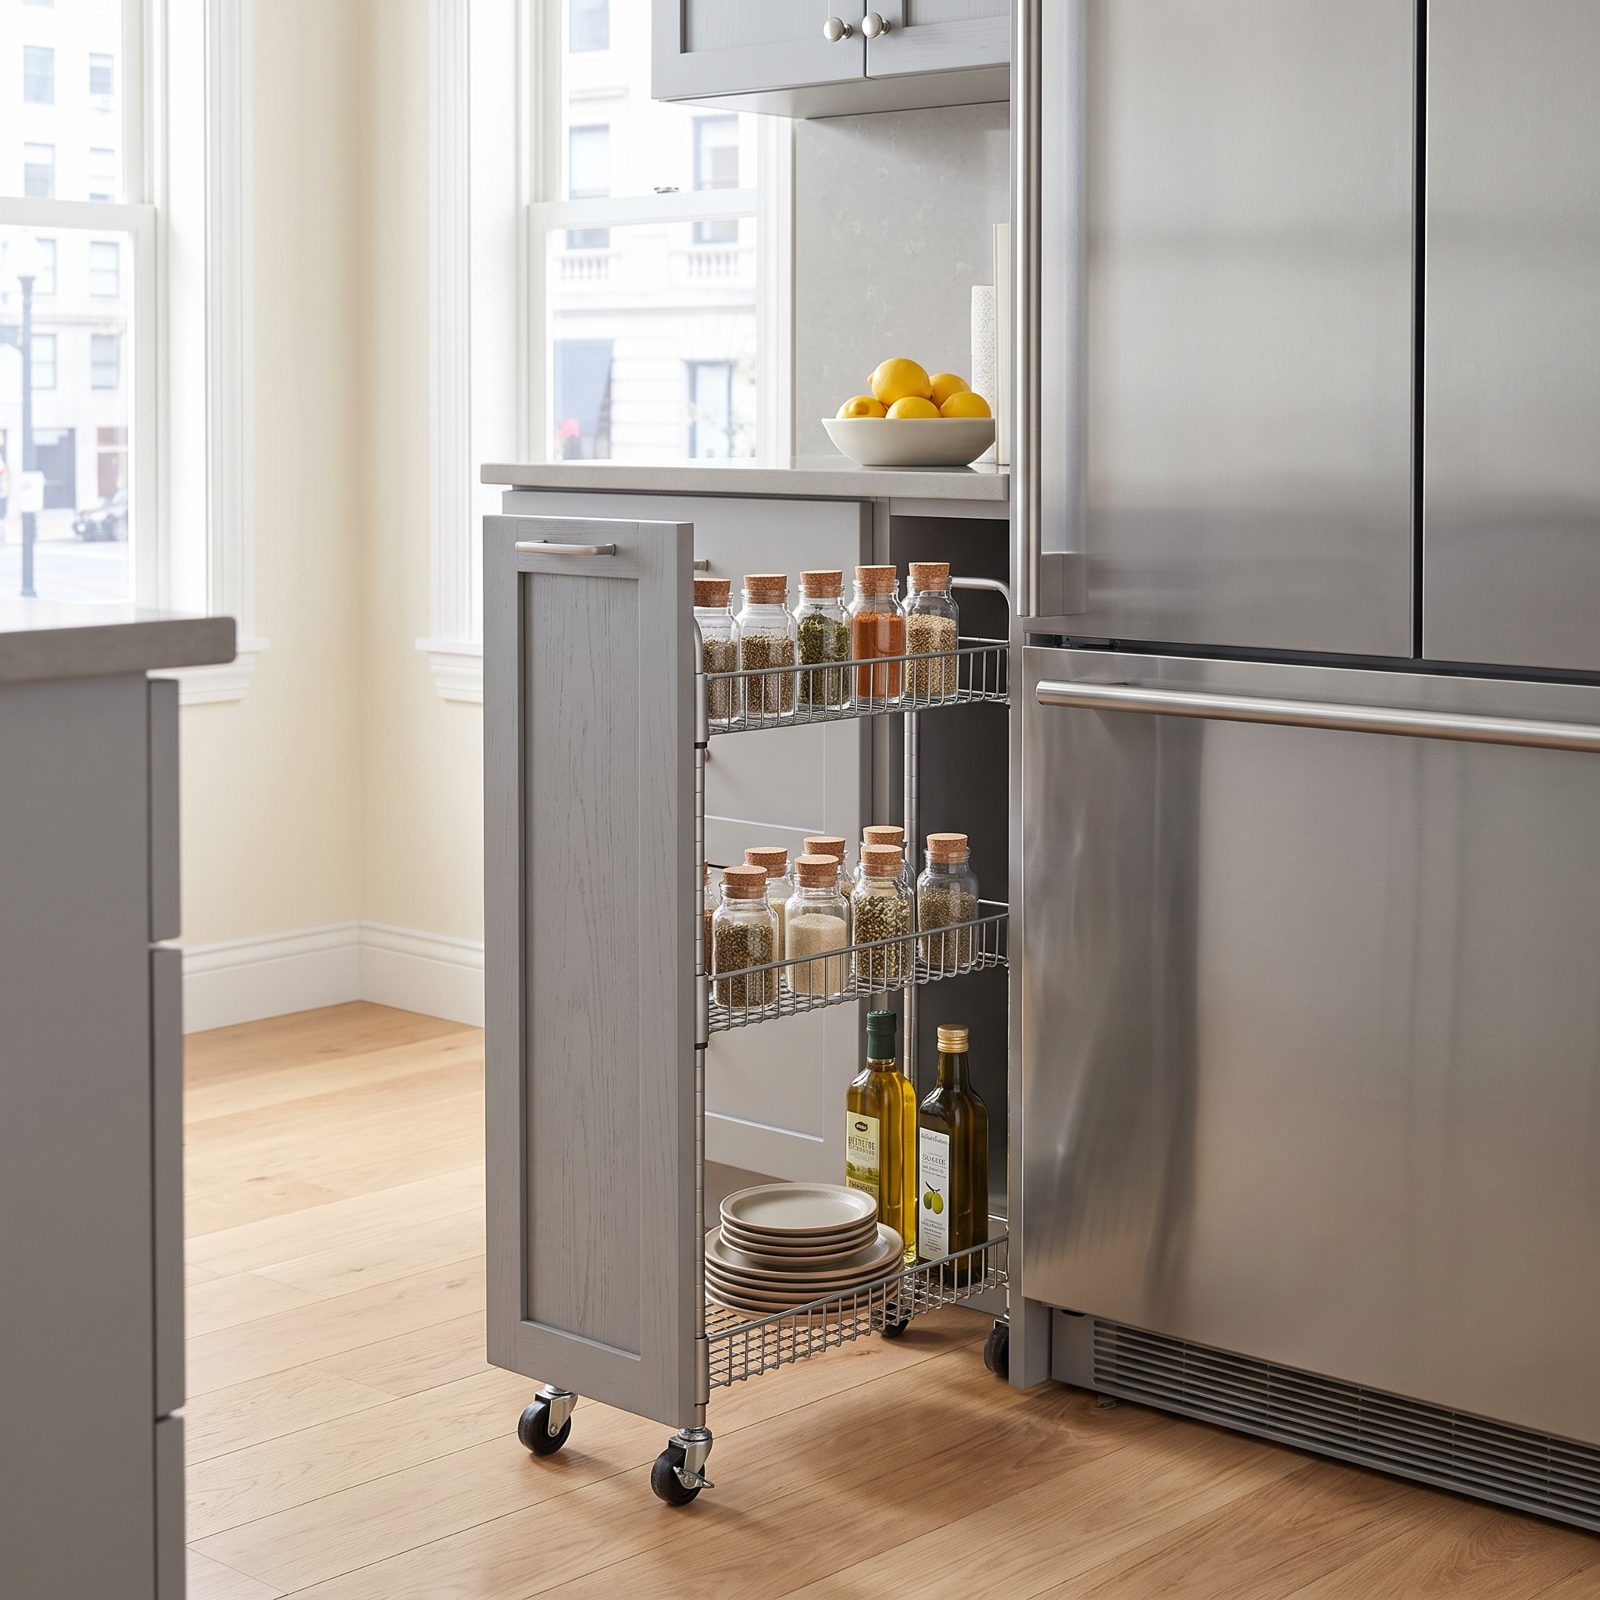
Every RV has a slot of wasted air. The gap beside the fridge, the dead space at the end of the counter. A rolling cart about eight inches wide slides right in, and suddenly that nothing-space is holding your spices, your oils, your coffee gear.
The magic is the roll. Pull it out when you cook, push it back when you drive. Get one with locking casters, because an unlocked cart becomes a battering ram the first time you take a hard left.
2. Turn the Dinette Bench End Into Galley Storage
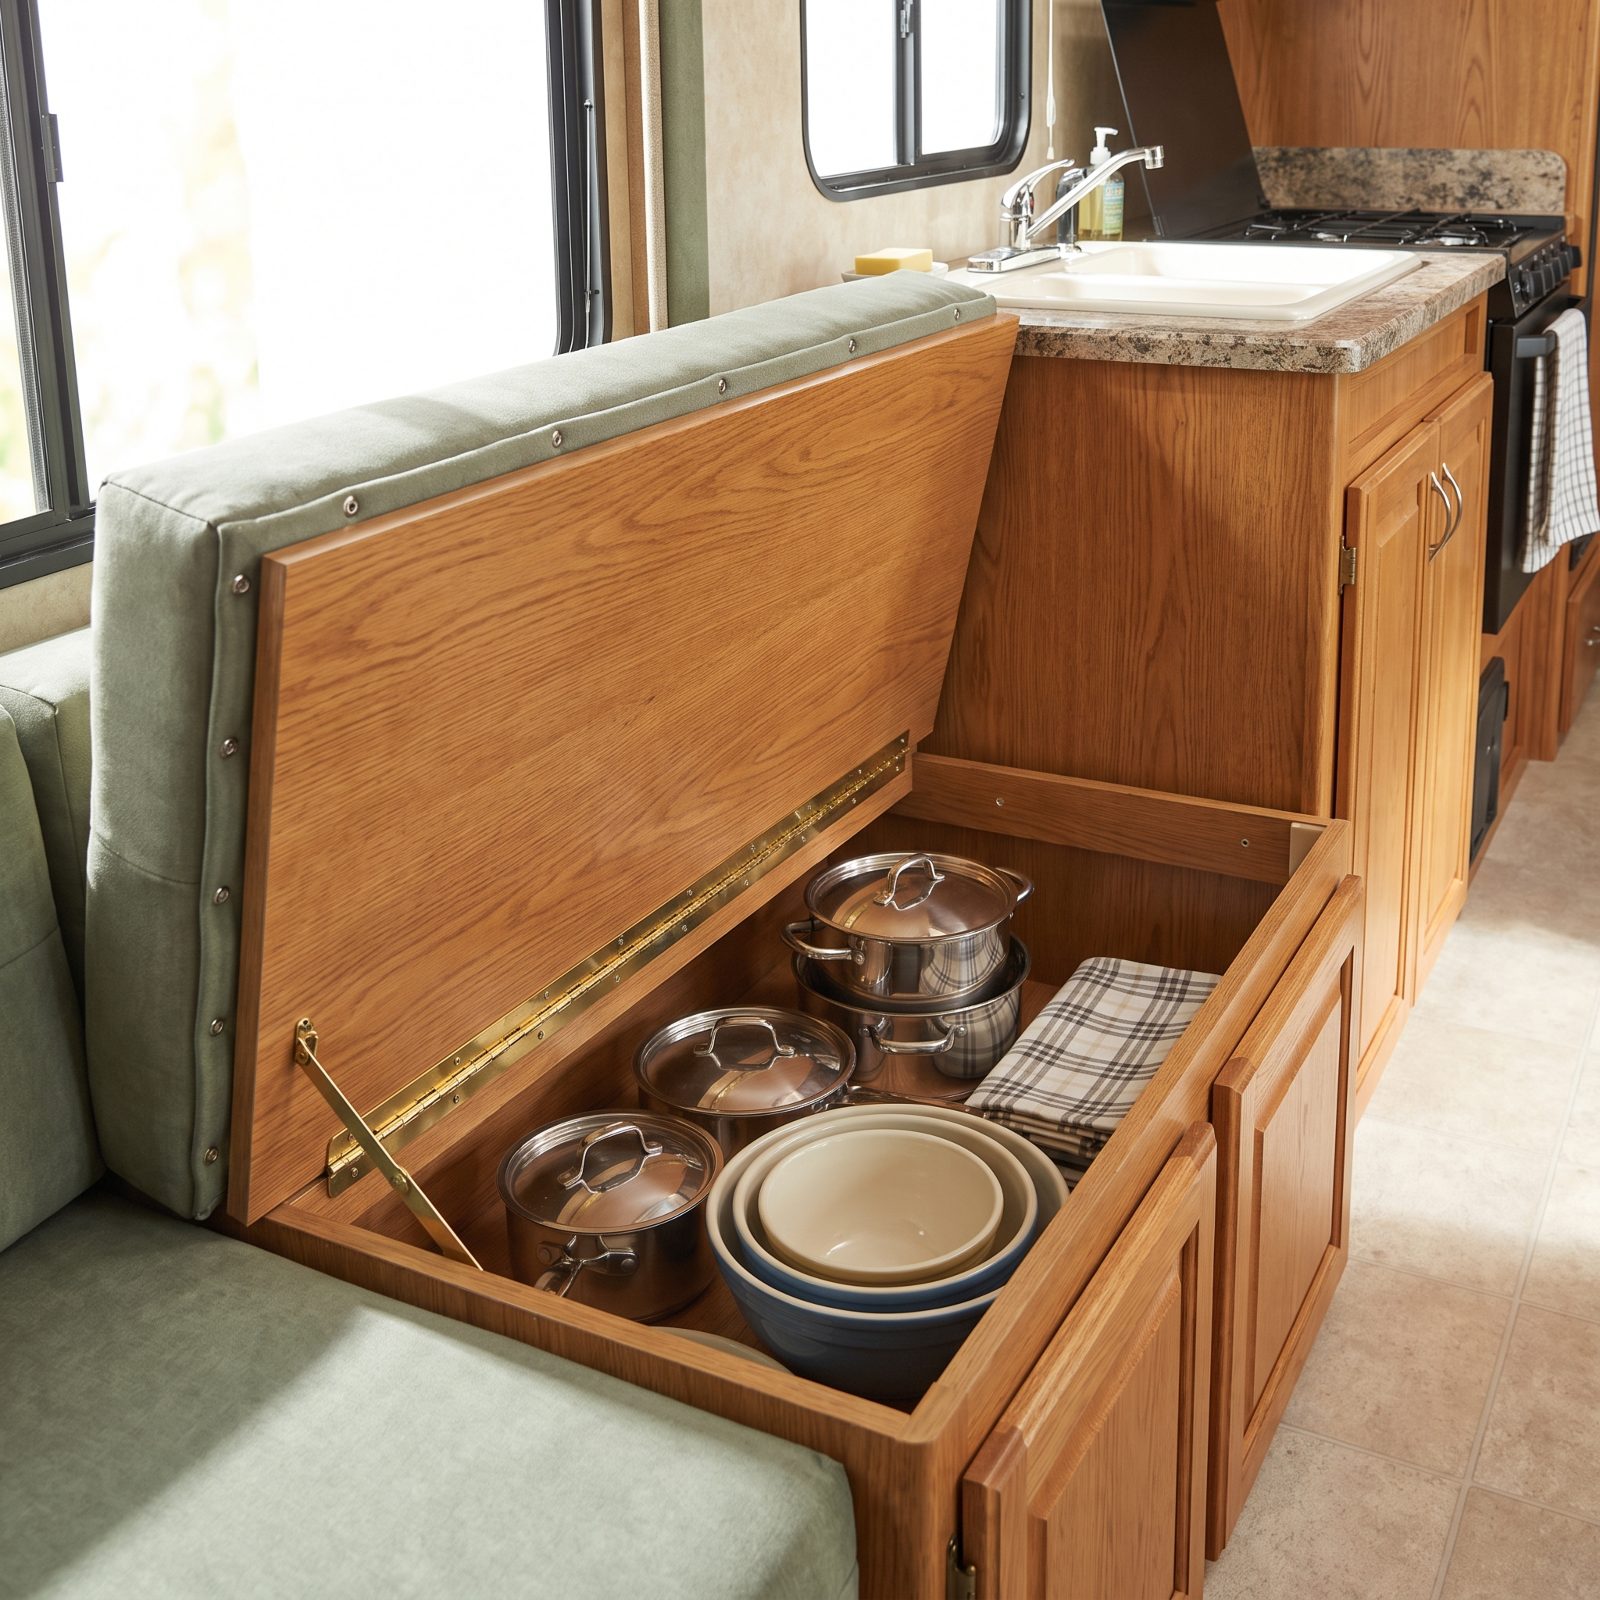
The dinette bench is almost always hollow, and the cavity closest to the galley is prime real estate — except you’re probably getting at it through the top, which means unloading cushions every single time. Cut an access door in the end panel facing the kitchen and that cavity becomes a cabinet you open with one hand.
Stock it with the heavy, bulky stuff. Pots, the big pan, the salad spinner you use twice a year. Keeping weight low and near the kitchen settles the galley down without stealing a single inch of counter.
1. Mount a Fold-Down Counter Extension at the Galley’s End
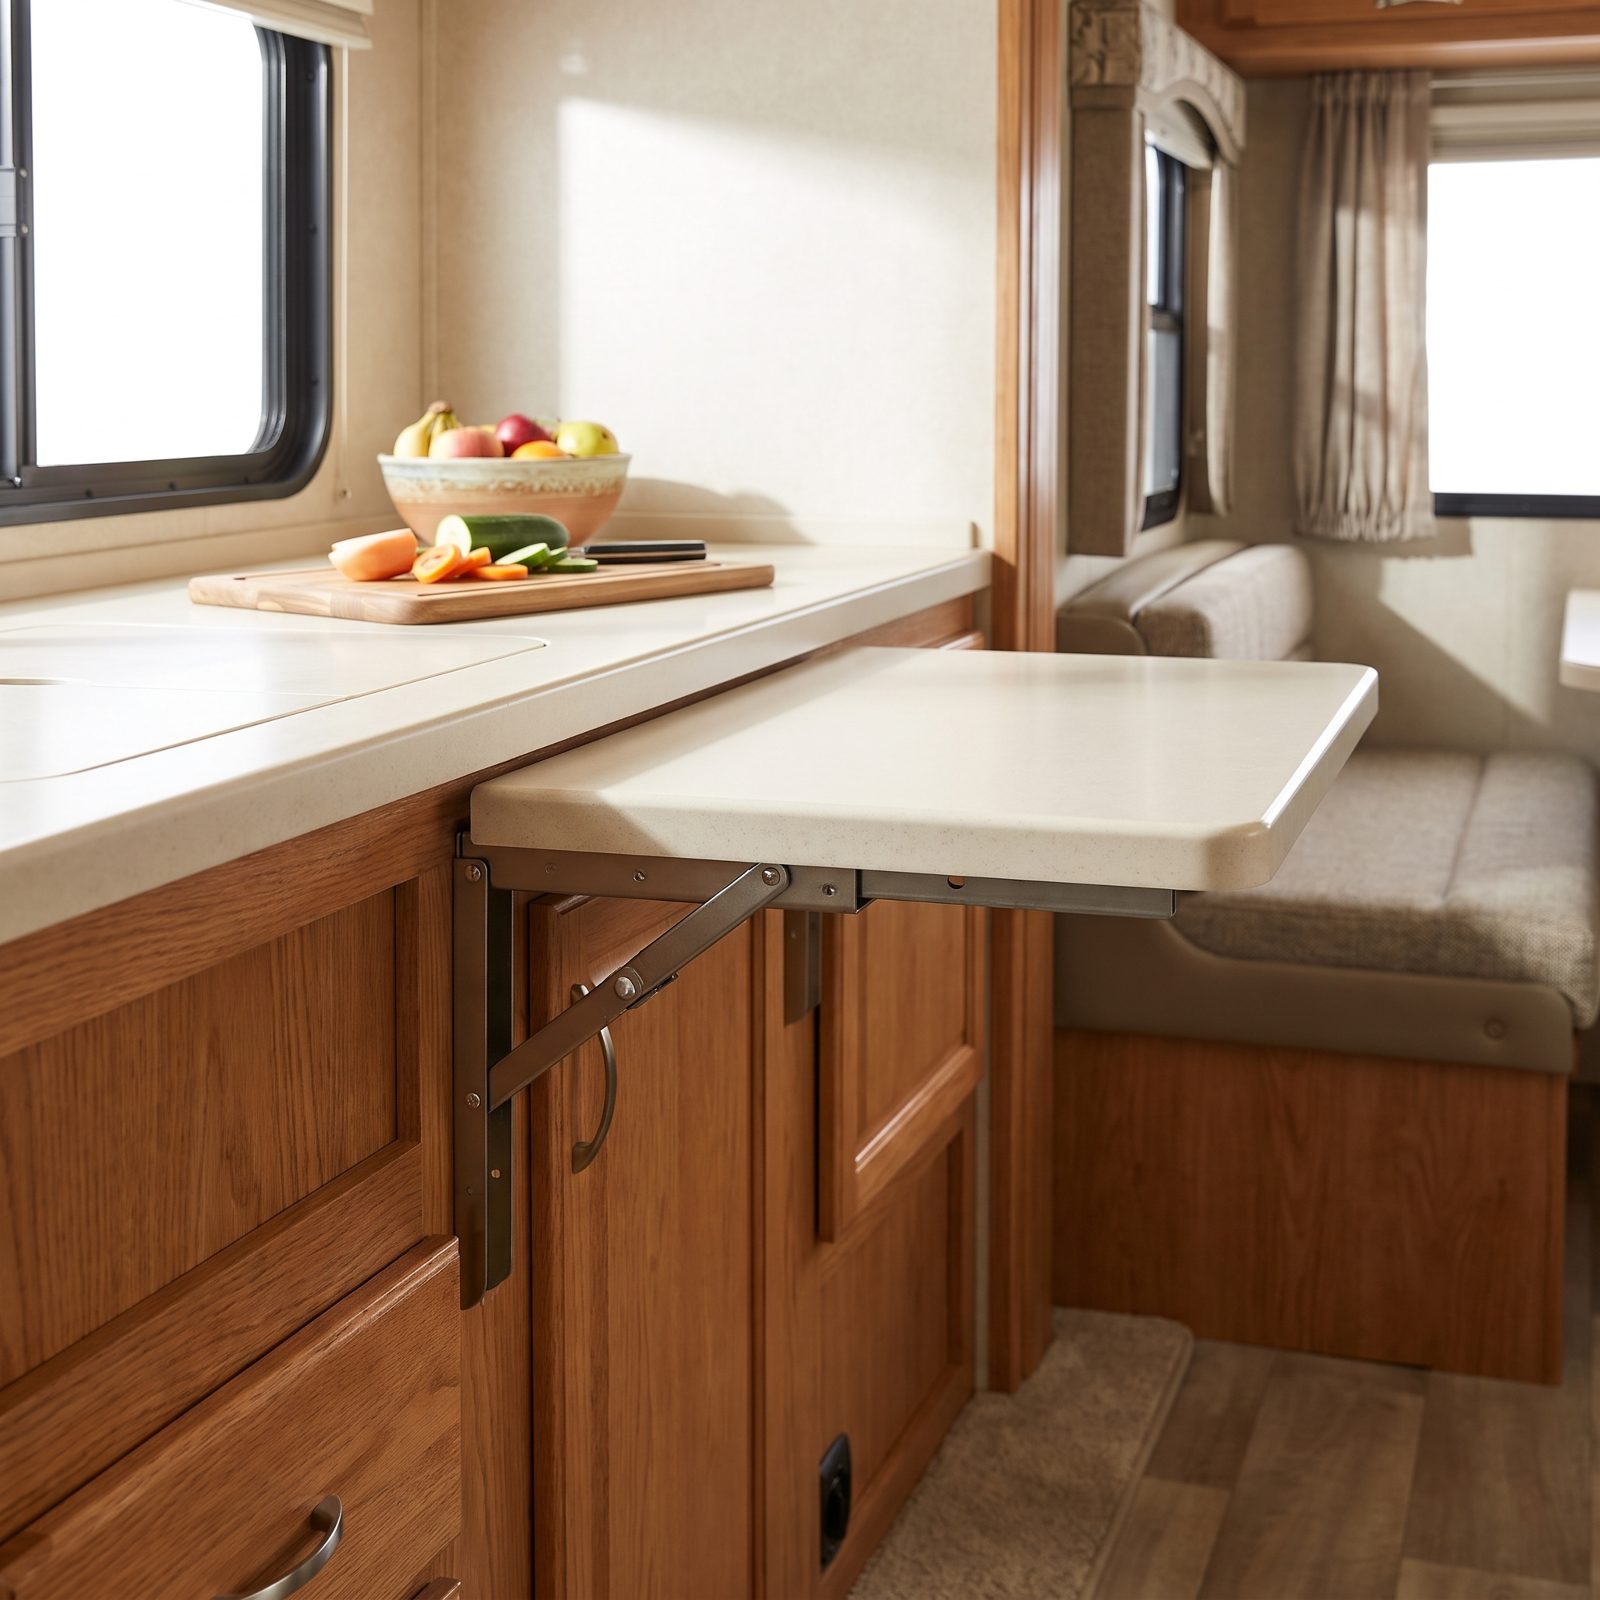
Counter space is the currency of a small galley, and most RVs are broke. A fold-down extension at the end of the run buys you another square foot or so, then folds flat against the cabinet when you don’t need it.
A folding shelf bracket and a cut piece of countertop or butcher block, and you’re done. Just hang it where it won’t block the aisle when it’s up. If I could only do one upgrade on this whole list, this would be it — there’s never been a cooking night where I didn’t want more flat space to put things down. Go try it.