
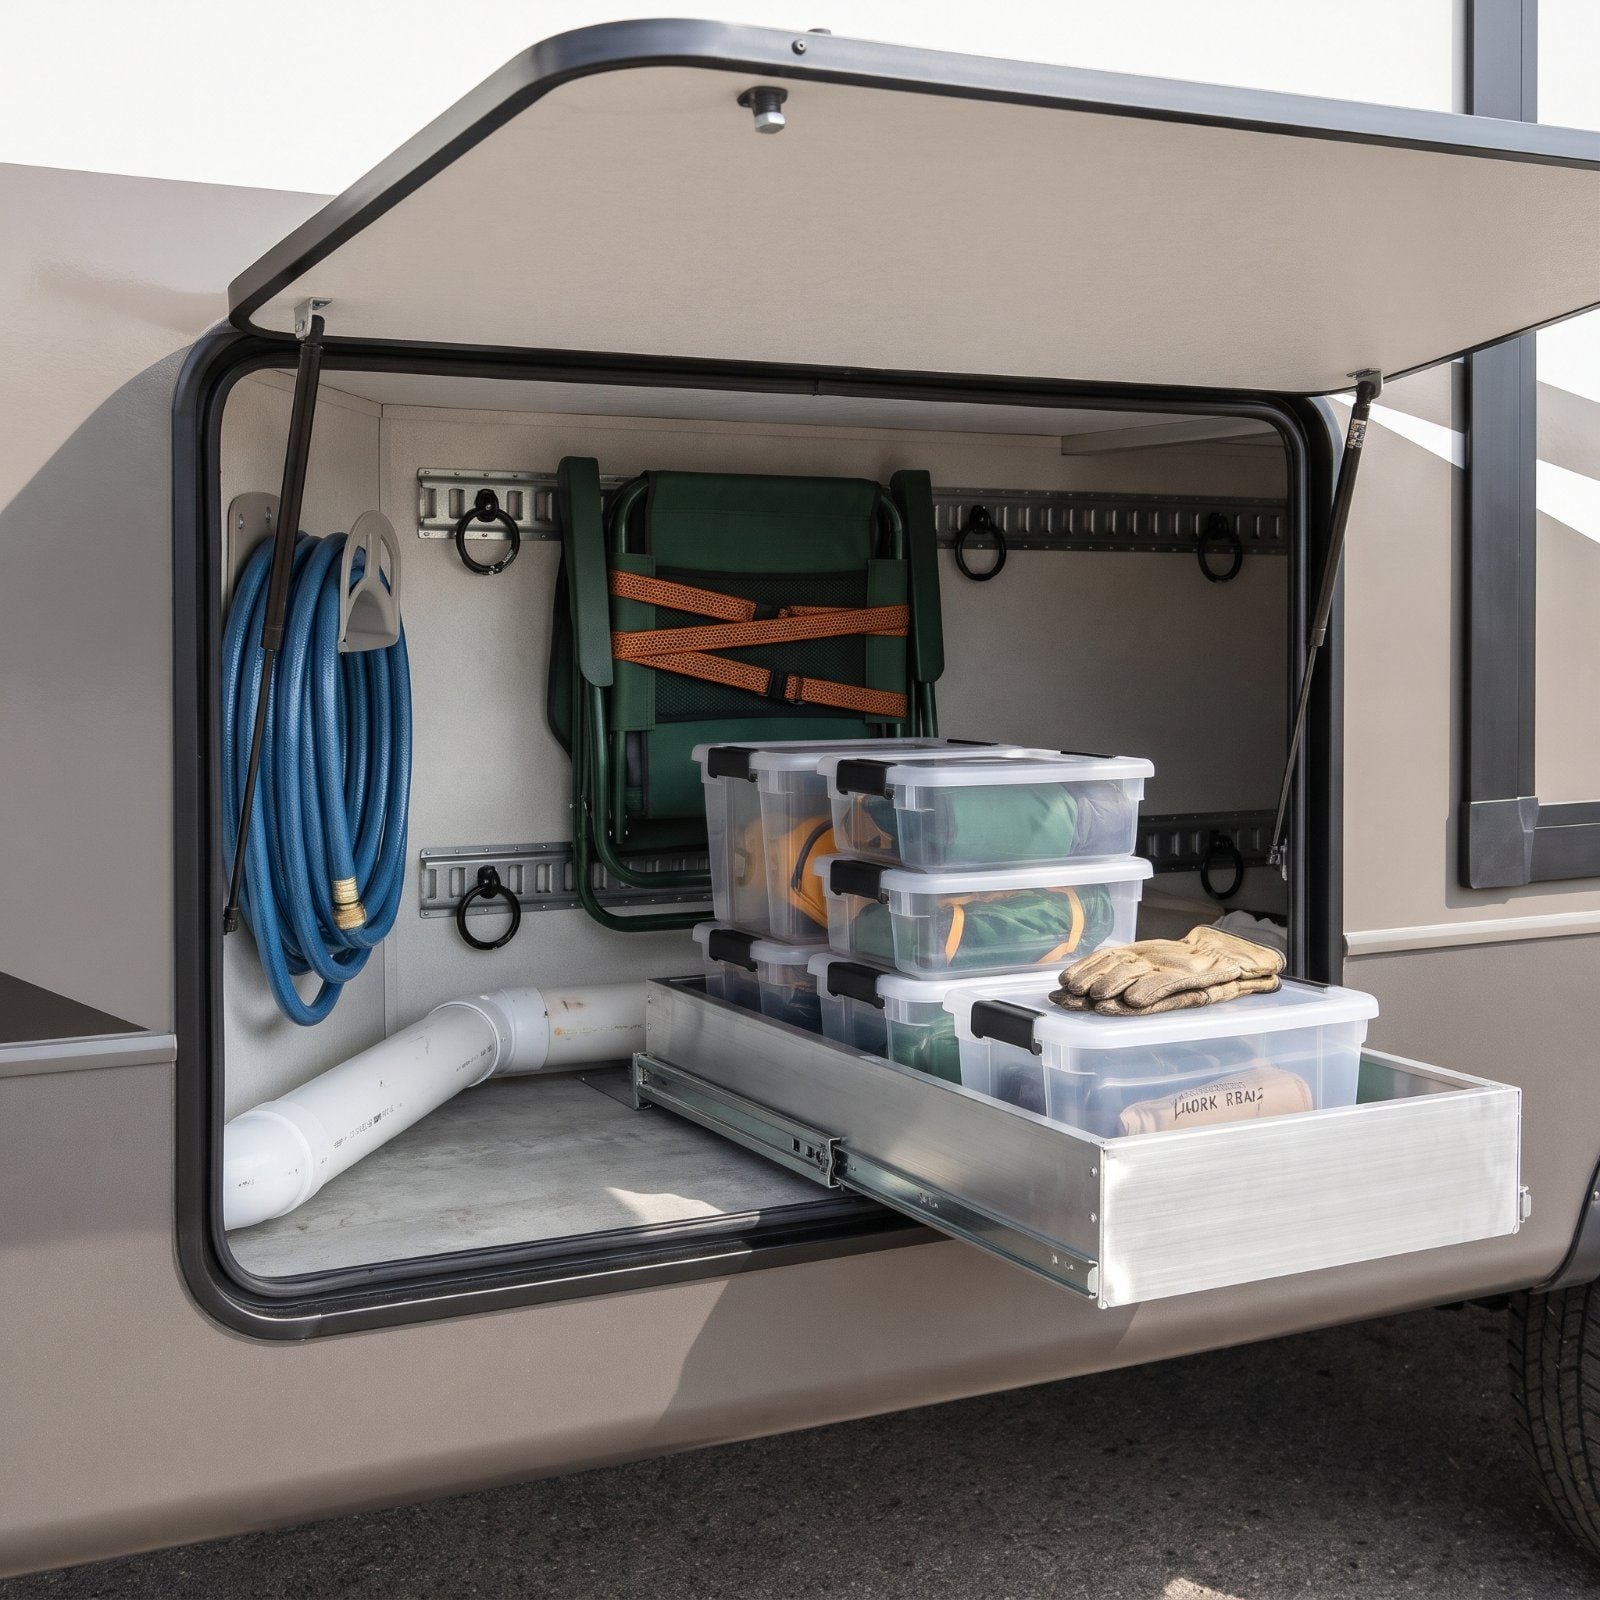
The first time you reach into a basement bay for the sewer gloves and come out with a leveling block, a crushed box of fire starters, and a mystery hose, you get it. Deep bays swallow gear and under-bed voids hide it, and every pothole rearranges the whole mess while you drive. Full-timers figure this out fast because they live with it daily, not twice a summer. The fixes below aren’t glamorous. They’re the stuff that saves you from kneeling on gravel in the rain, elbow-deep in a bay, muttering at a propane tank. We’ve packed and unpacked enough rigs to know which tricks actually hold.
Please note that some of the images in this article were created with the assistance of AI.
46. Install a Full-Extension Tray in a Deep Bay
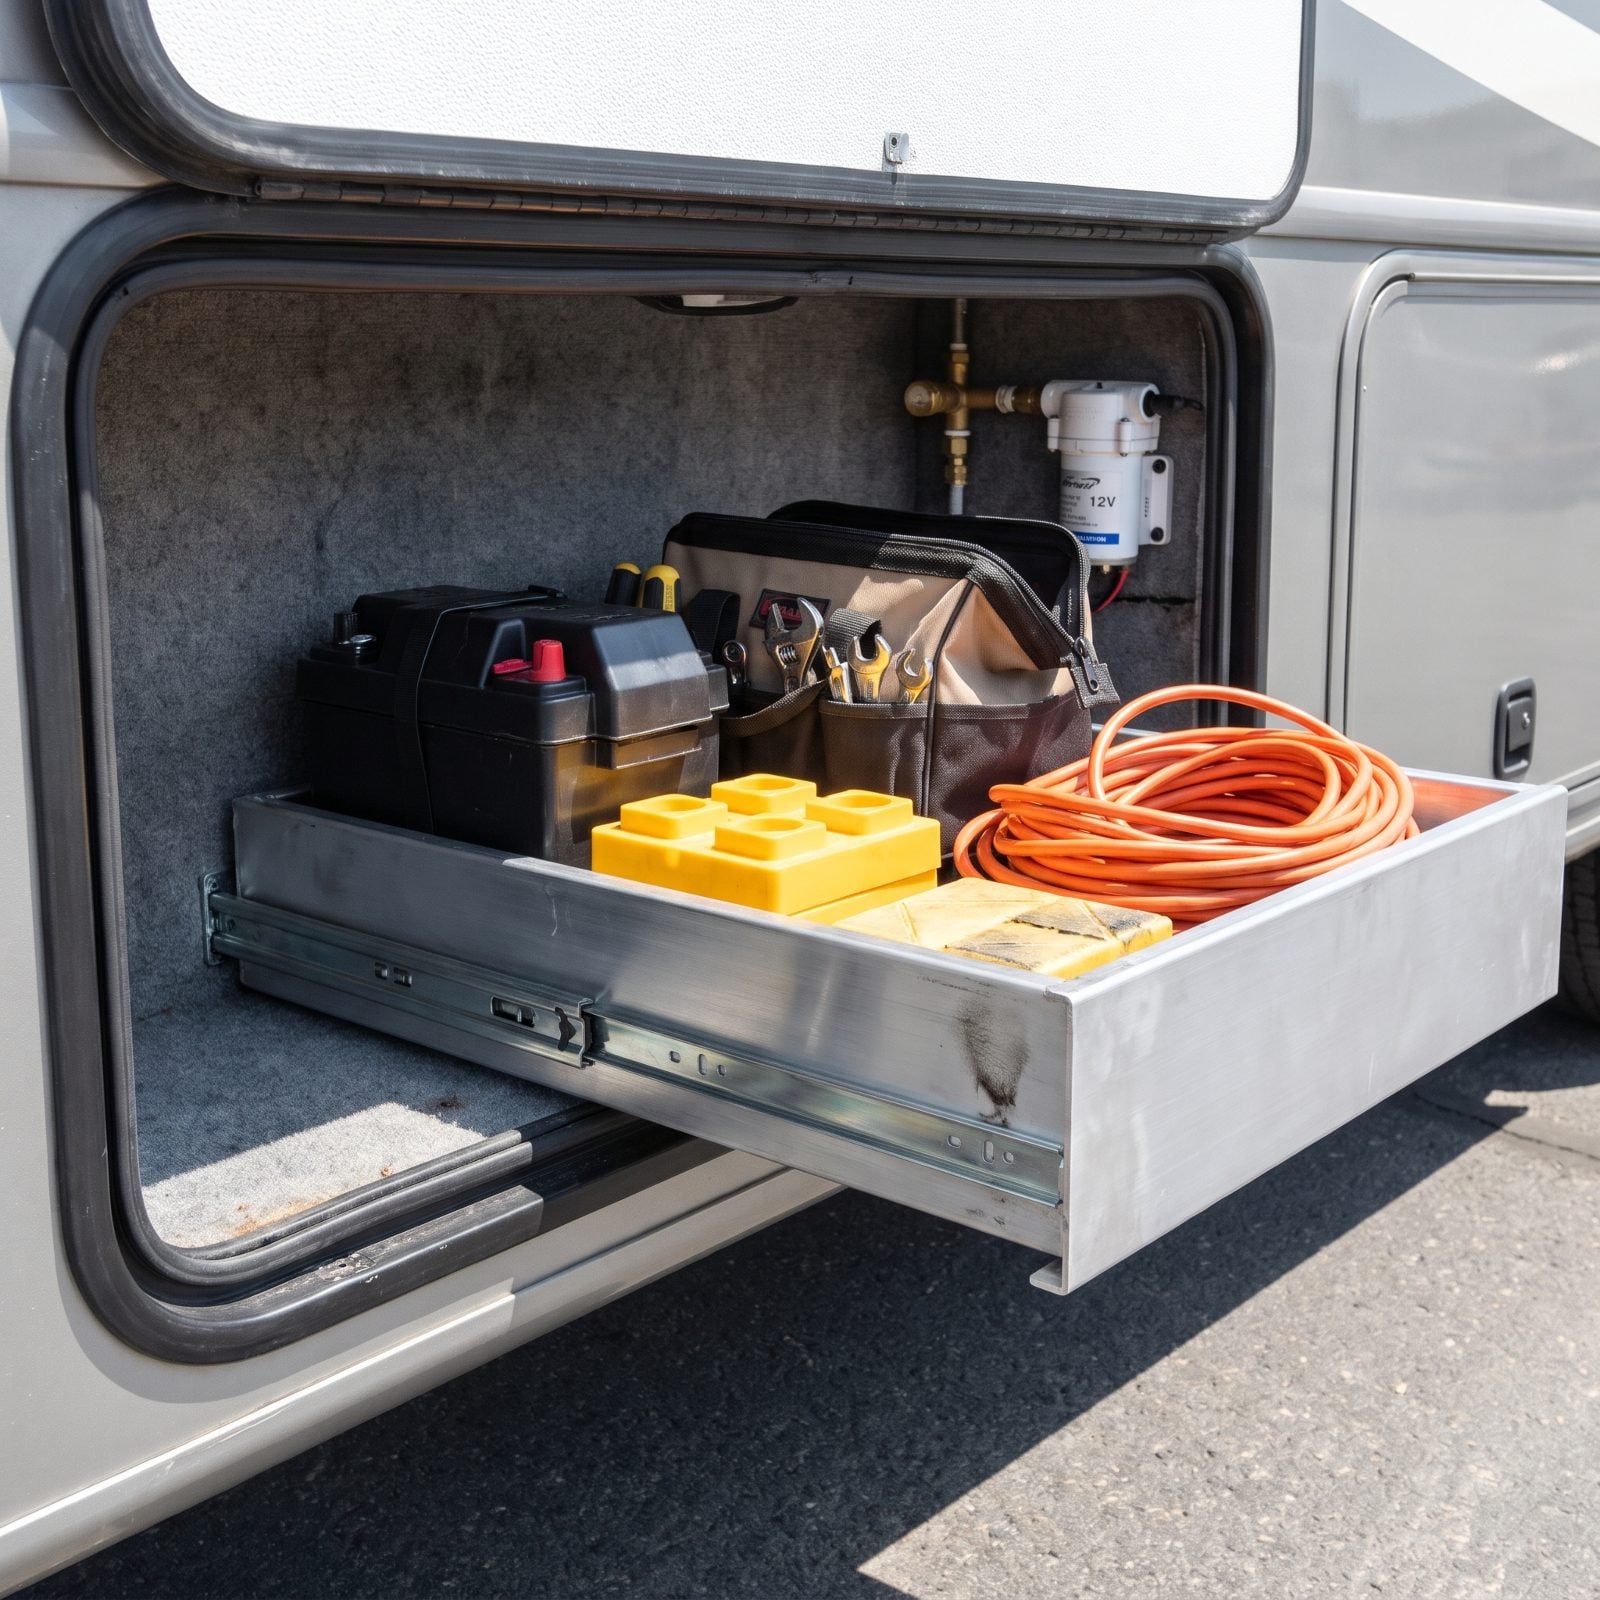
The gear you need always lives at the very back of the bay, behind everything else. A full-extension slide tray fixes that in one move: instead of crawling in on your knees, you pull the whole floor out to you and grab what you want standing up.
Rated trays run anywhere from around $80 for a light-duty one to several hundred for the 500-plus-pound versions that hold batteries and toolboxes. Get the load rating right. We under-bought the first time, loaded it with two Group 31 batteries, and watched the runners bind on every bump until we swapped them out.
45. Use Clear, Latching Bins for Instant Visibility
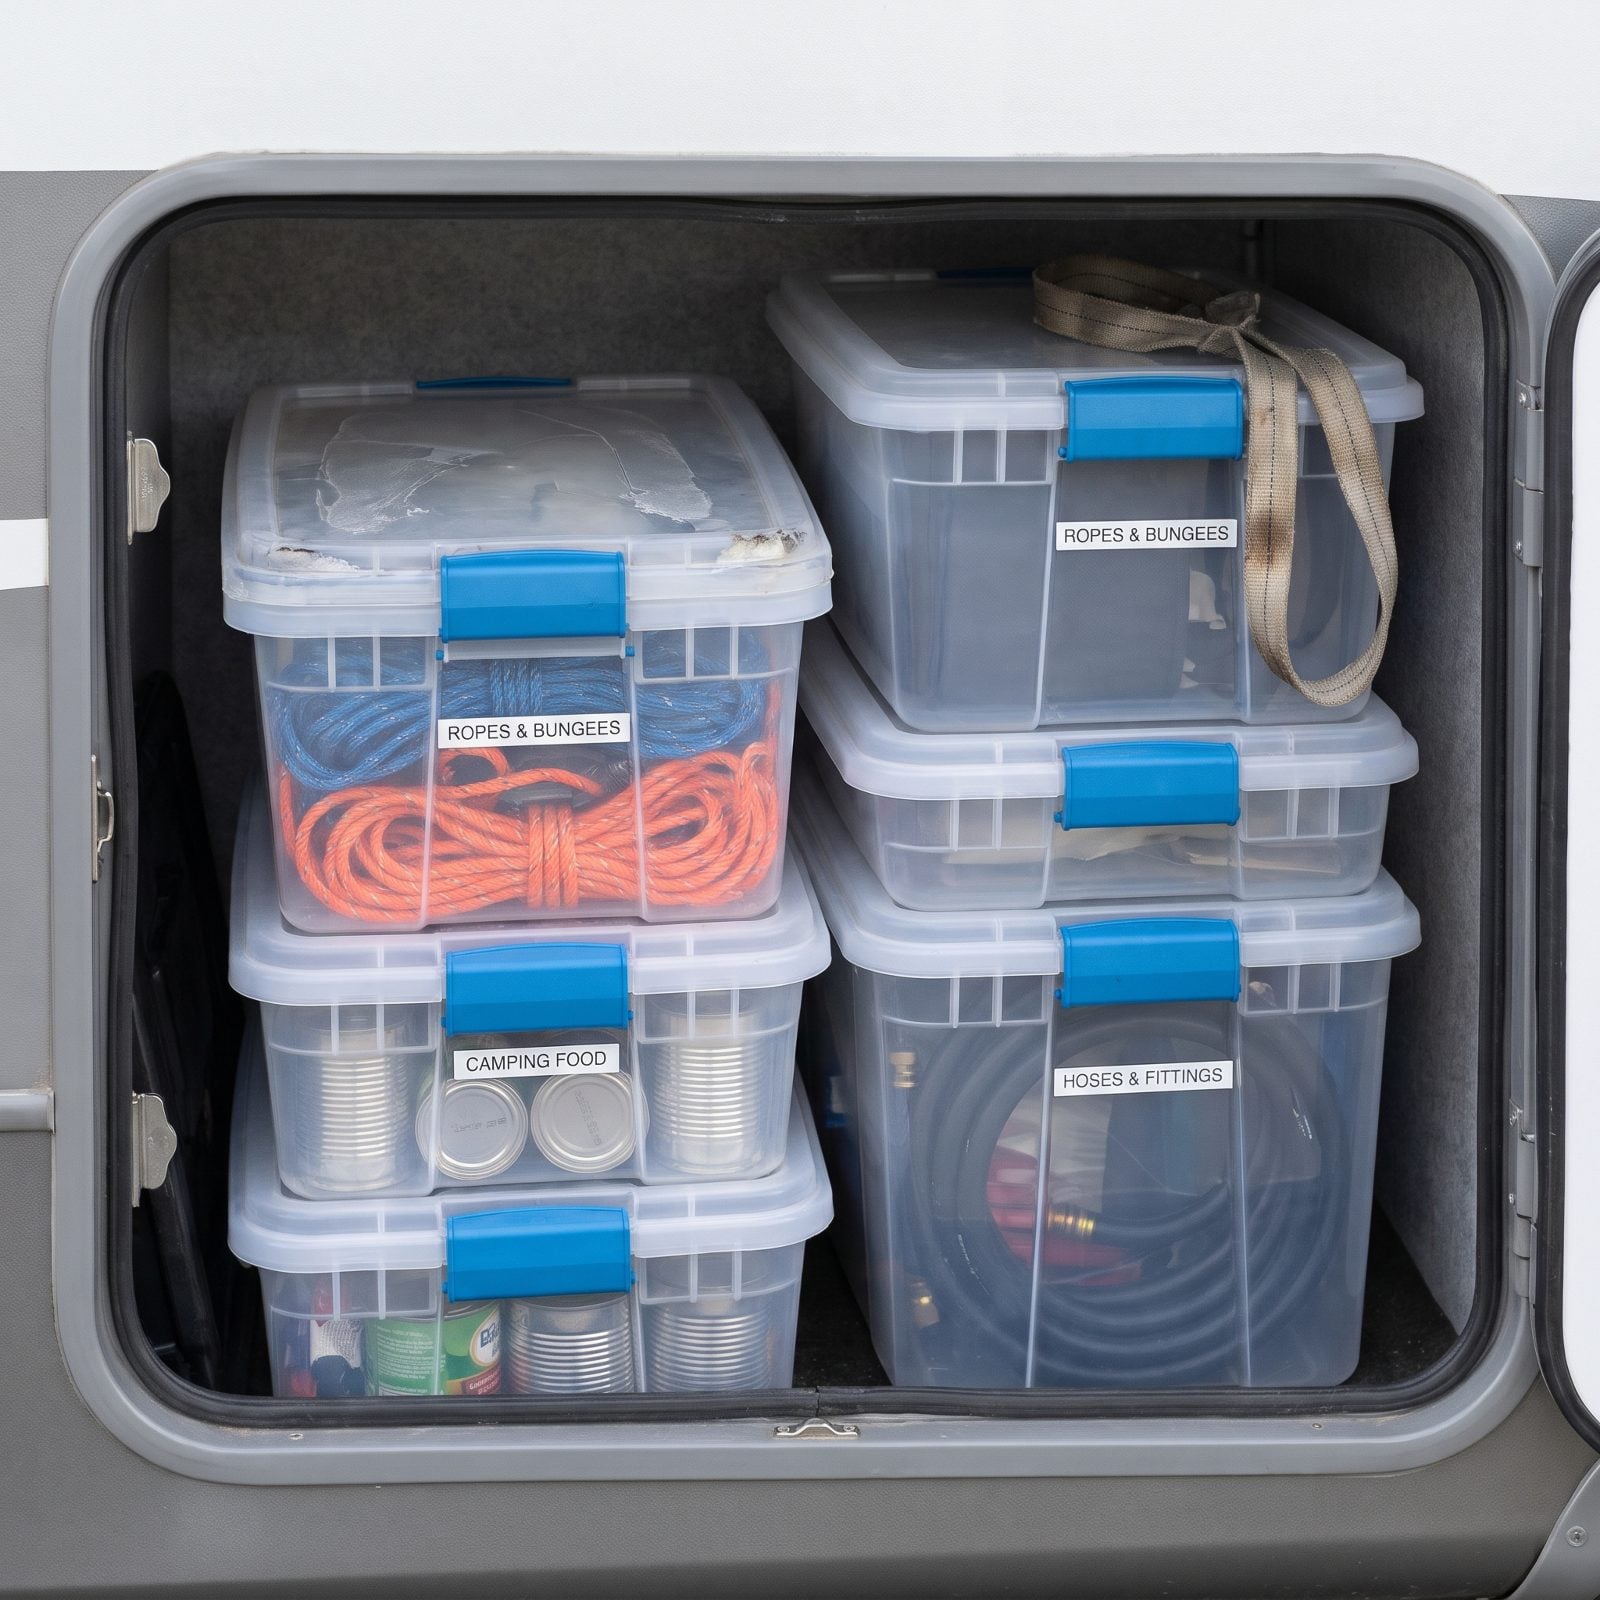
Cardboard boxes in a bay are a mistake you only make once. They wick up moisture, collapse under weight, and hide what’s inside. Clear latching bins solve both problems — you see the contents before you open anything, and the latches keep the lid on when a pothole throws the whole stack sideways.
Don’t worry about buying one size. Mixing a tall bin for bulky hoses with shallower ones for food and ropes lets you fill the bay’s height with little wasted air, and snug stacks wedged side by side keep everything from shifting. Label the short end, not the top, so you can read them without pulling the stack apart.
44. Stop Tote Drift With Telescoping Cargo Bars
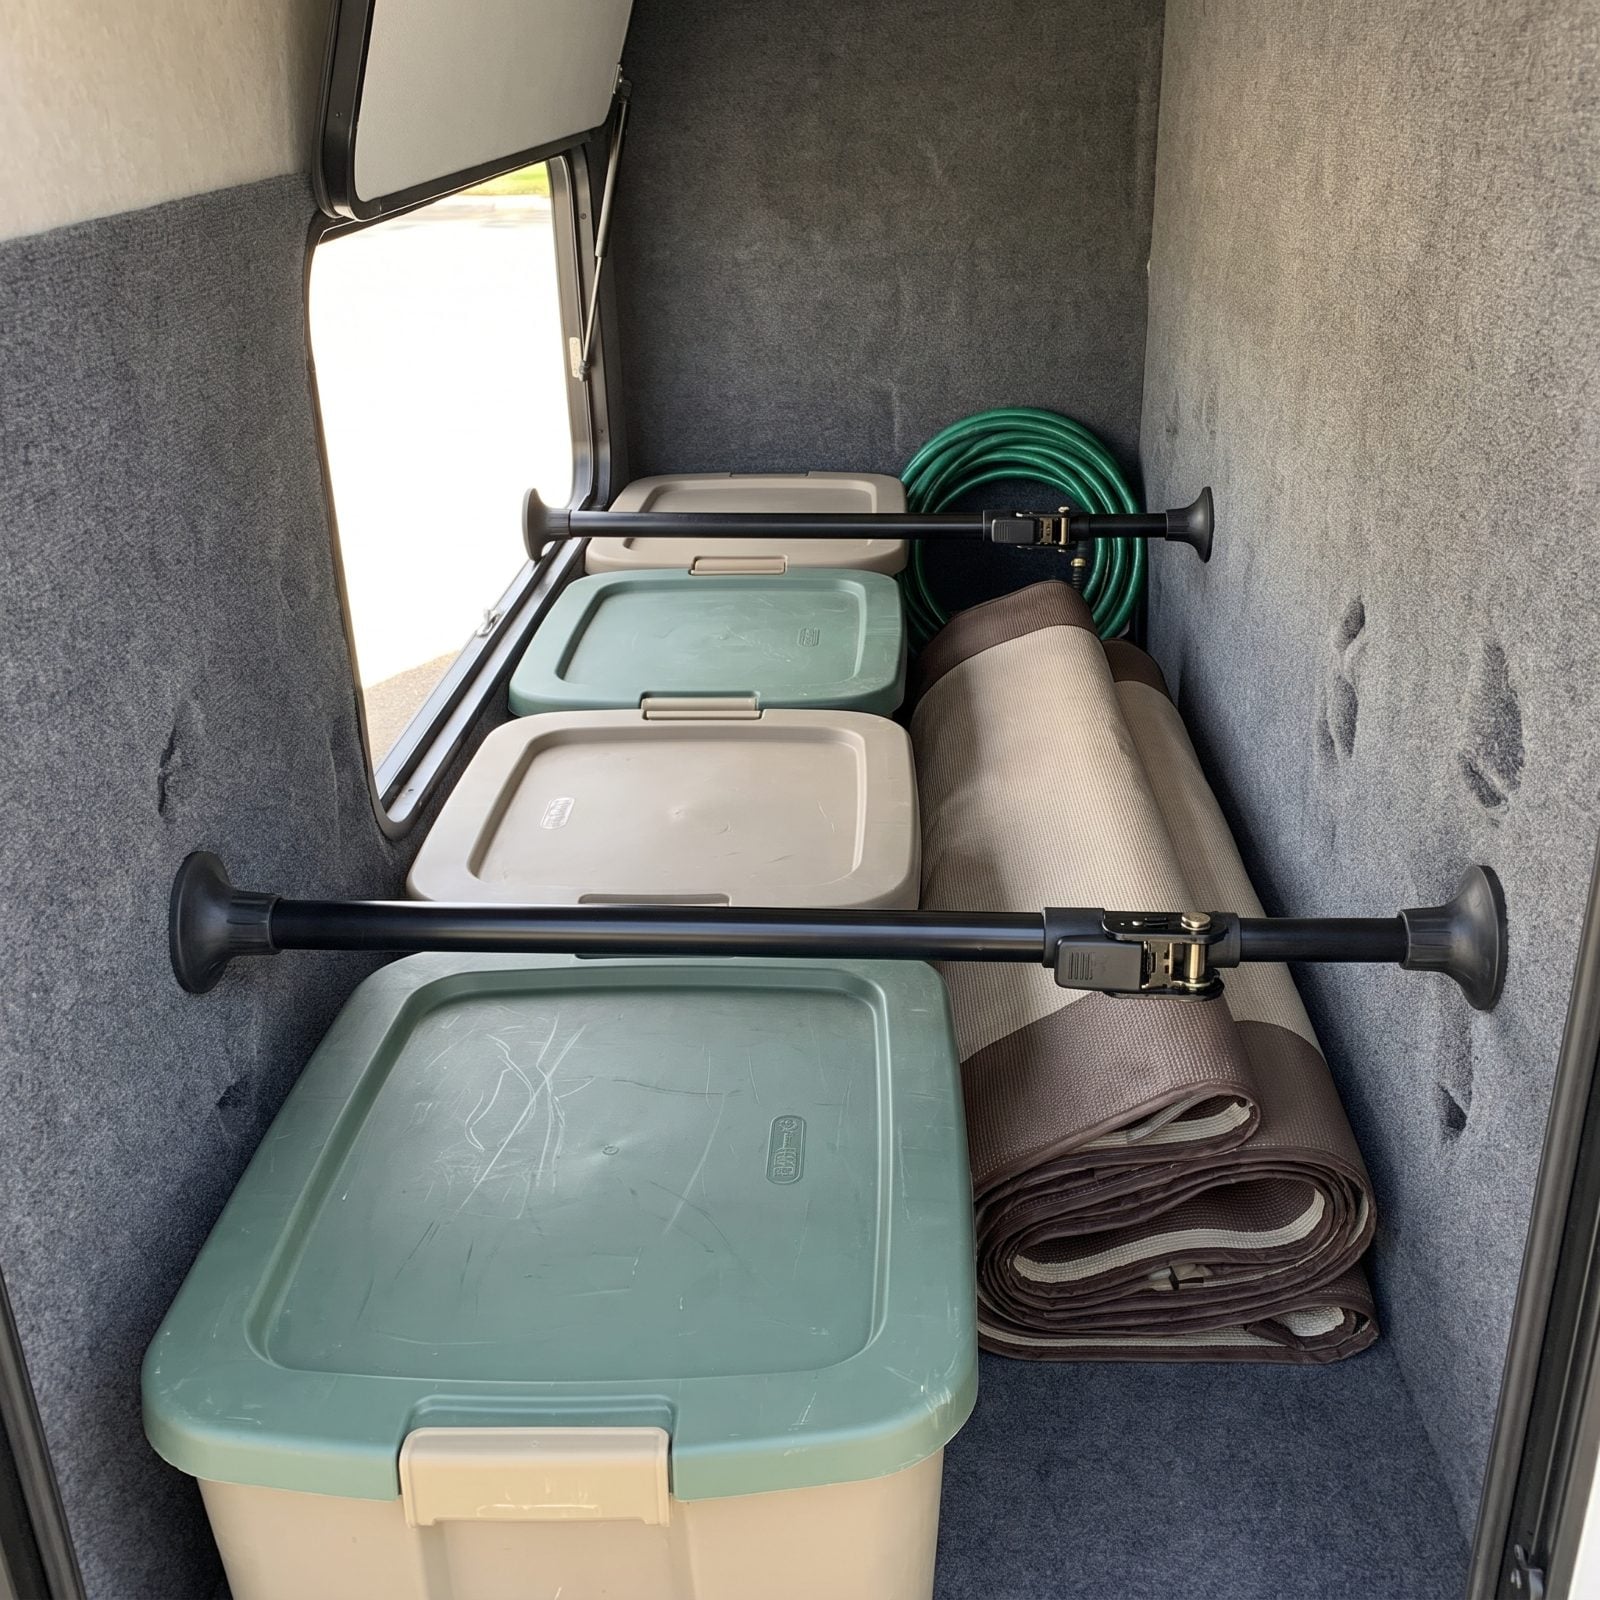
Everything you load neatly at the campground turns into a pile at the next turn. Telescoping cargo bars, the same kind people use in pickup beds and SUV cargo areas, stop that cold. You extend one across the bay, lock the ratchet, and the rubber feet press into the walls to hold a whole row of totes against the back.
Figure $25 to $40 a pair, and they install in seconds with no drilling. That last part matters in a rental or a rig you’re not ready to put holes in yet.
43. Use Vertical Tension Rods to Brace Tall Gear
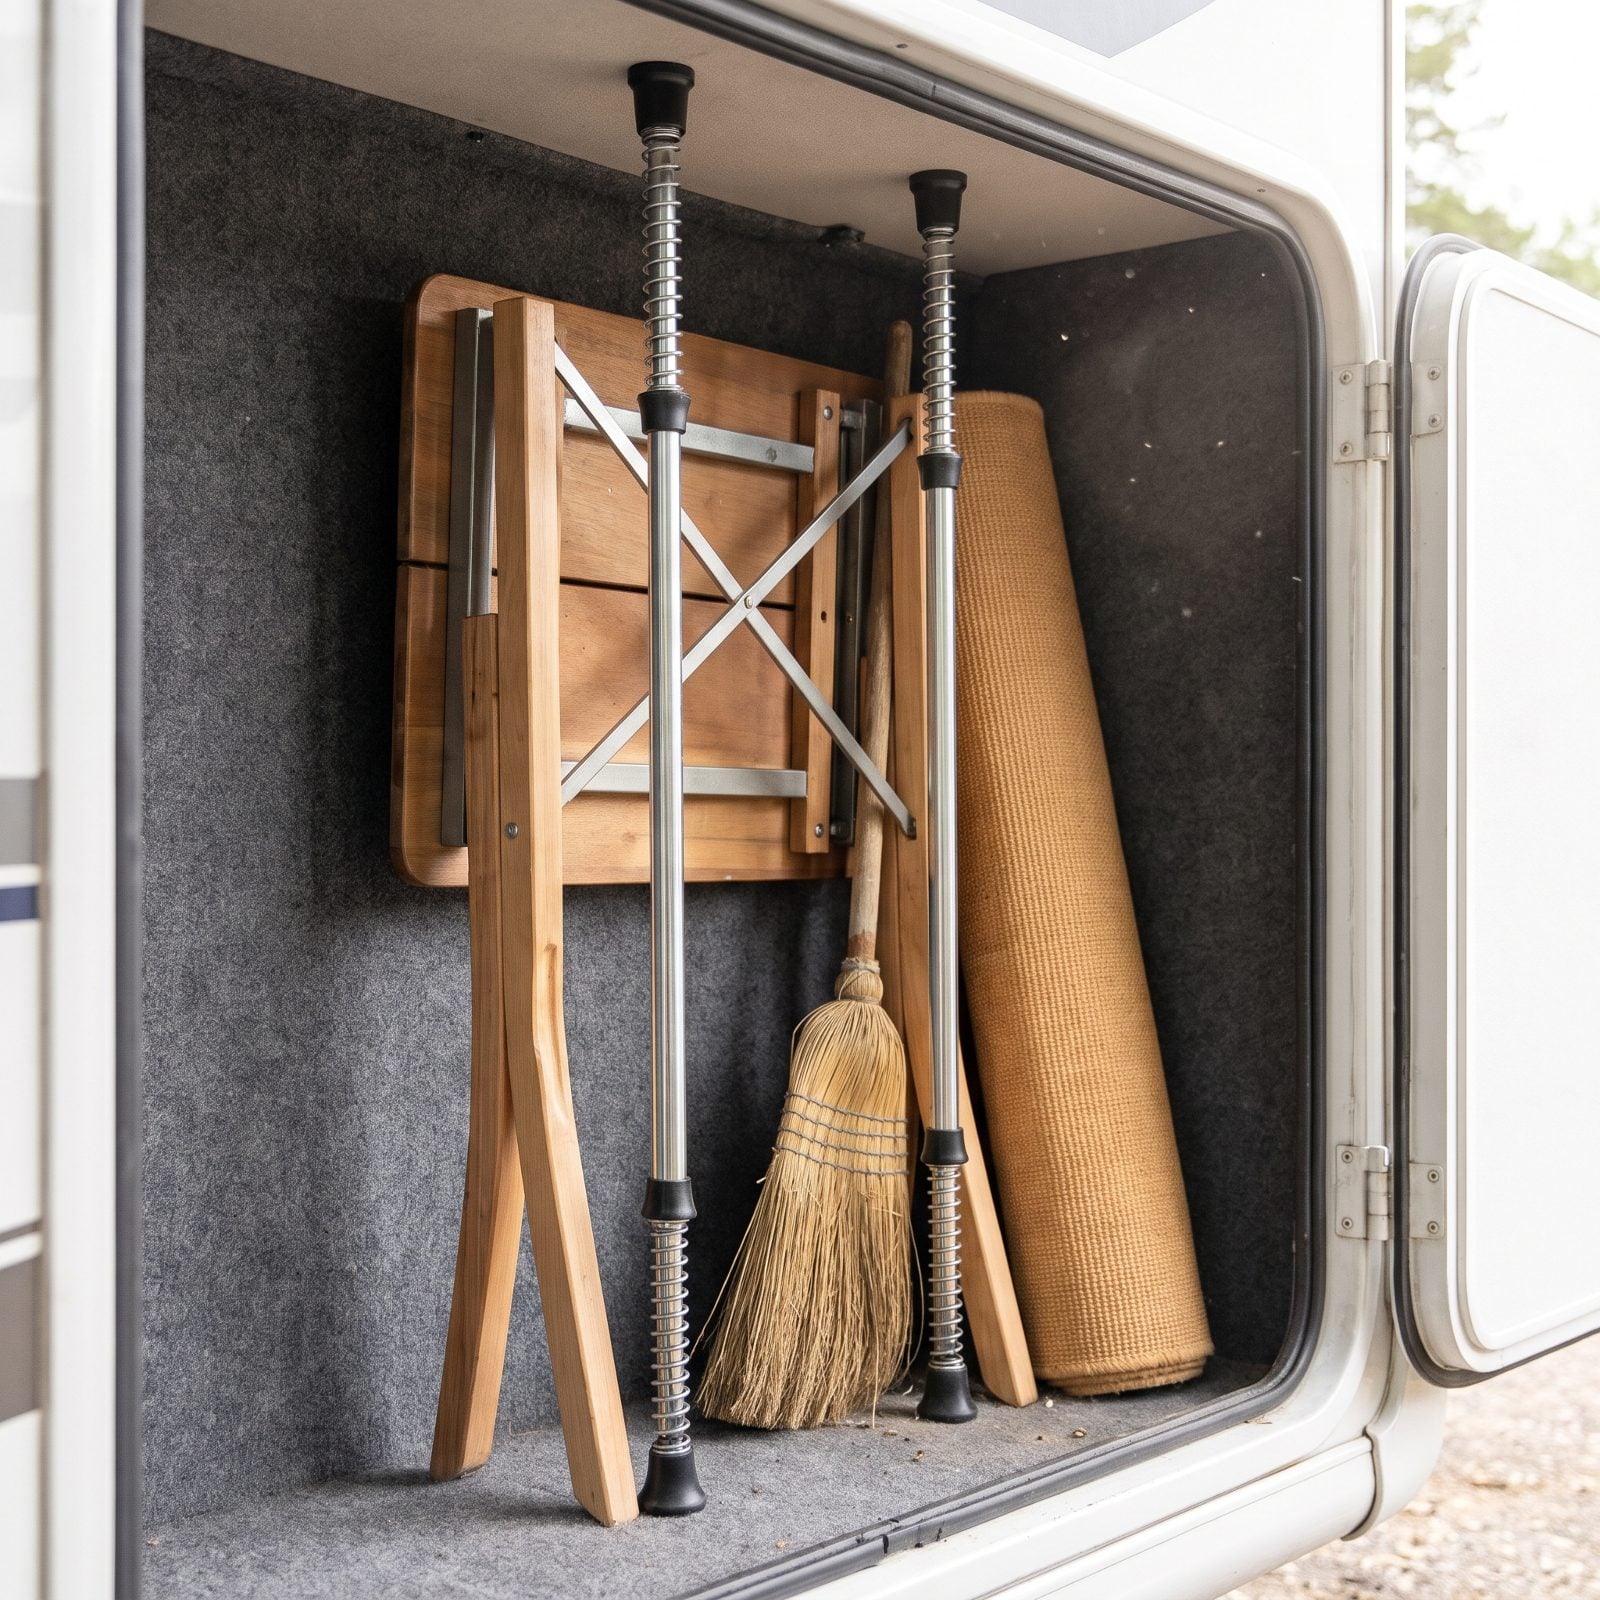
Tall skinny gear is the worst to store. Brooms, folding tables, rolled rugs, fishing rods — they slide flat and bury everything under them. Stand the table up and brace it with a vertical tension rod wedged floor to ceiling, then stand the broom and rolled rug upright against the wall and pin them behind a second rod, and everything stays put instead of sliding around.
Shower-curtain tension rods work fine for light stuff. It’s the cheapest fix in this whole list, maybe ten bucks, and nobody tells you to do it until you’ve chased a rolling broom handle out of the bay twice.
42. Mount a Pegboard Tool Wall on a Bay Partition
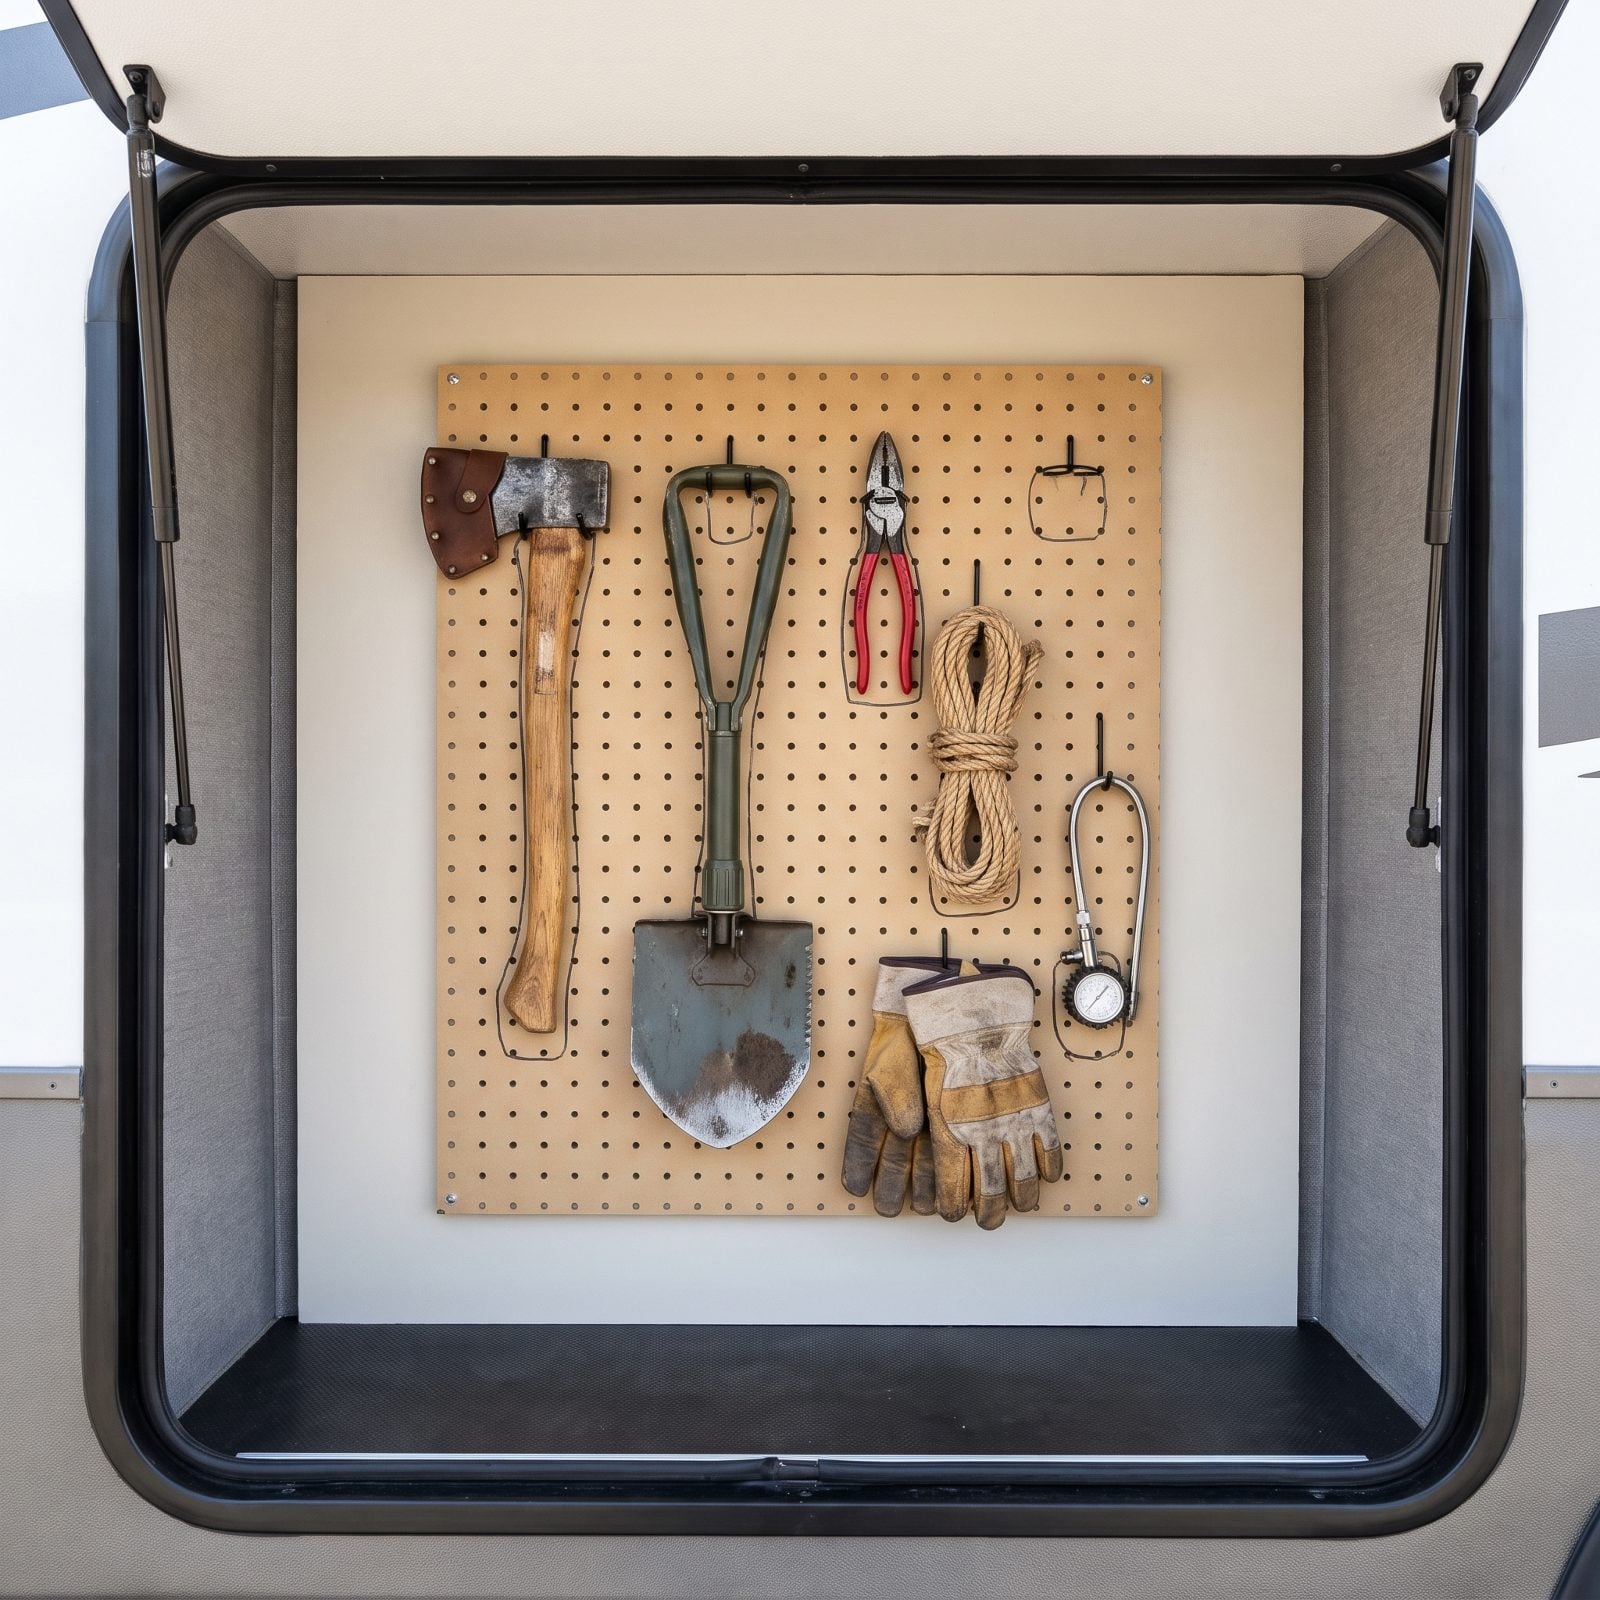
That flat vertical partition at the end of your bay is wasted space. Screw a small pegboard panel to it and suddenly you’ve got a tool wall where every hatchet, pair of pliers, and coil of rope hangs in plain sight.
Here’s what makes it work: trace each tool’s outline on the board with a marker. An empty outline with no tool filling it means something didn’t make it back, and you catch it before you pull away from the site. Dumb-simple habit. It’s saved us a $20 shovel more than once.
41. Add E-Track Rails With Movable Tie-Down Rings
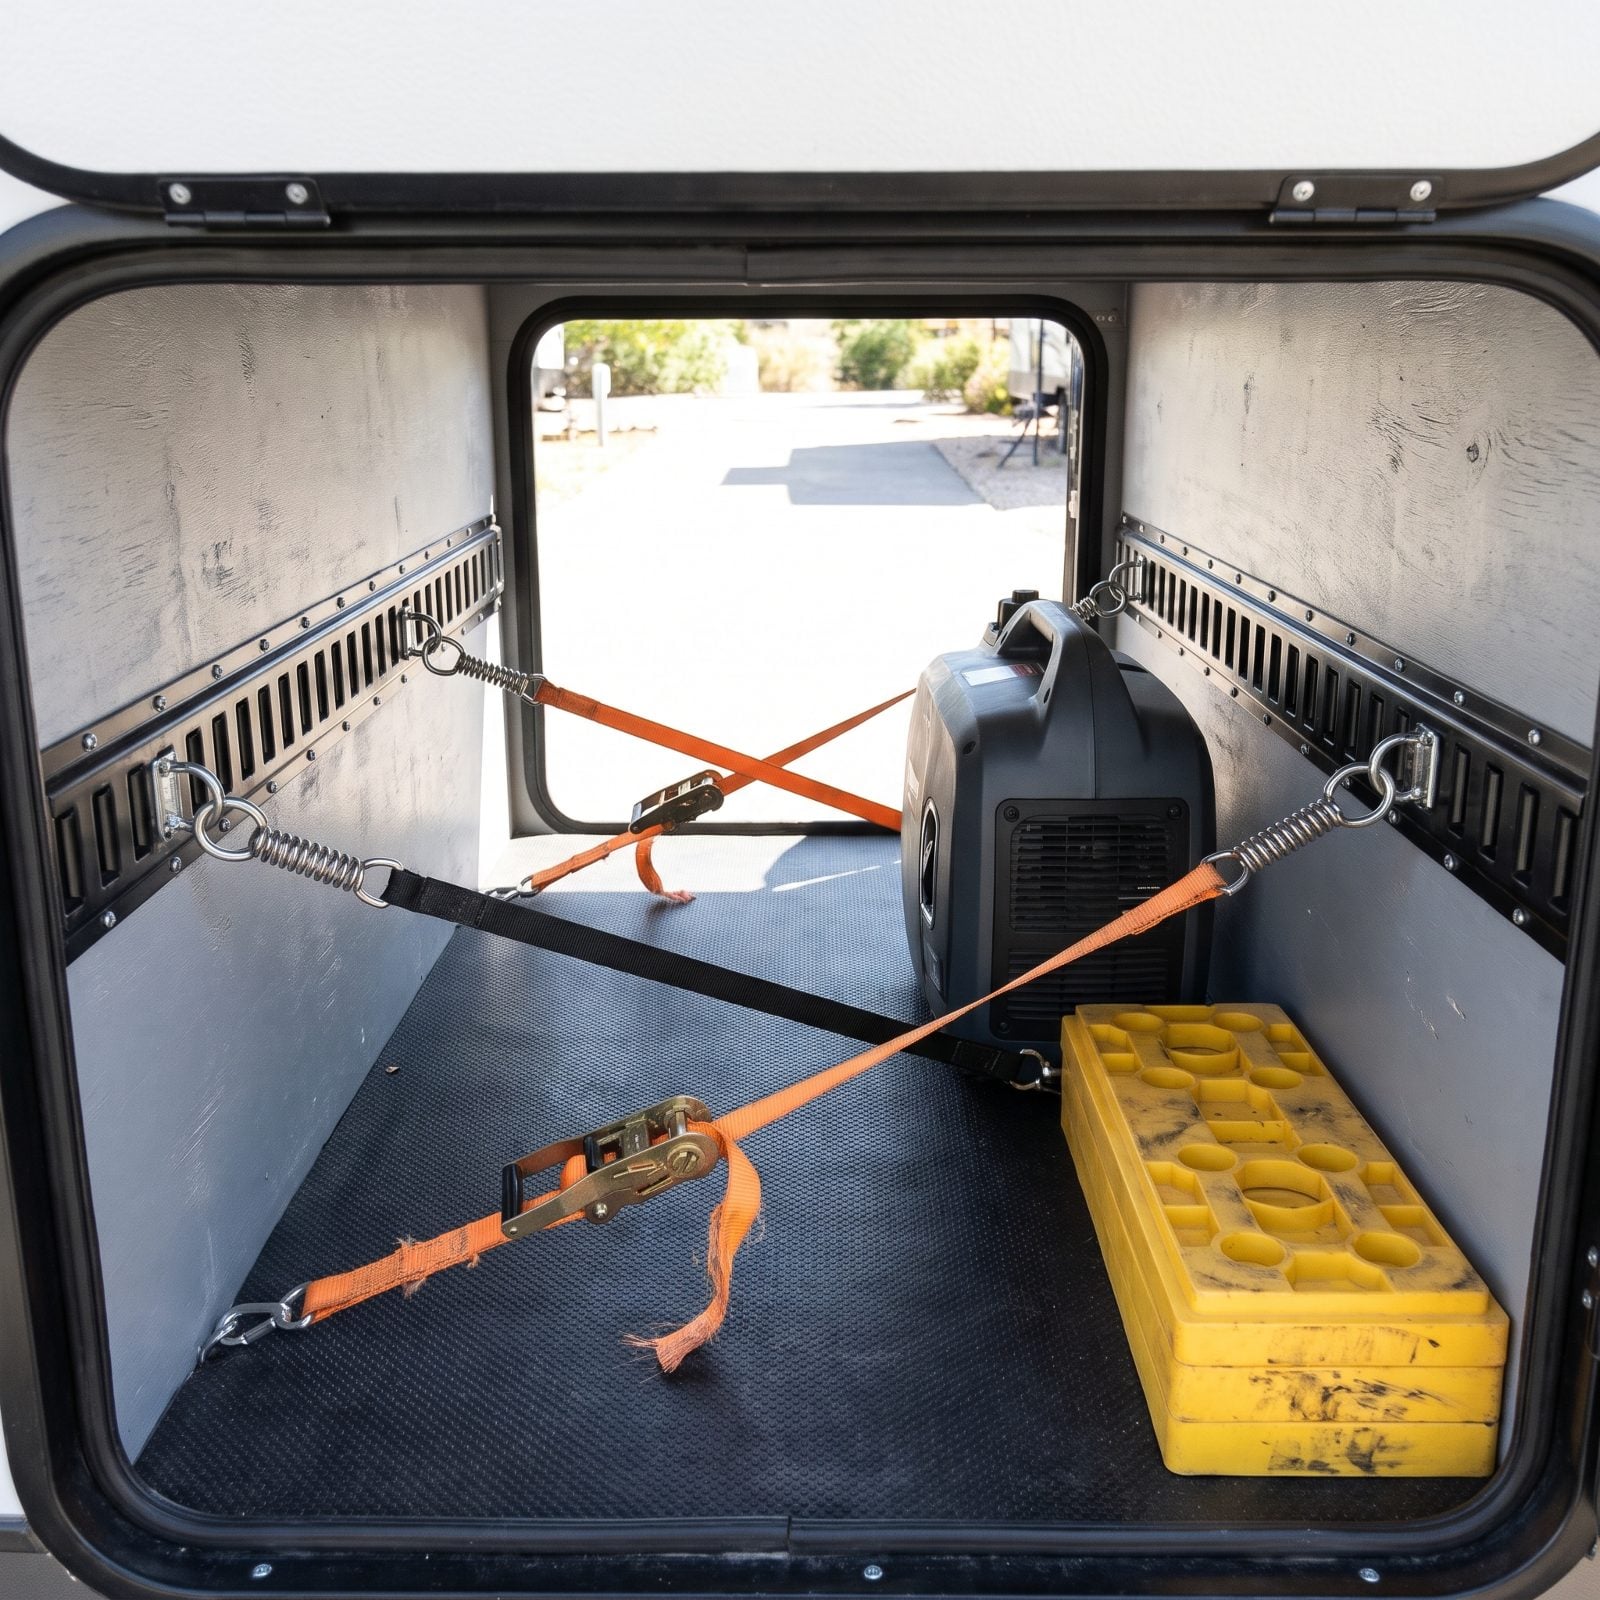
Heavy gear needs more than a bungee. E-track is the slotted rail system the trucking world uses to tie down freight, and it’s the right answer for a generator, a cargo bike, or a case of tools that can’t shift. You bolt the rail to the wall, then clip movable rings wherever the load actually sits.
The movable part is what sells it. Your load changes trip to trip, and fixed anchors never line up with what you’re hauling this week. With E-track you slide a ring to meet the strap, then run the strap over the load before you ratchet it down — a strap left criss-crossing empty space or hooked to nothing won’t hold anything. A few feet of track and a handful of rings runs under $50.
40. Suspend Light Gear in a Bay-Ceiling Bungee Net
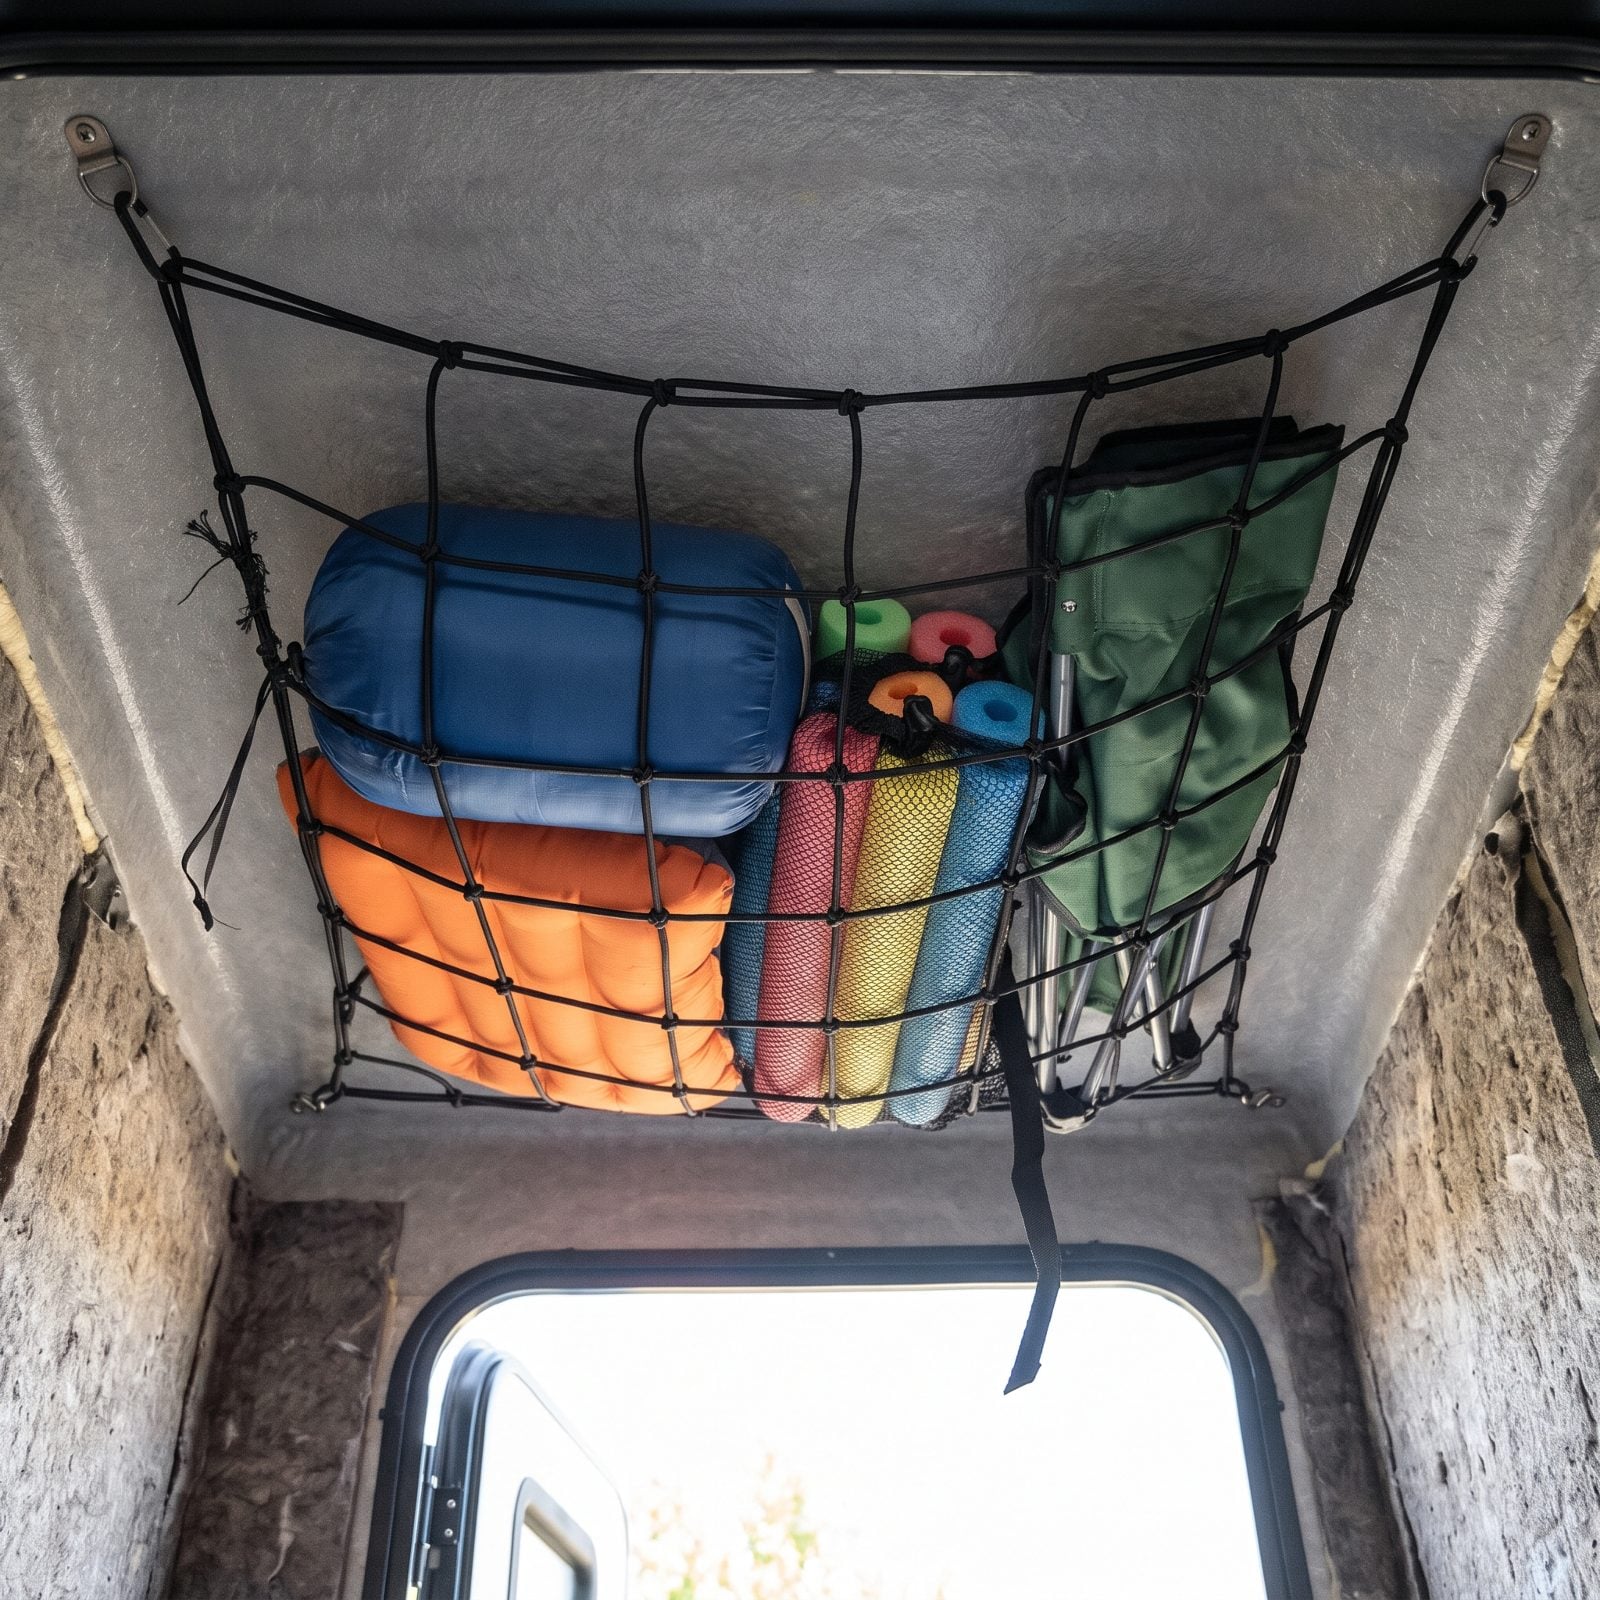
The ceiling of a basement bay is free real estate for anything light and bulky. Stretch a bungee cargo net across it, clip the corners to four small anchor hooks, and tuck your sleeping bags, camp pillows, and pool noodles up overhead where they don’t eat floor space.
Soft, light stuff only. A net is not a shelf — load it with anything heavy and the cords stretch, the gear sags onto your head when you open the door, and you learn why nobody hangs their toolbox up there.
39. Store the Sewer Hose in a PVC Tube
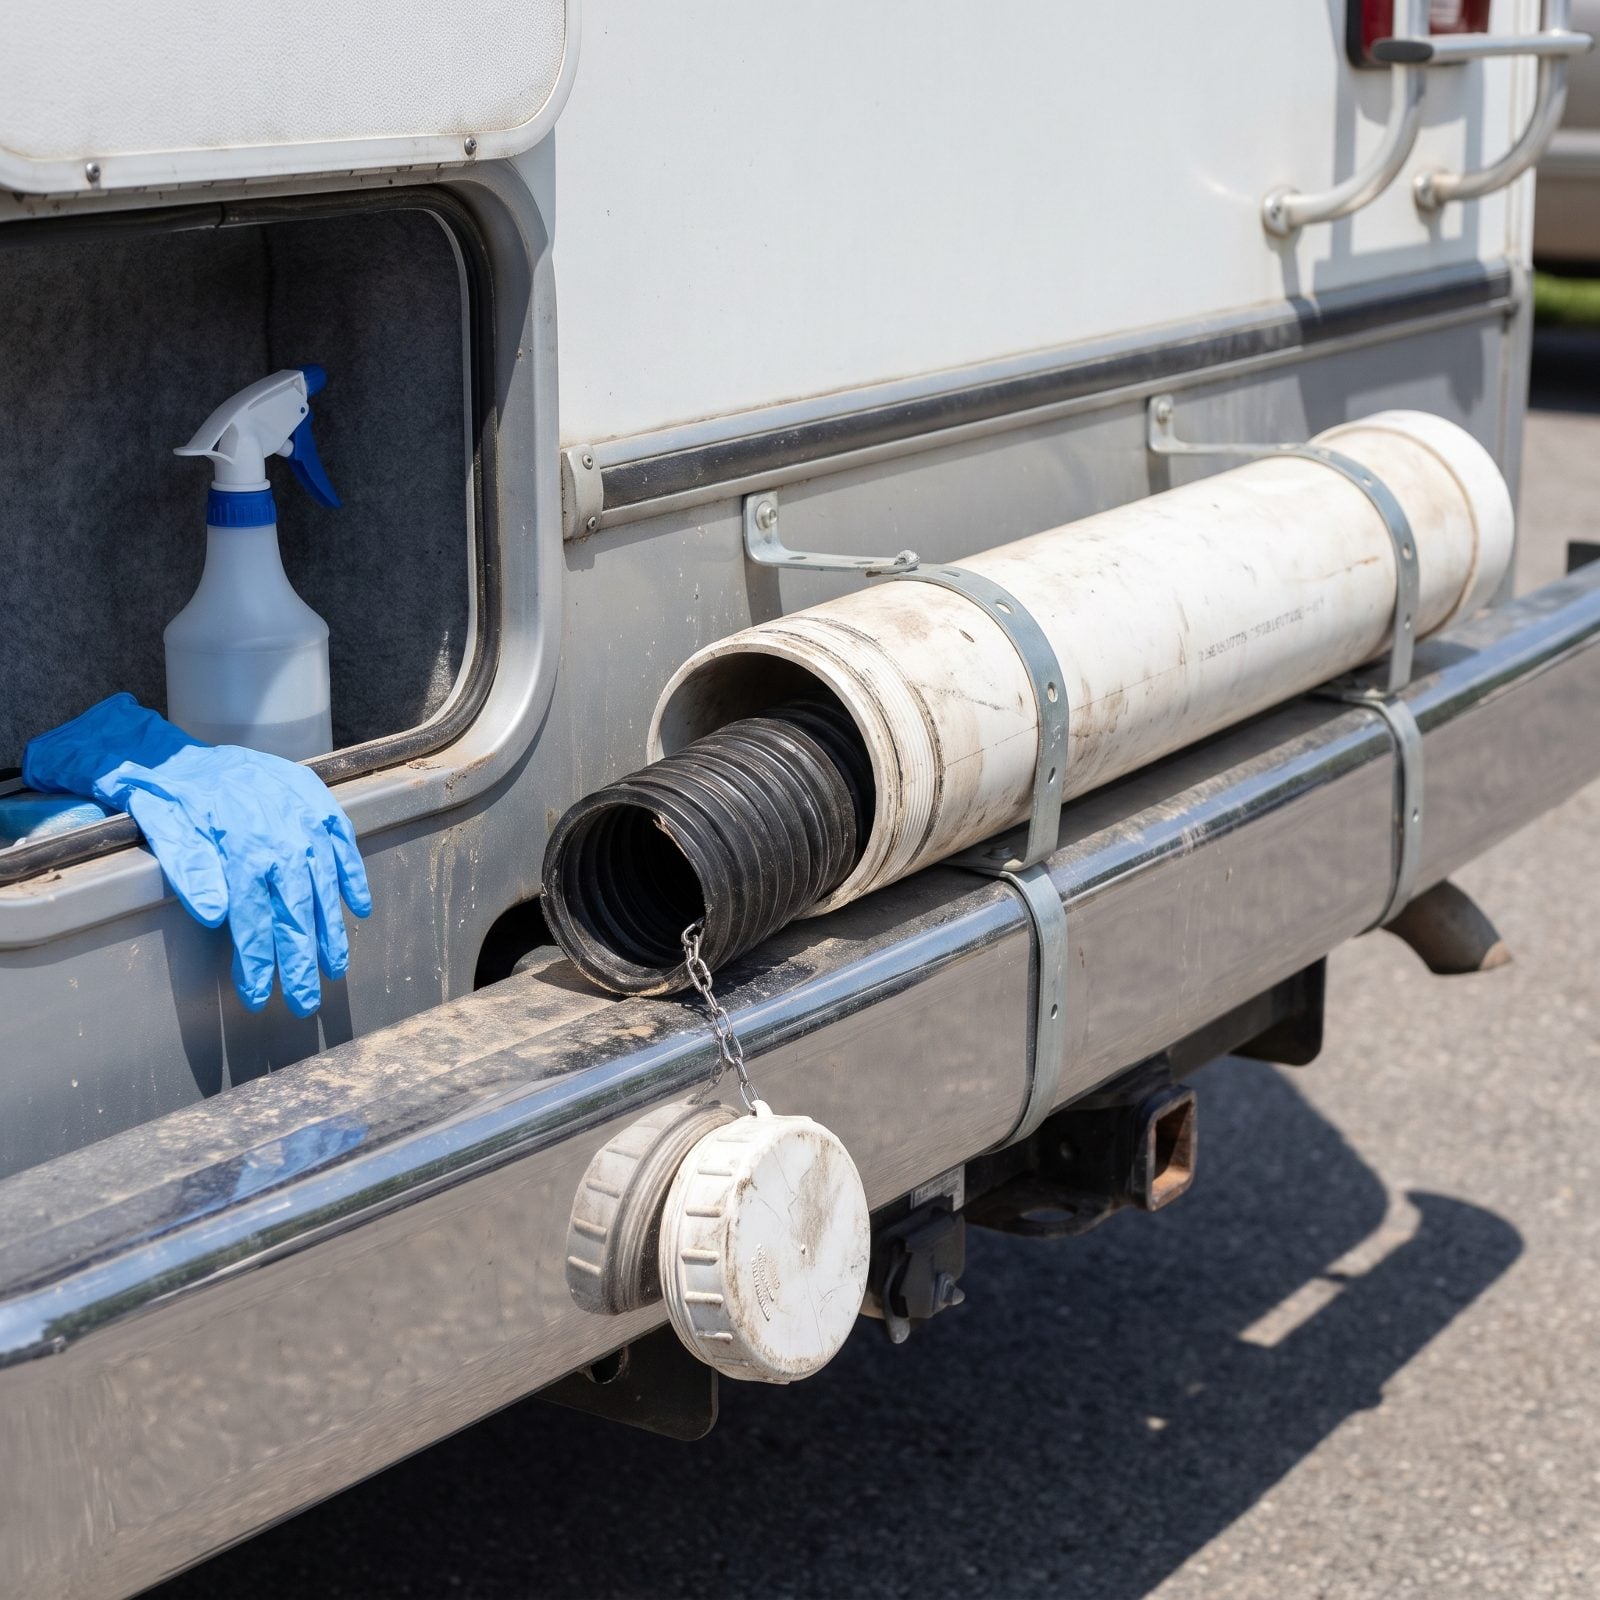
Nobody wants the sewer hose touching anything else they own. A length of 4-inch PVC pipe with a screw cap, mounted along the rear bumper or in a dedicated bay, gives that hose its own sealed home away from your clean gear.
Buy a ready-made bumper tube or build one from hardware-store PVC for maybe fifteen dollars. Either way, keep it dirty-side-only. Our rule is strict: the sewer tube, the gloves, and the spray bottle live together, and nothing from that corner ever shares a bin with food or linens.
38. Slide Outdoor Mats Into a Fence-Post Sleeve
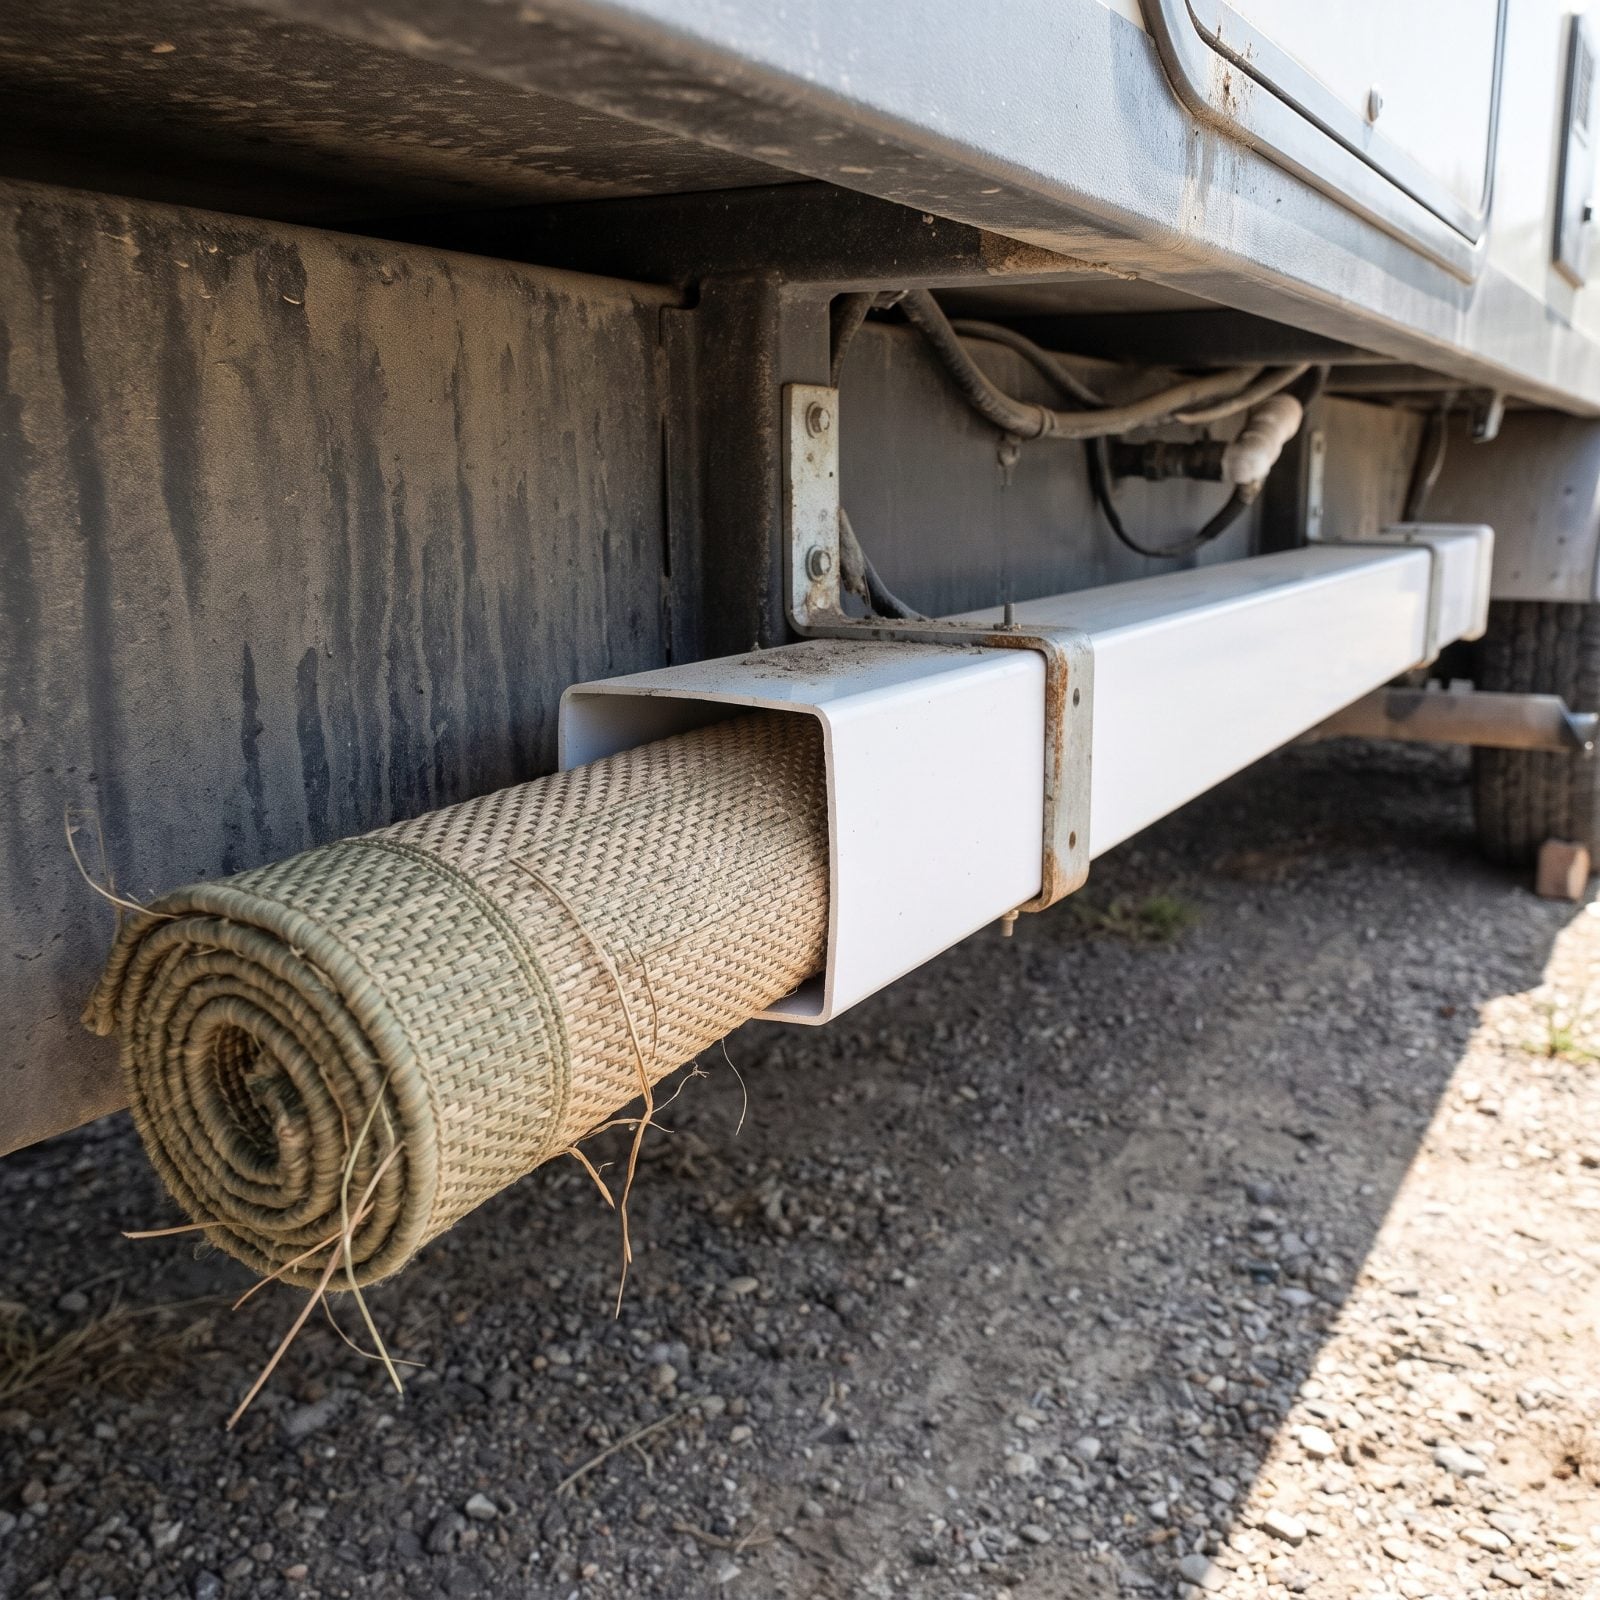
Your outdoor patio mat comes back damp, sandy, and covered in grass clippings, and mixing that into a bay with your clean bins is a bad trade. The fix full-timers love: a length of square vinyl fence post makes a cheap sleeve you slide the rolled mat straight into.
A section of 5-inch vinyl fence post runs about $20 at the hardware store, and the inside is wide enough for most rolled mats. Mount it under the rig or along a bay wall, cap one end, and the dirty mat stays sealed off from everything you’d rather keep clean.
37. Mount a Reel for the Fresh-Water Hose
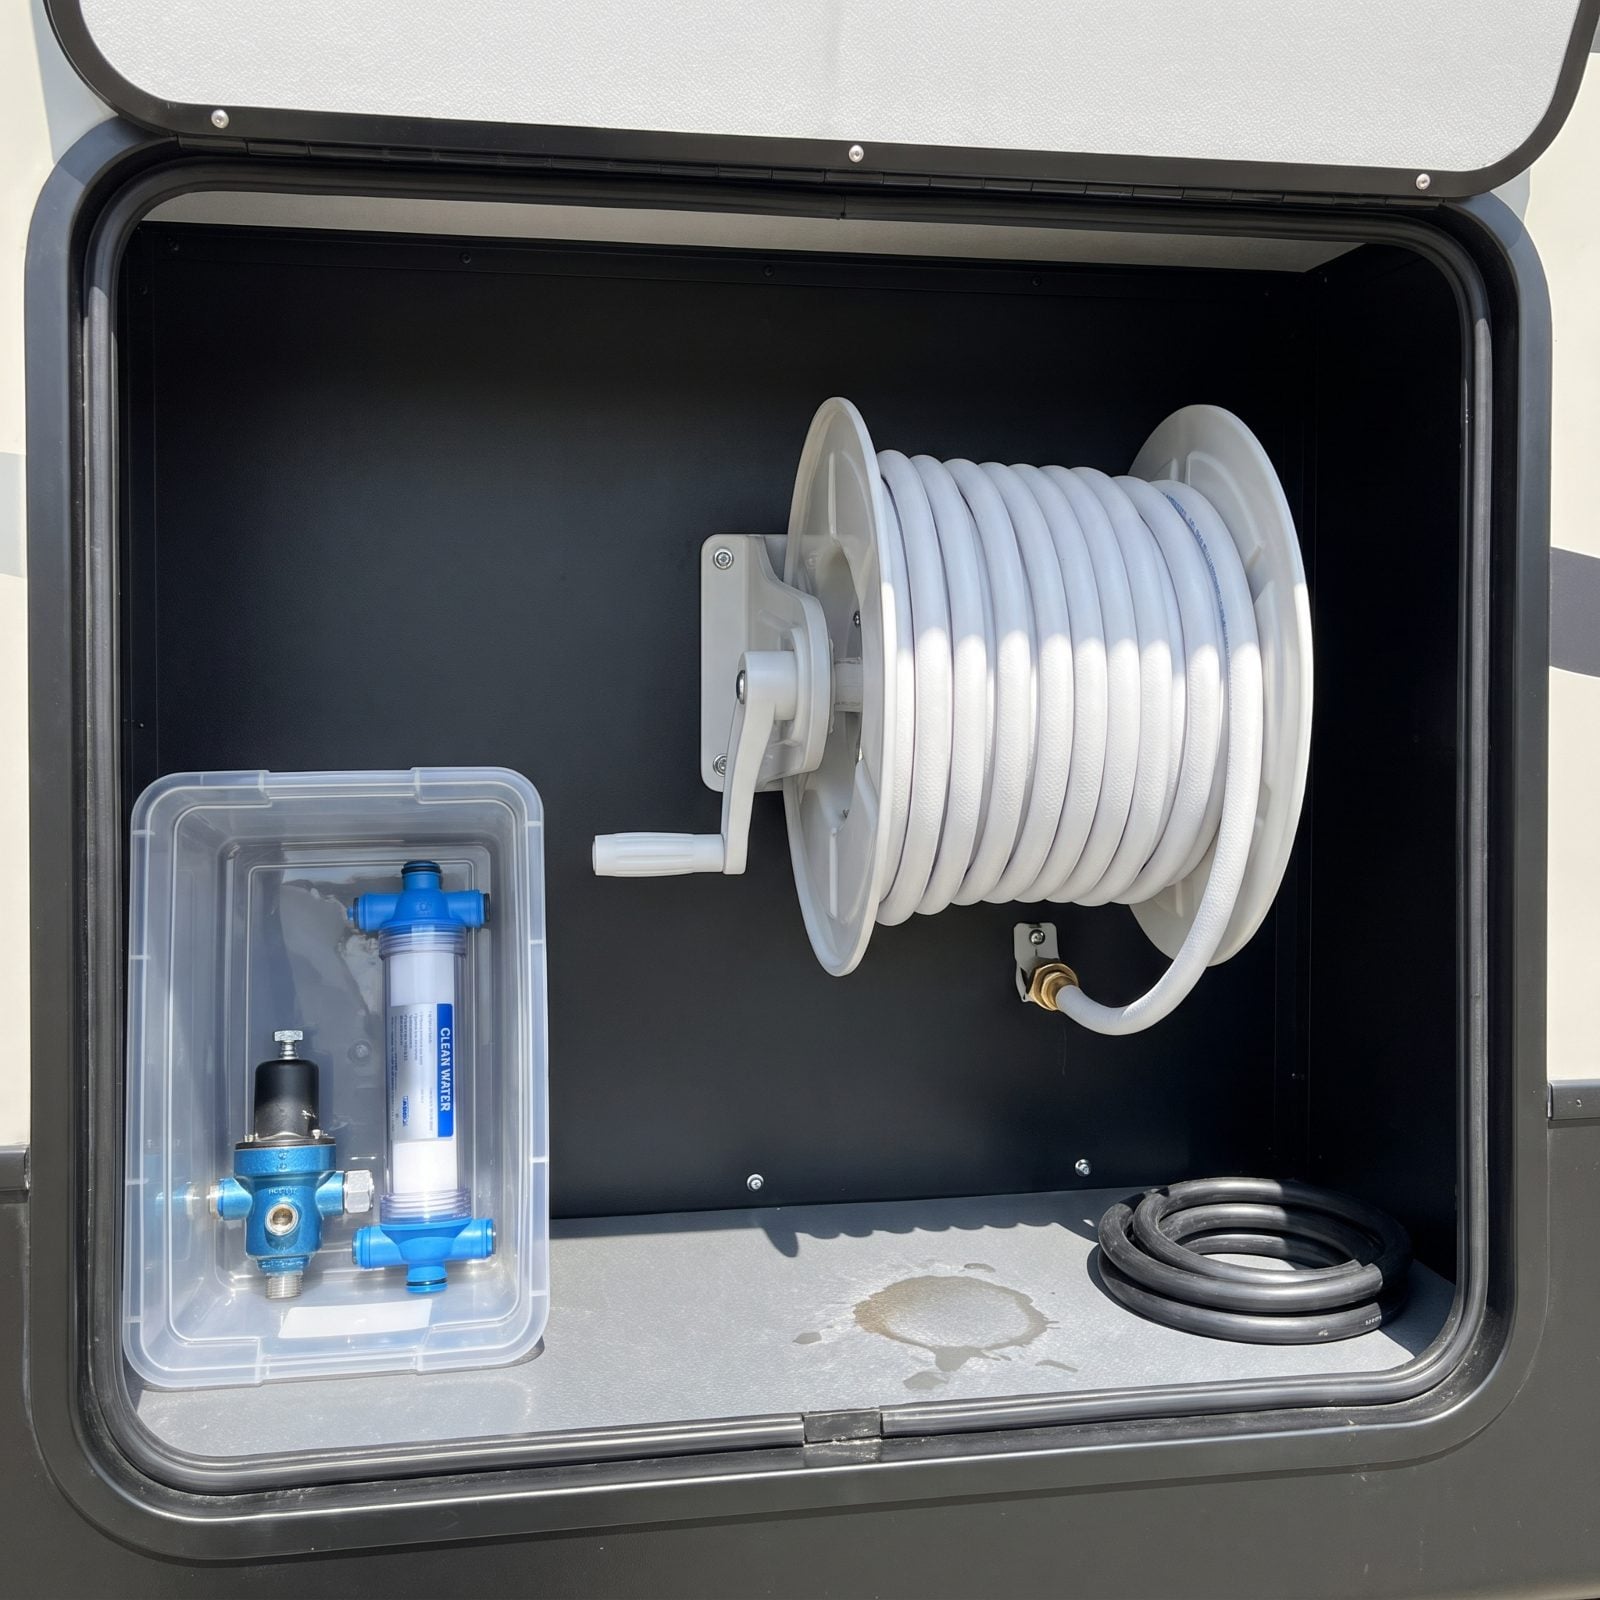
A loose fresh-water hose is a mess. It won’t coil the way it did new, it drips onto everything, and it ends up in a tangle on the bay floor. A wall-mounted reel ends all of that — you crank it in clean, it stays coiled, and the end stays off the dirty floor.
One rule we don’t bend: the fresh-water hose, the pressure regulator, and the filter stay in their own clean zone, nowhere near the sewer corner. Use a white drinking-water-rated hose so you never confuse it with anything else. Different color, different bay, different life.
36. Add a Retractable Shore-Power Cord Reel
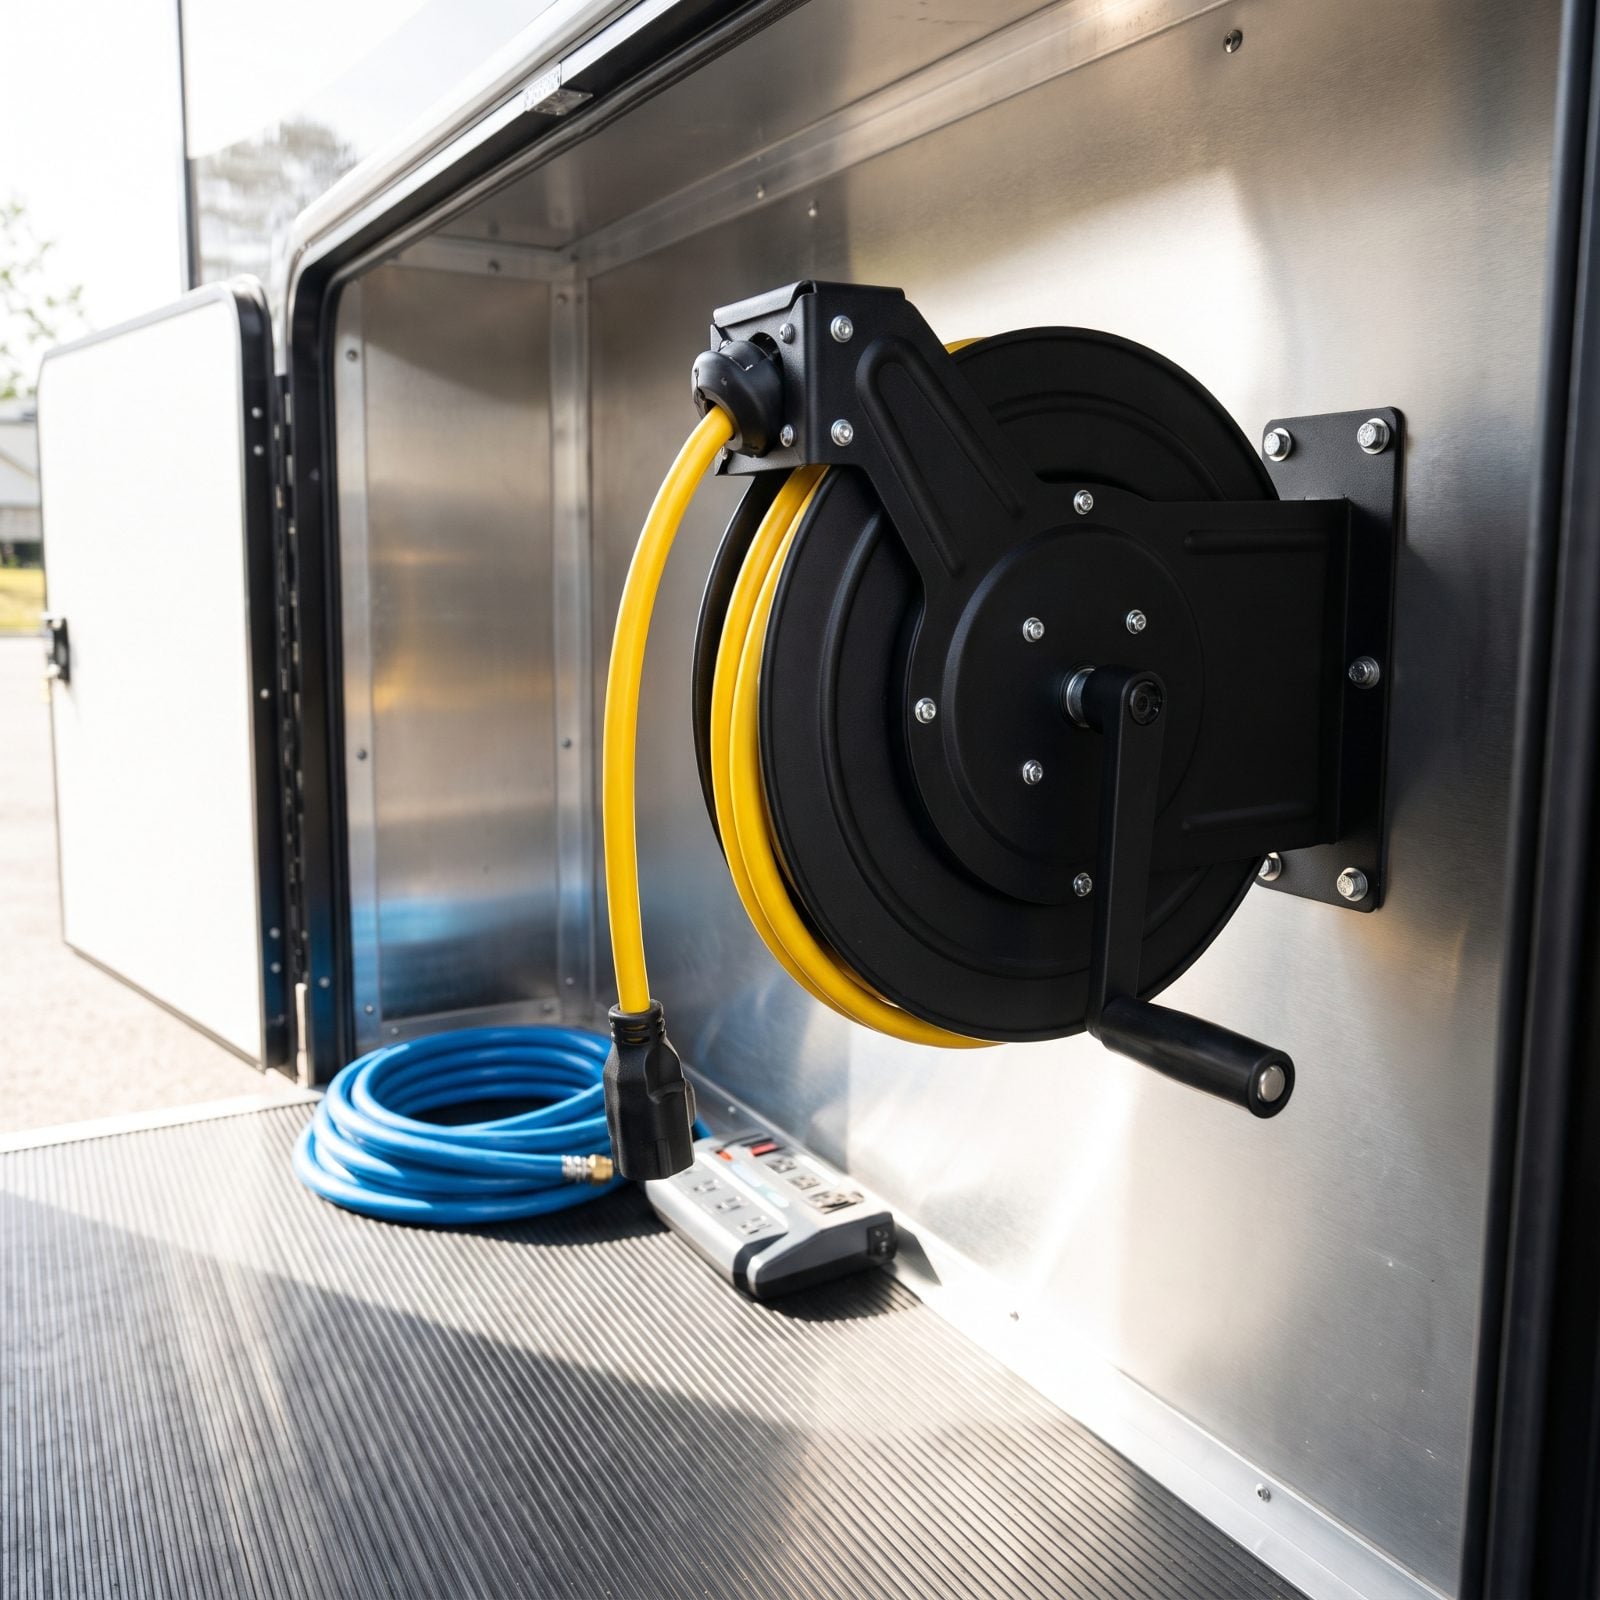
Coiling a wet shore-power cord by hand at a dark 11pm arrival gets old fast. A retractable reel bolted to the bay wall fixes that for good — you pull out only the length you need, and a few turns of the hand crank wind it back onto the drum.
Mount it high on a side wall, not the floor, so road grit and tank drips stay off the mechanism. A decent 30 or 50-amp reel runs a couple hundred bucks. The payoff? Never again wrestling a stiff, muddy cord into a neat loop that unravels the second you turn around.
35. Keep Hand Tools in a Roll-Up Pouch
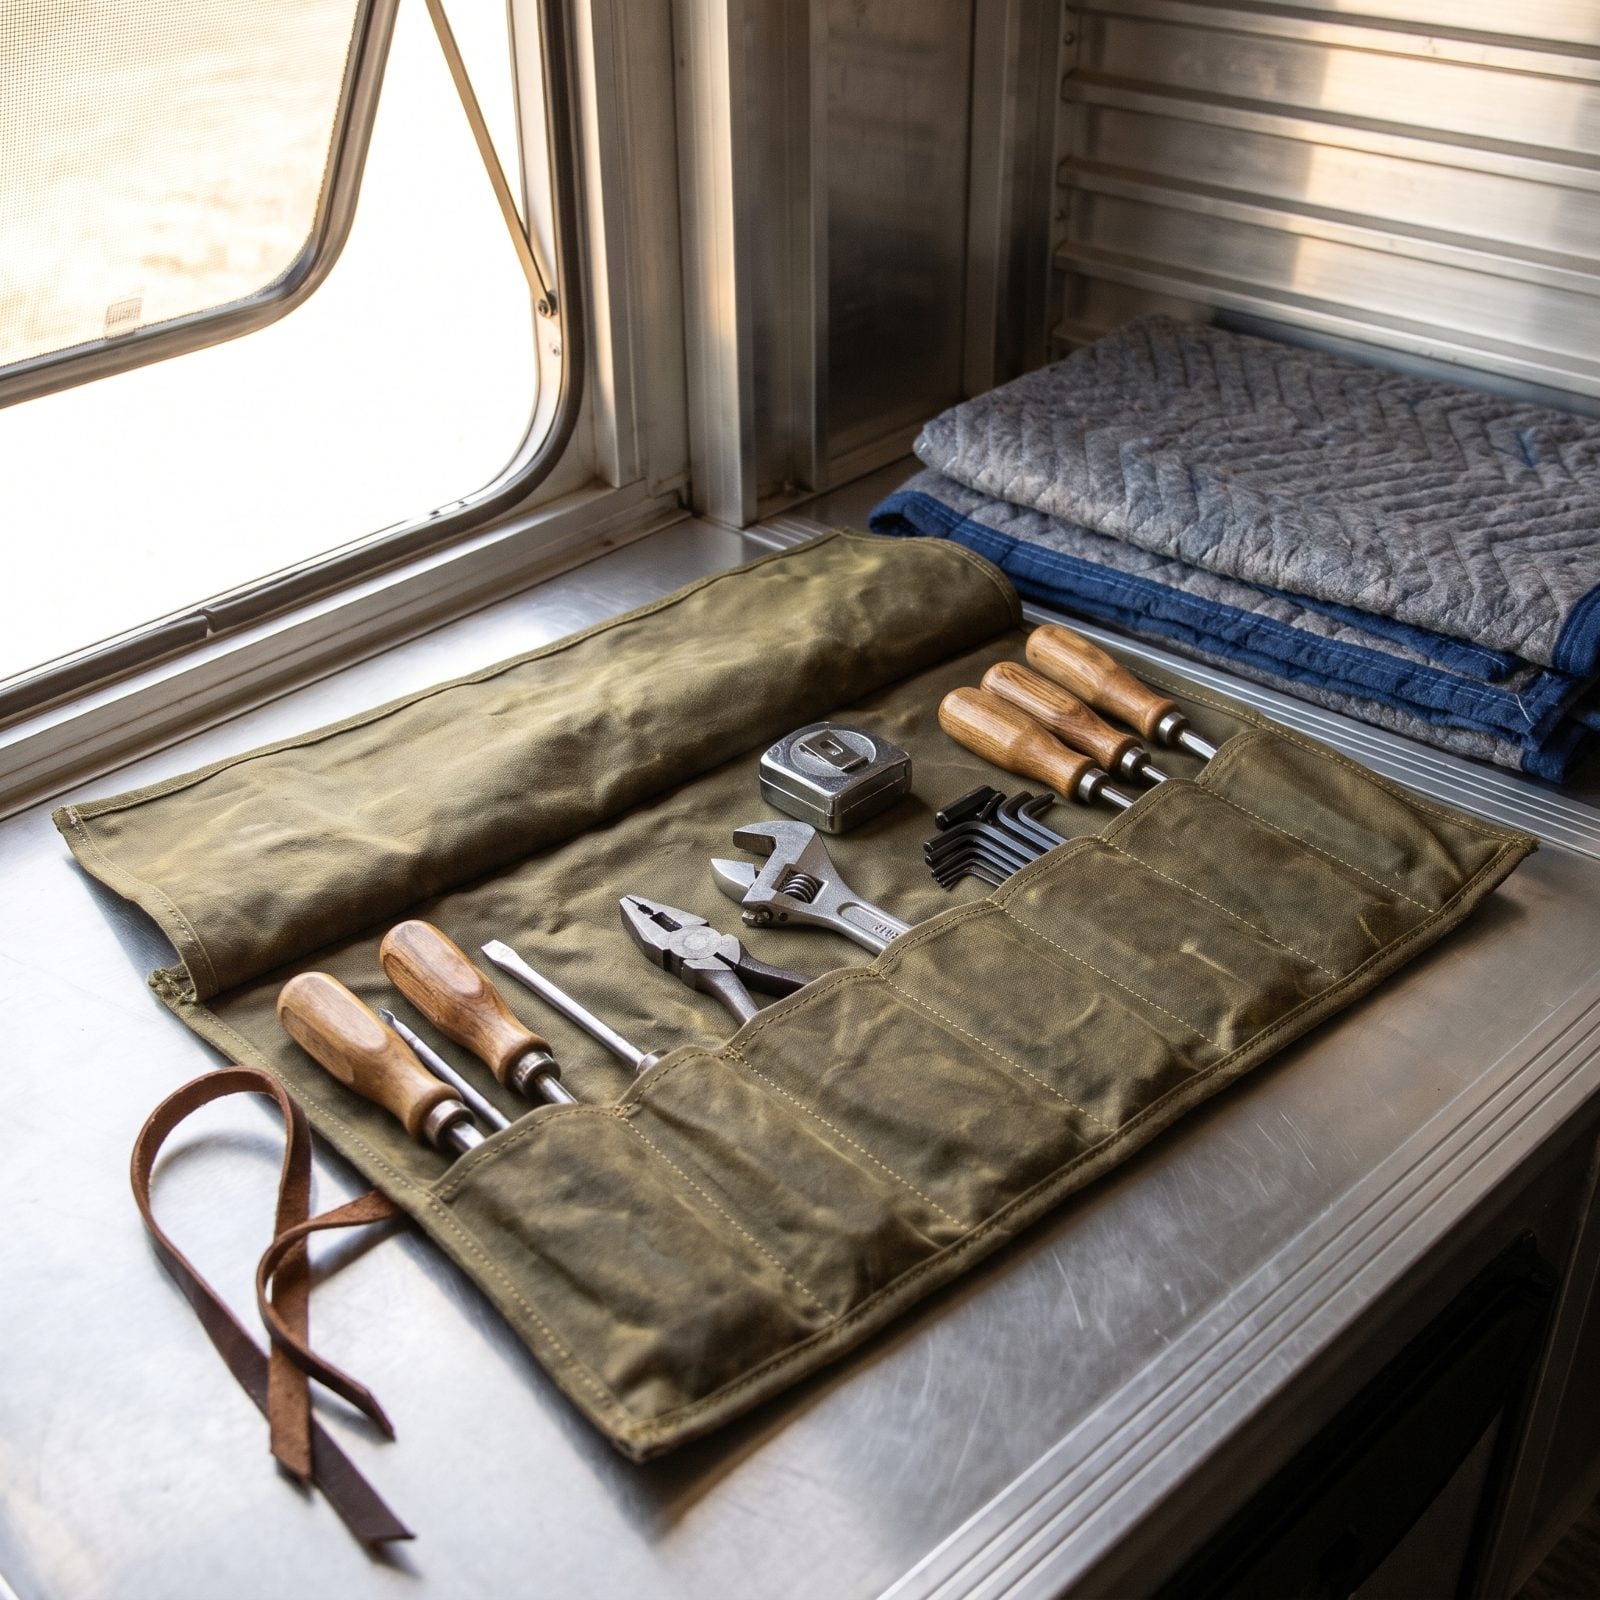
Drawers rattle. A tool pouch doesn’t, because everything sits flat against the next pocket, so a day of washboard roads leaves it silent. Roll it up, cinch the tie, and it slots into any gap in the bay.
The real win is diagnosis. You open it once and see every tool at a glance, which means you notice the missing screwdriver before you need it at a pull-out — not during a breakdown with the sun going down.
34. Sort Spare Parts in Stackable Drawers
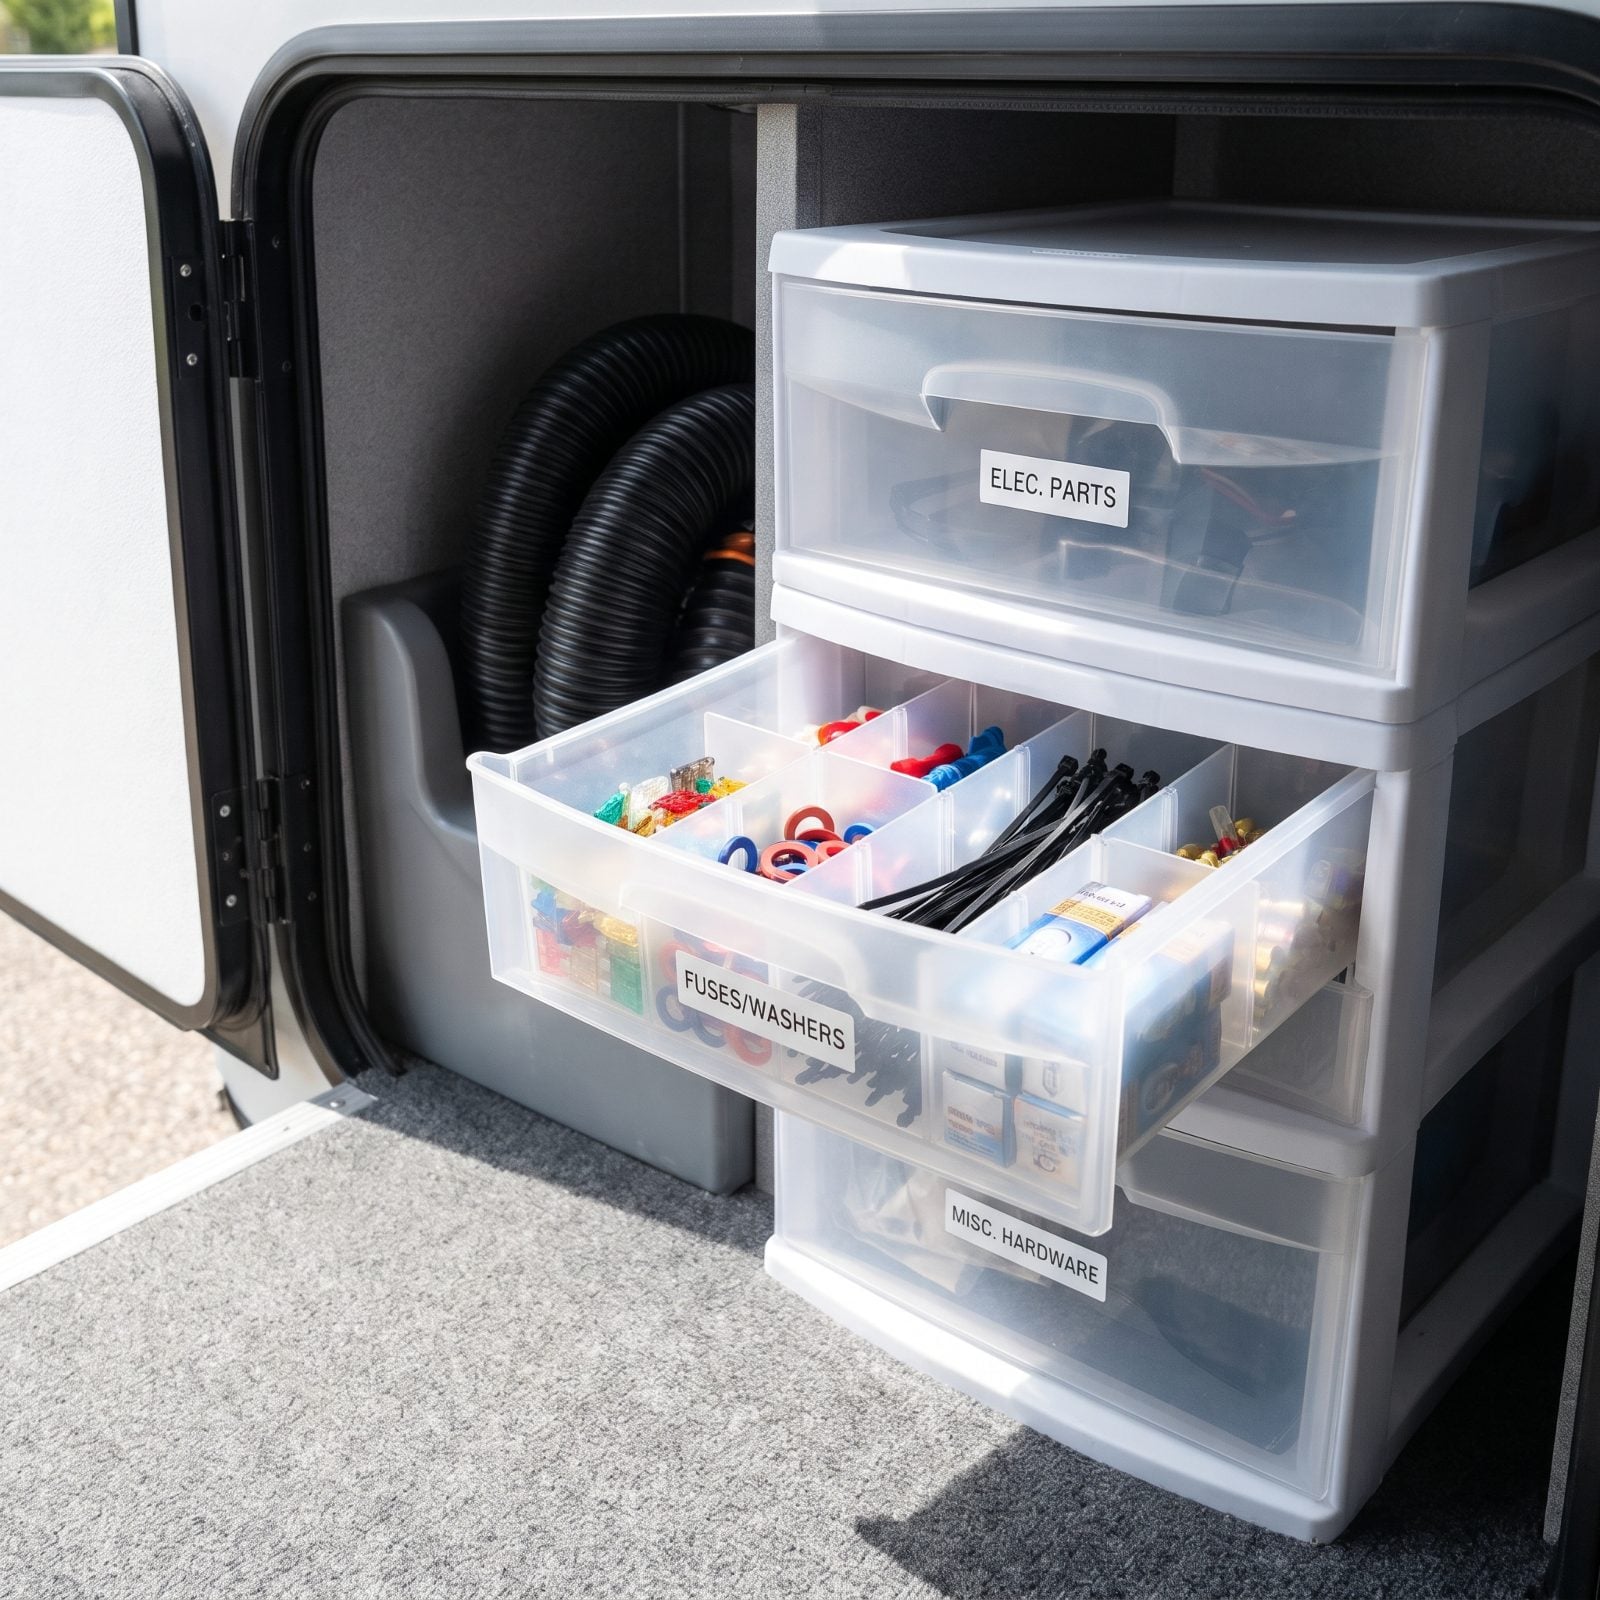
You know the moment. A fuse blows, and you’re on your knees digging through a shoebox of rattling odds and ends with a flashlight in your teeth.
Stackable clear drawers kill that. Fuses in one, hose washers in another, zip ties and bulbs sorted by type. The clear fronts mean you spot the right drawer without opening three wrong ones first.
Label every front. We put this off for a full season because we figured we’d remember, and we never once remembered.
33. Build a Riser Shelf Over the Wheel Well
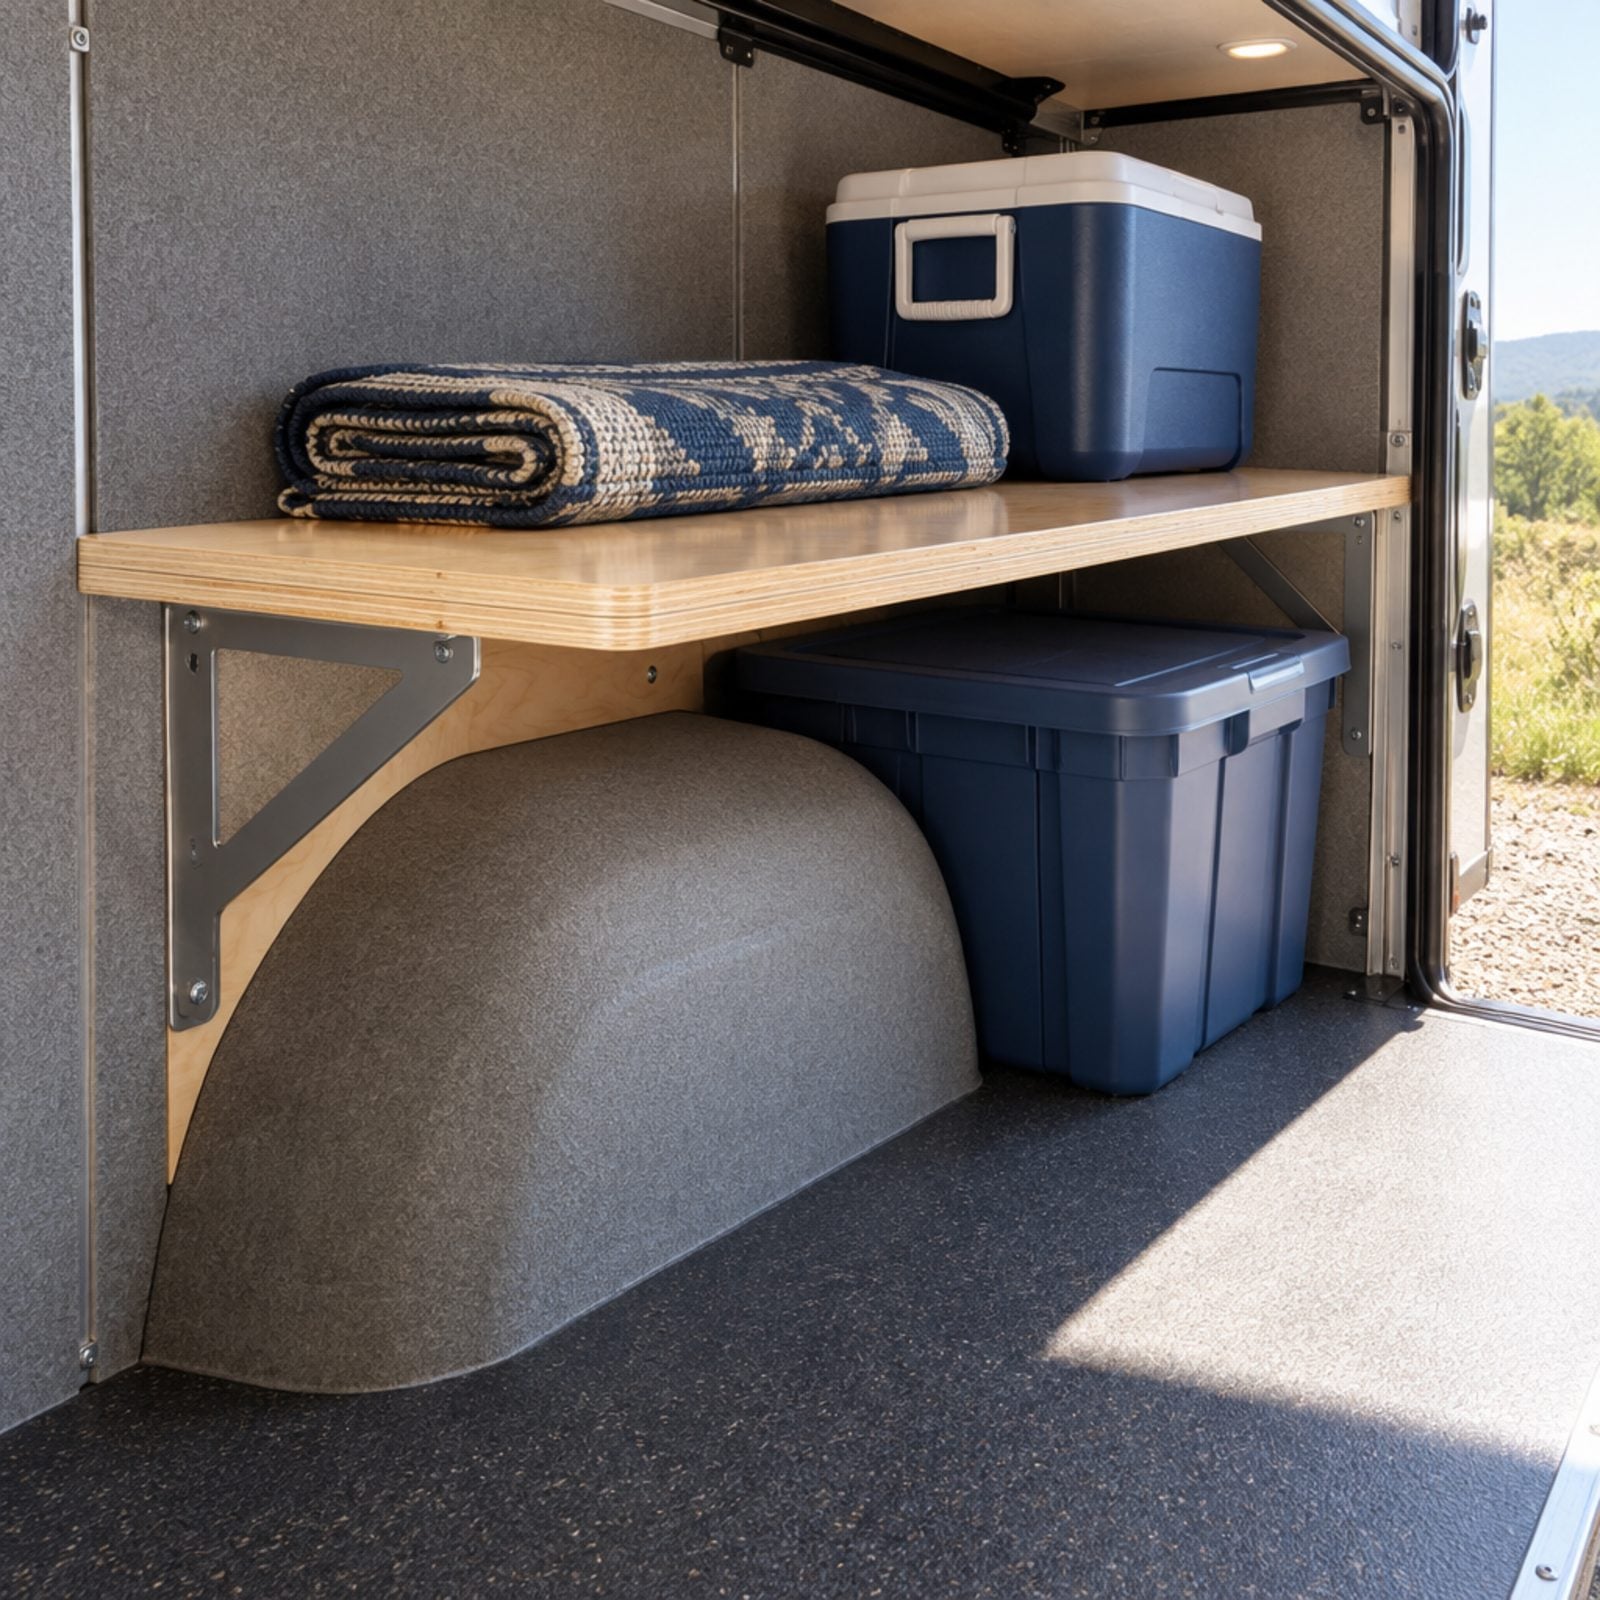
That bulging wheel well eats the most usable corner of your bay and gives nothing back. A plywood riser turns the dead hump into two levels: a flat deck on top, open storage underneath.
Cut it to clear the tire’s travel with room to spare, then bracket it along the back wall. Use stout steel brackets spaced closely enough that the open front corner can float without a leg, and bolt them solidly into the wall so nothing sags or shifts in a hard stop. Birch ply, a few brackets, and an afternoon with a jigsaw — suddenly folded blankets live up top, totes slide beneath, and you’ve reclaimed the one spot everyone else wastes.
32. Give the Folding Table Its Own Vertical Slot
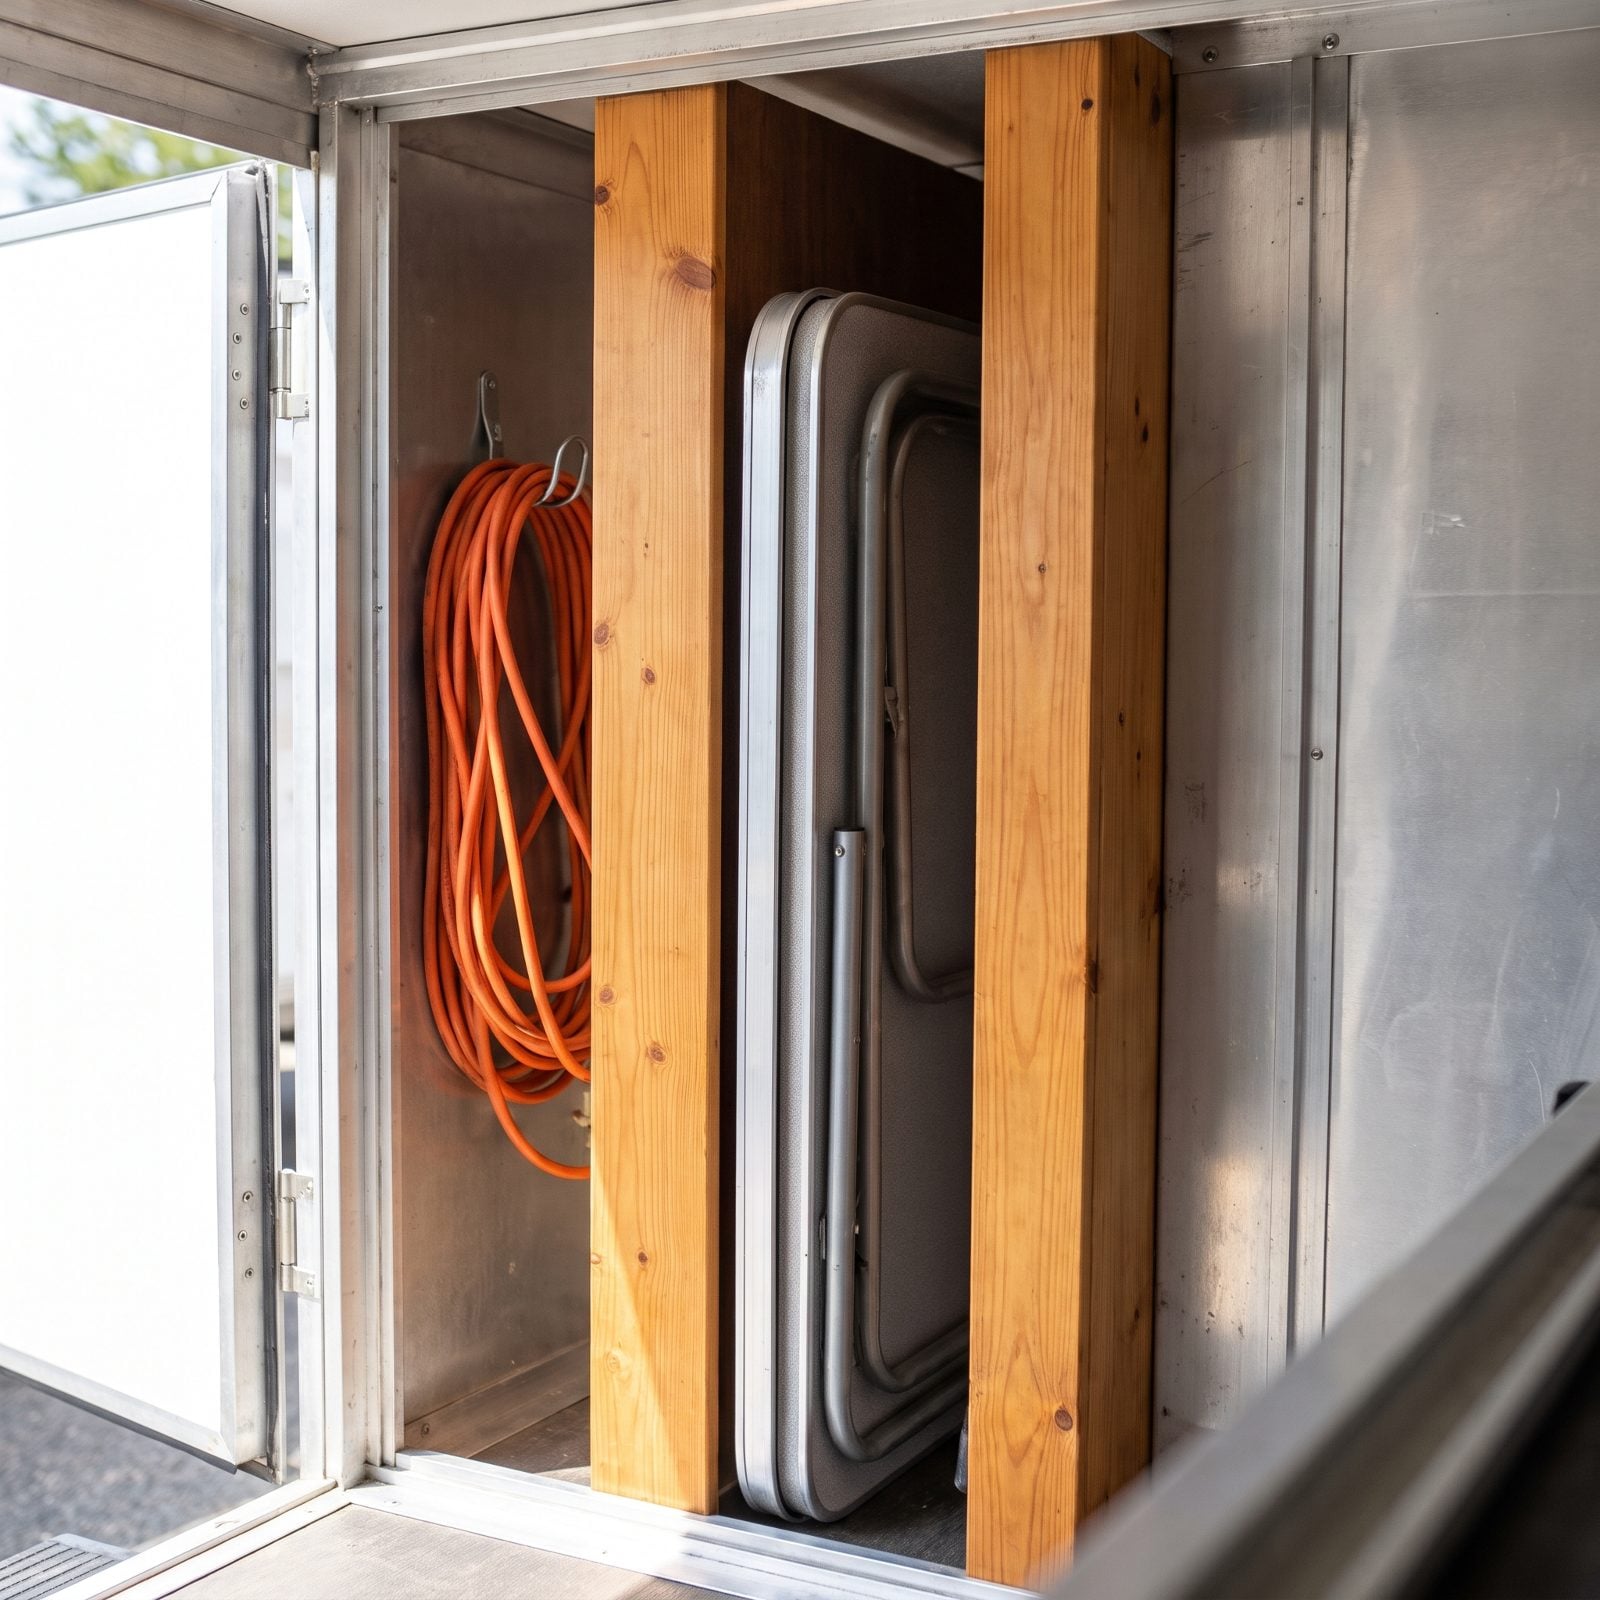
Lay a folding table flat and it becomes a sliding tray that buries everything beneath it. Stand it on edge in a vertical slot and it holds its own lane, eating barely an inch of floor width.
Two divider rails screwed to the bay wall is all it takes. The table drops in, stays put over bumps, and pulls straight out when you want lunch outside. No lifting a stack of gear to free it. Just reach, grab, go.
31. Strap Folding Chairs Against the Bay Ceiling
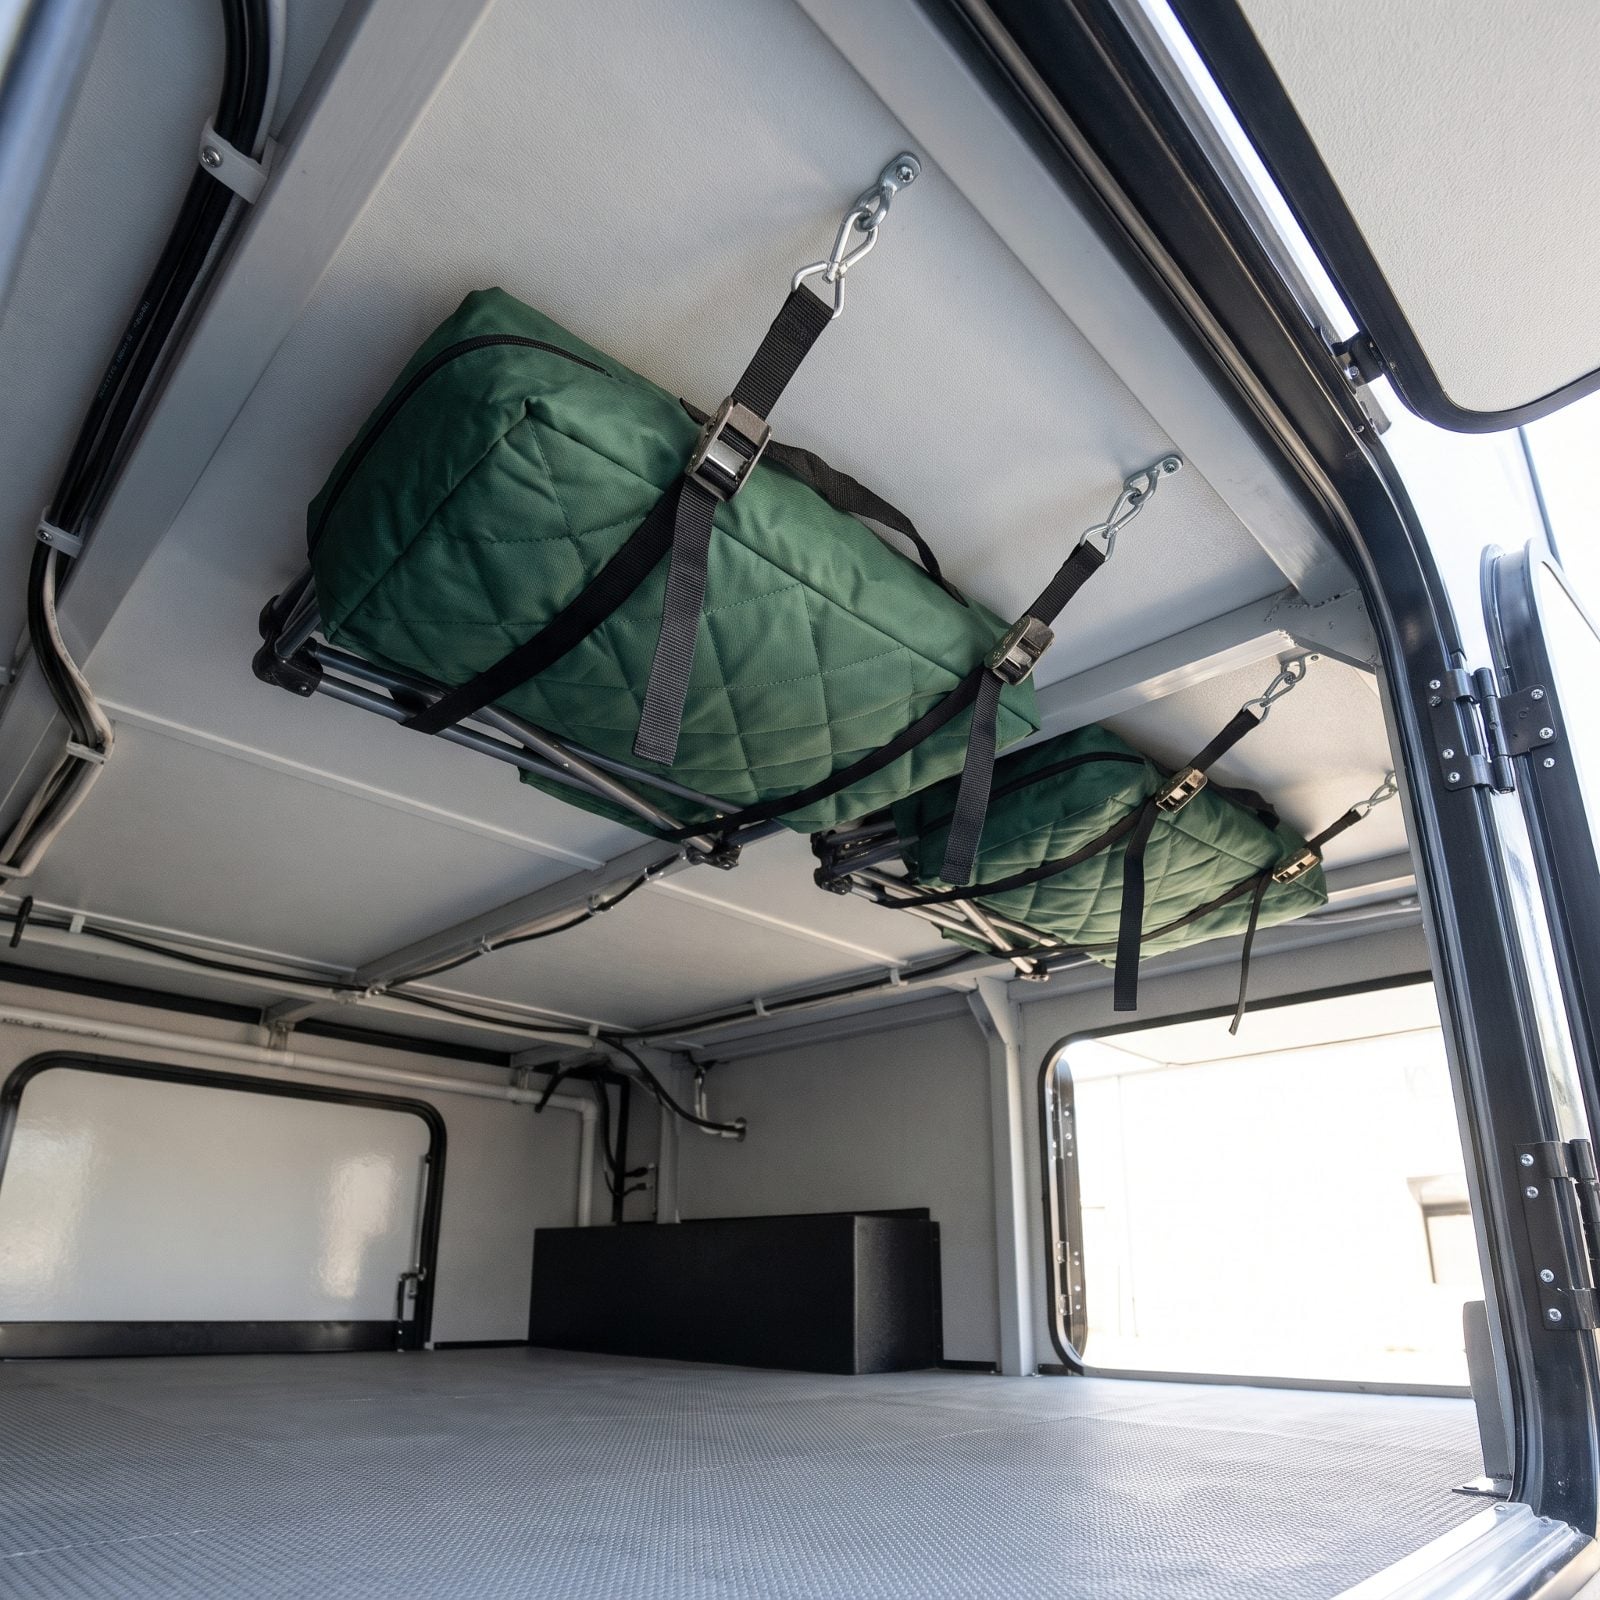
The bay ceiling is prime real estate nobody uses. Two cam-buckle straps anchored to the roof of the compartment cradle your folded chairs flat overhead, and the whole floor opens up underneath.
Use screw eyes rated for real weight, not the little cup hooks from the junk drawer. Cinch the straps snug so the chairs can’t swing and bang on a rough mile. The first time you reach past clear floor space instead of shoving chairs aside, you’ll wonder why you ever stacked them down low.
30. Secure Brooms and Long Handles With Wall Clips
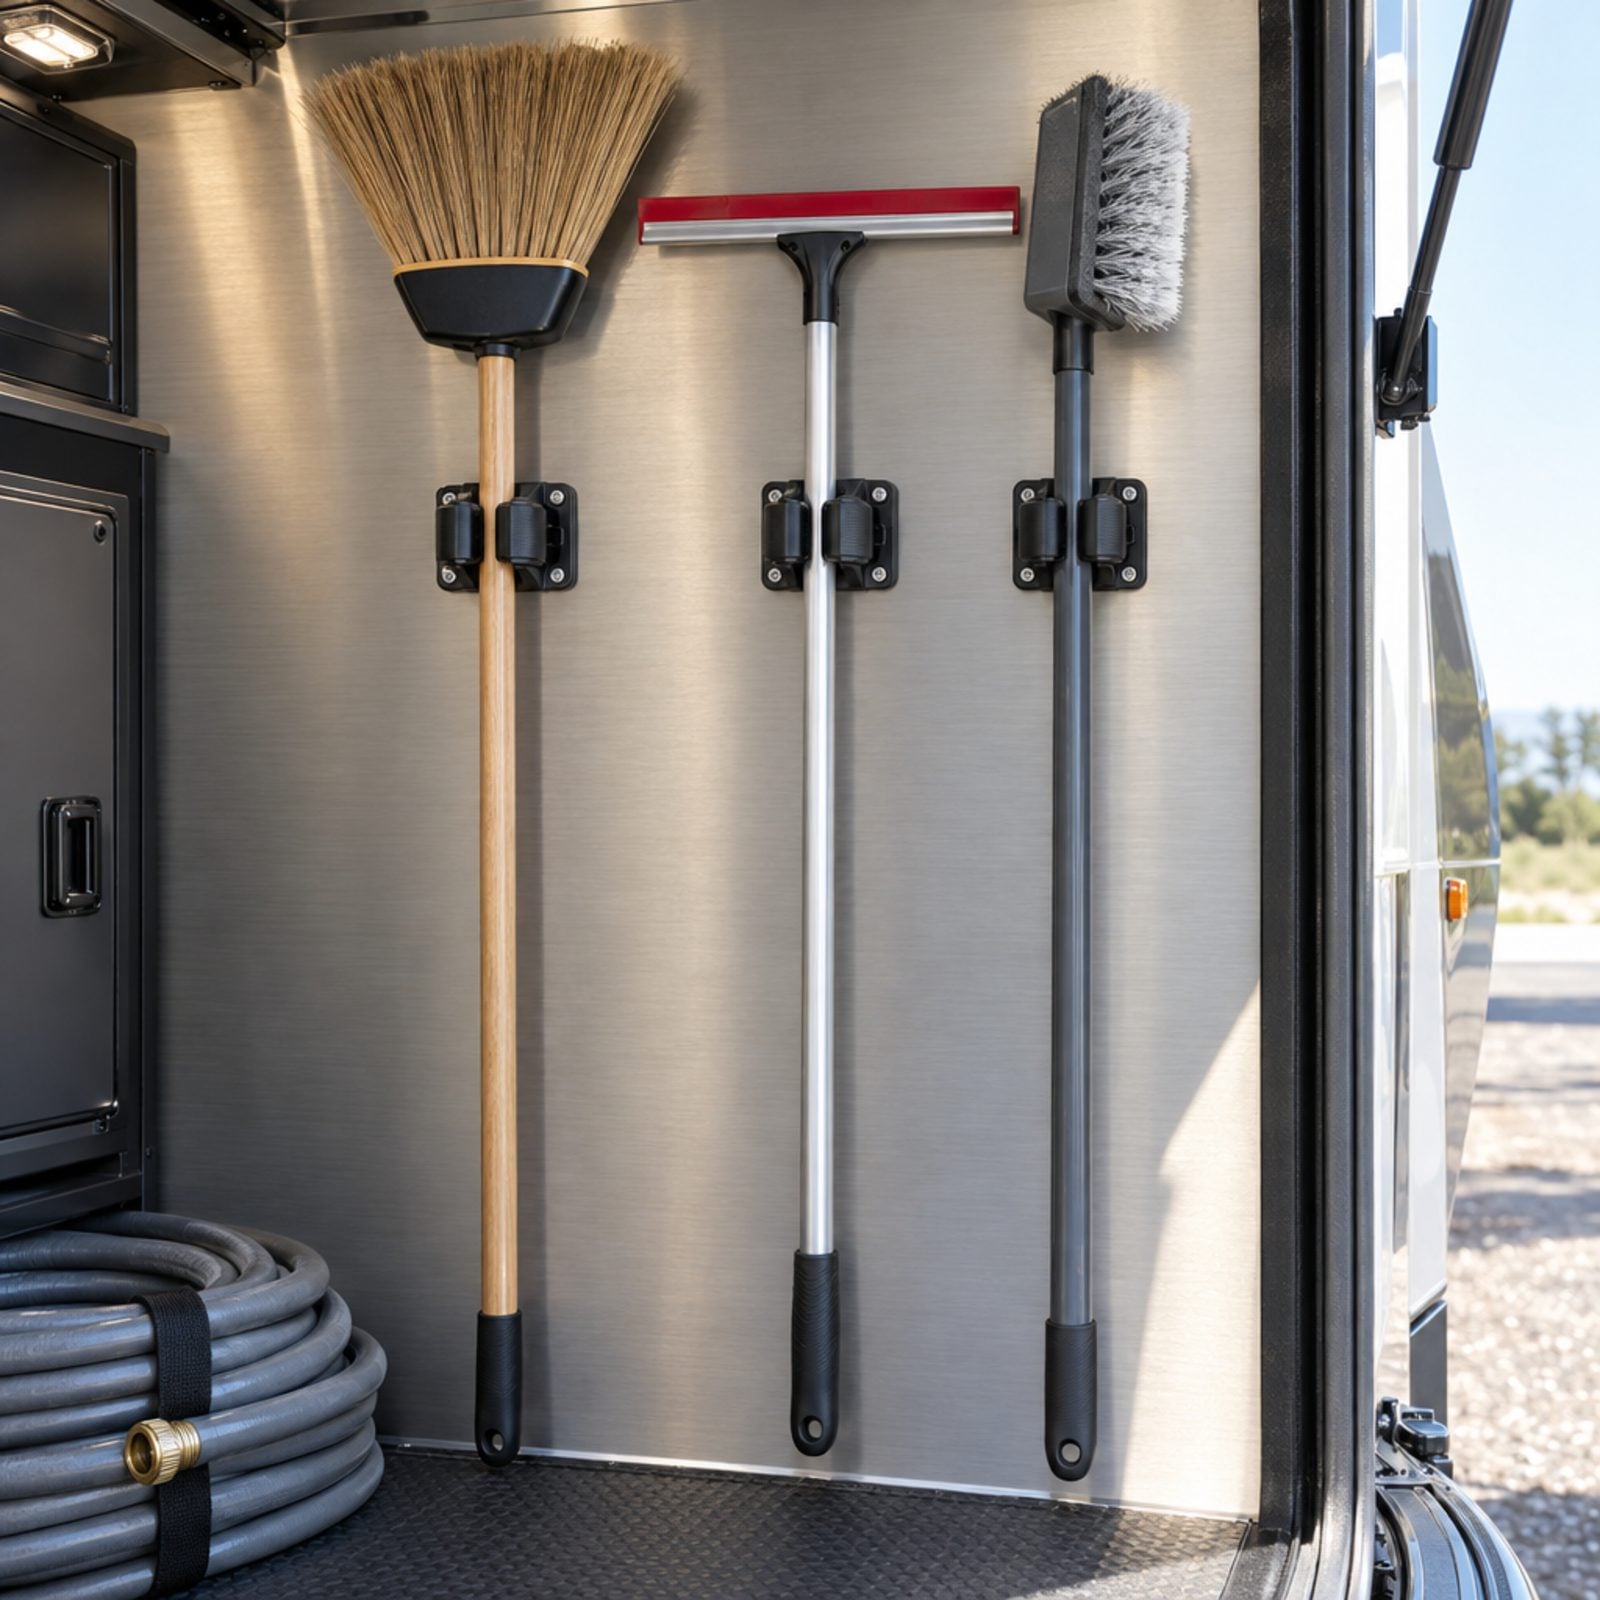
Loose broom handles are the bowling pins of the RV world. They slide, they fall, they jam the door track, and they clatter the whole drive.
Spring-loaded grip clips screwed to the bay wall hold each handle upright and pinned. Press the handle into the jaws until they snap around it; pull it straight out to release it. Dollar-store clips won’t hold on washboard, so spend a few bucks on the heavy-duty clamps that actually bite.
29. Protect Fishing Rods in a Horizontal Rack
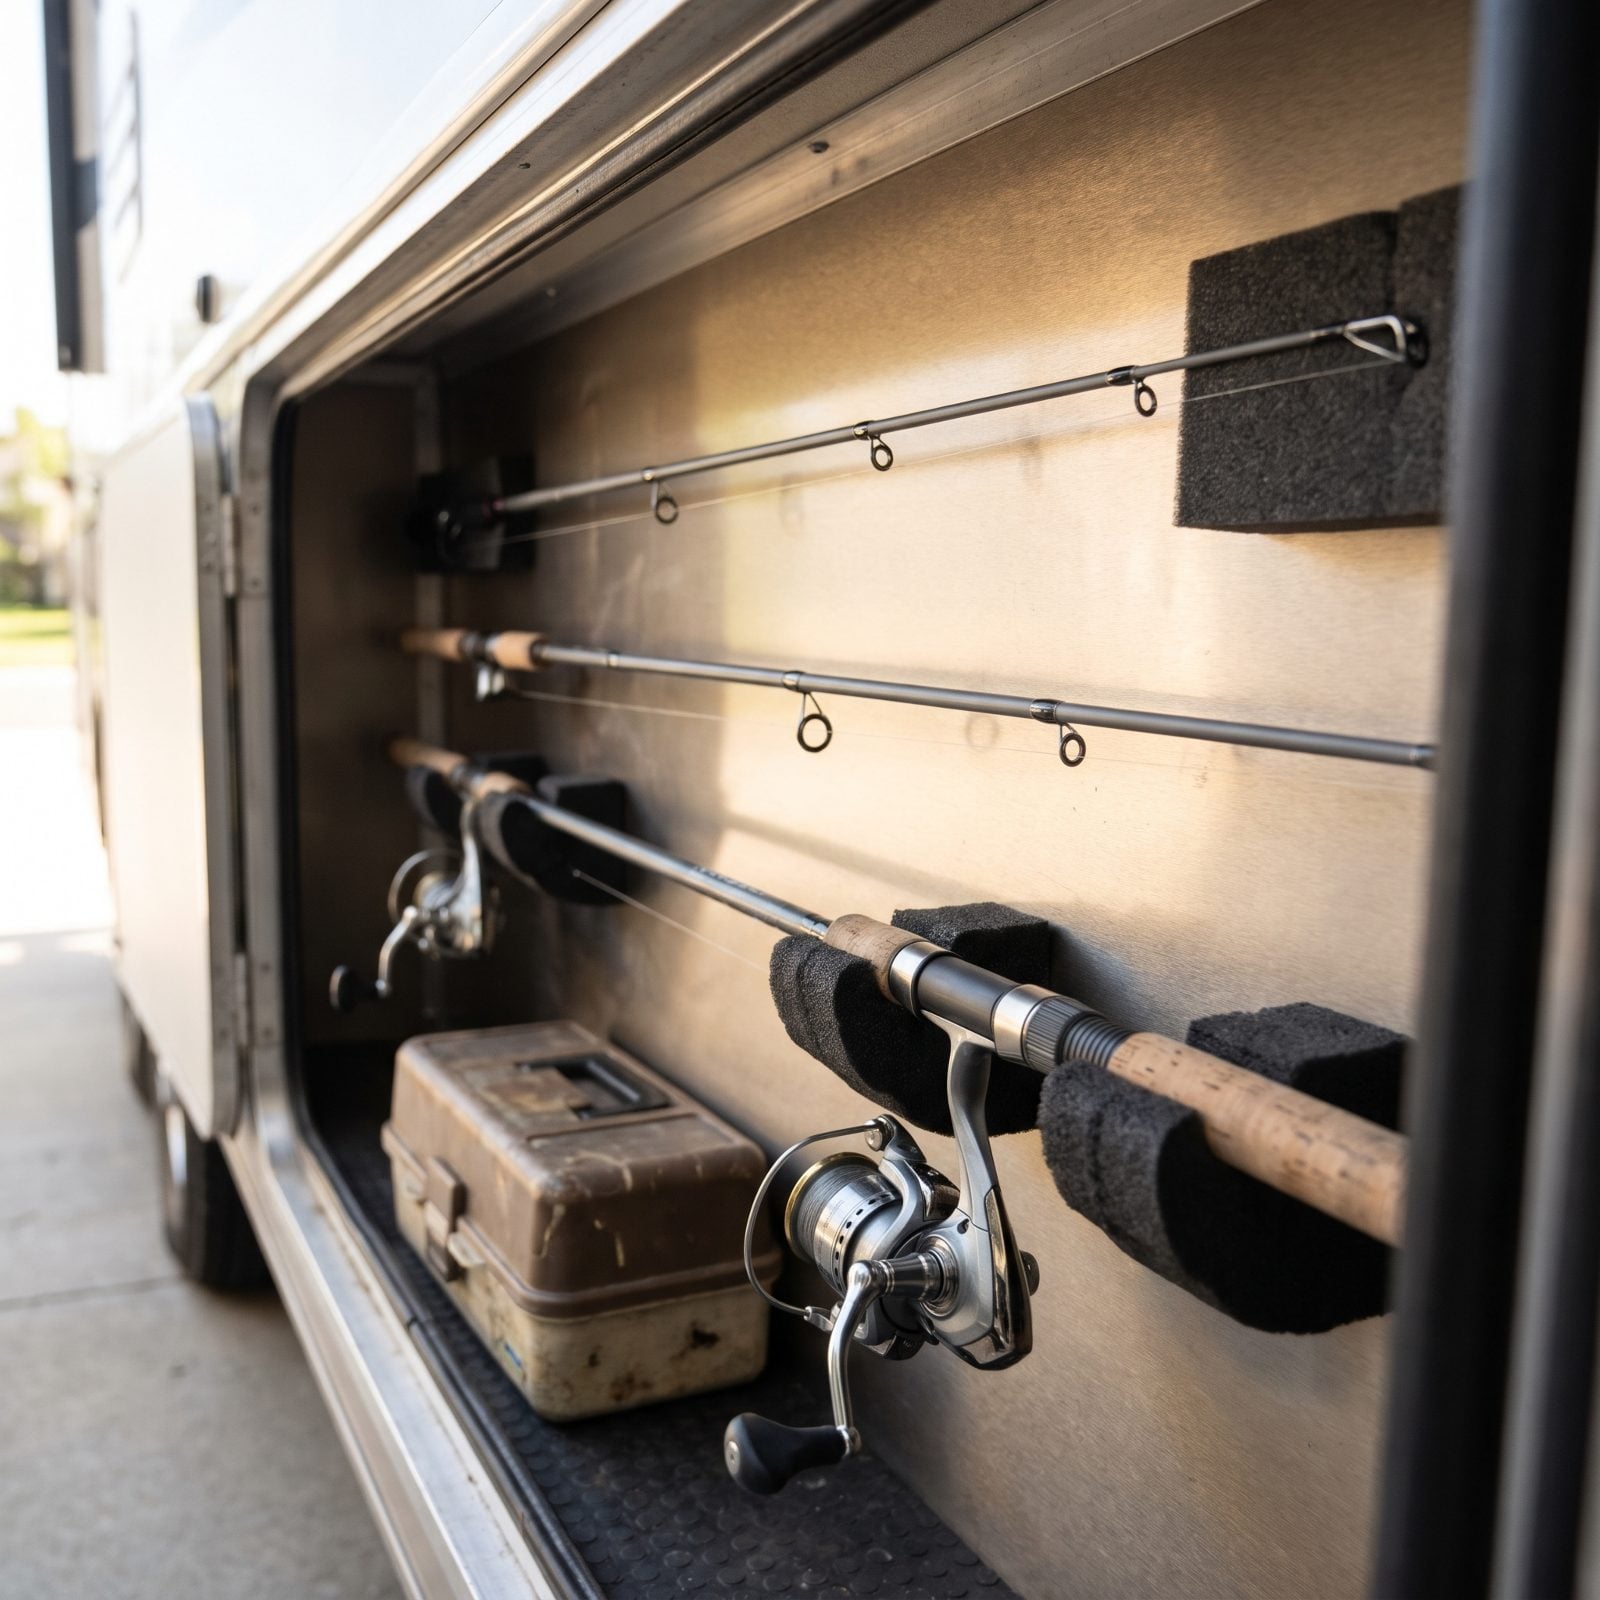
A good rod snaps at the tip, and it snaps when something heavy shifts onto it in transit. A horizontal rack with upright foam end blocks holds each rod up and spaced, nothing resting on the fragile end.
Run it along the longest wall of the bay so the rods lie out straight instead of bowed. Let the reels hang clear of the notched foam strip below and the guides never grind against a wall over a thousand miles of road. A lot cheaper than replacing the rod you loved.
28. Hang the RV Ladder on Heavy-Duty Utility Hooks
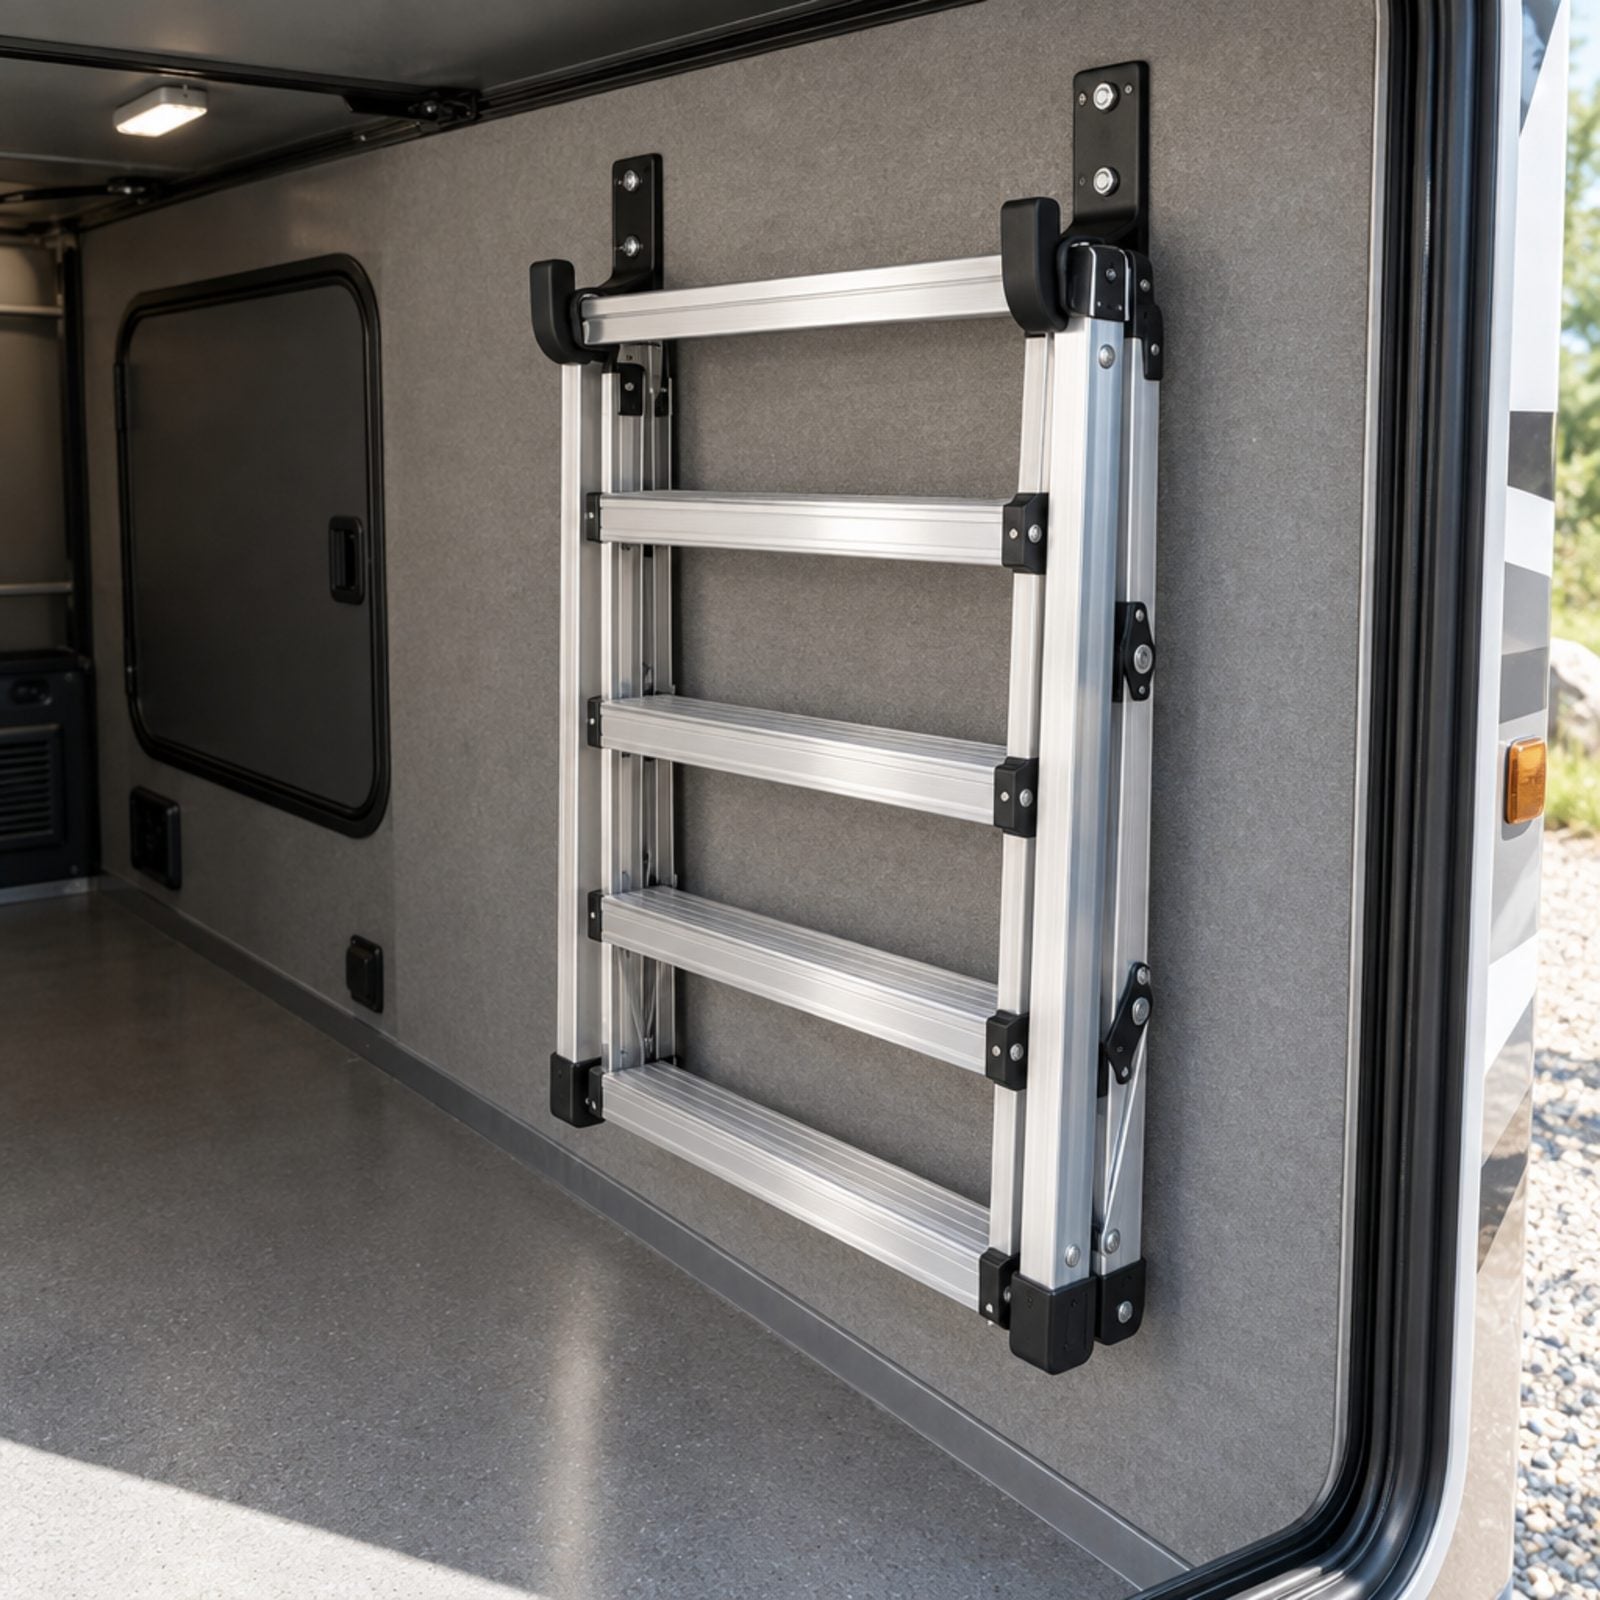
A folding ladder left loose on the bay floor turns into a slide every time you corner. Two heavy-duty utility hooks bolted to the wall lift it off the floor and hold it flat where it can’t travel.
Skip the adhesive hooks. Aluminum ladders are heavier than they look, and a stick-on hook lets go at the worst possible moment. Bolt through the panel, back it with a washer, and the ladder hangs there for years without a wobble.
27. Keep Leveling Blocks in an Open-Front Crate
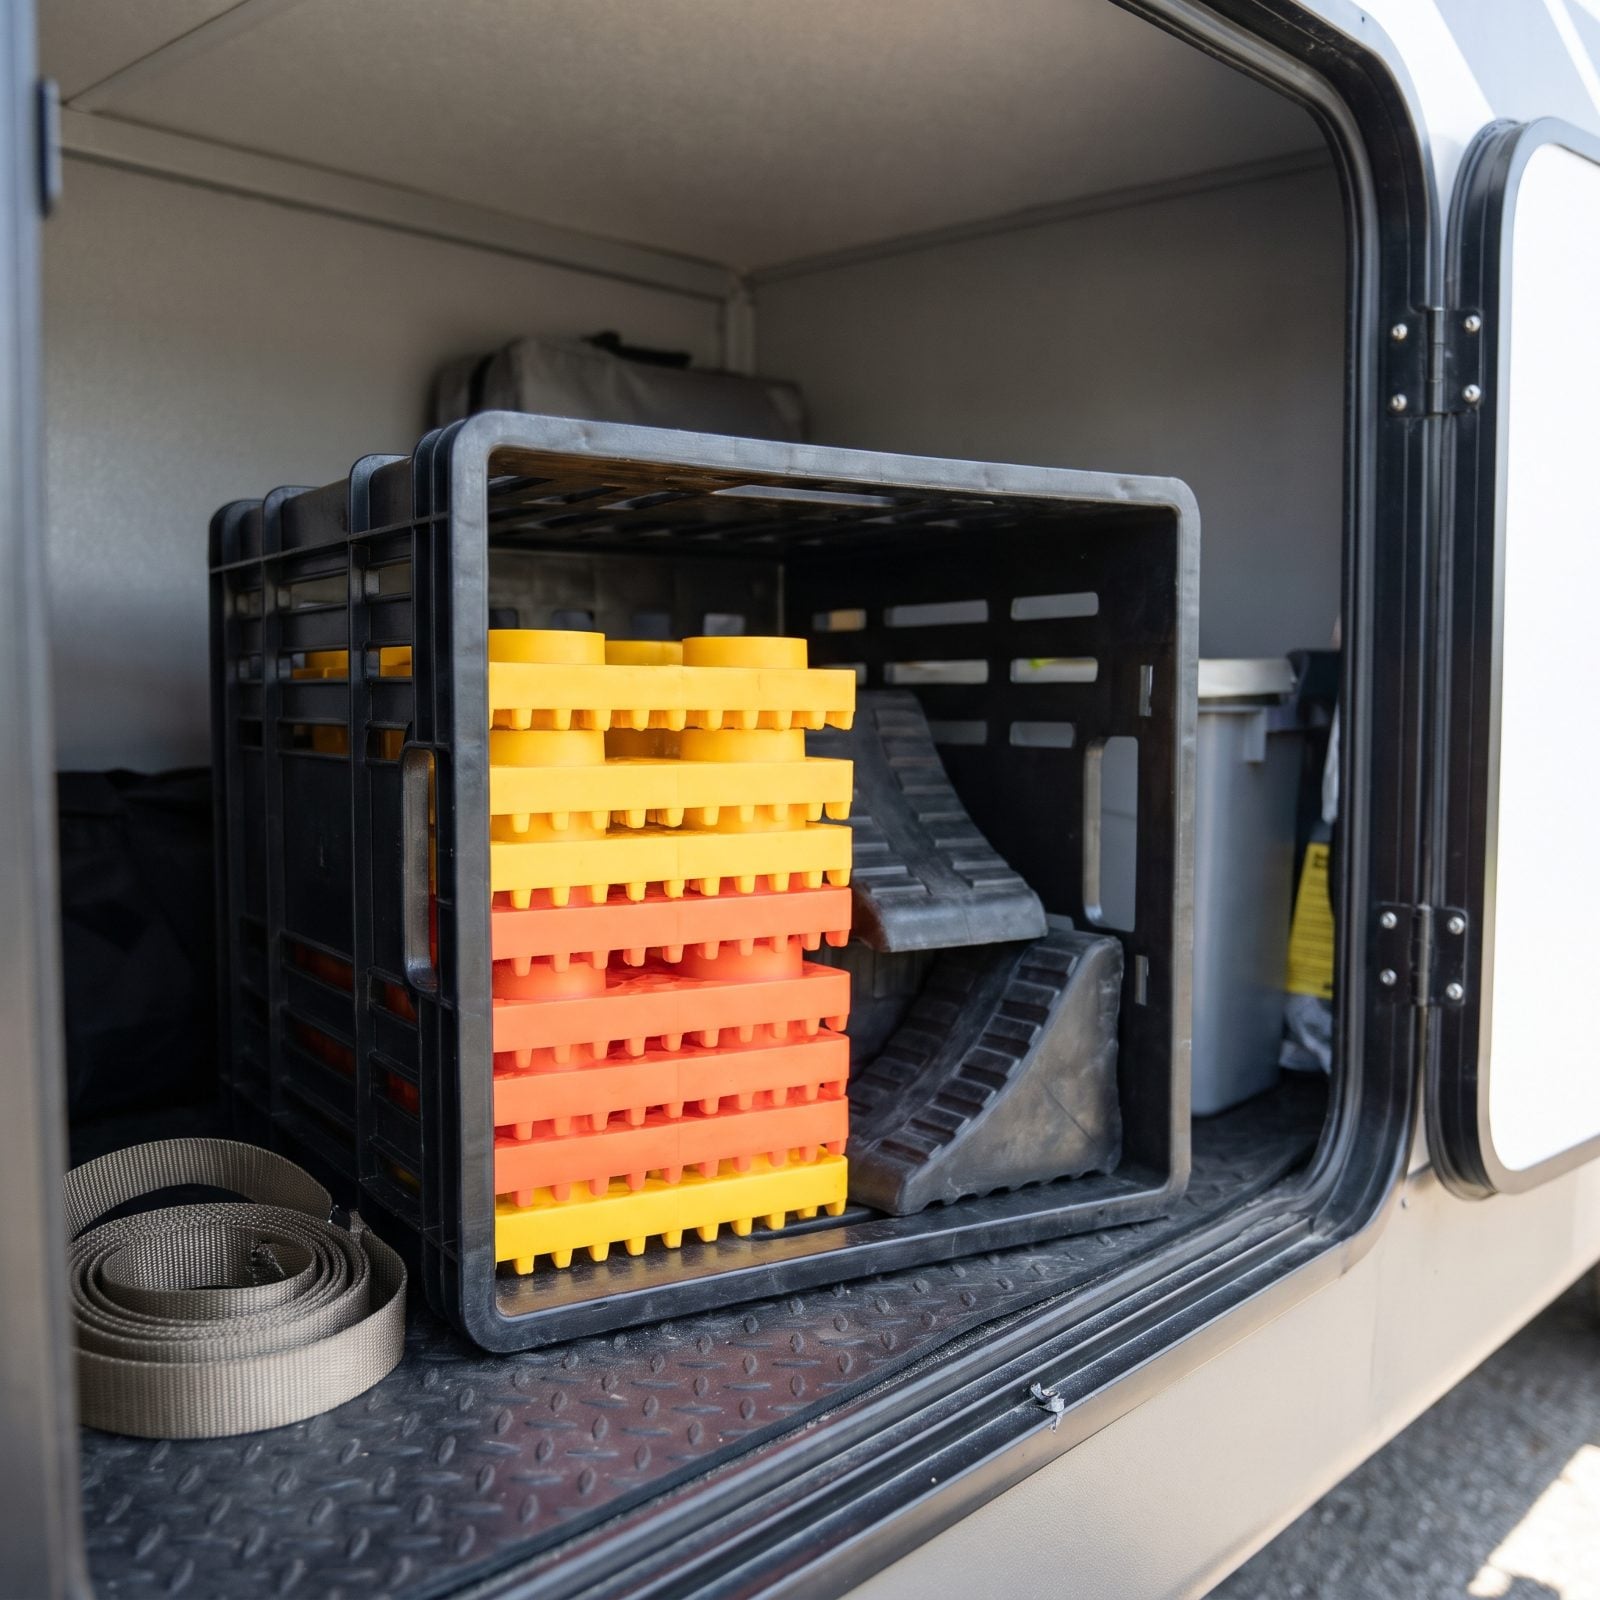
Leveling blocks are muddy, gritty, and always needed in a hurry the second you pull onto a slanted site. An open-front crate lets you grab a stack without unstacking the whole pile or lifting a lid every time.
The open face also drains and dries. Toss the wet blocks back in after a rainy site and they air out instead of growing a swamp smell in a sealed tote.
26. Give Wheel Chocks Quick-Release Wall Mounts
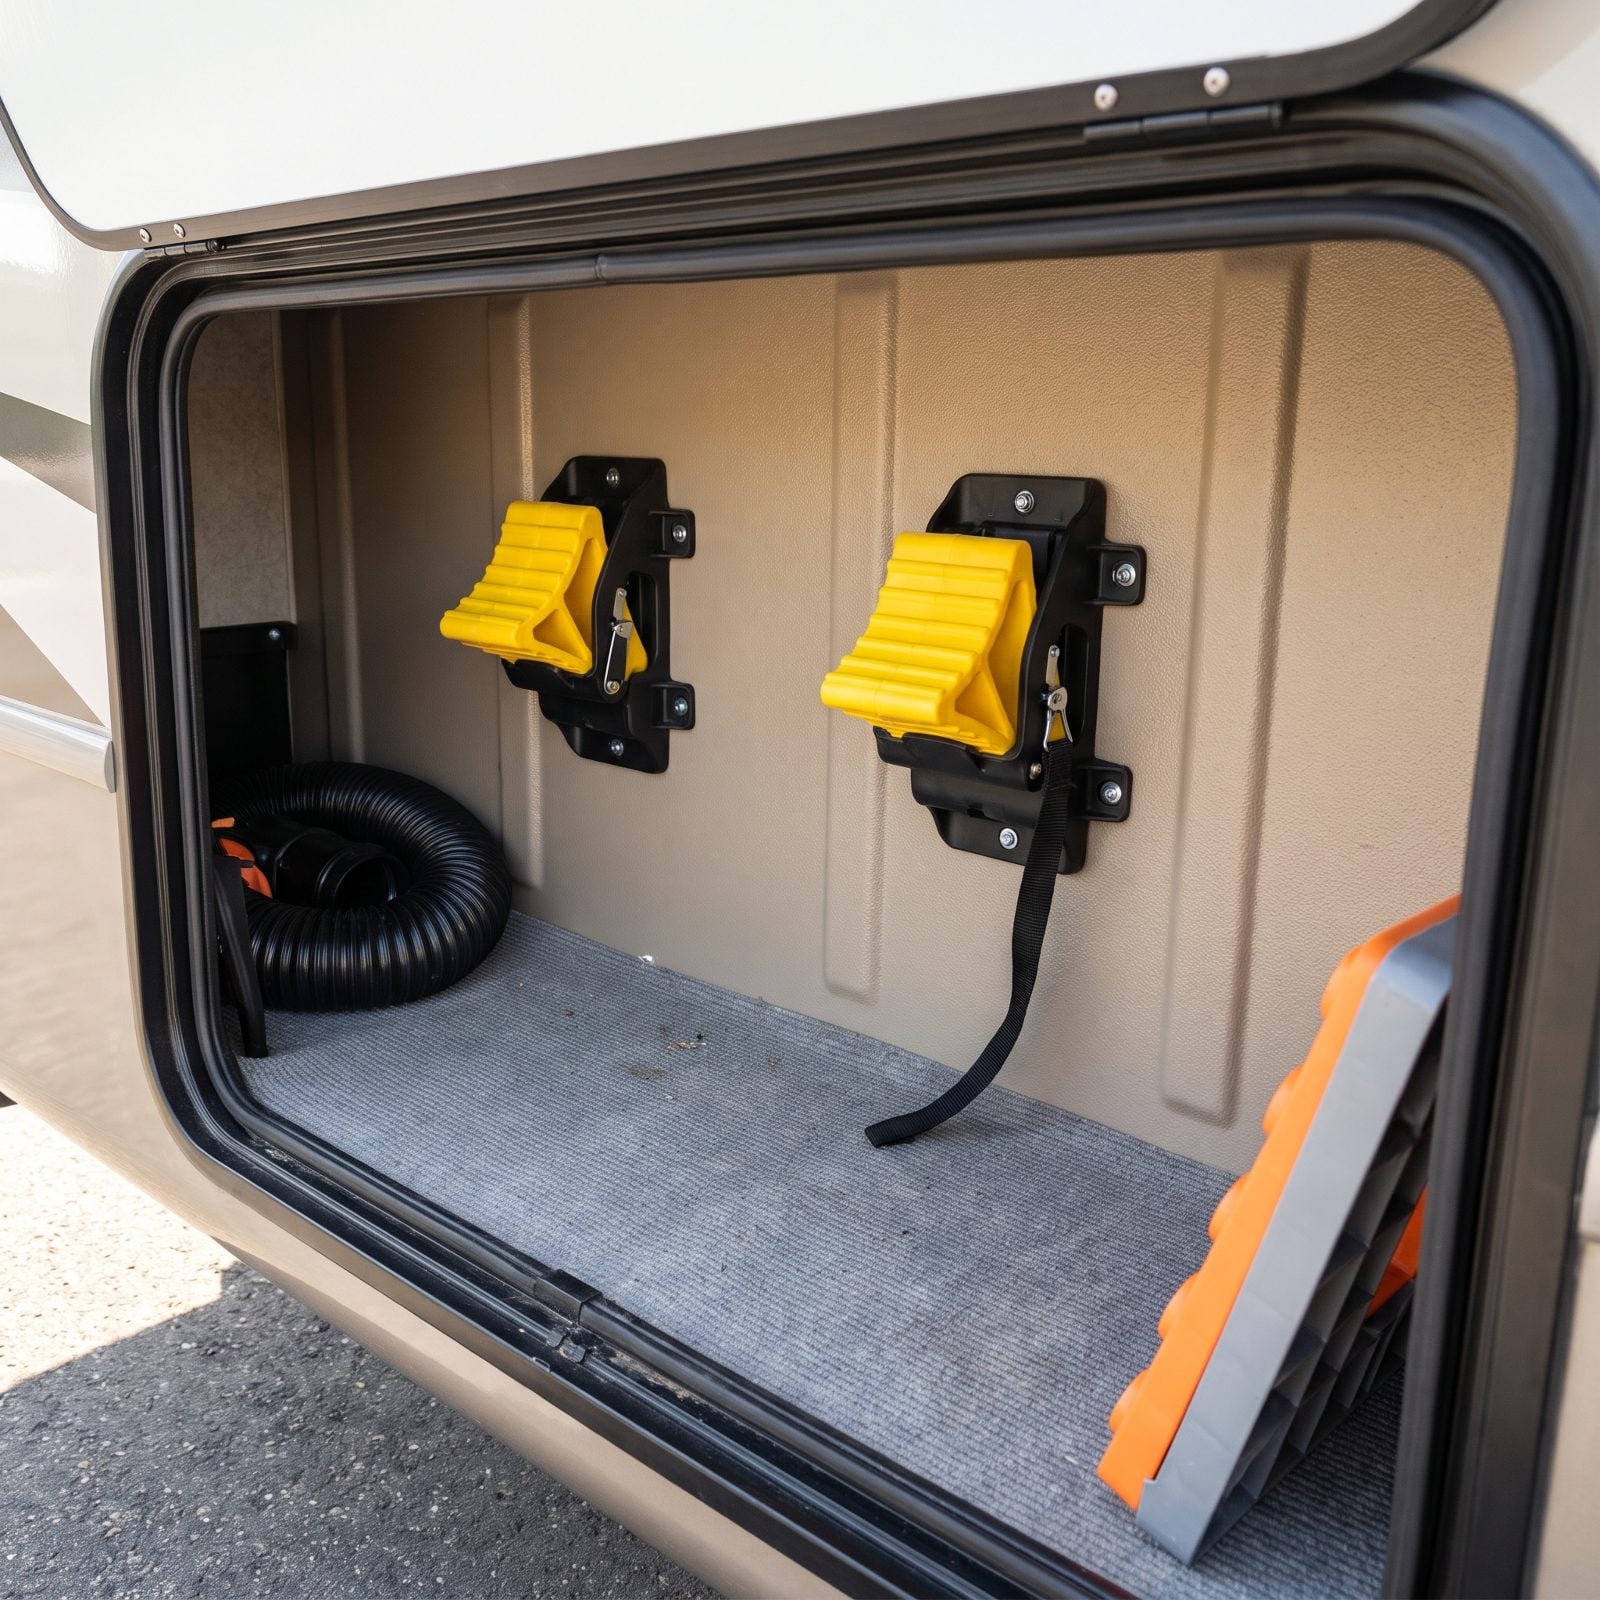
Loose chocks roll to the back of the bay and hide behind the surge protector every single time, so you end up on your knees with a flashlight at a dark pull-through. Nobody’s idea of a good start.
Bolt a pair of spring clips or purpose-made chock holders to the bay wall and the chocks click on and off in a second. They stop rattling down the highway too, which matters more than you’d think — we ignored that rattle for a whole season before we figured out it was the chocks.
25. Place Fluids in a Lipped Drip Tray
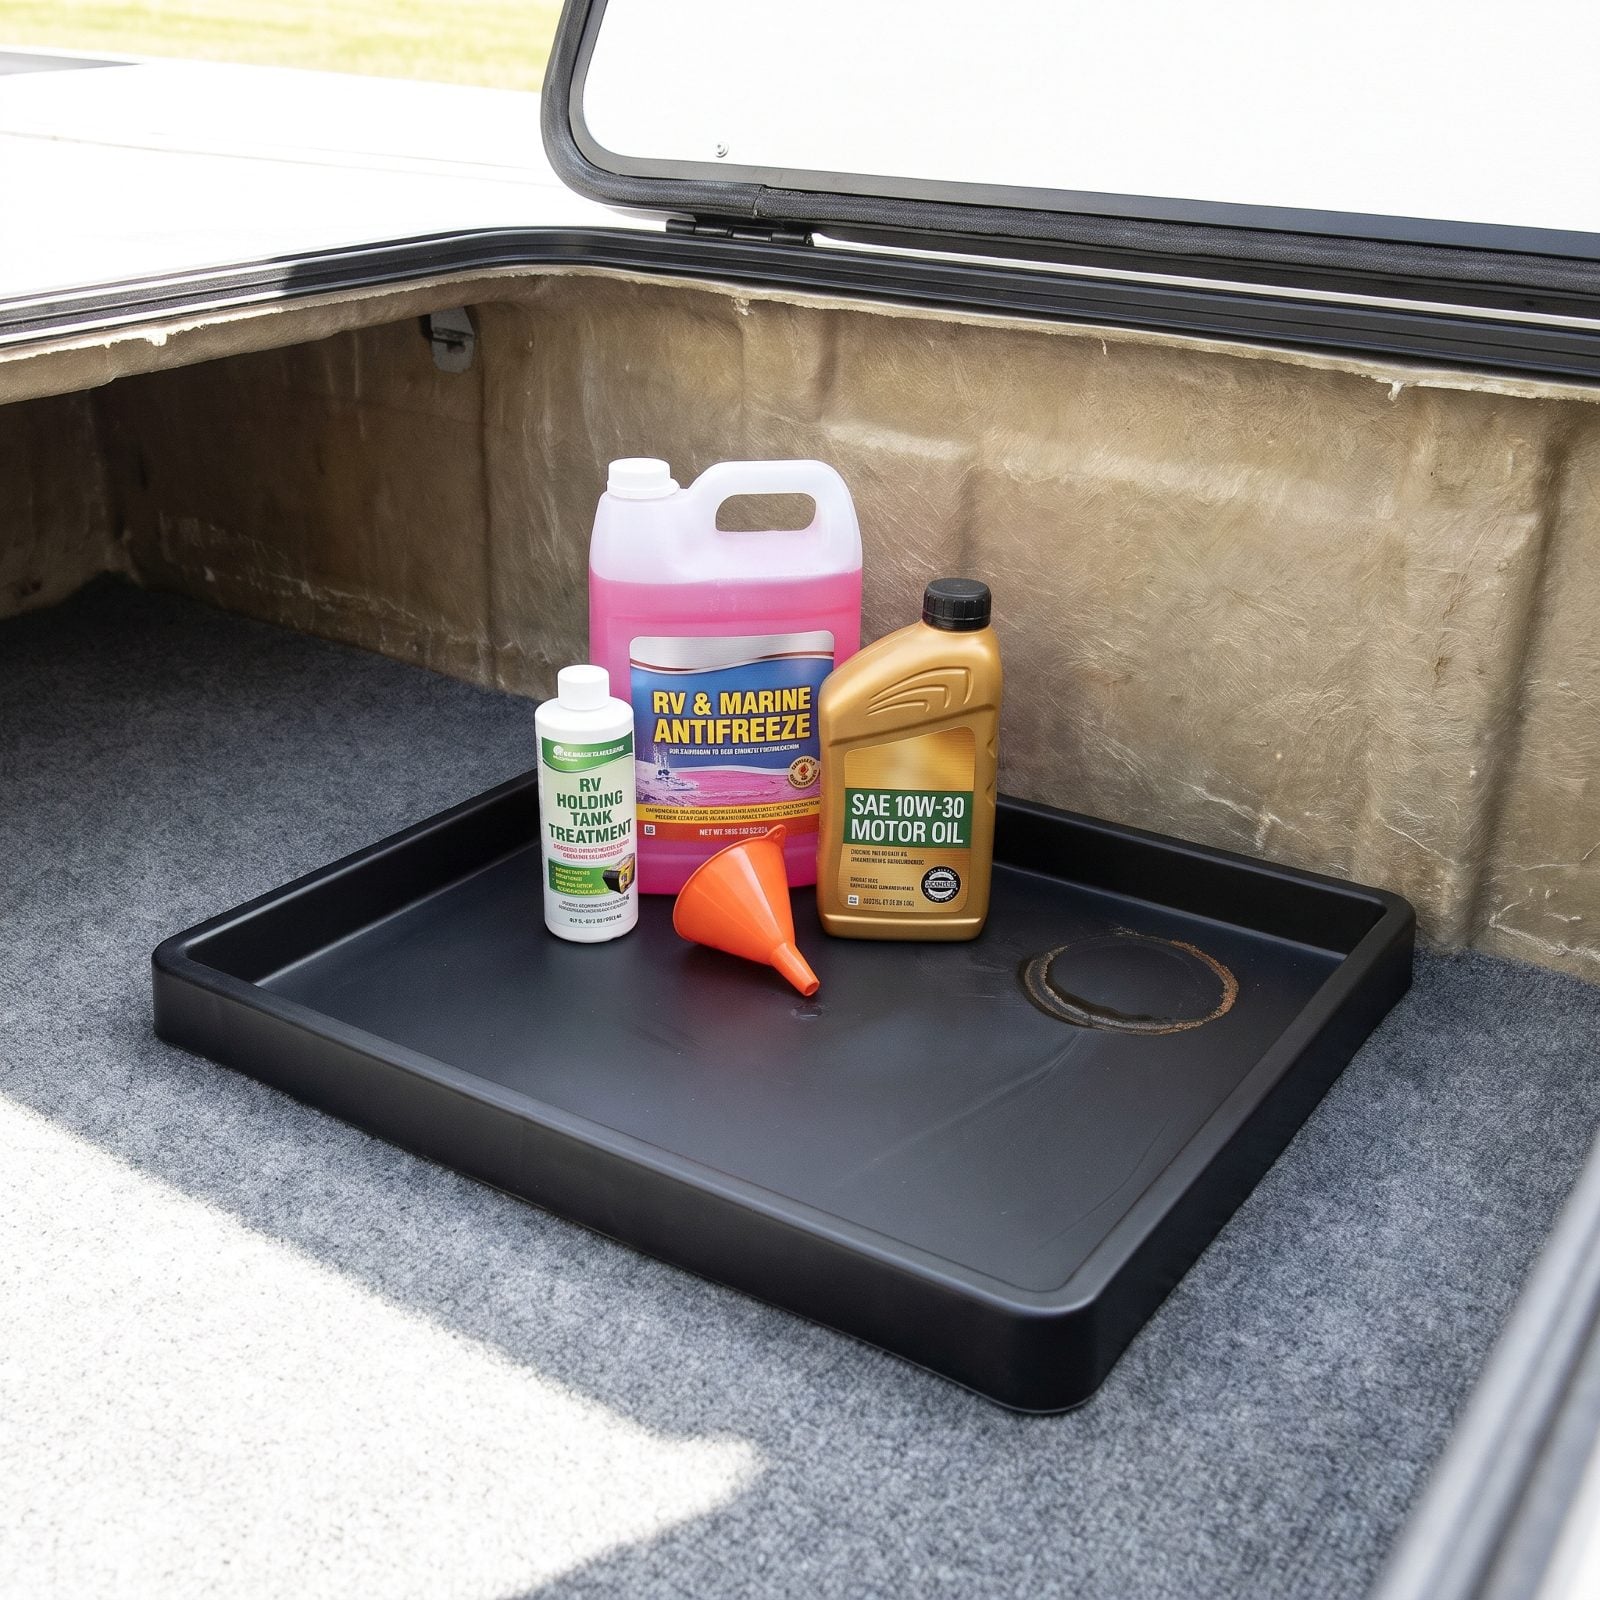
Every bottle of fluid leaks eventually. The cap backs off a half-turn over a thousand miles of vibration, and then you’ve got antifreeze soaking into your bay carpet and a smell that never fully leaves.
A cheap boot tray or paint tray with a real lip catches all of it. Keep the oil, the tank treatment, the washer fluid and the two-stroke mix together in one tray, and a spill stays a two-paper-towel problem instead of a scrub-the-whole-bay afternoon.
24. Use a Gasketed Bin for Pet-Food Backstock
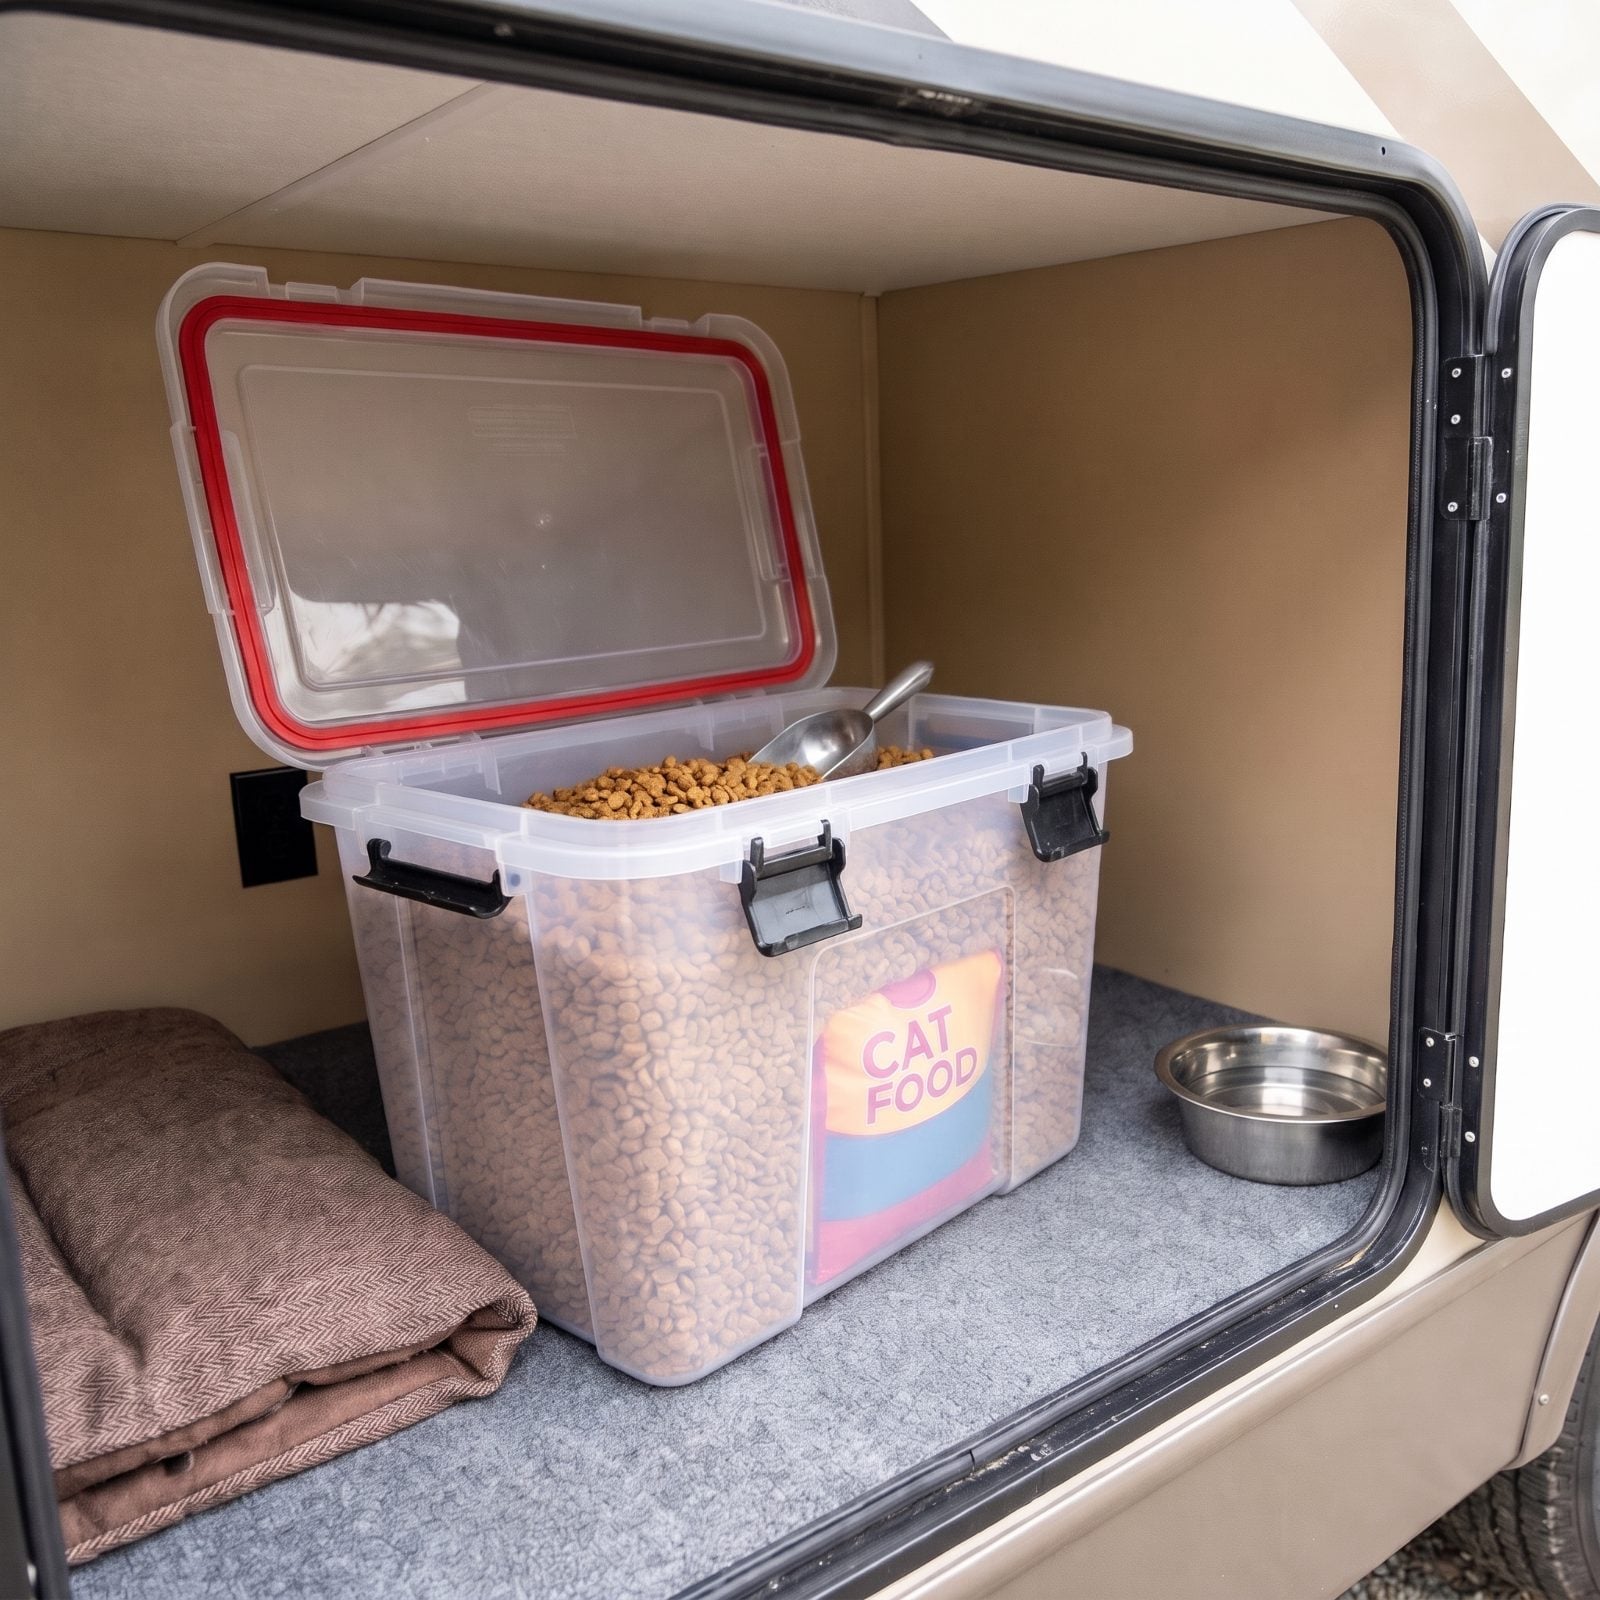
Mice can smell a bag of kibble through a closed bay door. And a basement bay — warm, dark, tucked near the frame — is exactly where they want to spend the winter.
A bin with a full rubber gasket and locking latches kills the scent trail and keeps the humidity out, so the food doesn’t go stale or soft between fill-ups. Clear sides let you see when you’re running low without cracking the lid. We buy pet food in bulk precisely because we have somewhere safe to keep it, and the bin paid for itself the first time I didn’t have to hunt down a store in the middle of nowhere.
23. Hang Handled Gear From a Carabiner Daisy Chain
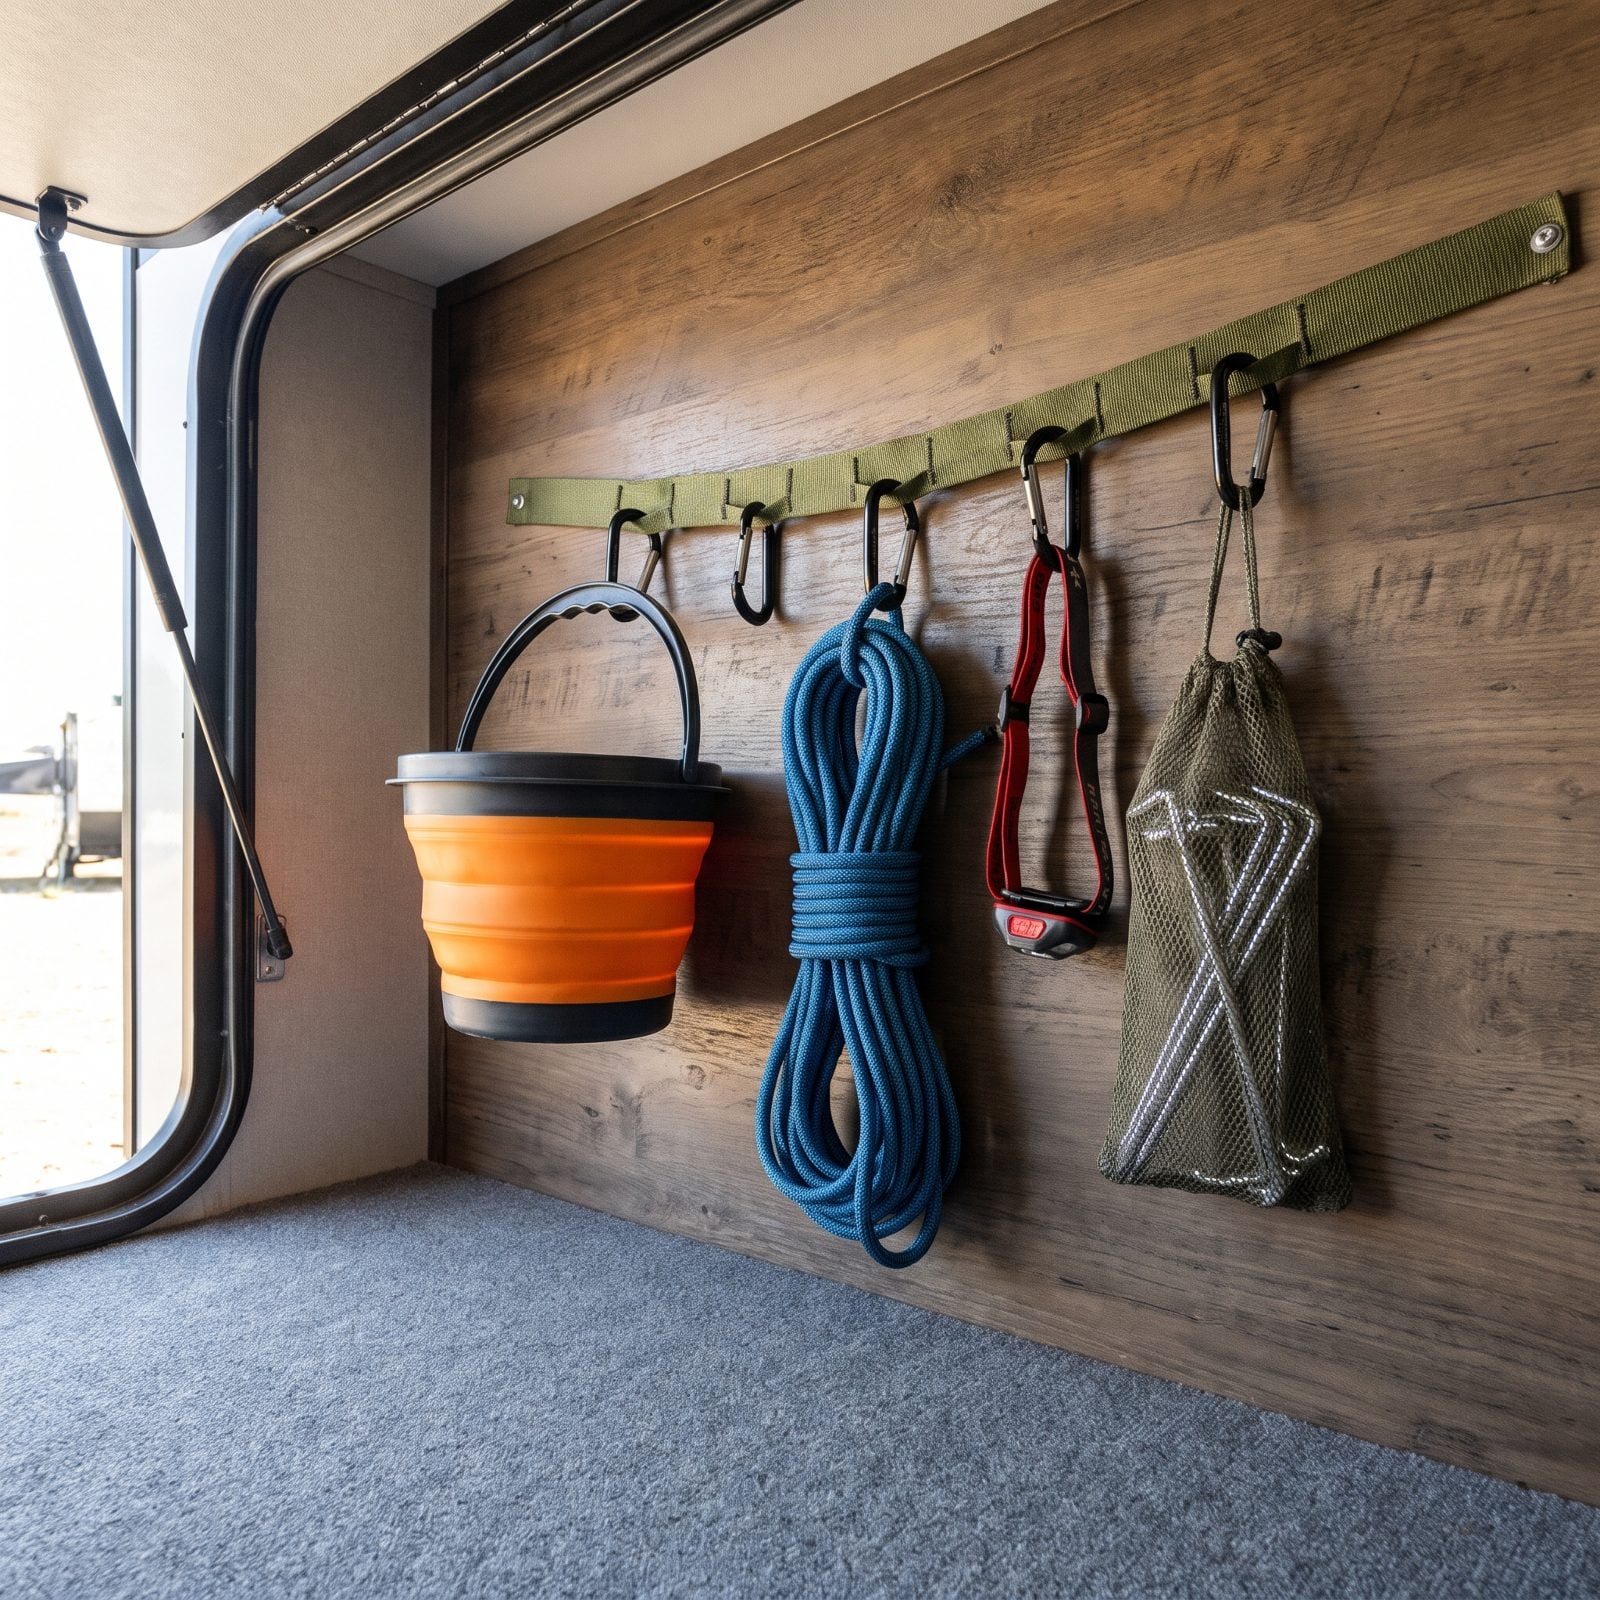
Floor space in a bay is prime real estate, and anything with a handle doesn’t need to use it. Screw both ends of a strip of daisy-chain webbing to the wall and run it across the bay as a slightly sagging line of loops, then let a handful of carabiners turn that into a row of hanging hooks you can rearrange whenever the load changes.
Clip up the camp bucket, the rope, the headlamp, the folding saw. Everything dangles in midair off the floor, nothing slides, and you see the whole inventory at a glance instead of digging blind.
22. Corral Hose Adapters in See-Through Mesh Pockets
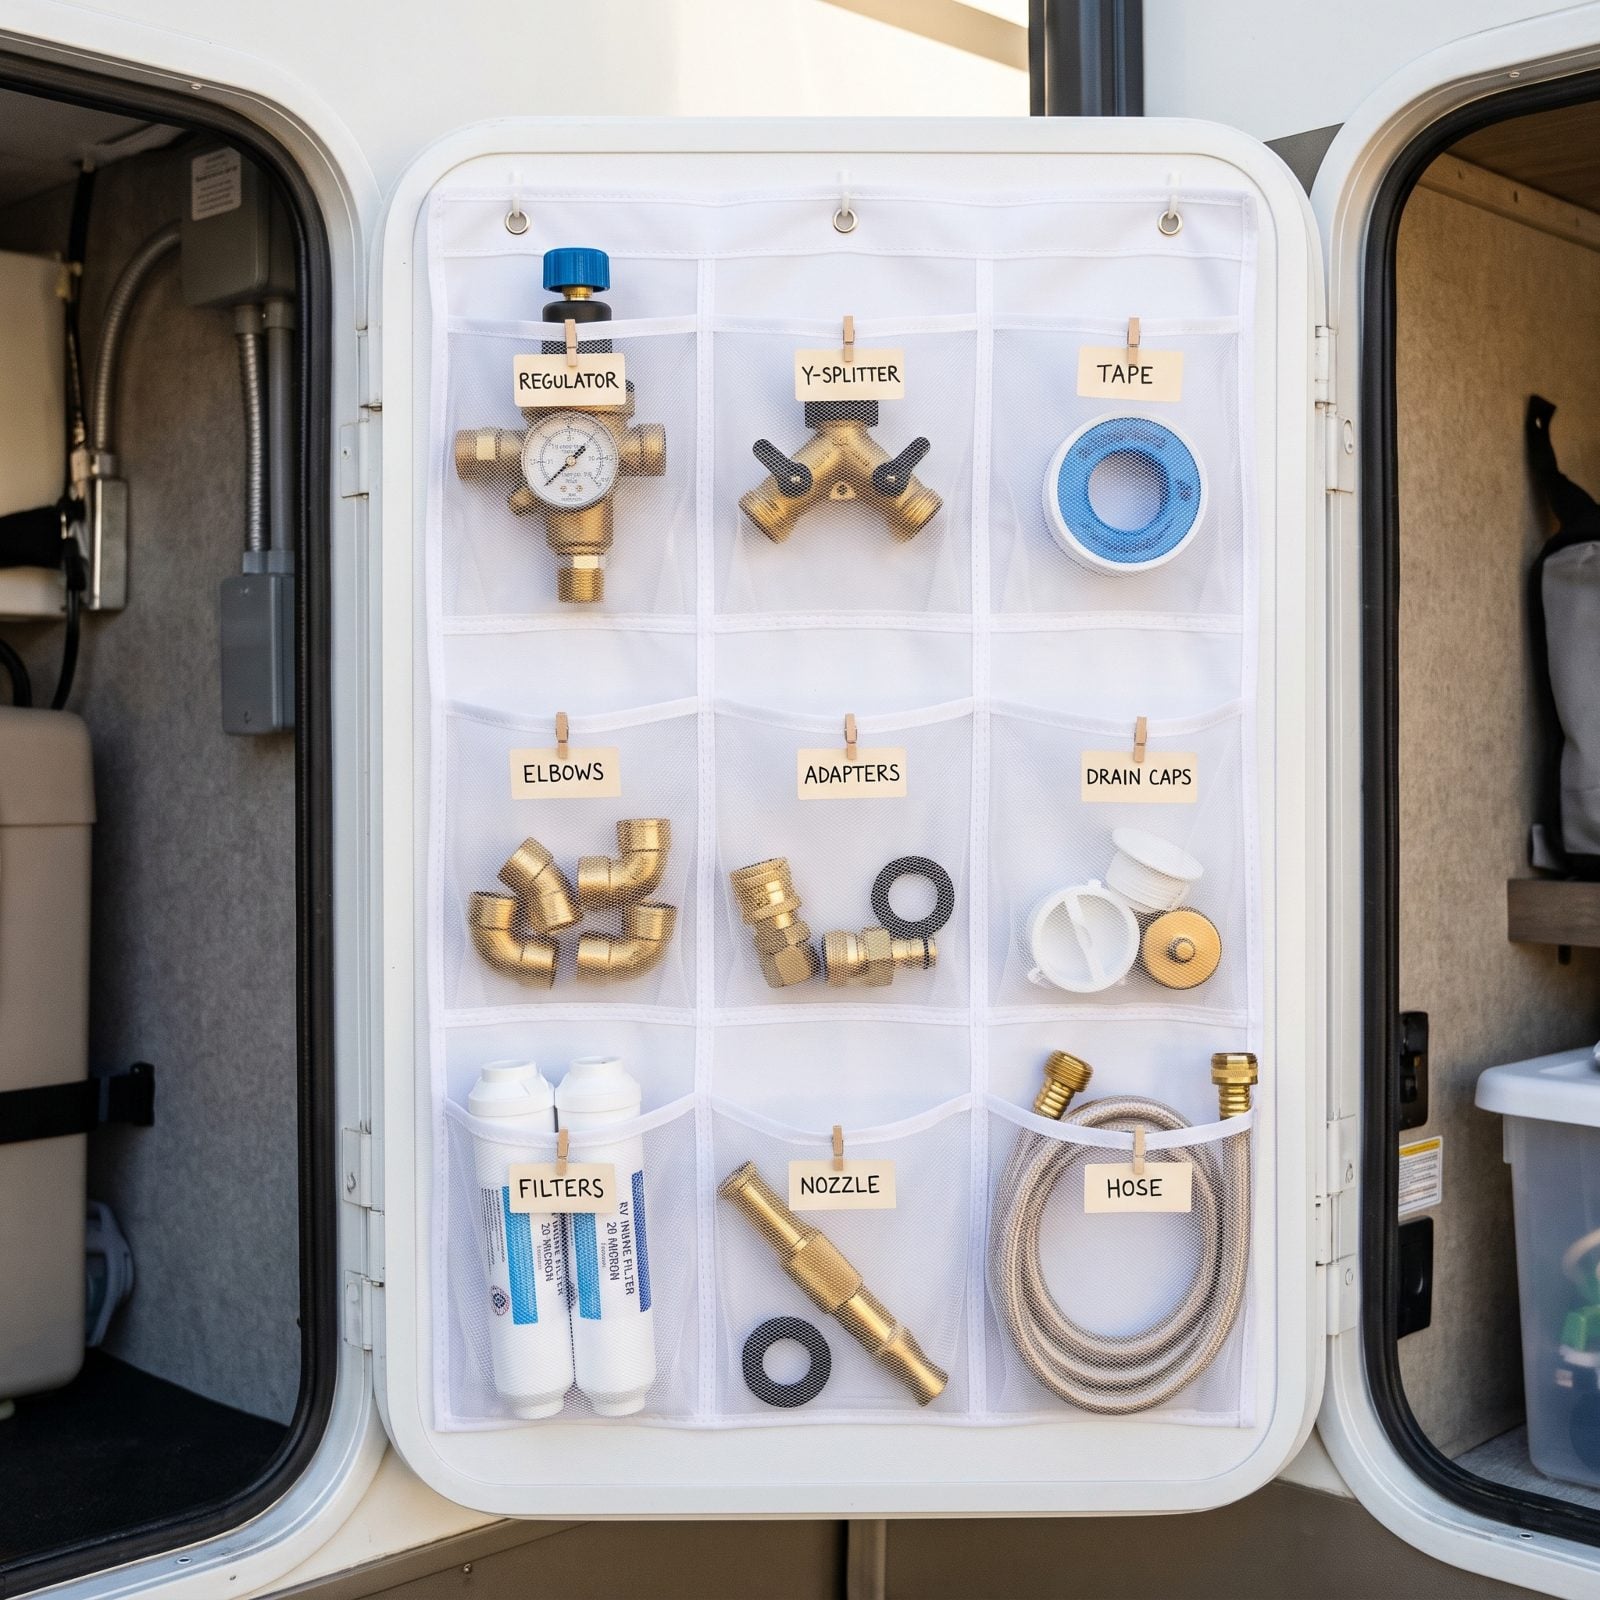
Water adapters are small, they all look vaguely alike, and they drift to the bottom of whatever bin holds them. You arrive, you can’t find the pressure regulator, and you burn ten minutes confirming it’s not lost before you remember it’s exactly where it always is.
Hang a clear mesh shoe organizer or a few see-through zip pouches and give each fitting its own pocket — the regulator, the Y-splitter, the brass elbow, the roll of tape. You see every piece through the mesh, grab the one you need, and move on.
21. Add Pull Straps to Containers in Deep Bays
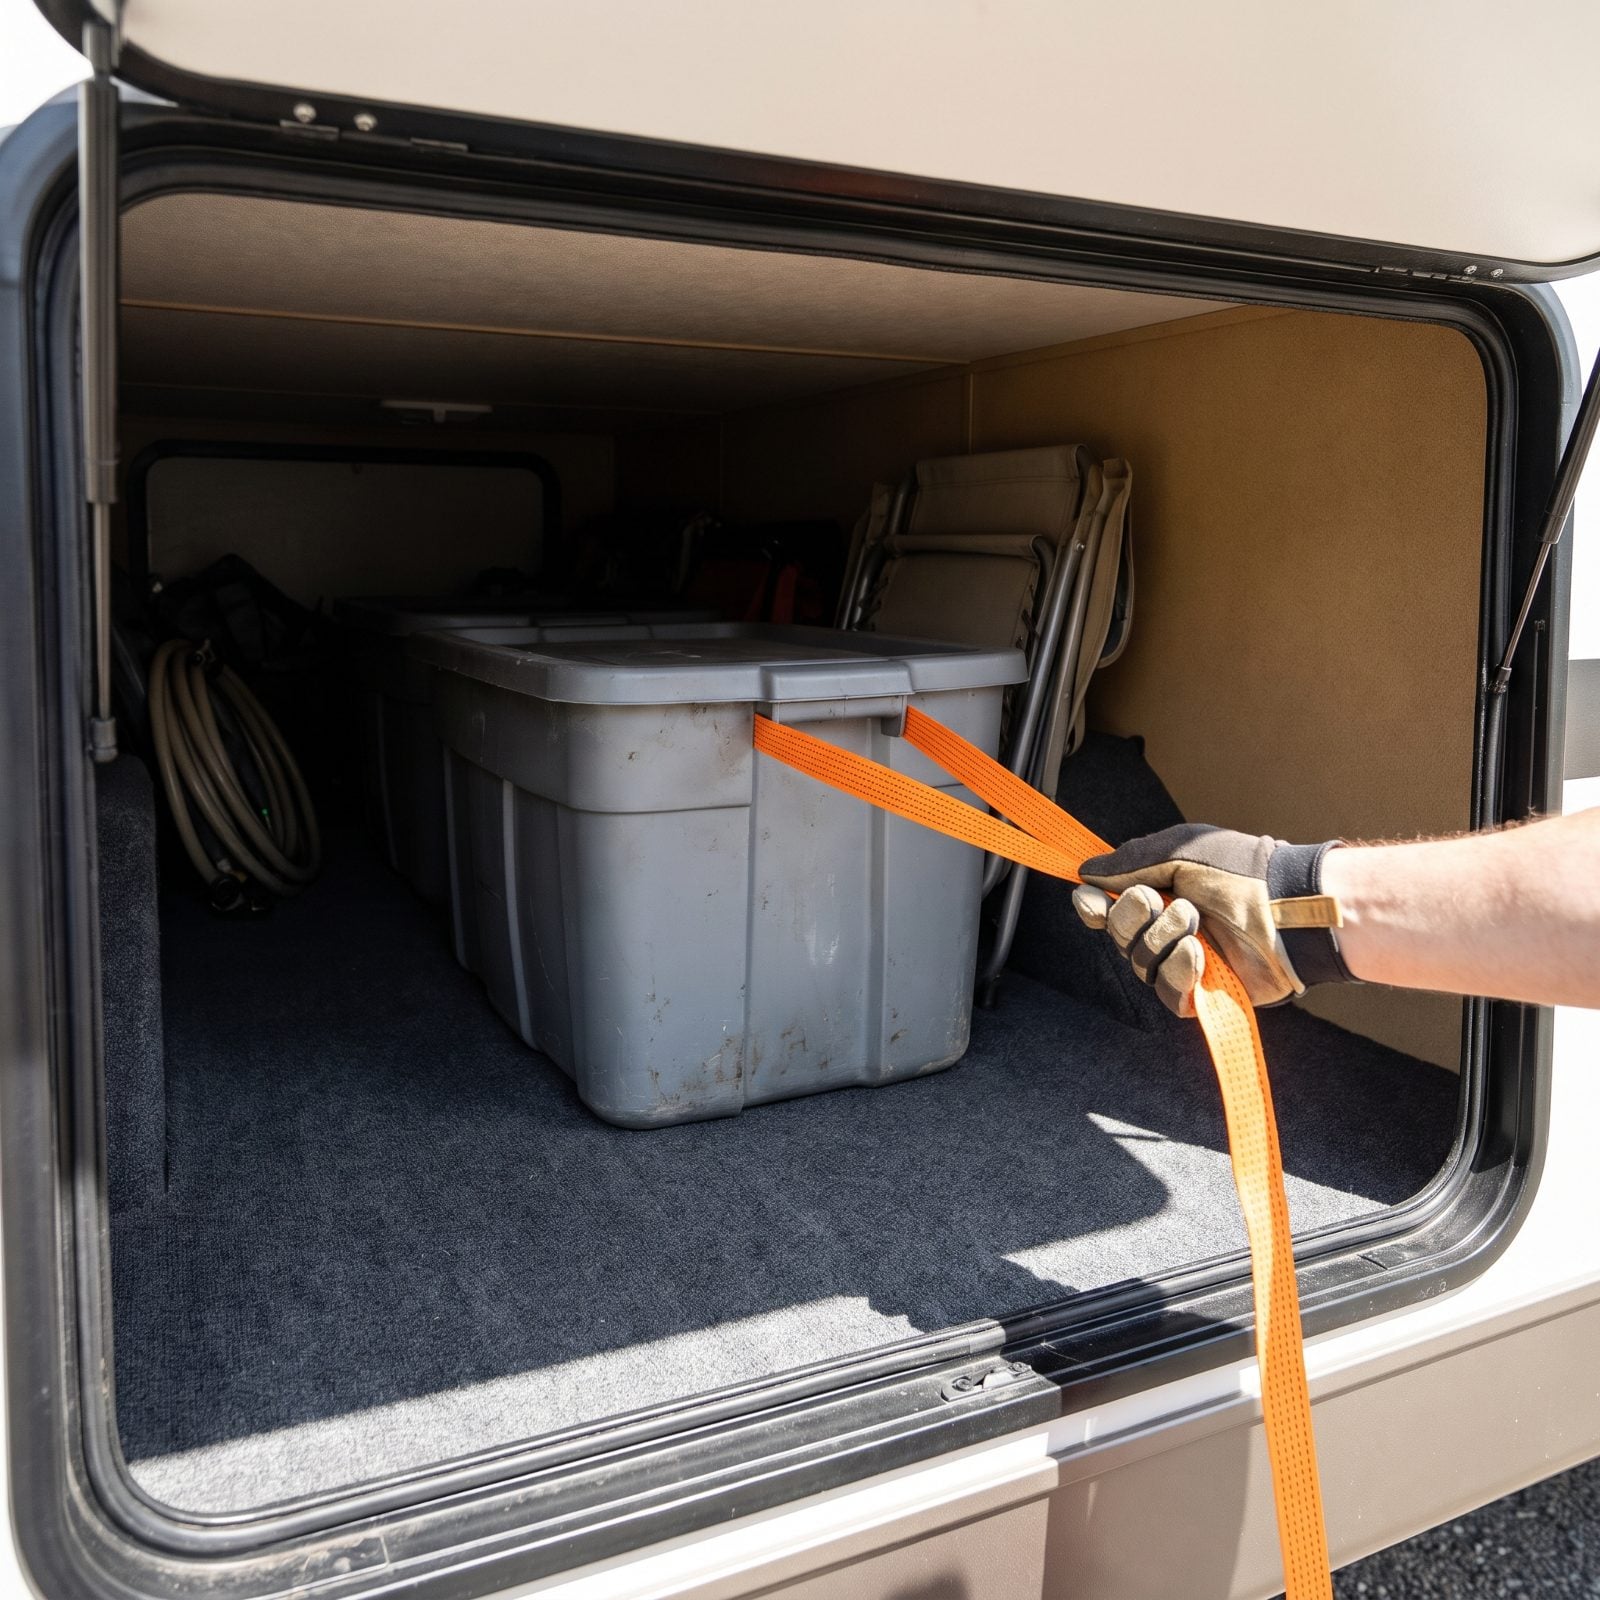
Pass-through bays are wonderful until the bin you want slides three feet past where your arm ends. You climb halfway in, bang your head on the hatch frame, and do that awkward shuffle to reach the far handle. We’ve done it more times than we’ll admit.
While a bin is still within easy reach at the opening, loop a webbing strap through its front handle and leave the tail long enough to reach the opening. When the bin ends up deep in the bay, one pull on that tail drags the whole thing back to the opening across the carpet. No climbing, no head-knocking, no shuffle.
20. Mark Every Loaded Bin With Its Weight
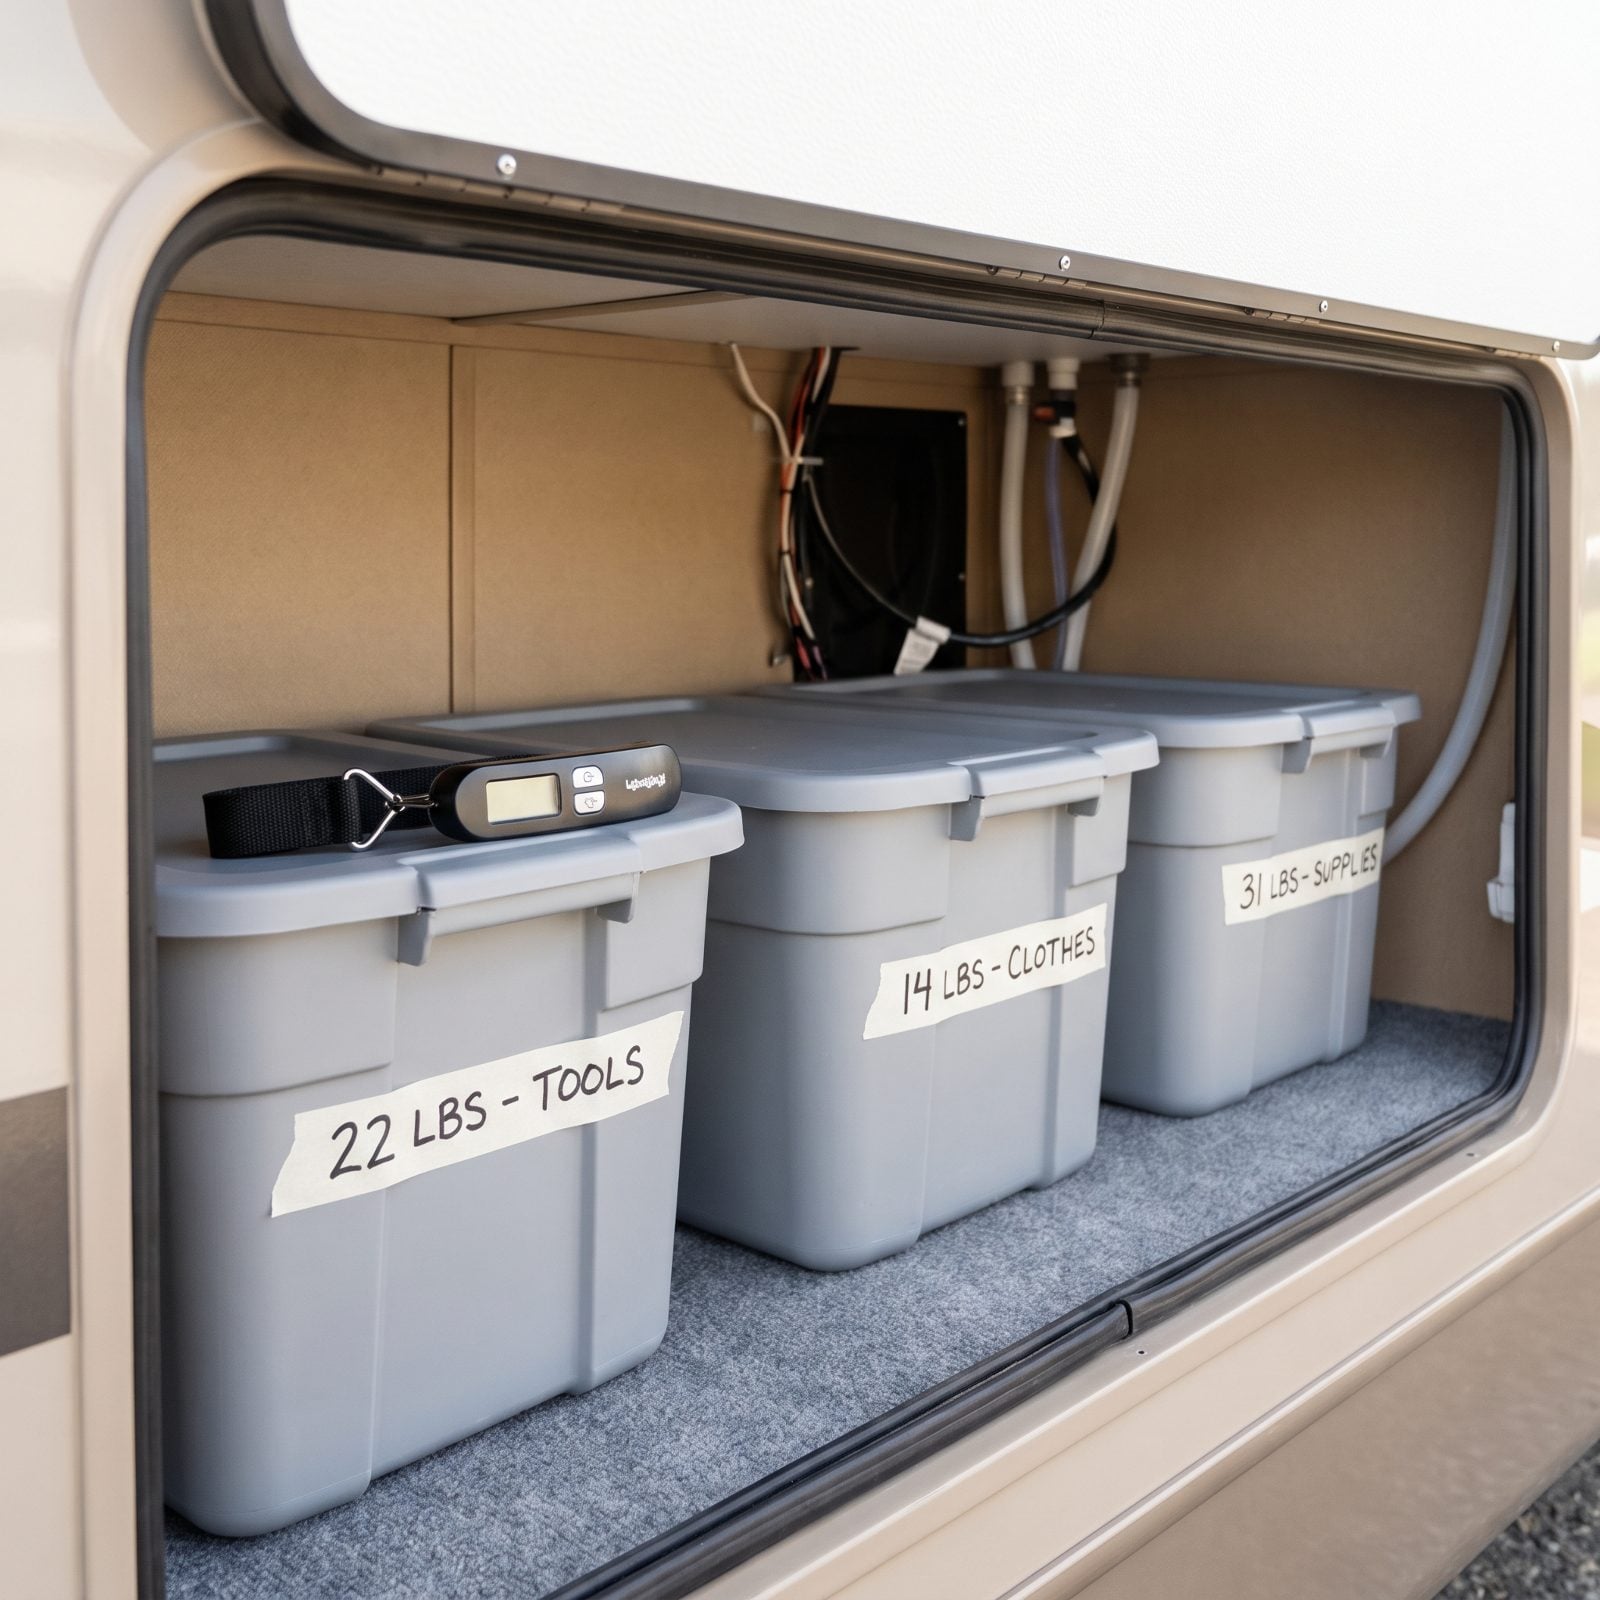
You can’t balance a rig you can’t measure. Cargo capacity disappears faster than anyone expects, and the bin full of canned goods weighs three times what you’d guess by looking at it.
Weigh each loaded bin once on a cheap luggage scale and write the number on the front with a marker. Now you distribute weight on purpose, keep the heavy stuff off the one axle that’s already working too hard, and tell at a glance whether there’s room to add anything without blowing past your rating.
19. Position Heavy Gear Low and Near the Axles
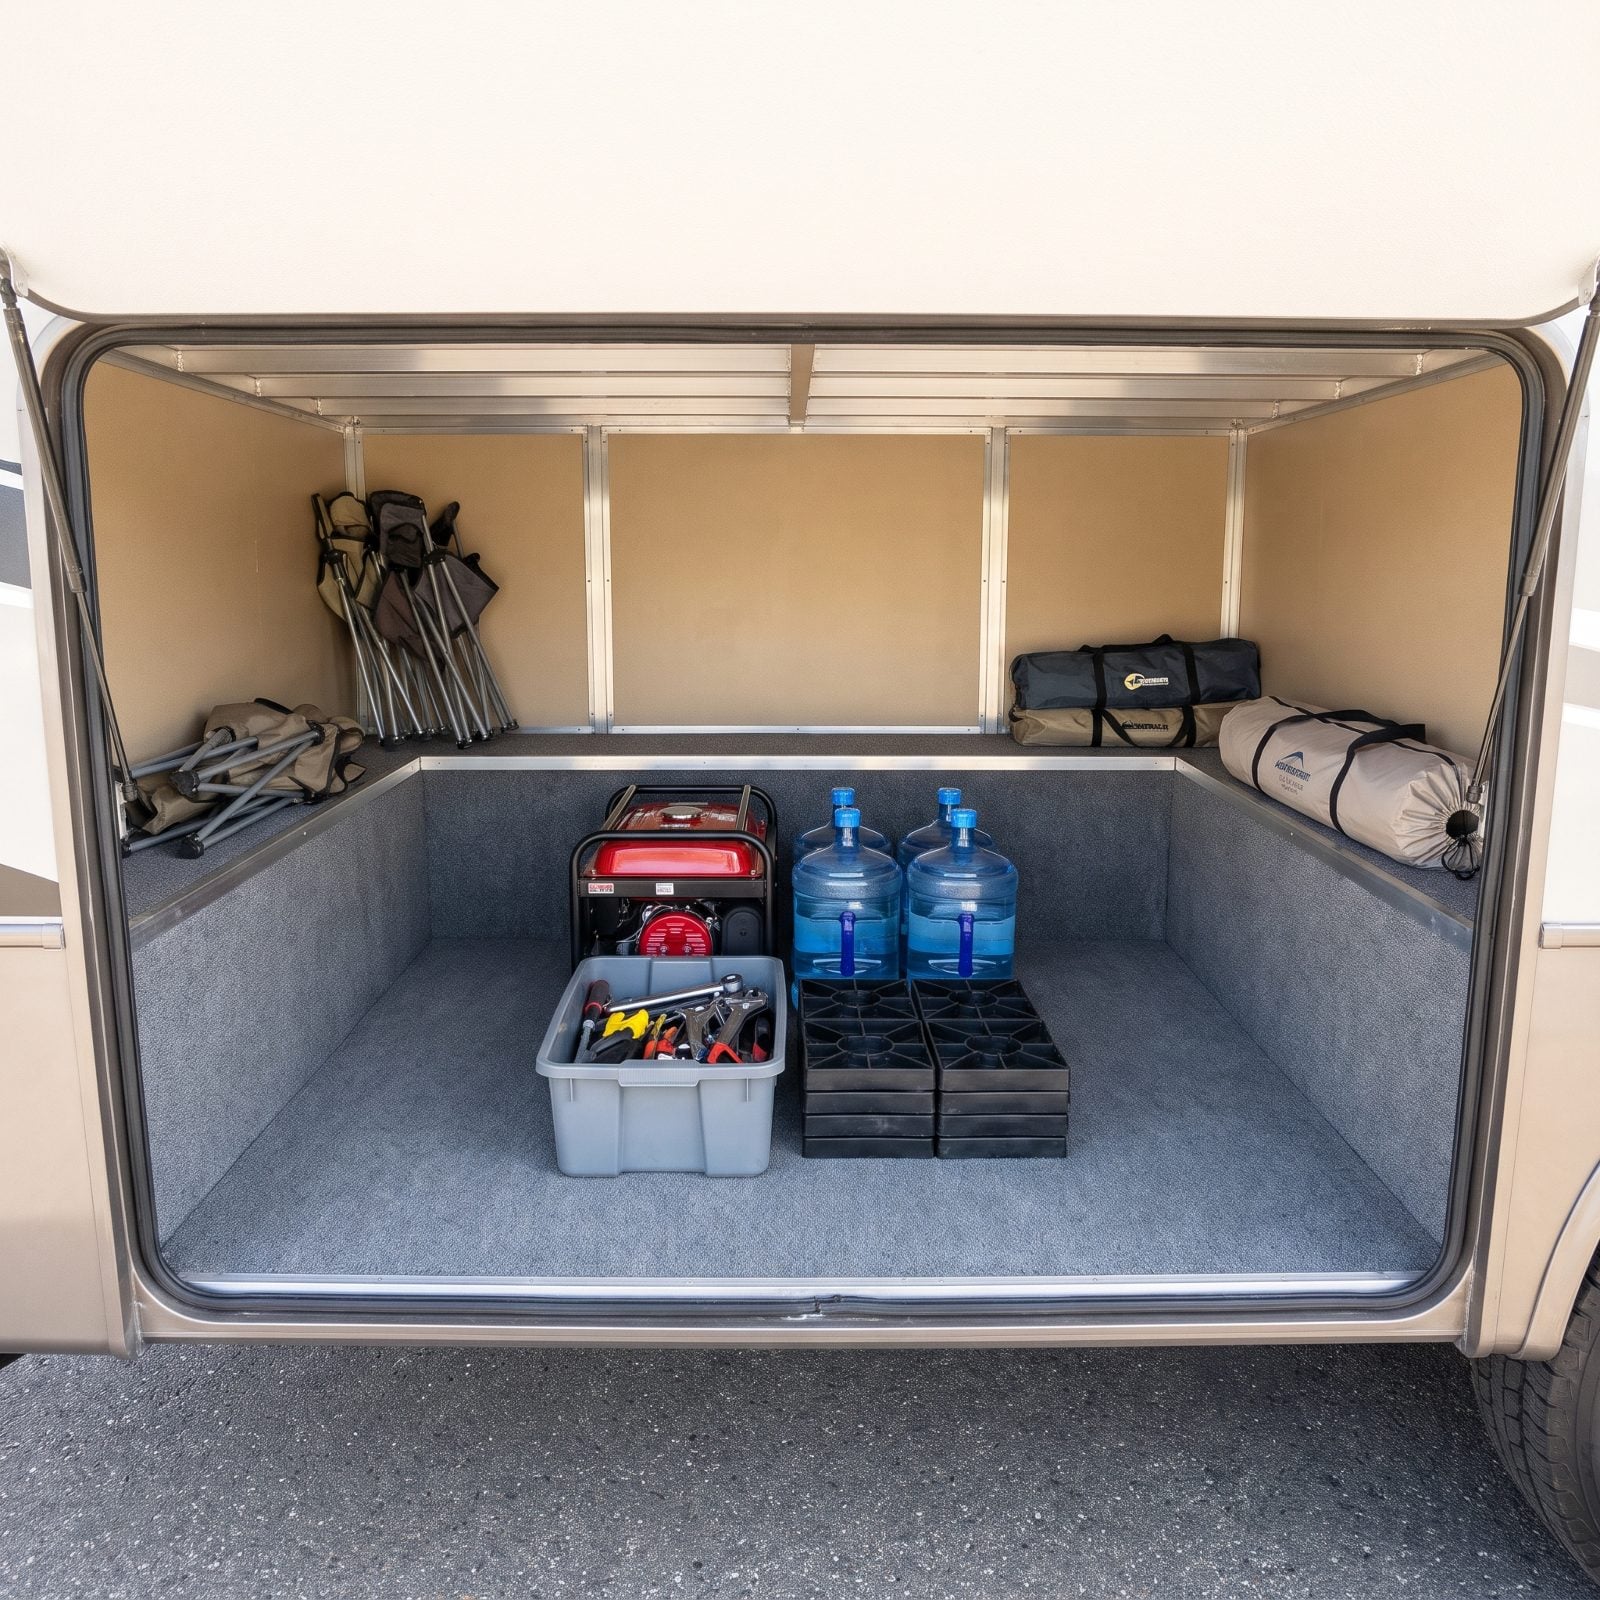
Where you set the heavy stuff changes how the whole rig drives. Load the generator and the full water jugs up high or way out past the wheels and you’ll feel it in every sway, every crosswind, every semi that blows past you.
Keep the dense gear low to the floor and clustered over or just ahead of the axles. A lower center of gravity settles the trailer down, the weight sits where the suspension is built to carry it, and the whole thing tracks straighter.
18. Raise Containers on a Slatted Moisture Barrier
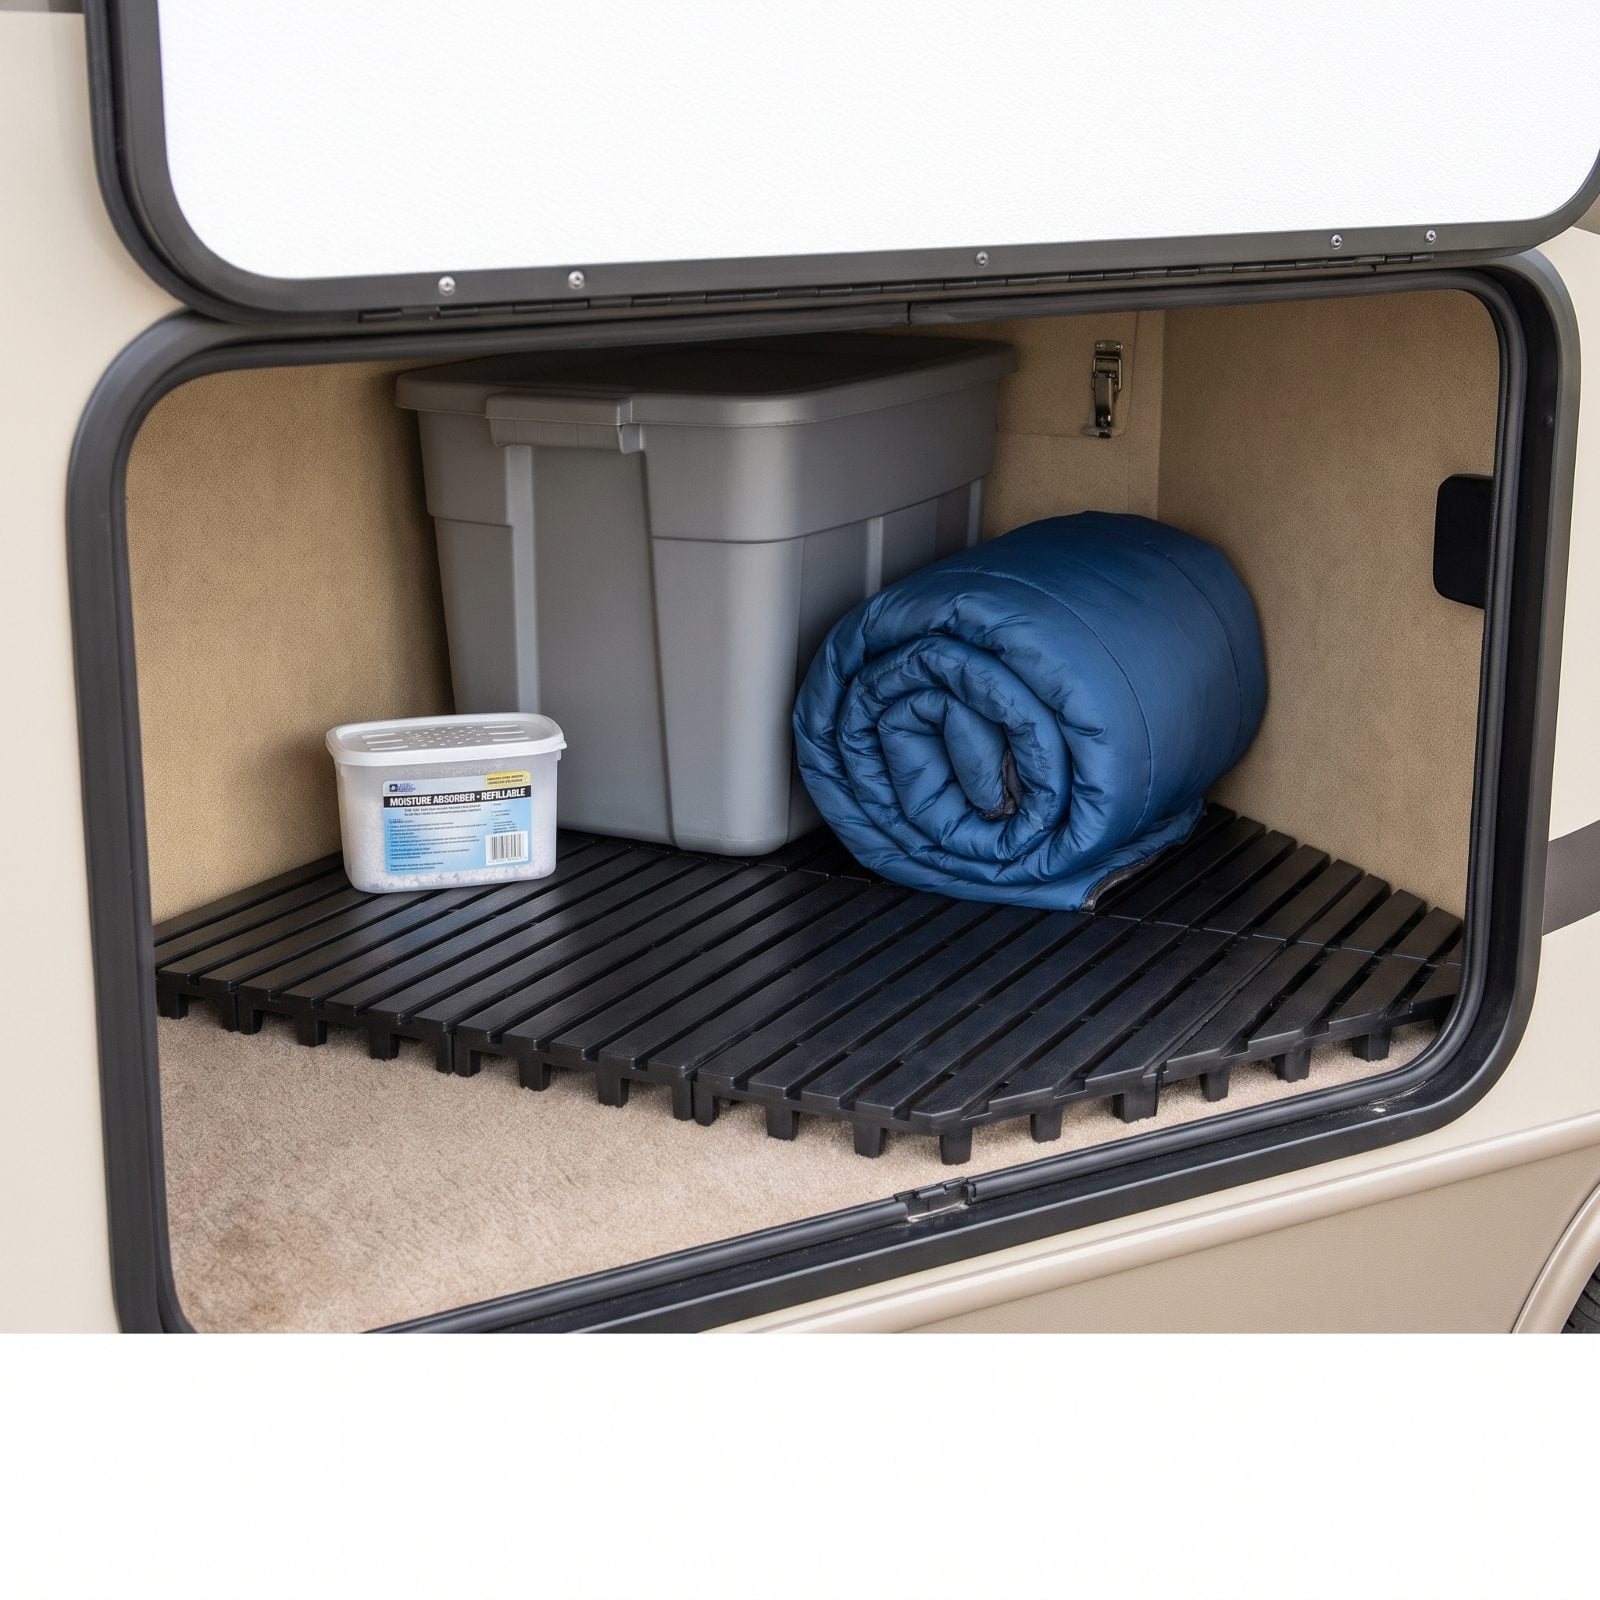
Condensation collects on the cold floor of a storage area overnight, especially in shoulder season when warm days give way to cold nights. Anything sitting flat on that carpet wicks it right up. Open a bin after a damp week and you’ll find out the hard way.
Lay down slatted plastic deck tiles or a cheap boot grid and your bins ride an inch up on an air gap. Moisture rolls off underneath instead of pooling against your cardboard and your spare bedding. Dry gear, no musty smell, no ruined towels.
17. Install Motion-Activated LED Lighting
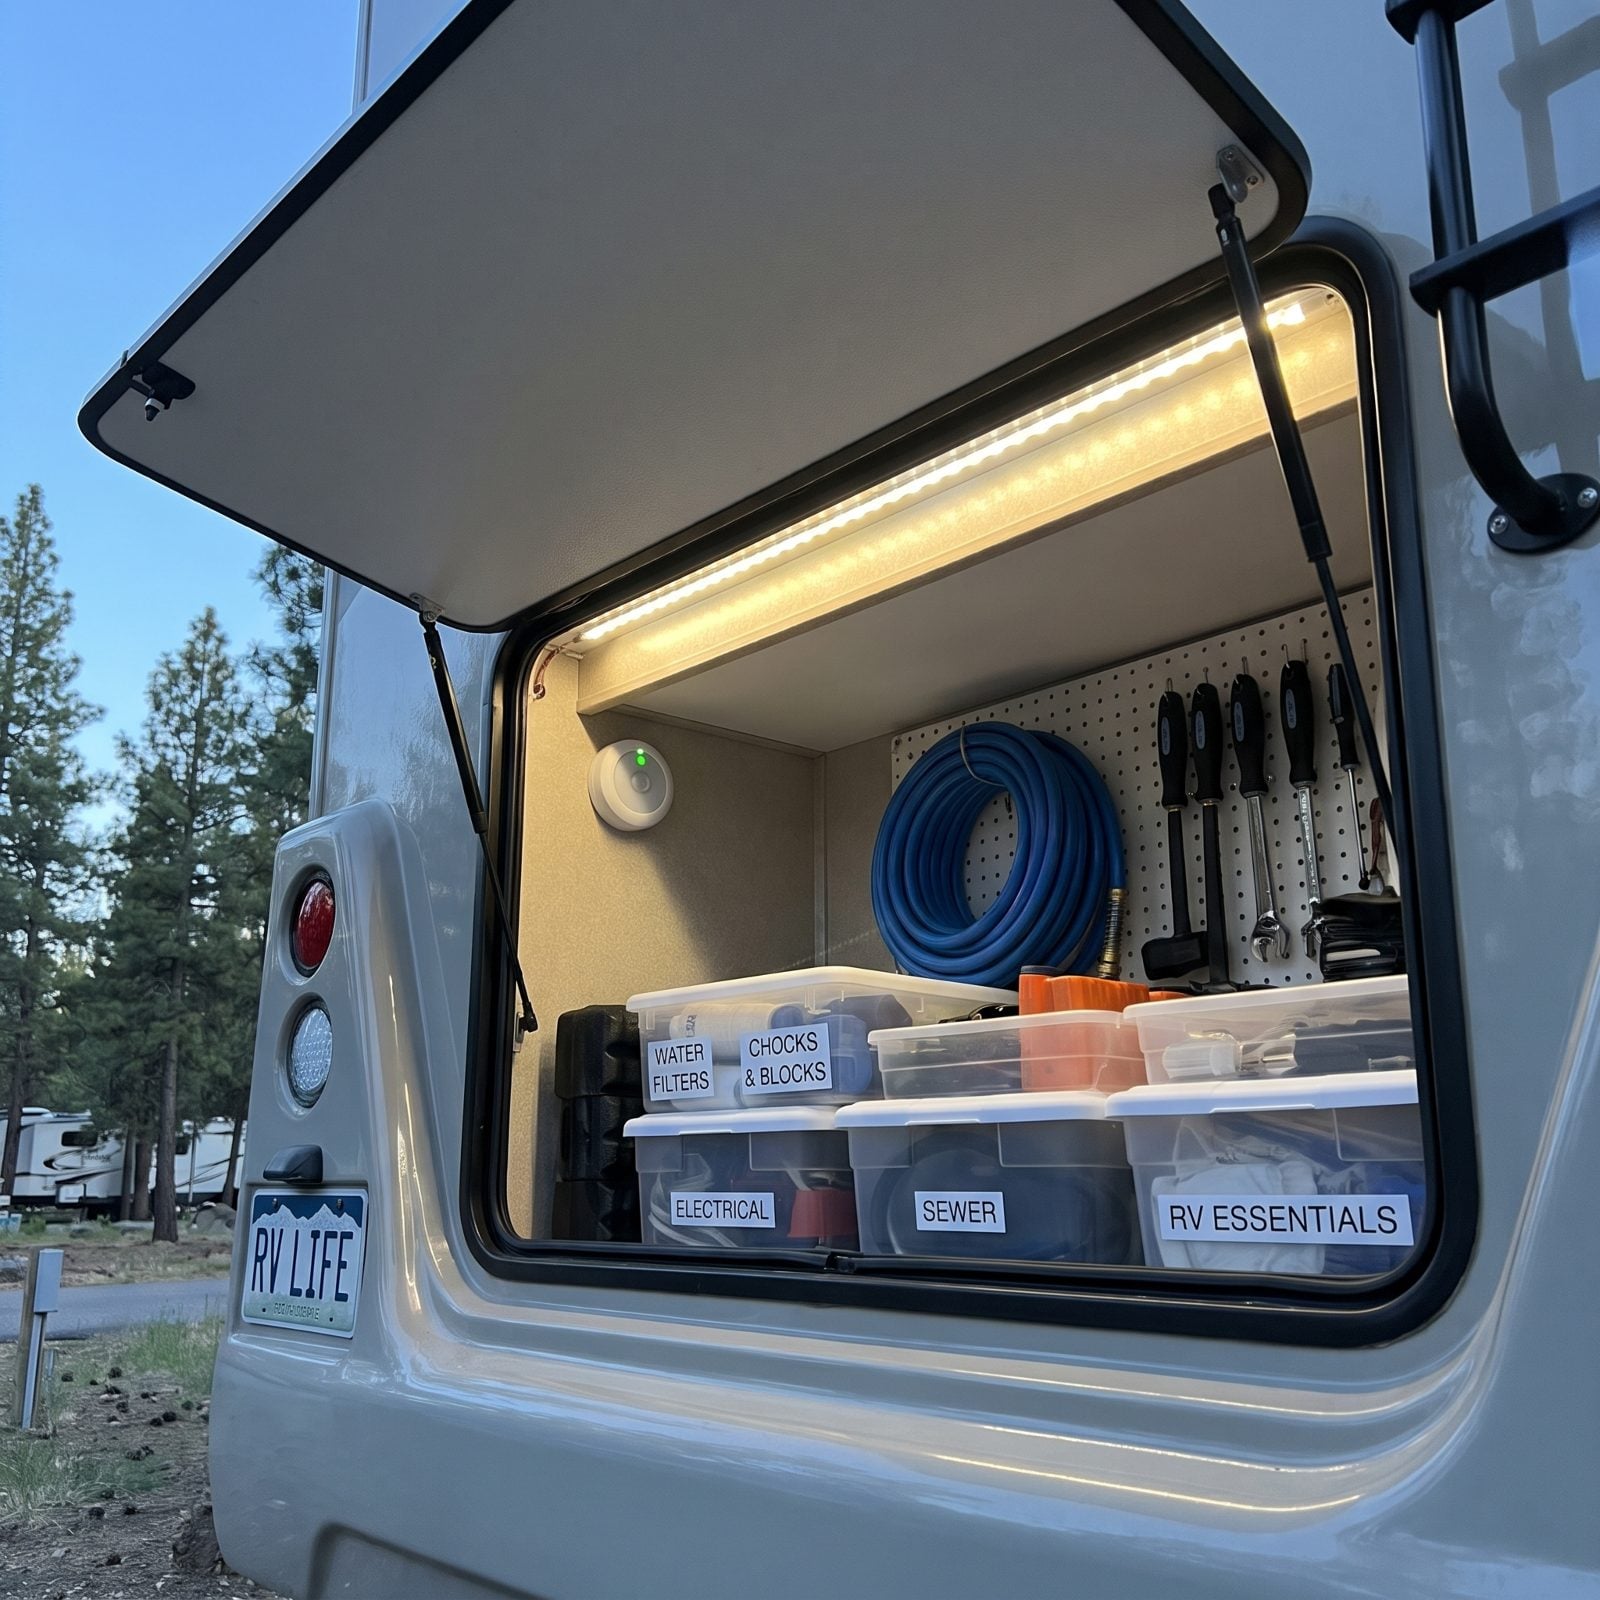
Half your bay access happens in the dark. You roll in after a long drive, it’s nine at night, and there you are holding a flashlight in your teeth while you dig for the leveling blocks.
Stick a strip of battery or USB-rechargeable motion LEDs along the top of the bay. Open the hatch, the light comes on, both hands stay free. The rechargeable ones run for weeks on a charge, and the magnetic mounts let you move one into a dark corner when you need it. Small thing. Changes every nighttime setup.
16. Stretch a Cargo Net Across the Bay Opening
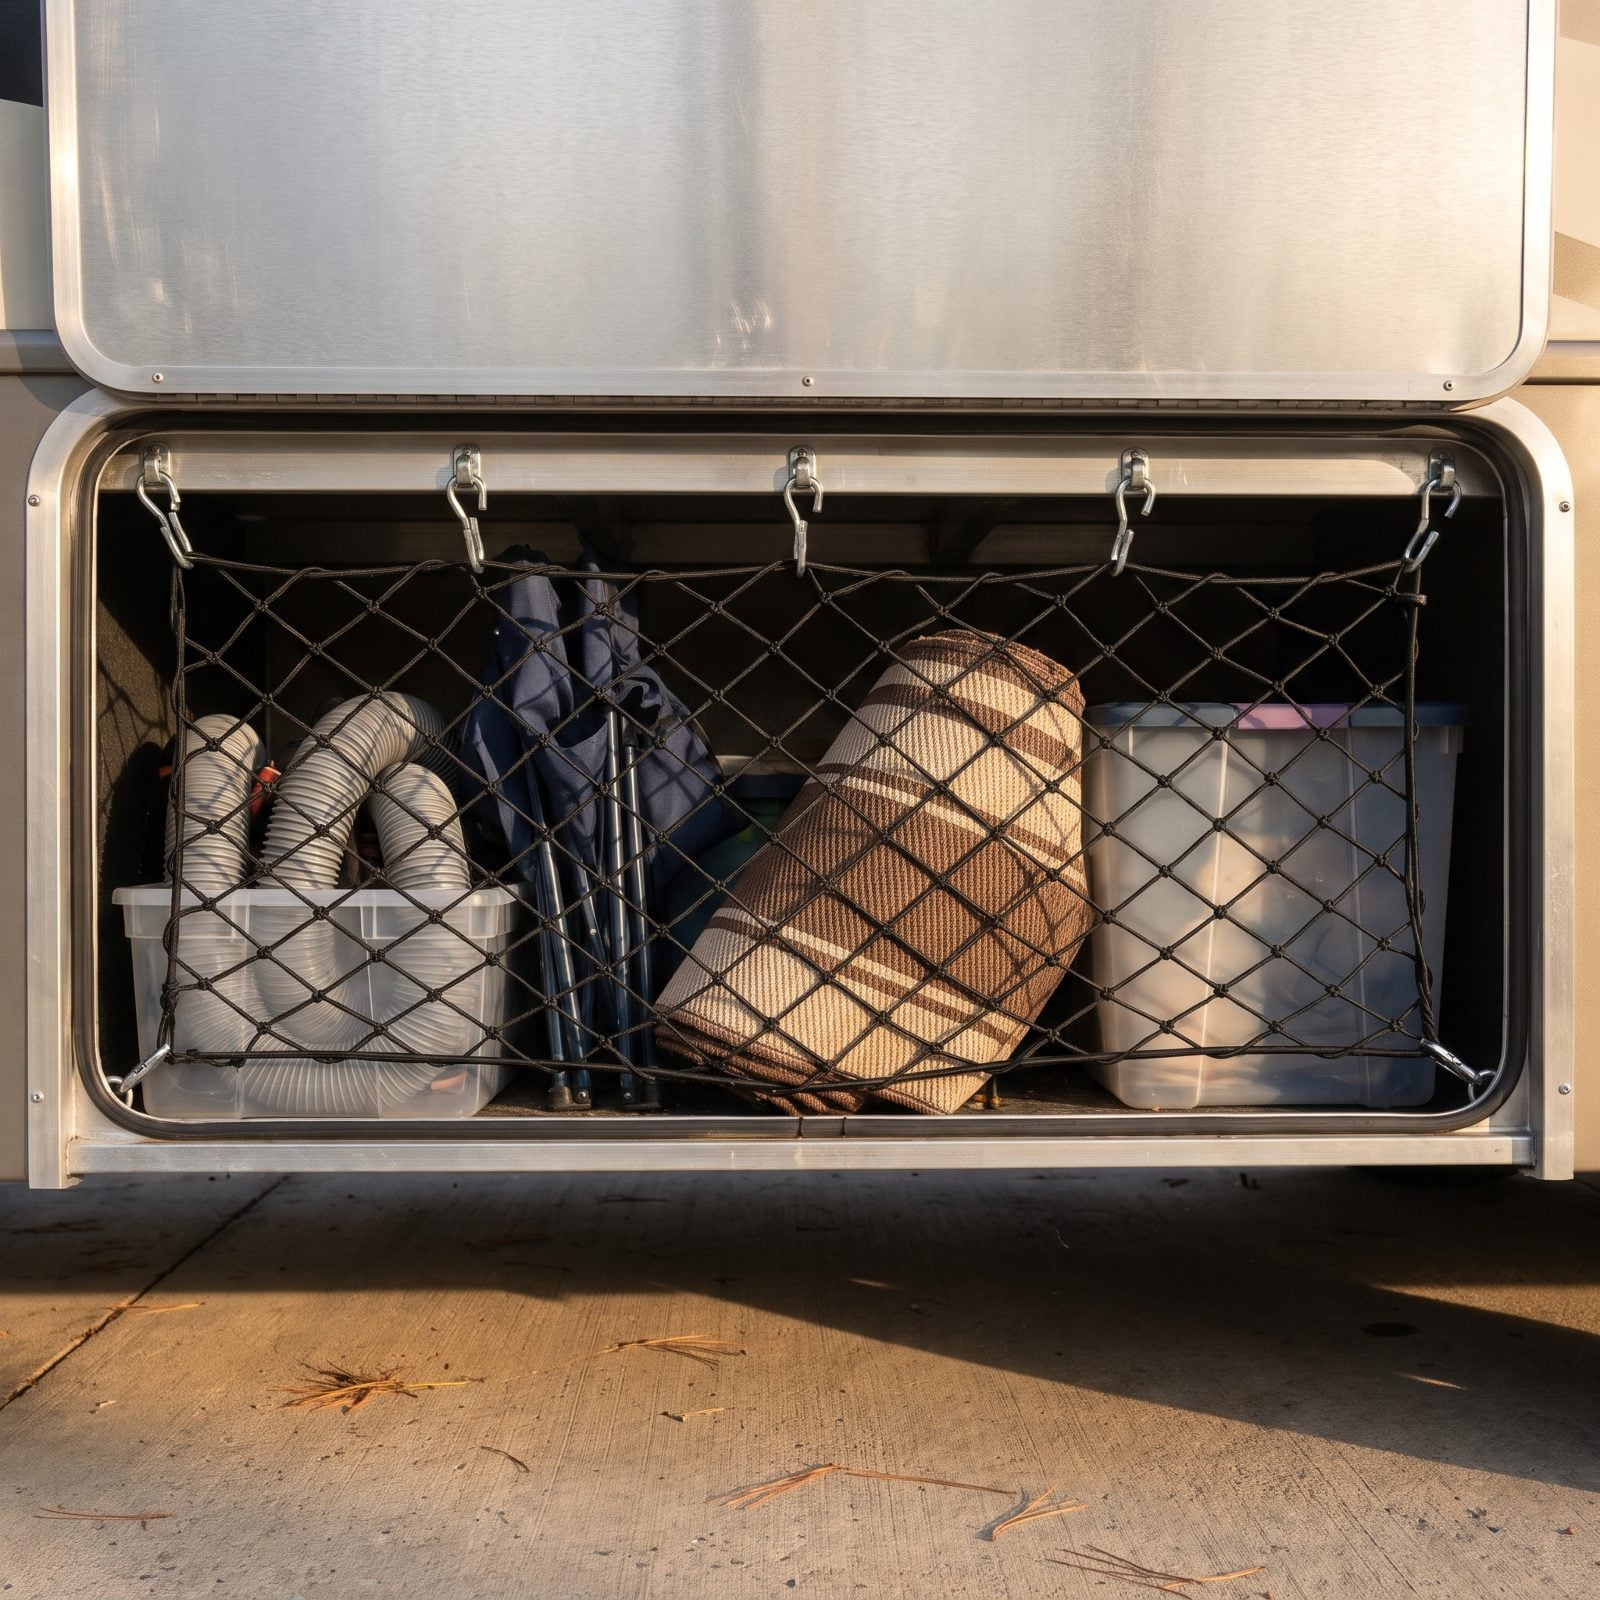
You open the bay after two hundred miles of washboard road and everything that was neatly stacked is now a landslide. A cargo net fixes that for about twelve bucks and ten minutes with a drill.
Stretch it across the full opening and clip it to hooks screwed into the bay frame, and nothing shifts forward while you drive. The real win comes at a scenic pullout, when you crack the bay open for one thing and the net keeps the rest from tumbling out at your feet.
15. Contain Muddy Gear in a Lidded Boot Tray
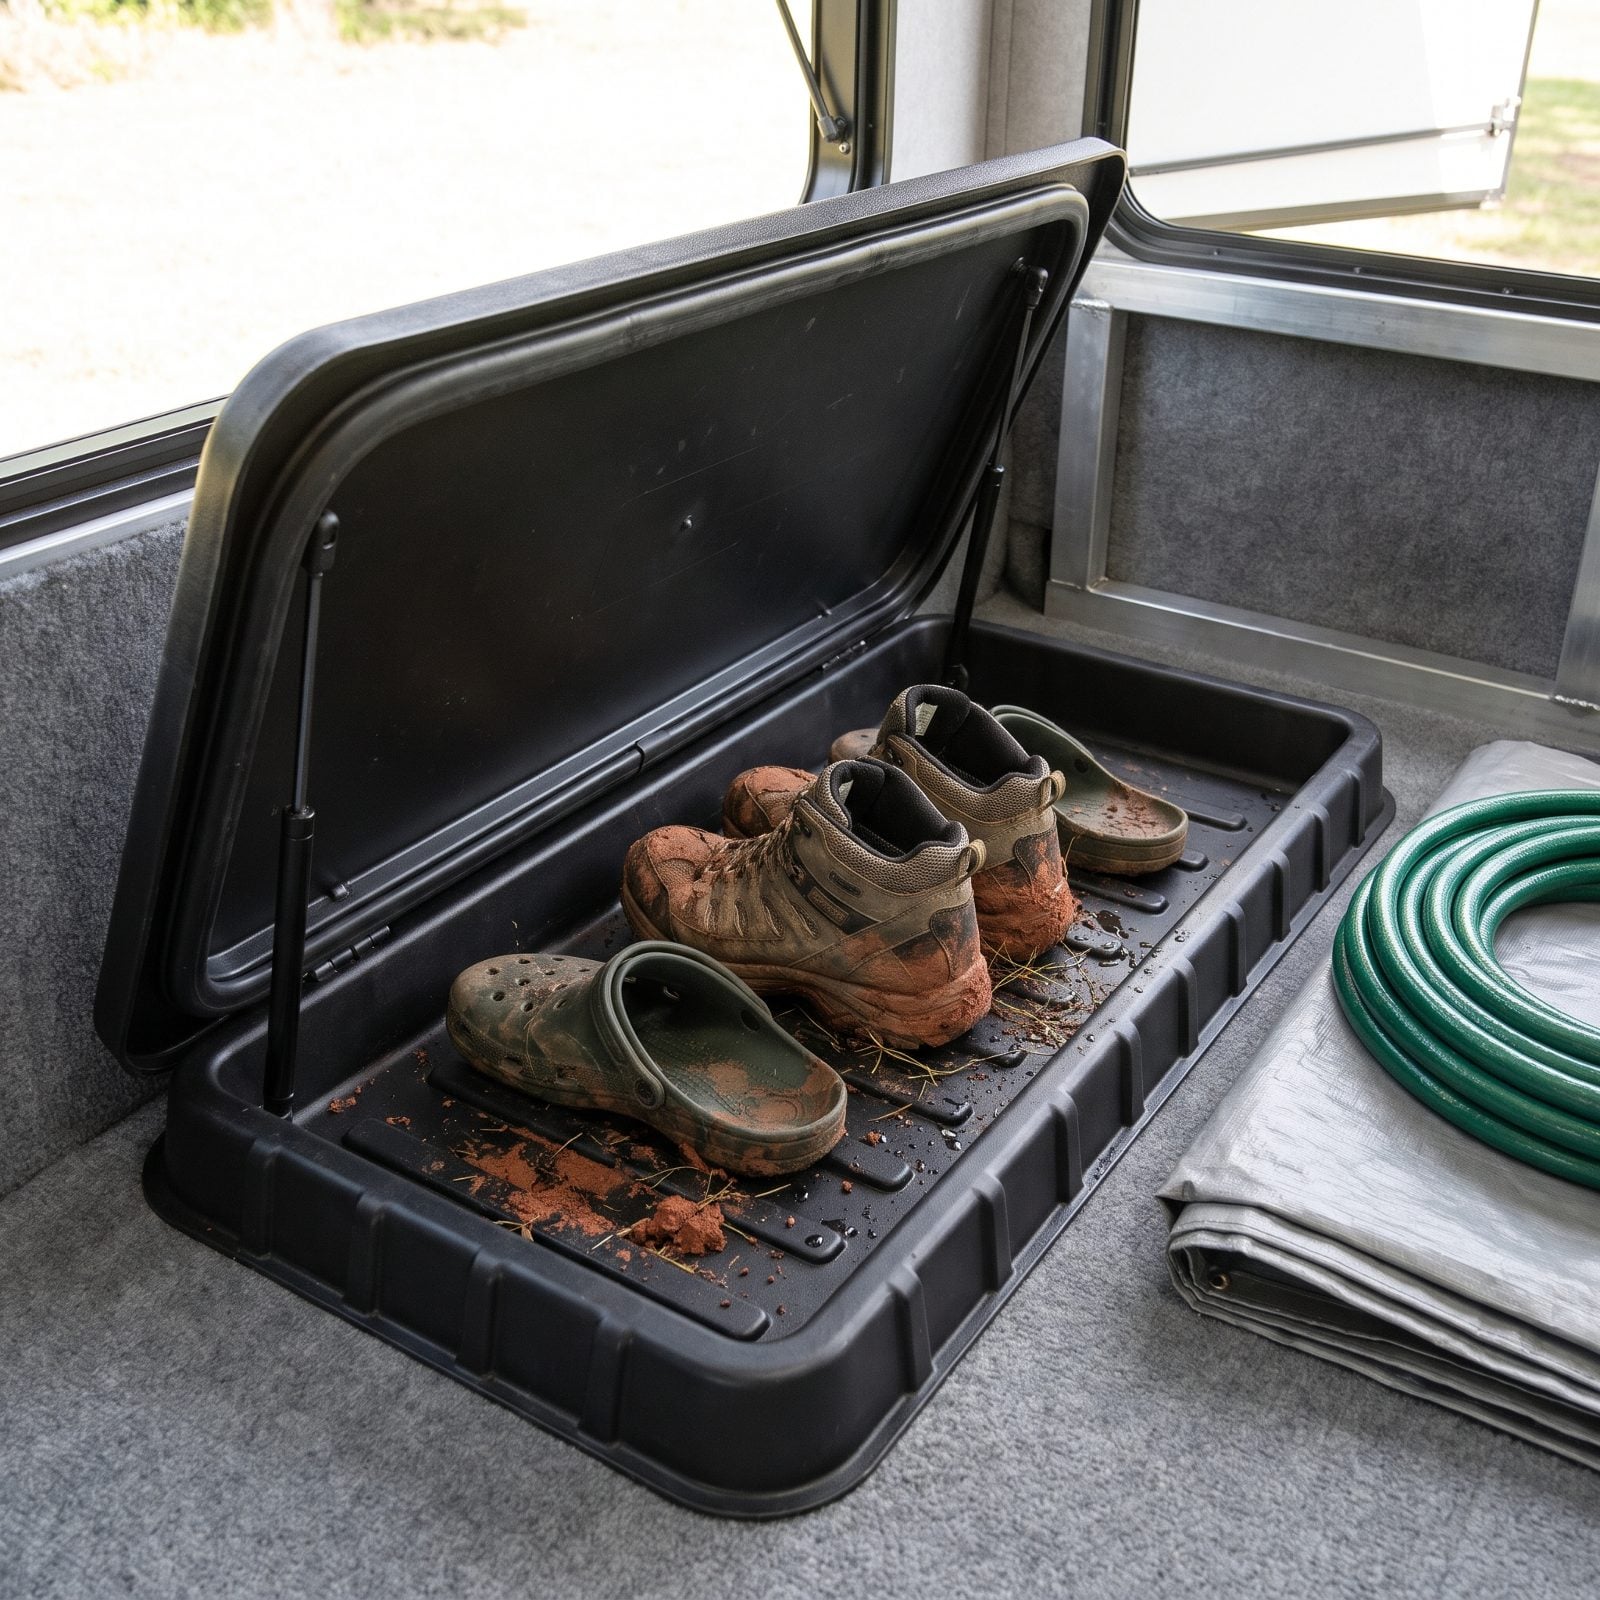
Mud is the quiet enemy of RV storage. One wet hike and your clean bay has brown smears on the carpet liner for the rest of the season.
A lidded boot tray with a gasket seal seals the mess off from everything else. Toss the dirty boots in wet, close the lid, deal with them at the next full hookup. The raised ribs let grit fall to the bottom instead of coating the soles. We ignored this for a year and then spent a whole afternoon on our knees scrubbing carpet liner. Don’t be us.
14. Wind Extension Cords on Flat Storage Spools
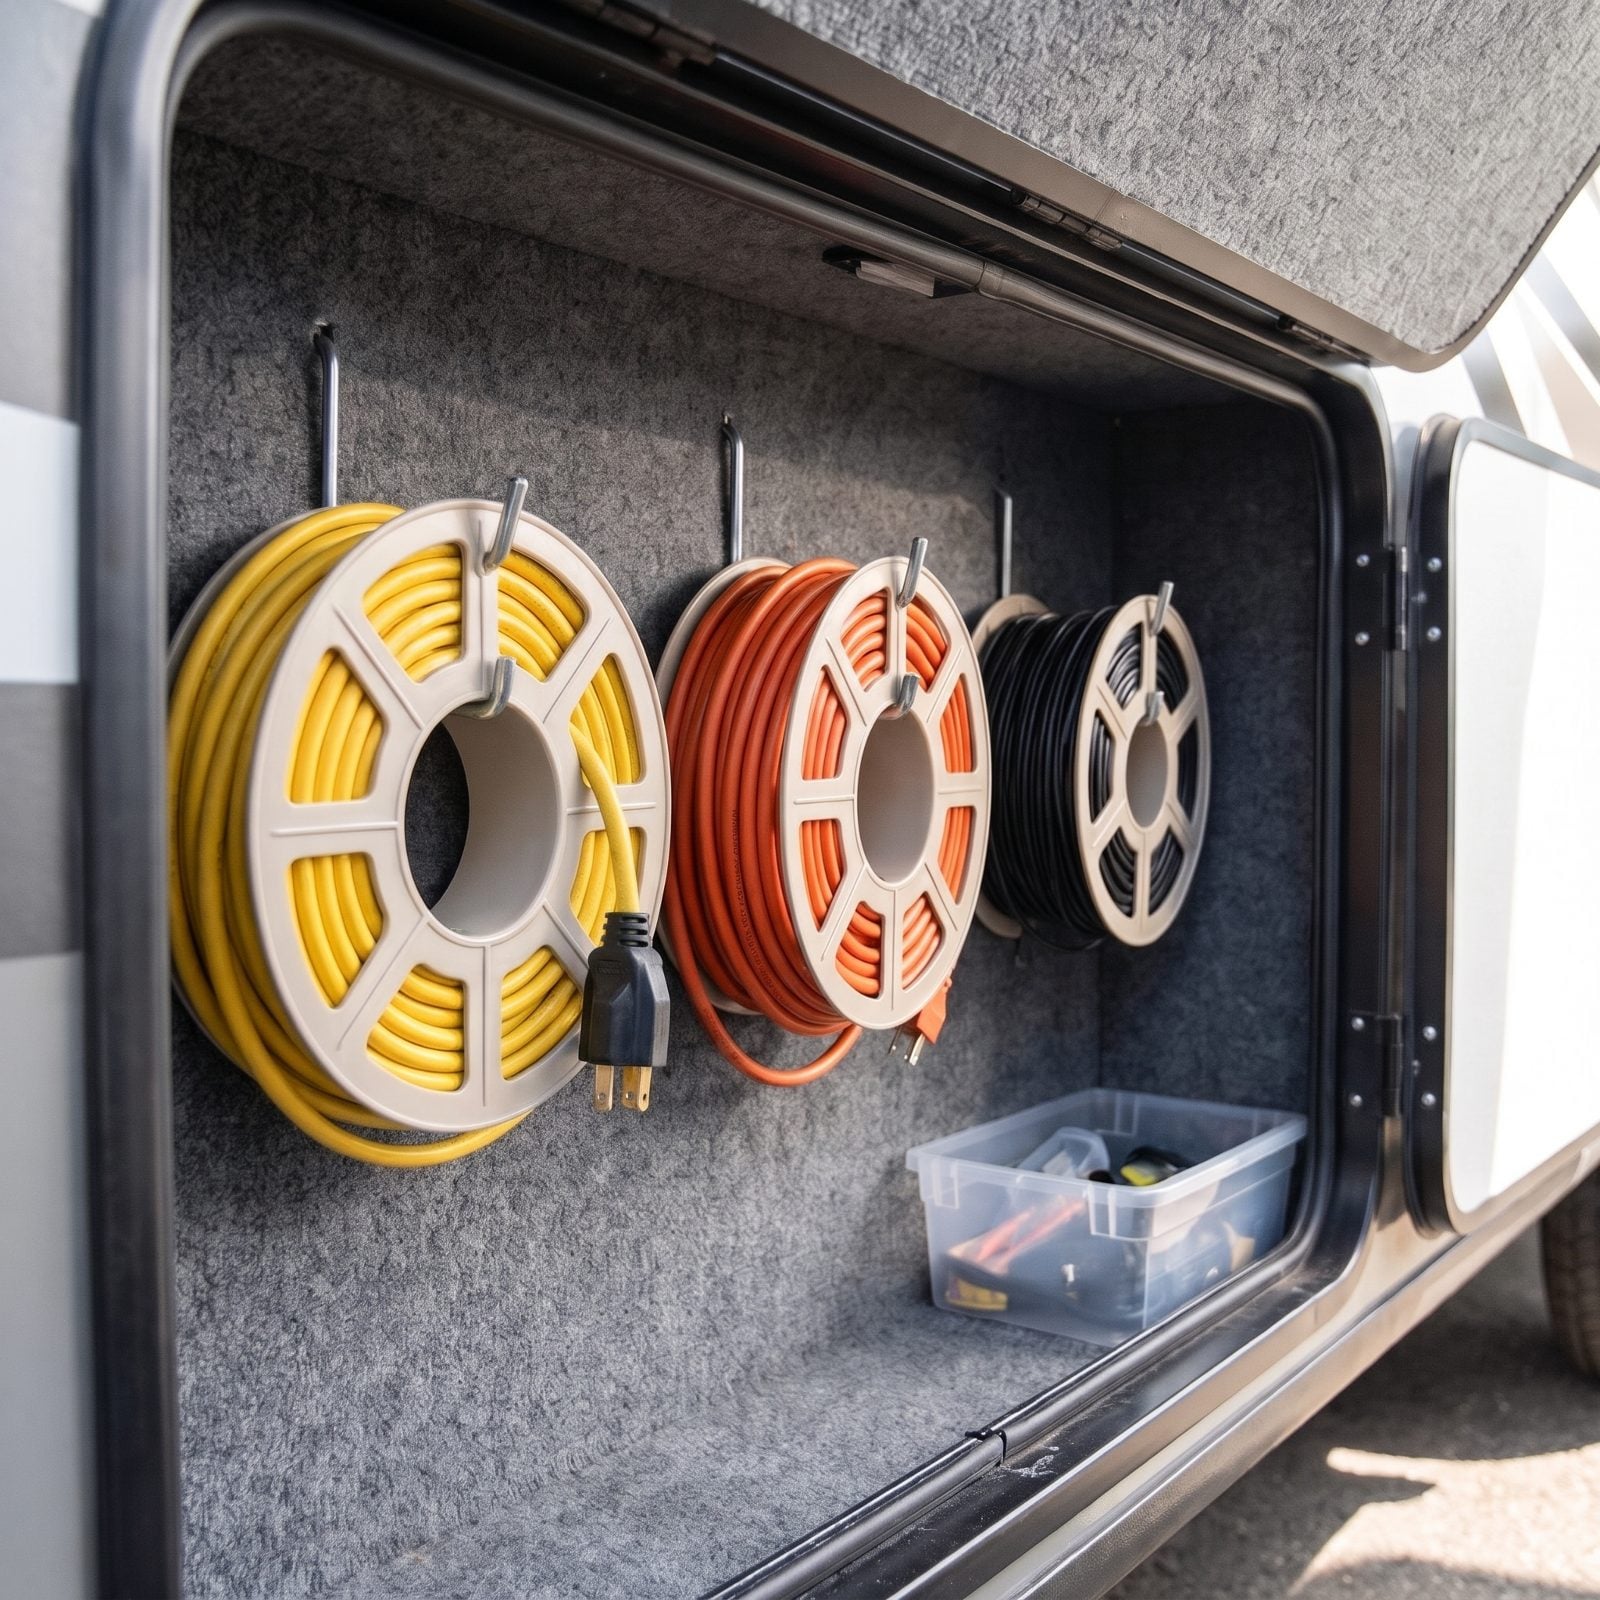
Loose cords breed knots. You reach for the shore power cord and pull out all three at once, welded into one angry nest.
Flat storage spools end the fight. Wind each cord on its own spool, hang the spool on hooks, and every cord unspools clean. The flat profile tucks against the bay wall instead of hogging floor space the way a round reel does.
13. Cut Shadow-Foam Inserts for the Tool Drawer
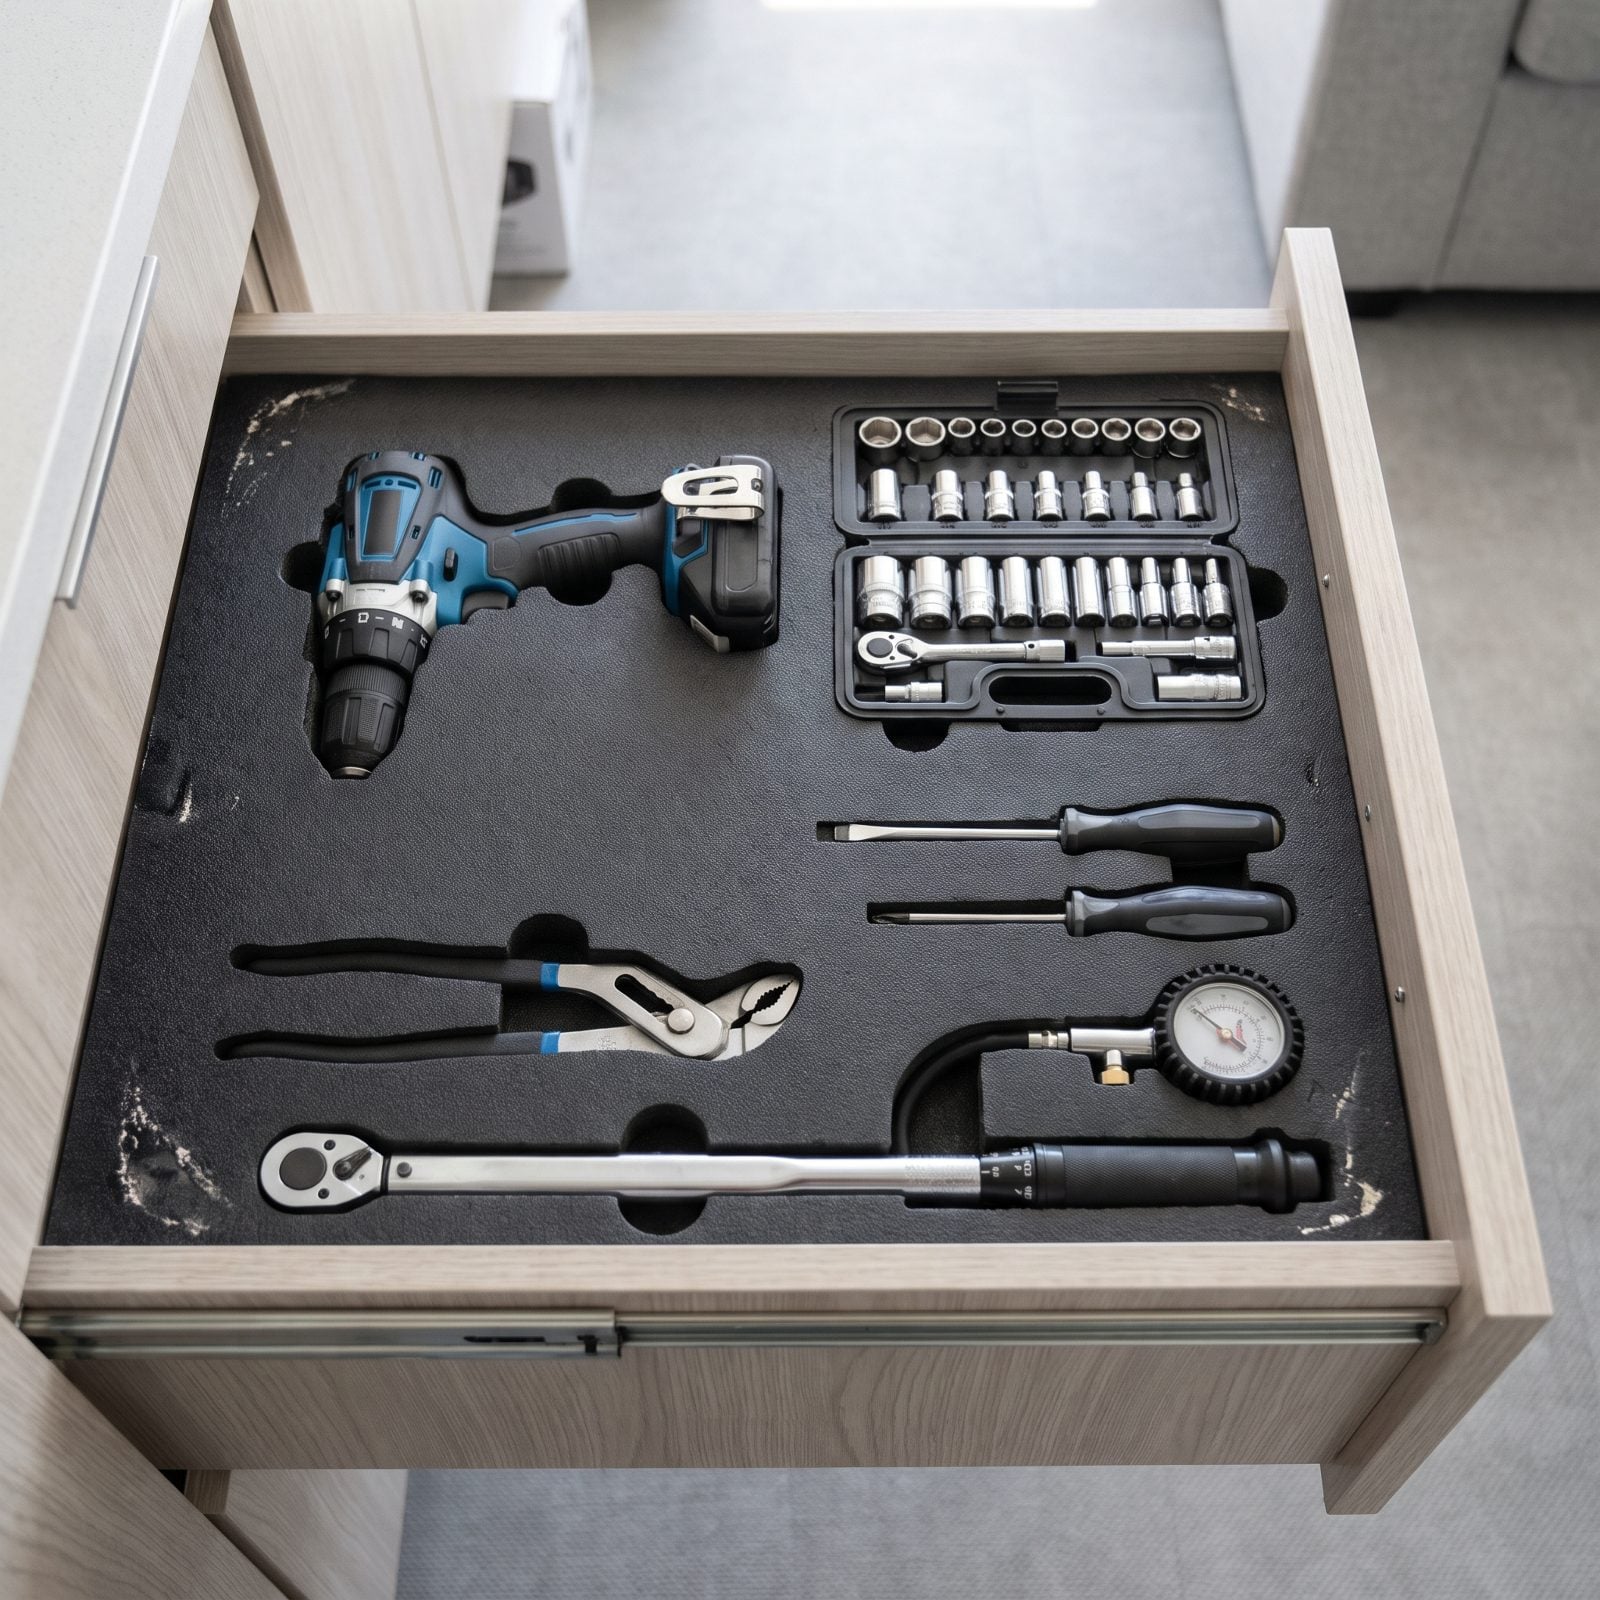
You will know instantly if a tool is missing. Each tool sits in its own cut silhouette, so an empty, tool-shaped pocket is easy to spot before you ever close the bay door and drive off.
Buy a thick sheet of solid black foam, trace your tools on it, and cut the shapes with a sharp knife so each tool drops into its own deep, snug pocket. On rough roads nothing rattles, nothing migrates, nothing clinks against the metal drawer at 2 a.m. in a rest stop.
12. Vacuum-Seal Off-Season Bedding Under the Bed
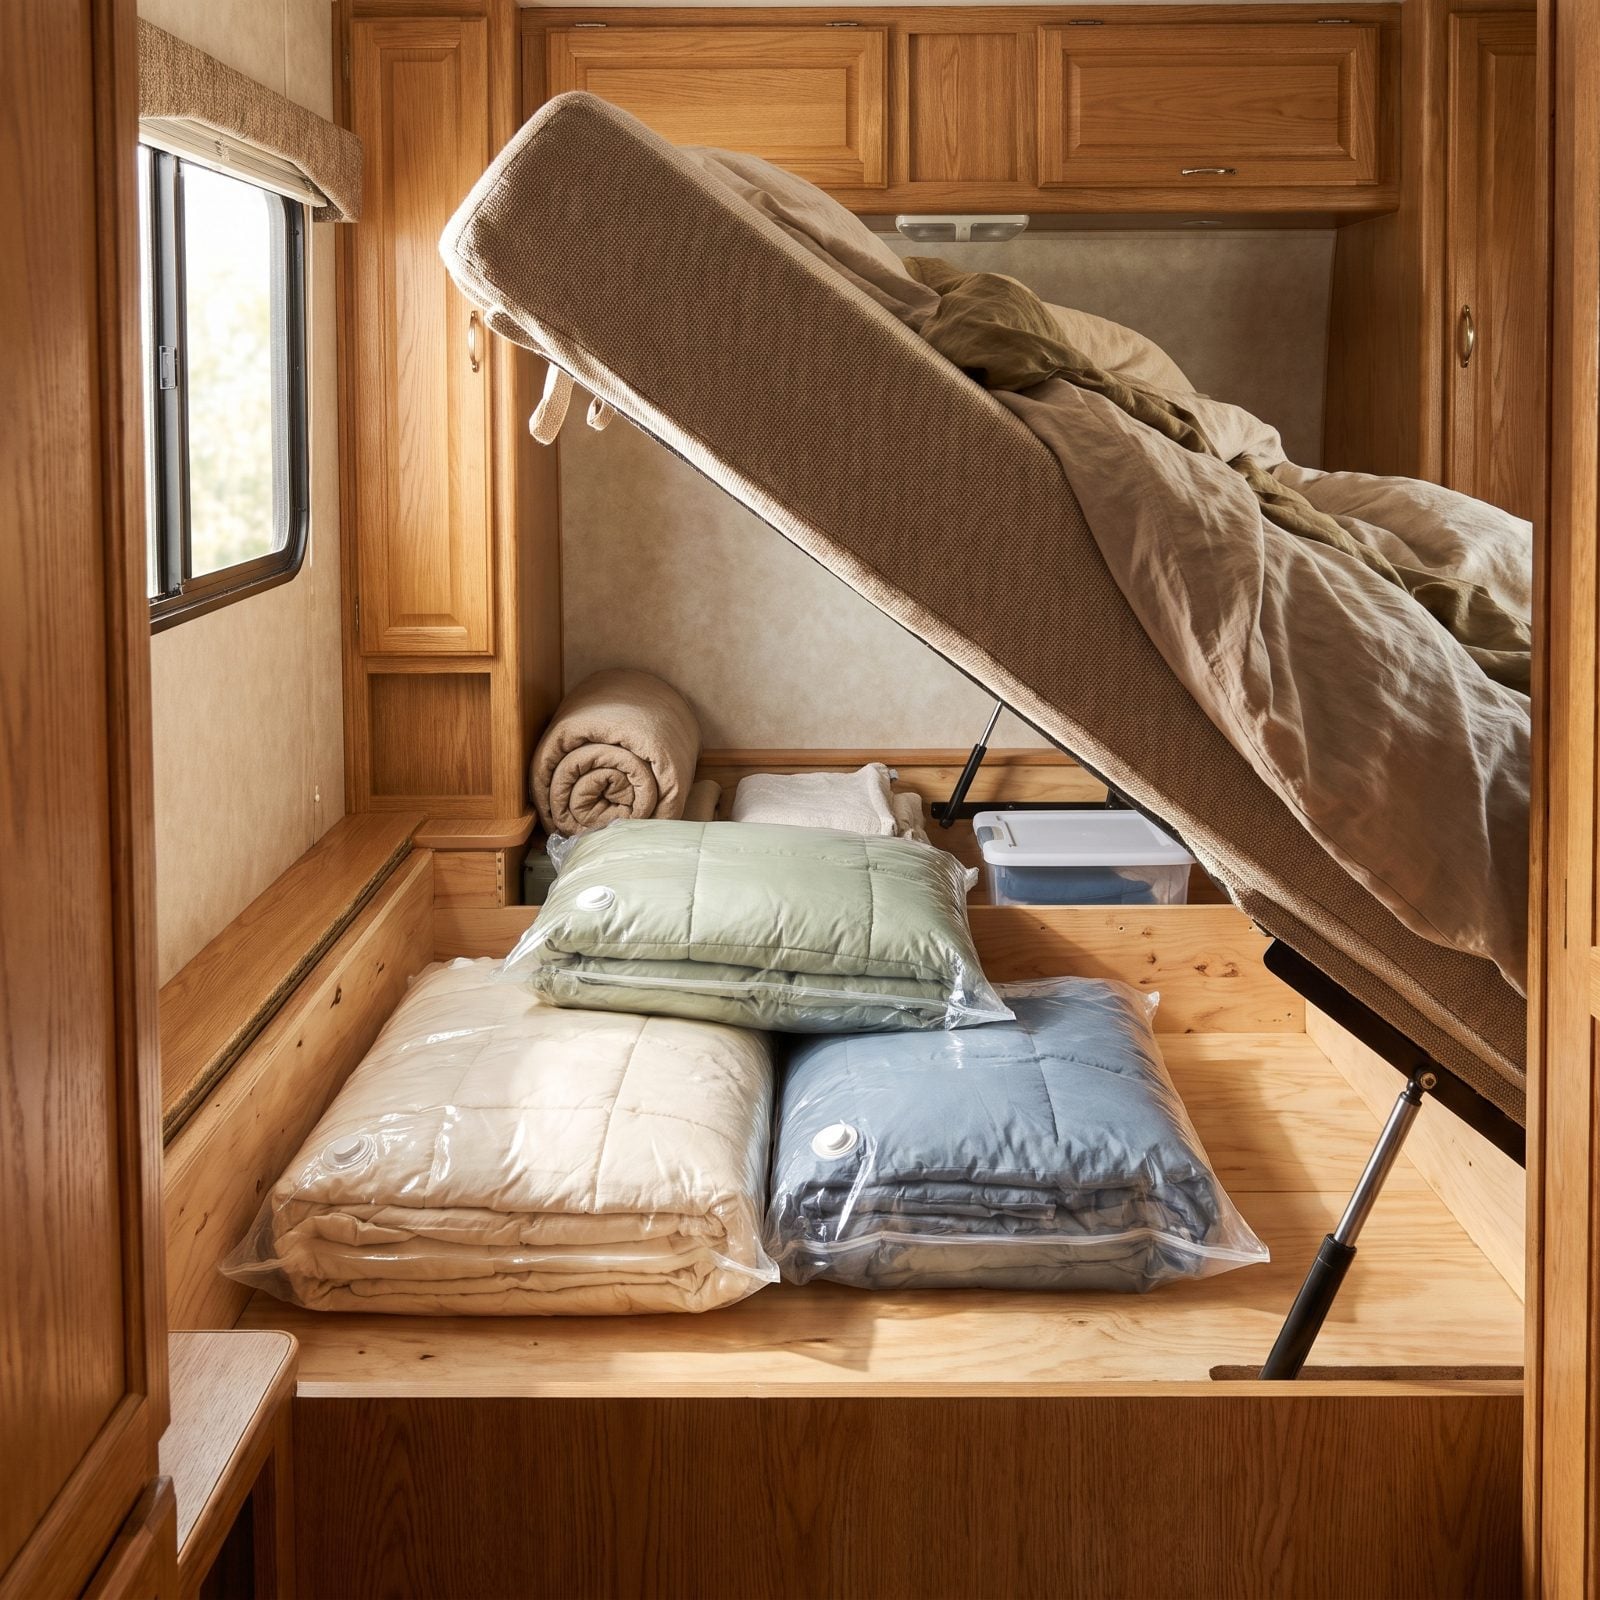
A puffy comforter is mostly air. Zip it into a vacuum bag and that puffy mountain stays clean, dry, and ready to squeeze down whenever you need the room.
Under-bed space is the best spot for off-season bedding. Winter blankets in summer, summer quilts in winter, and vacuum bags let you fit three where one used to live. They also keep out that damp smell that creeps into fabric stored in a cool, metal-floored RV. Press the valve with a hand pump if you’d rather not drag a vacuum out at a campsite.
Just don’t do it with feather pillows long-term. Crushing them flat for months breaks down the fill. Bedding is fine. Pillows have a limit.
11. Use Low-Profile Rolling Boxes Beneath the Bed
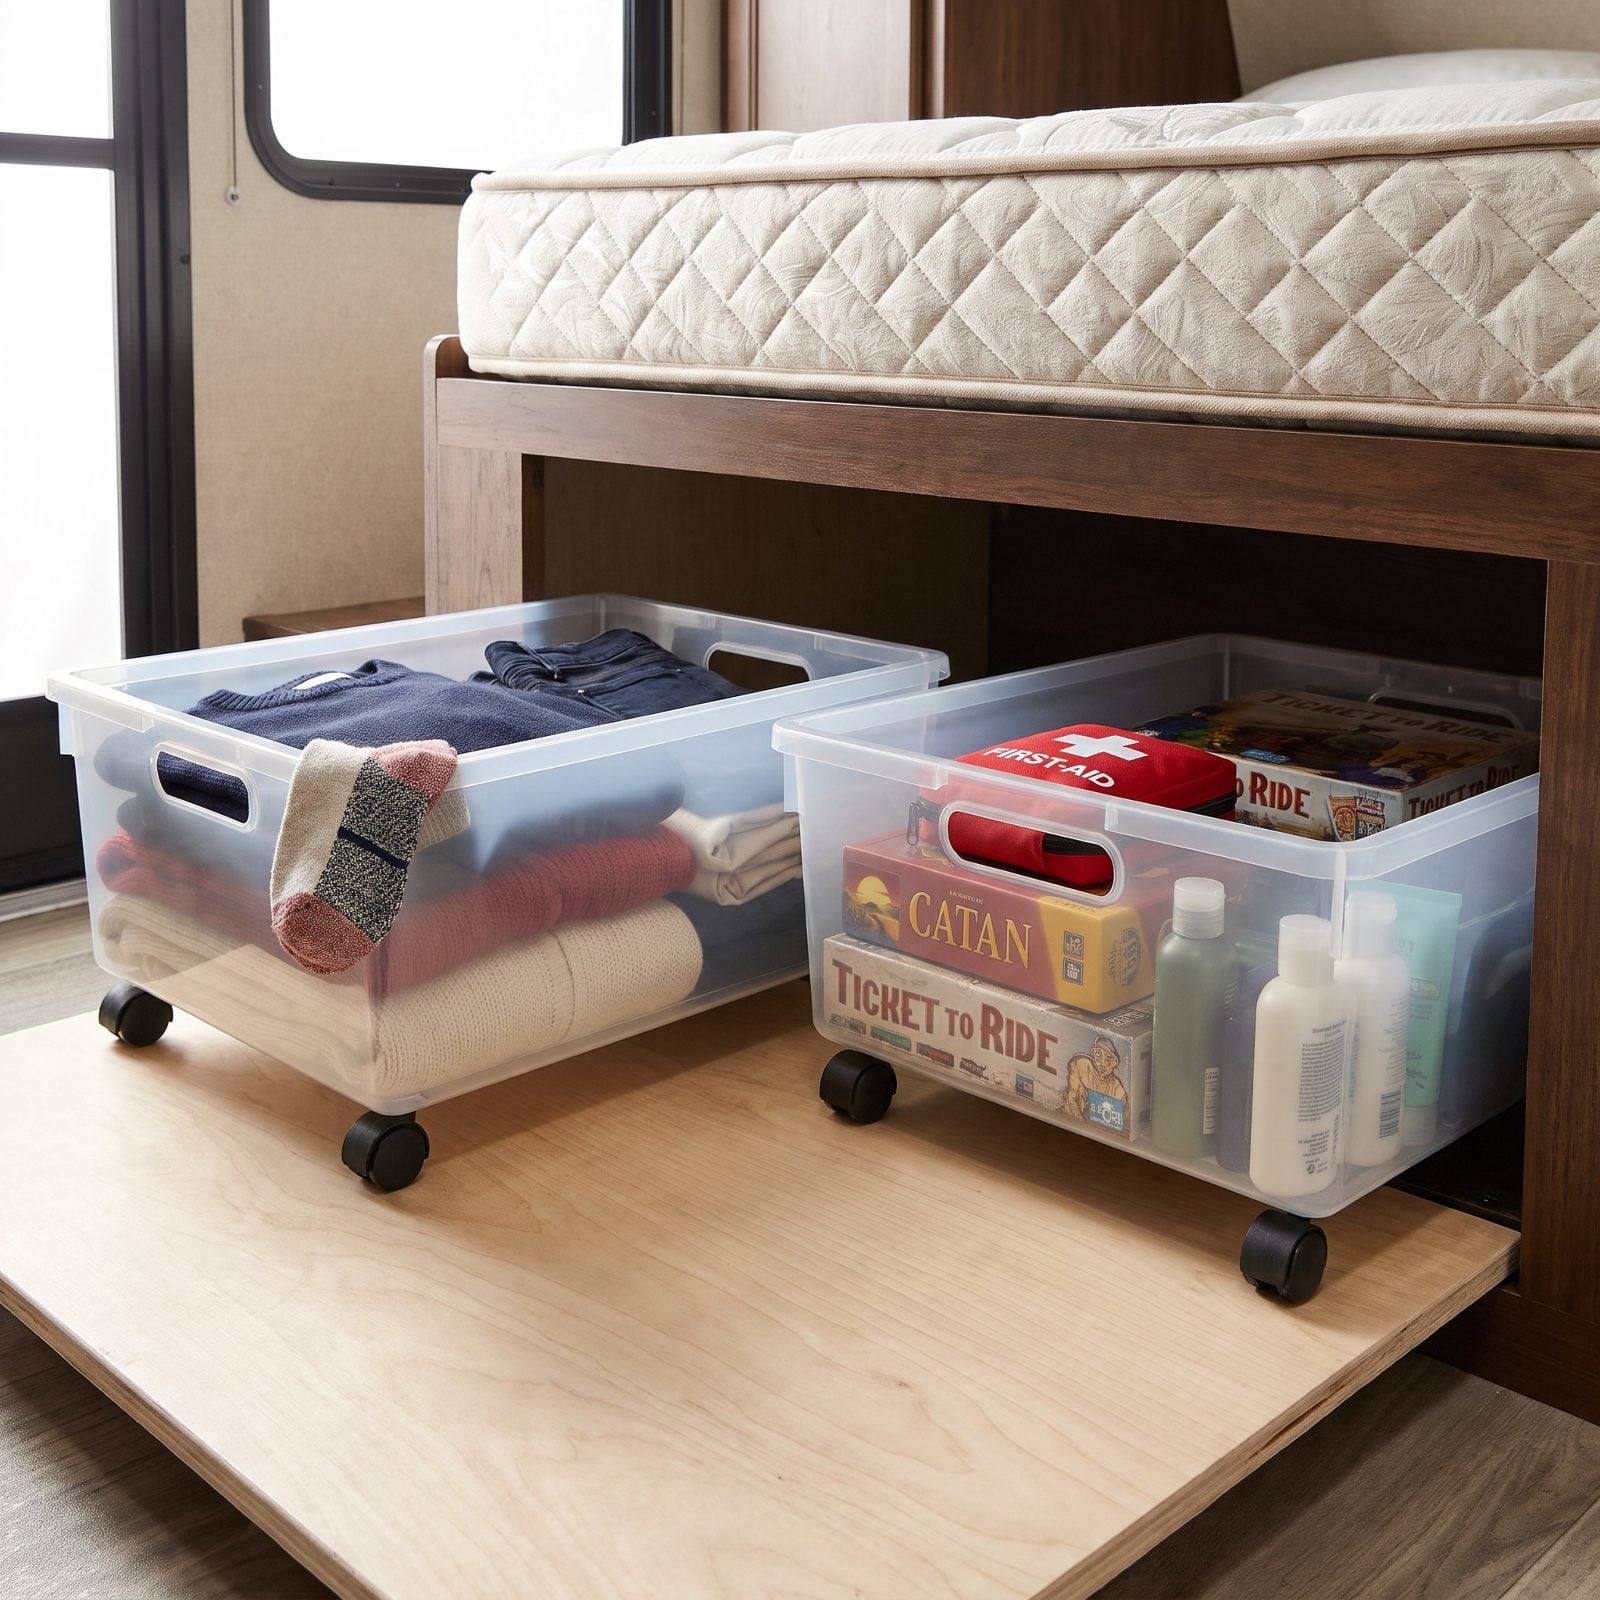
Reaching into the dark back corner of an under-bed cavity is a workout nobody signed up for. You end up on your knees, shoulder jammed under the frame, fishing around blind.
Low-profile totes on casters roll the whole thing out to you, and clear sides mean you spot what’s inside without opening every lid. Keep the stuff you grab often up front and let the deep-storage items ride in the back ones.
10. Upgrade the Bed Platform With Gas-Lift Struts
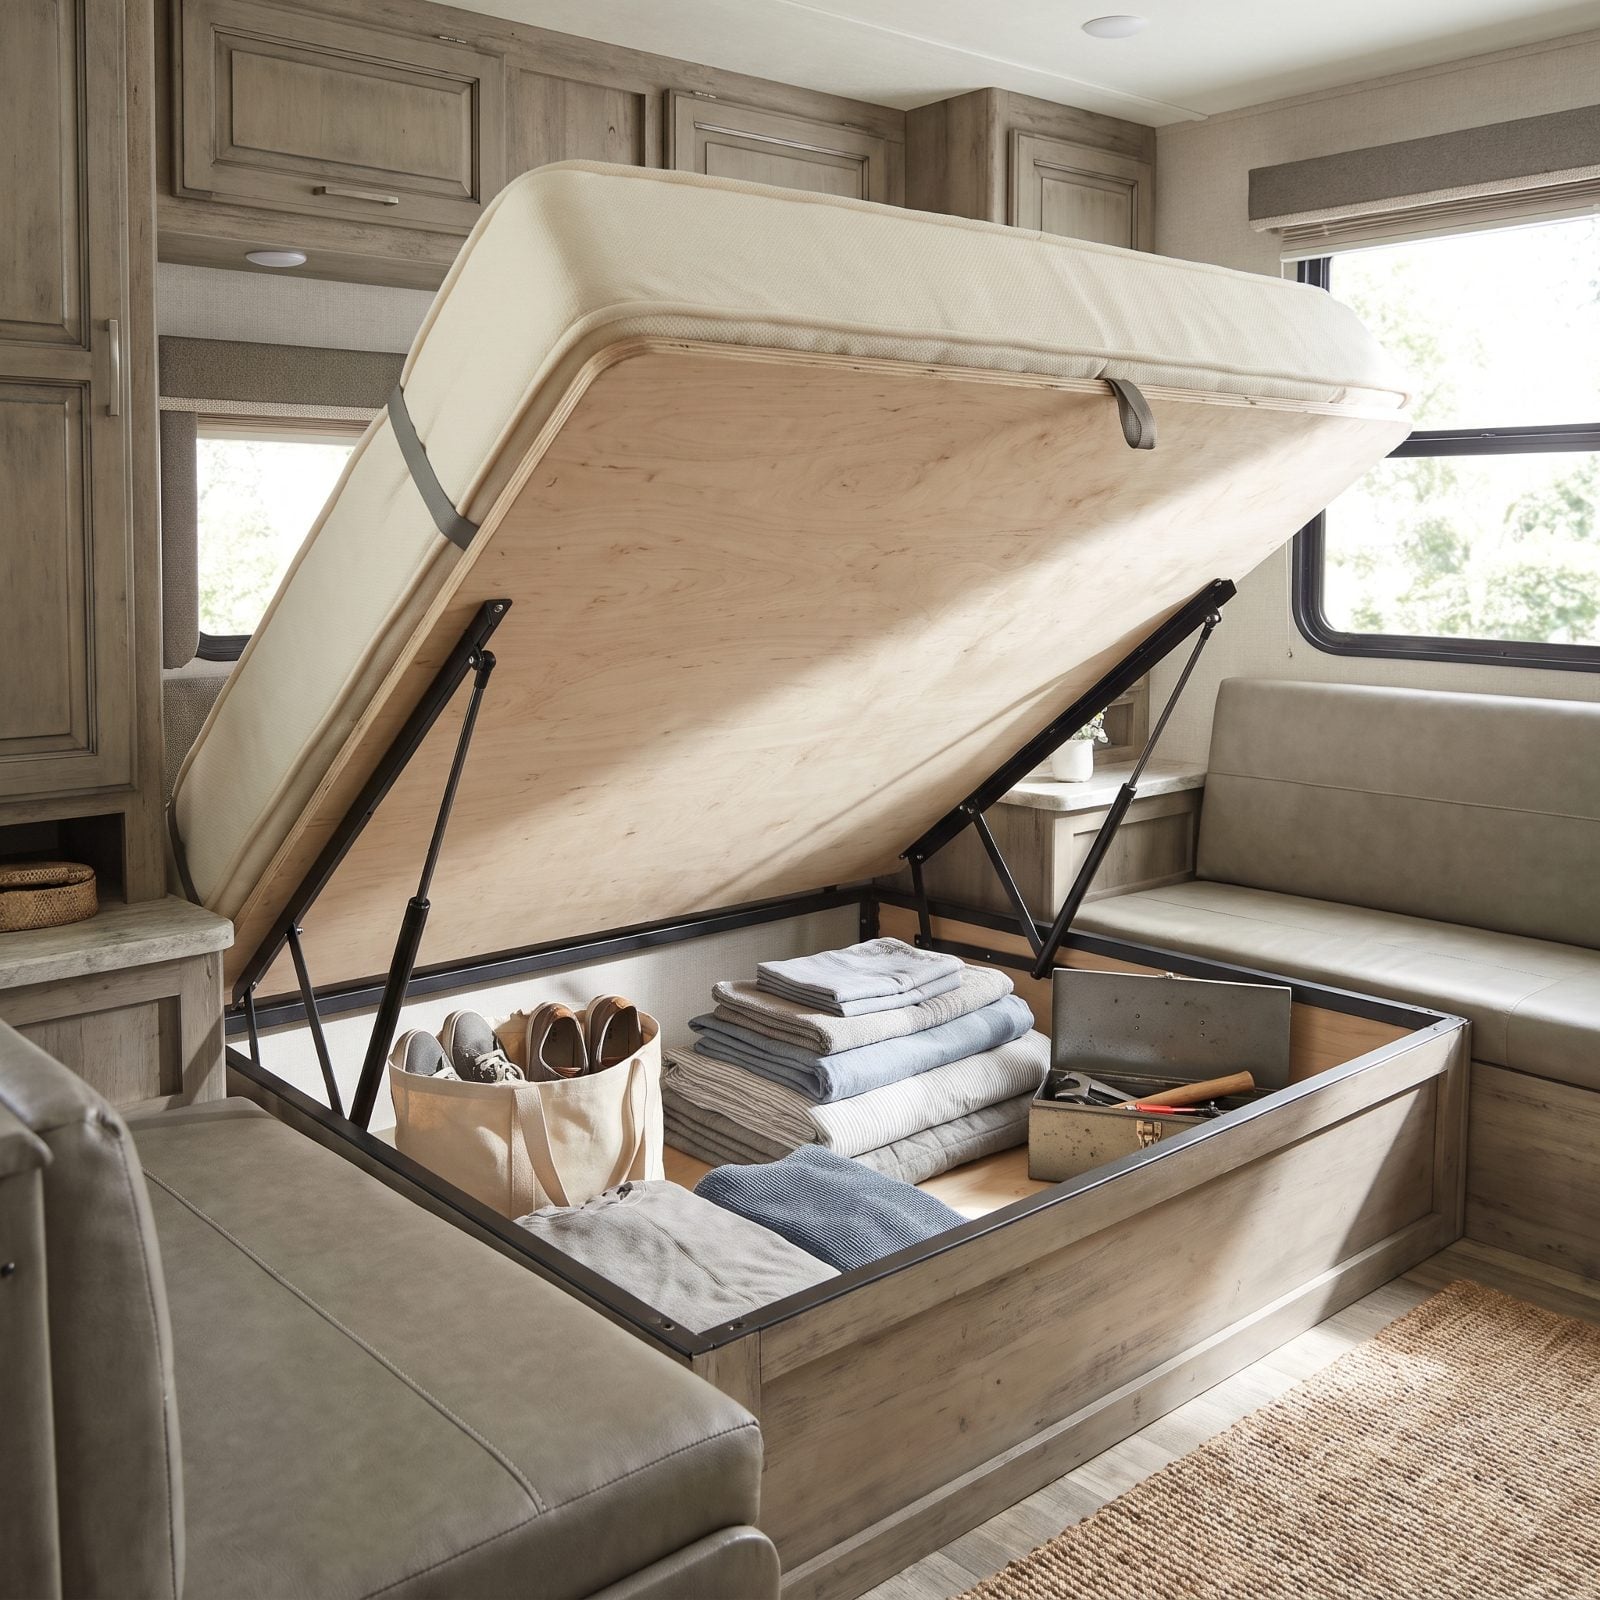
The factory prop stick is a menace. You’ve balanced the whole platform on a flimsy wooden dowel while digging for socks, waiting for it to slip and take your fingers with it.
Gas-lift struts solve it, the same kind that hold up a car hatchback. They raise the platform with a gentle push and hold it there while you load both hands with linens. A pair rated for the platform weight runs under forty dollars, and installing them is a few screws plus some careful measuring.
9. Divide the Under-Bed Compartment Into Cubbies
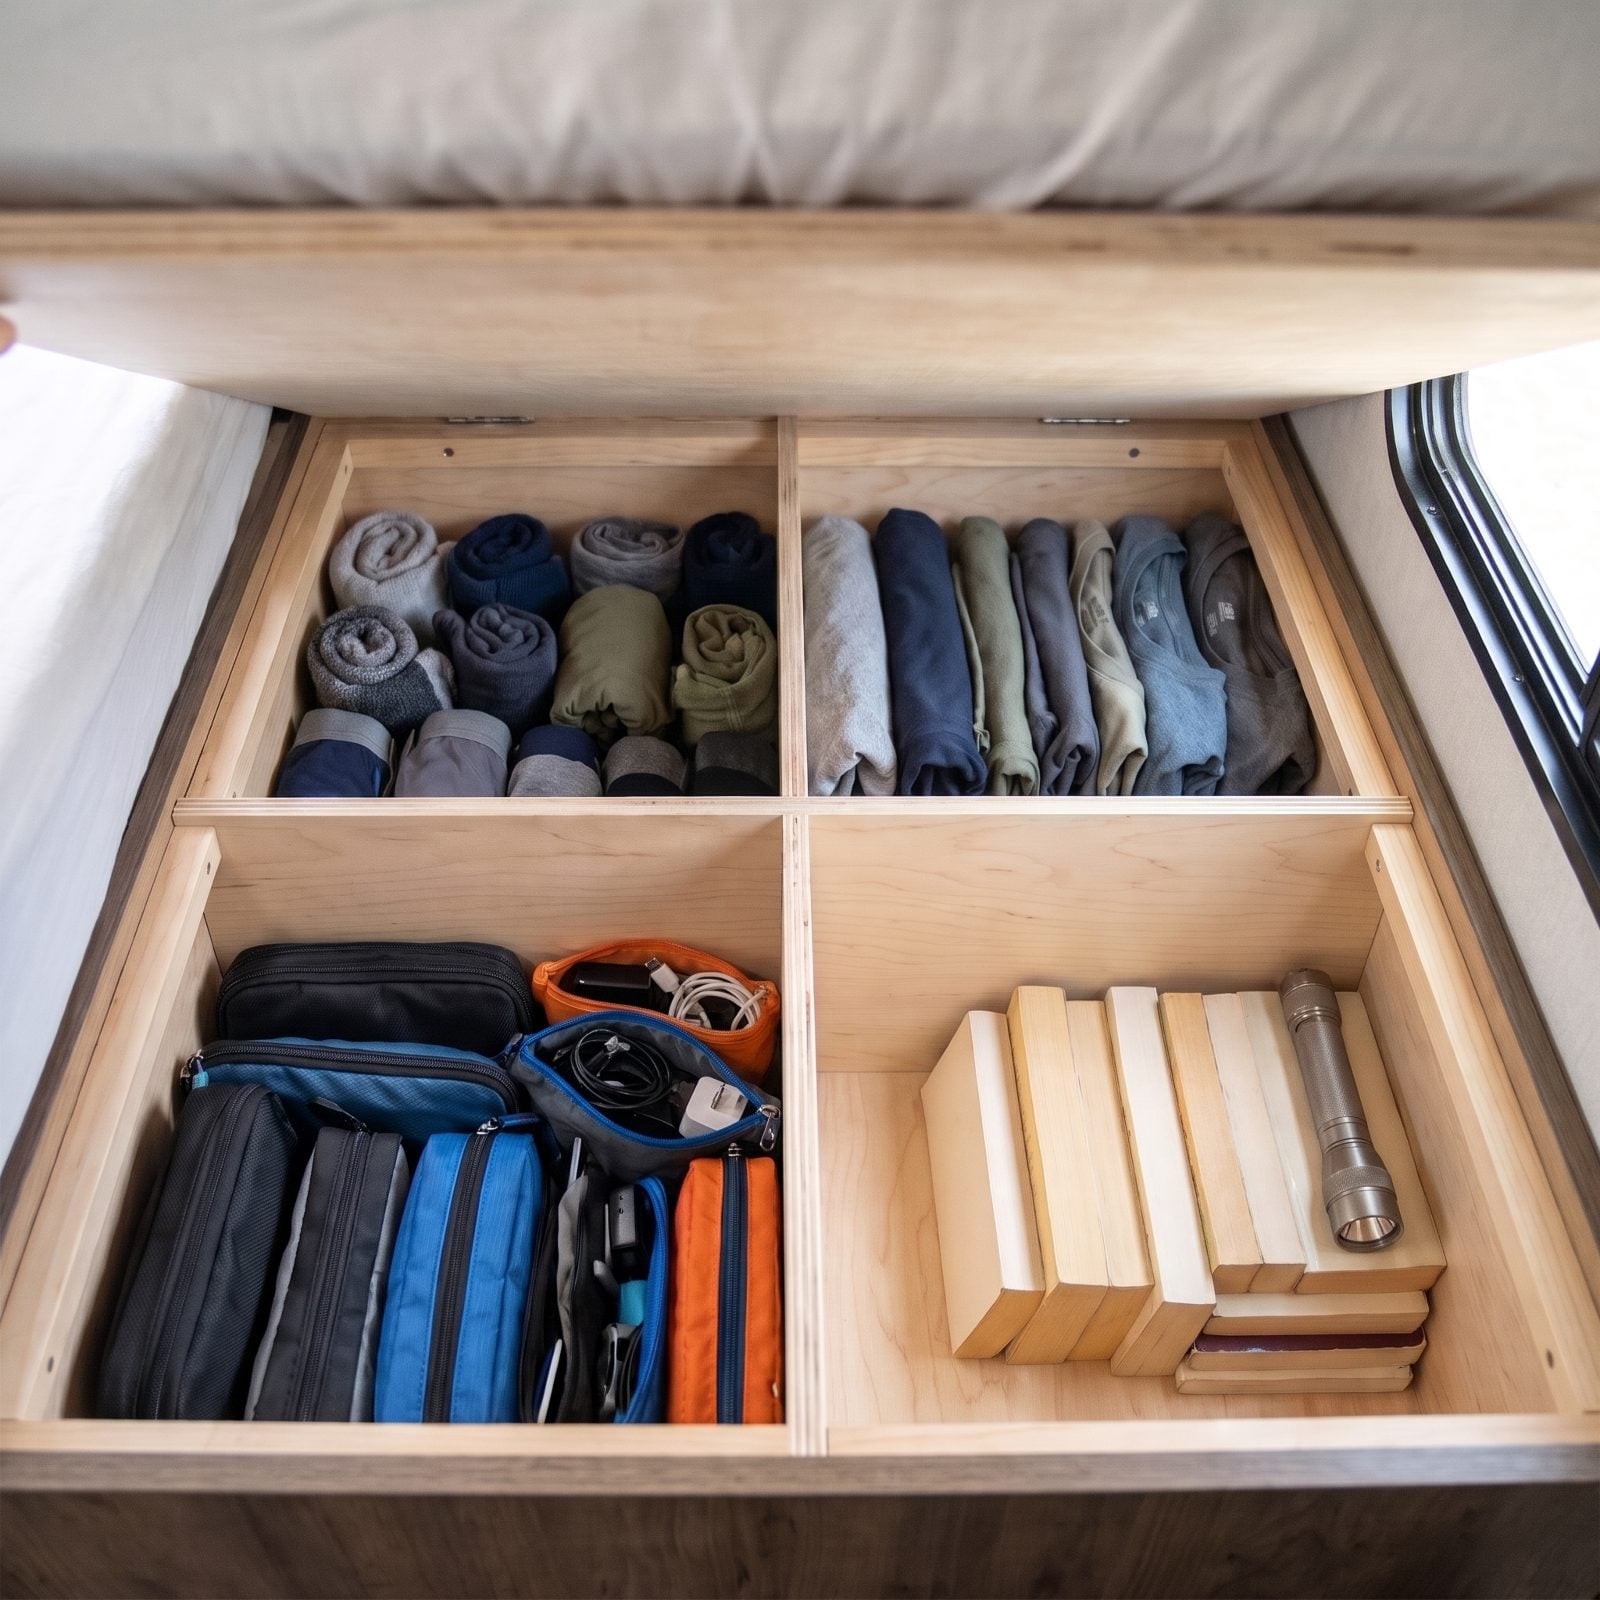
An empty under-bed cavity is one giant bin where everything slides into a single corner pile by the second day of driving. Dividers stop the slide.
Cut thin plywood partitions and wedge them in to make cubbies, one per category. Socks here, shirts there, cables and chargers in their own box. The sections keep things from migrating on curves, and they force a system, which is the part that actually sticks. When everything has a home, everything goes back to it. When it’s one big pit, it never does.
8. Use Soft Duffels to Fill Awkward Under-Bed Gaps
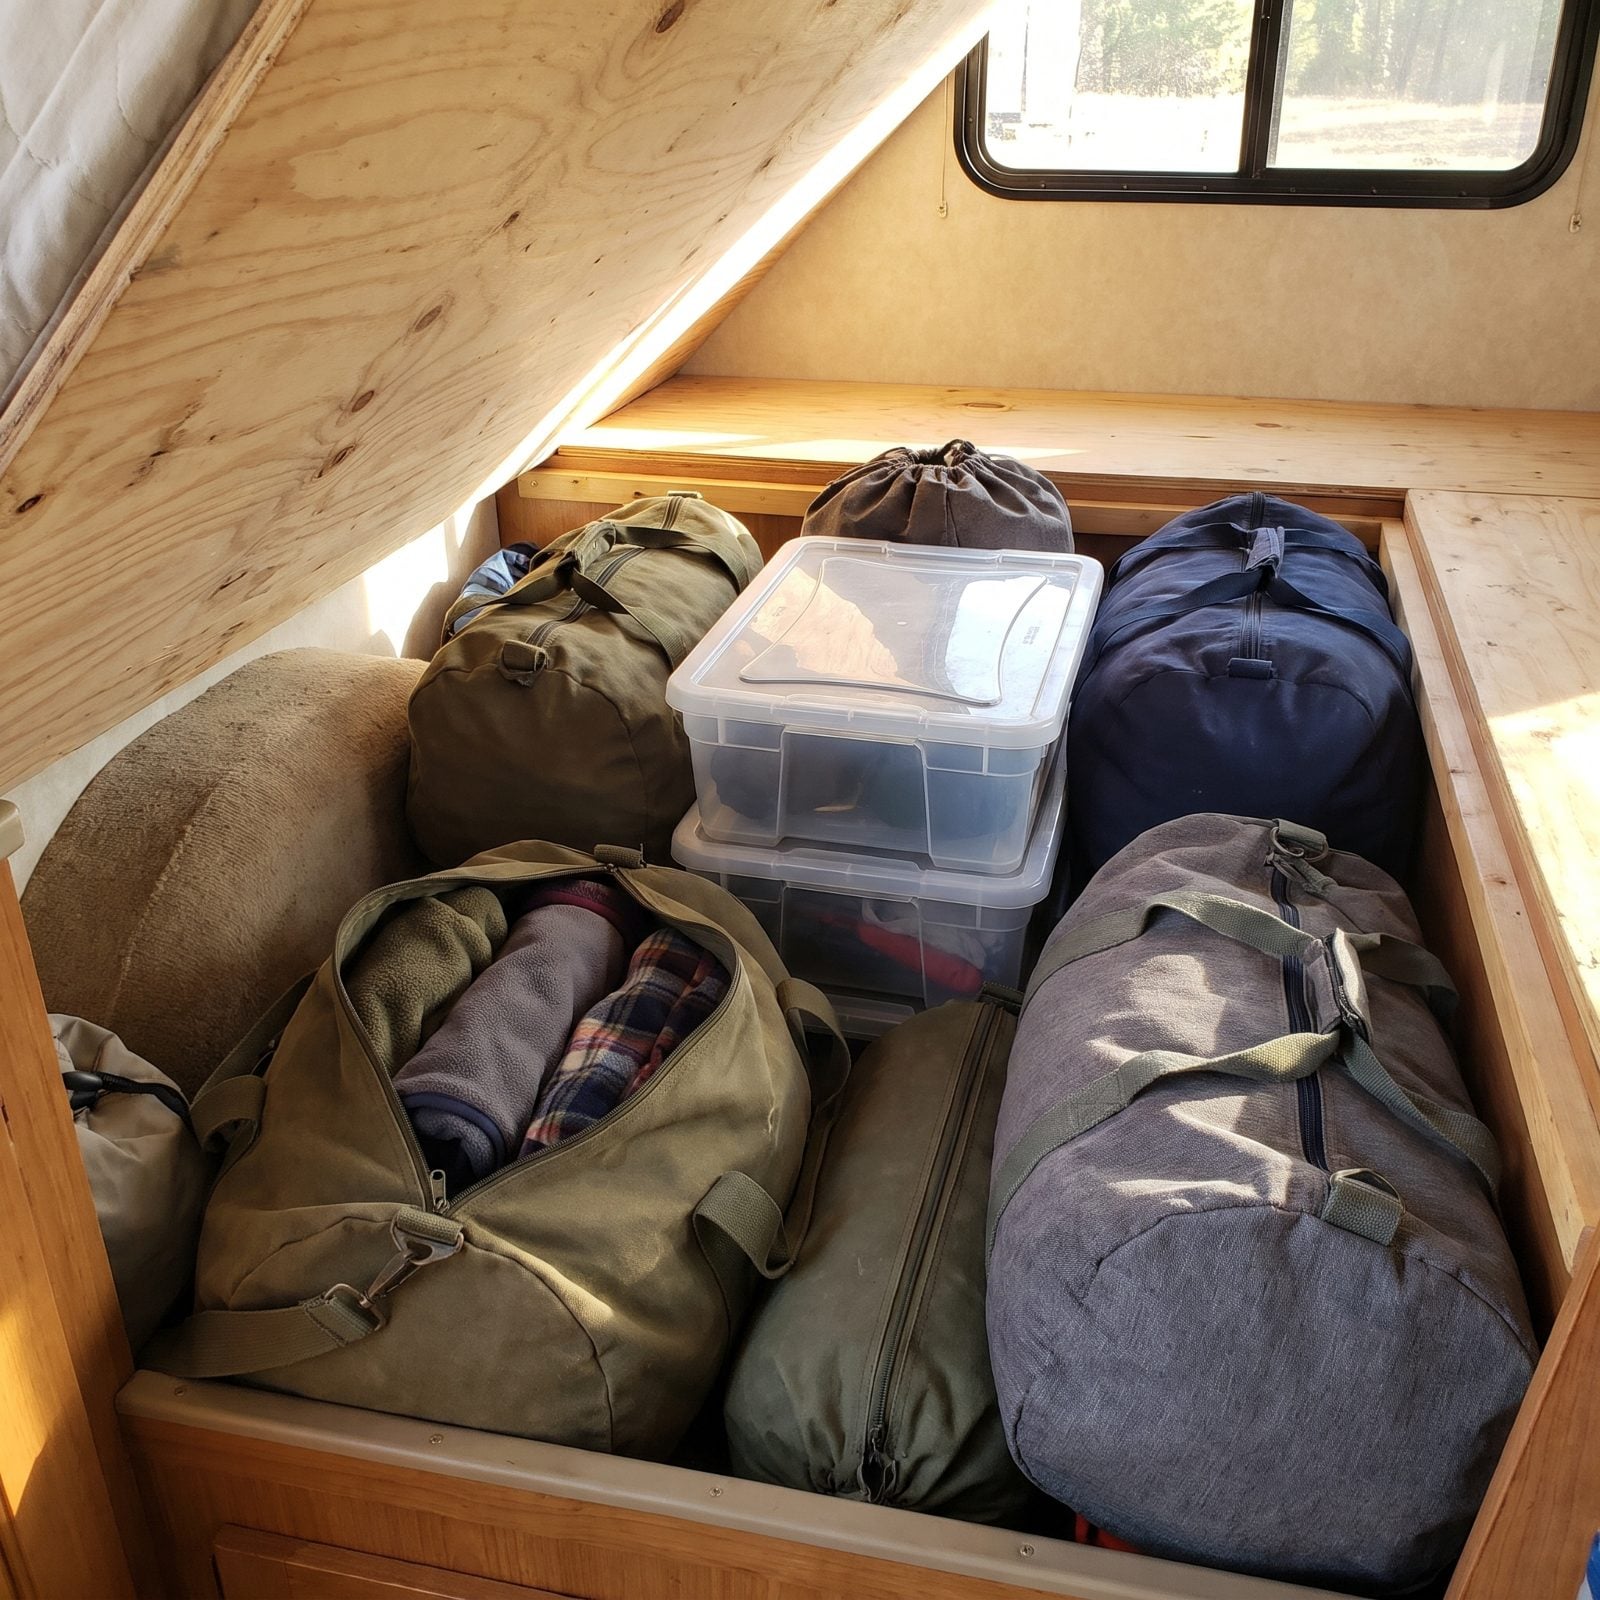
Every under-bed cavity has that one maddening gap. The spot by the wheel well hump, or the sloped corner where no box will ever fit square.
Soft duffels are the answer because they have no fixed shape. Stuff one with jackets or shoes and it molds right into the dead space a rigid bin wastes. That corner you were about to write off as useless suddenly swallows a whole bag of bulky stuff.
Canvas duffels with grab handles beat stiff totes here every time. Empty, they fold flat. Rigid bins never will.
7. Build Narrow Shoe Slots Along the Bed Base
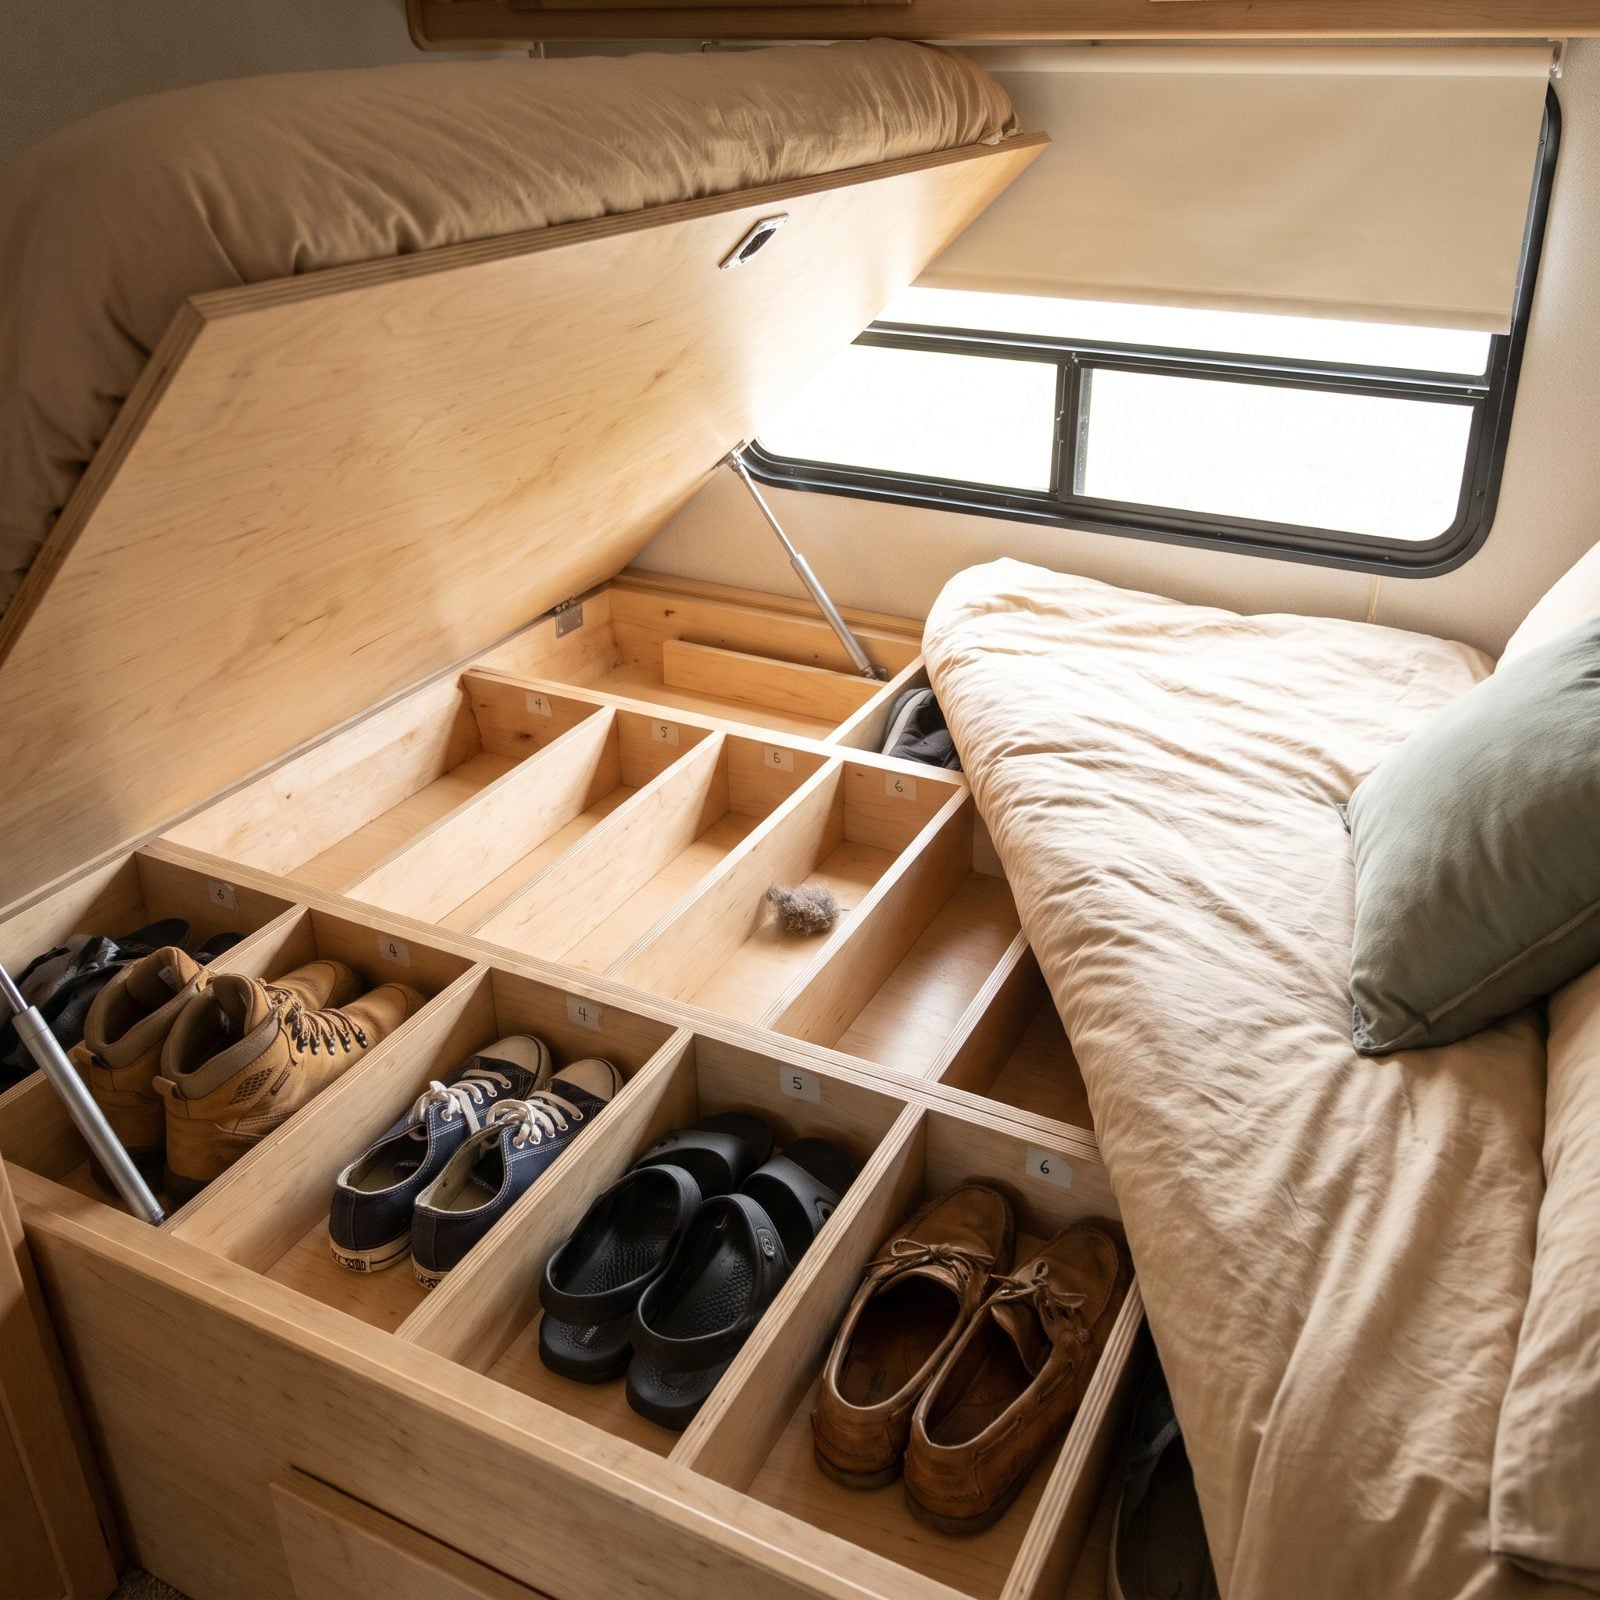
Shoes are the clutter nobody plans for. They roll around under the bed, collect grit, and you end up kicking them into a pile you can’t see. Individual compartments fix that by giving each pair its own spot, lying flat side by side.
Run birch plywood dividers across the base, each compartment just wide enough for one pair laid flat, and that dead base space becomes a shoe rack you reach from the top — four pairs in a row, with more space behind. We resisted this for a full season, kept a floppy fabric organizer instead, hated every single day of it. Rigid compartments win. Nothing slumps.
6. Add a Pull-Out Laundry Drawer at the Bed Foot
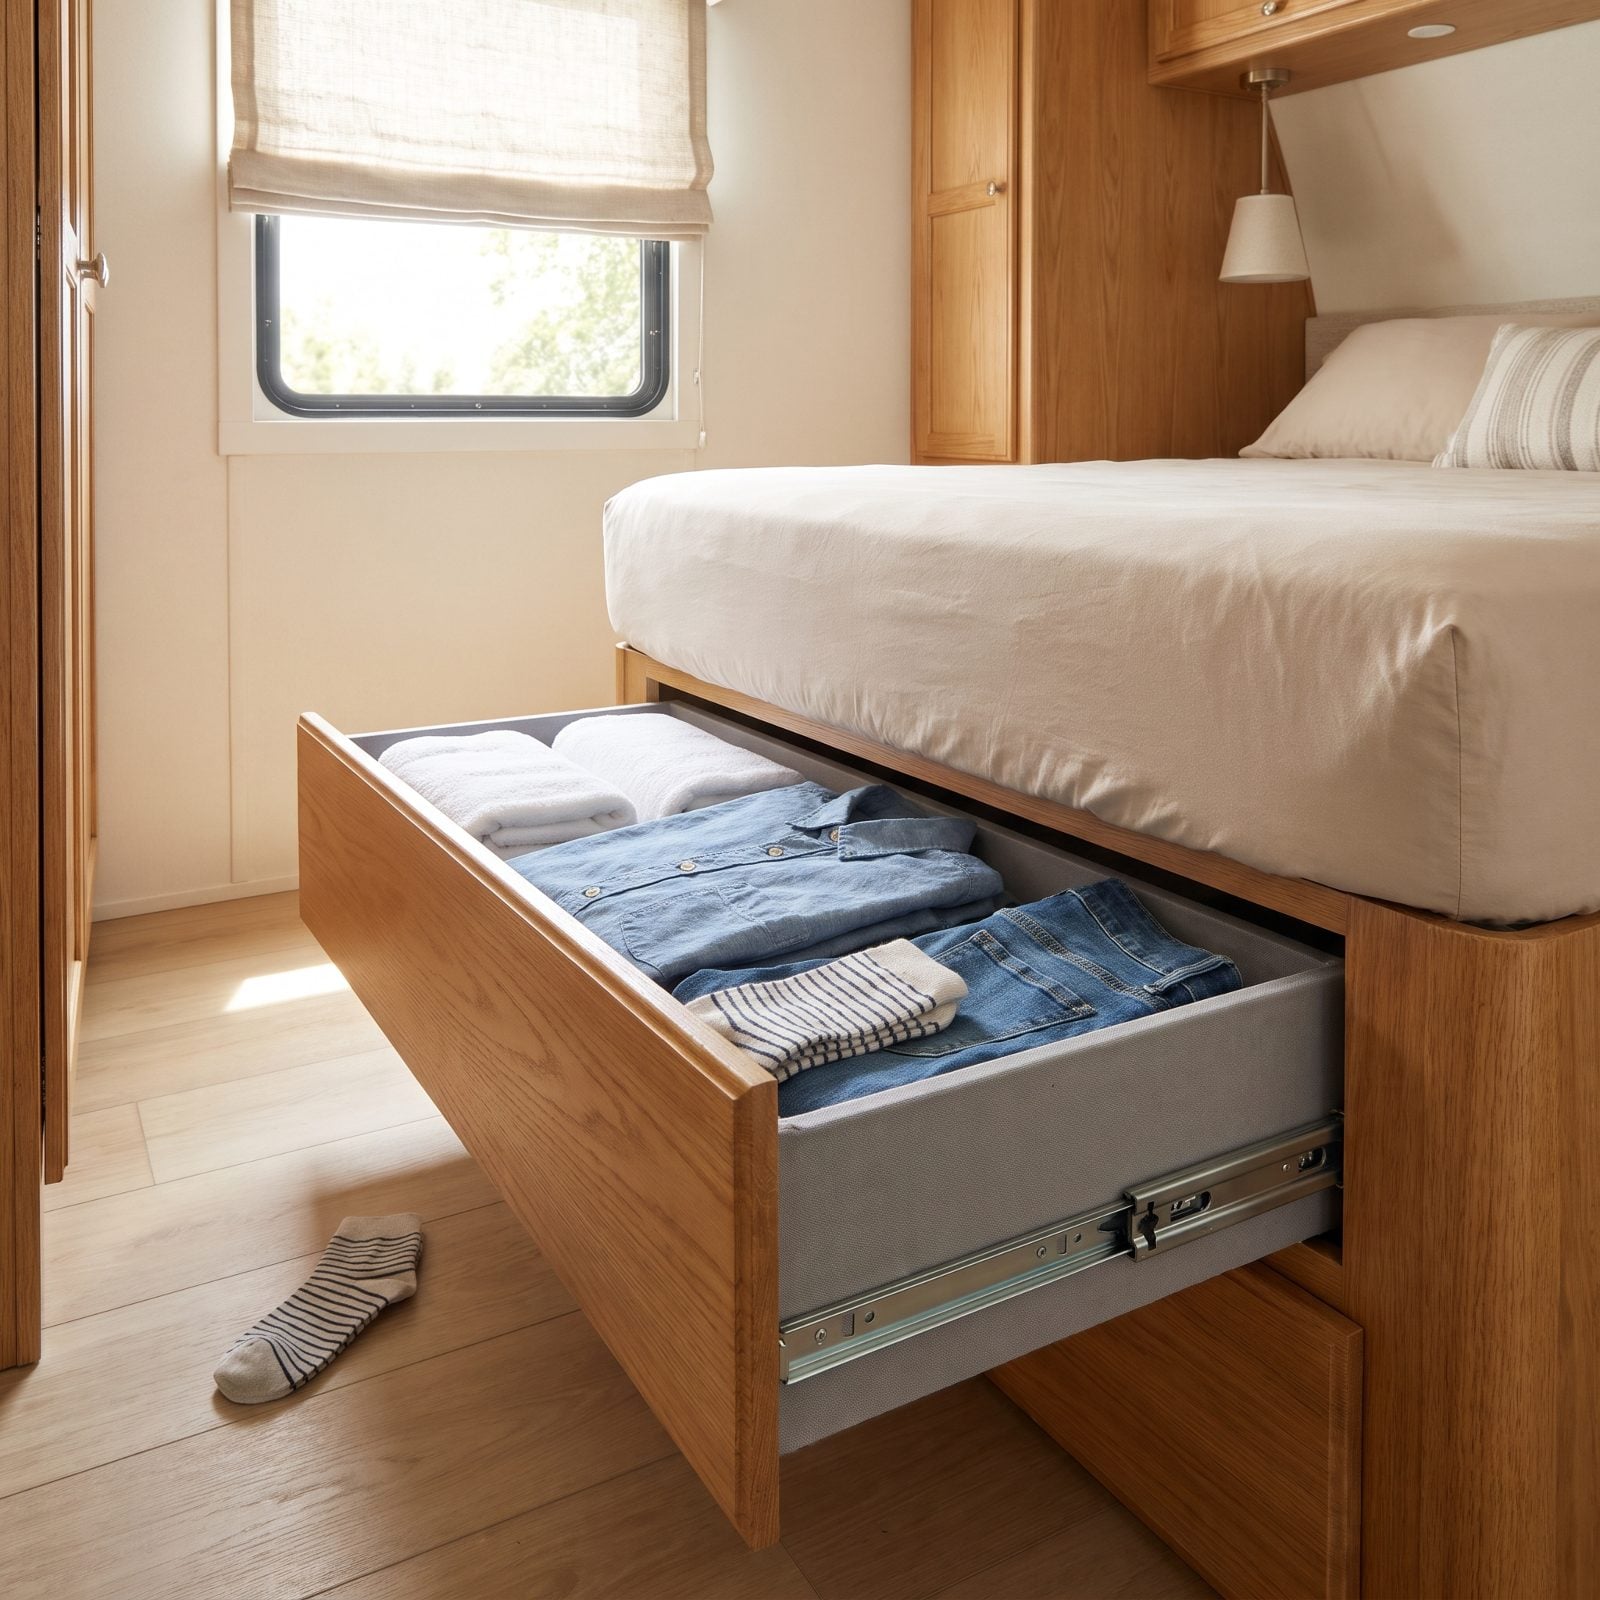
A hamper eats floor space you don’t have, and a laundry bag hanging off a hook swings into your shins every time you walk past. Build the hamper into a pull-out drawer at the foot of the bed and you kill both problems at once.
Mount it on full-extension slides so the whole thing comes out and you can actually reach the bottom. Drop in a removable canvas liner. On laundry day you lift that liner straight out and haul it to the campground machines — no scooping, no bending into a cave.
One warning: wet gear belongs somewhere else. Toss a damp towel in here and by morning the whole drawer smells like a middle-school locker room.
5. Conceal a Bolted Floor Safe Beneath the Bed
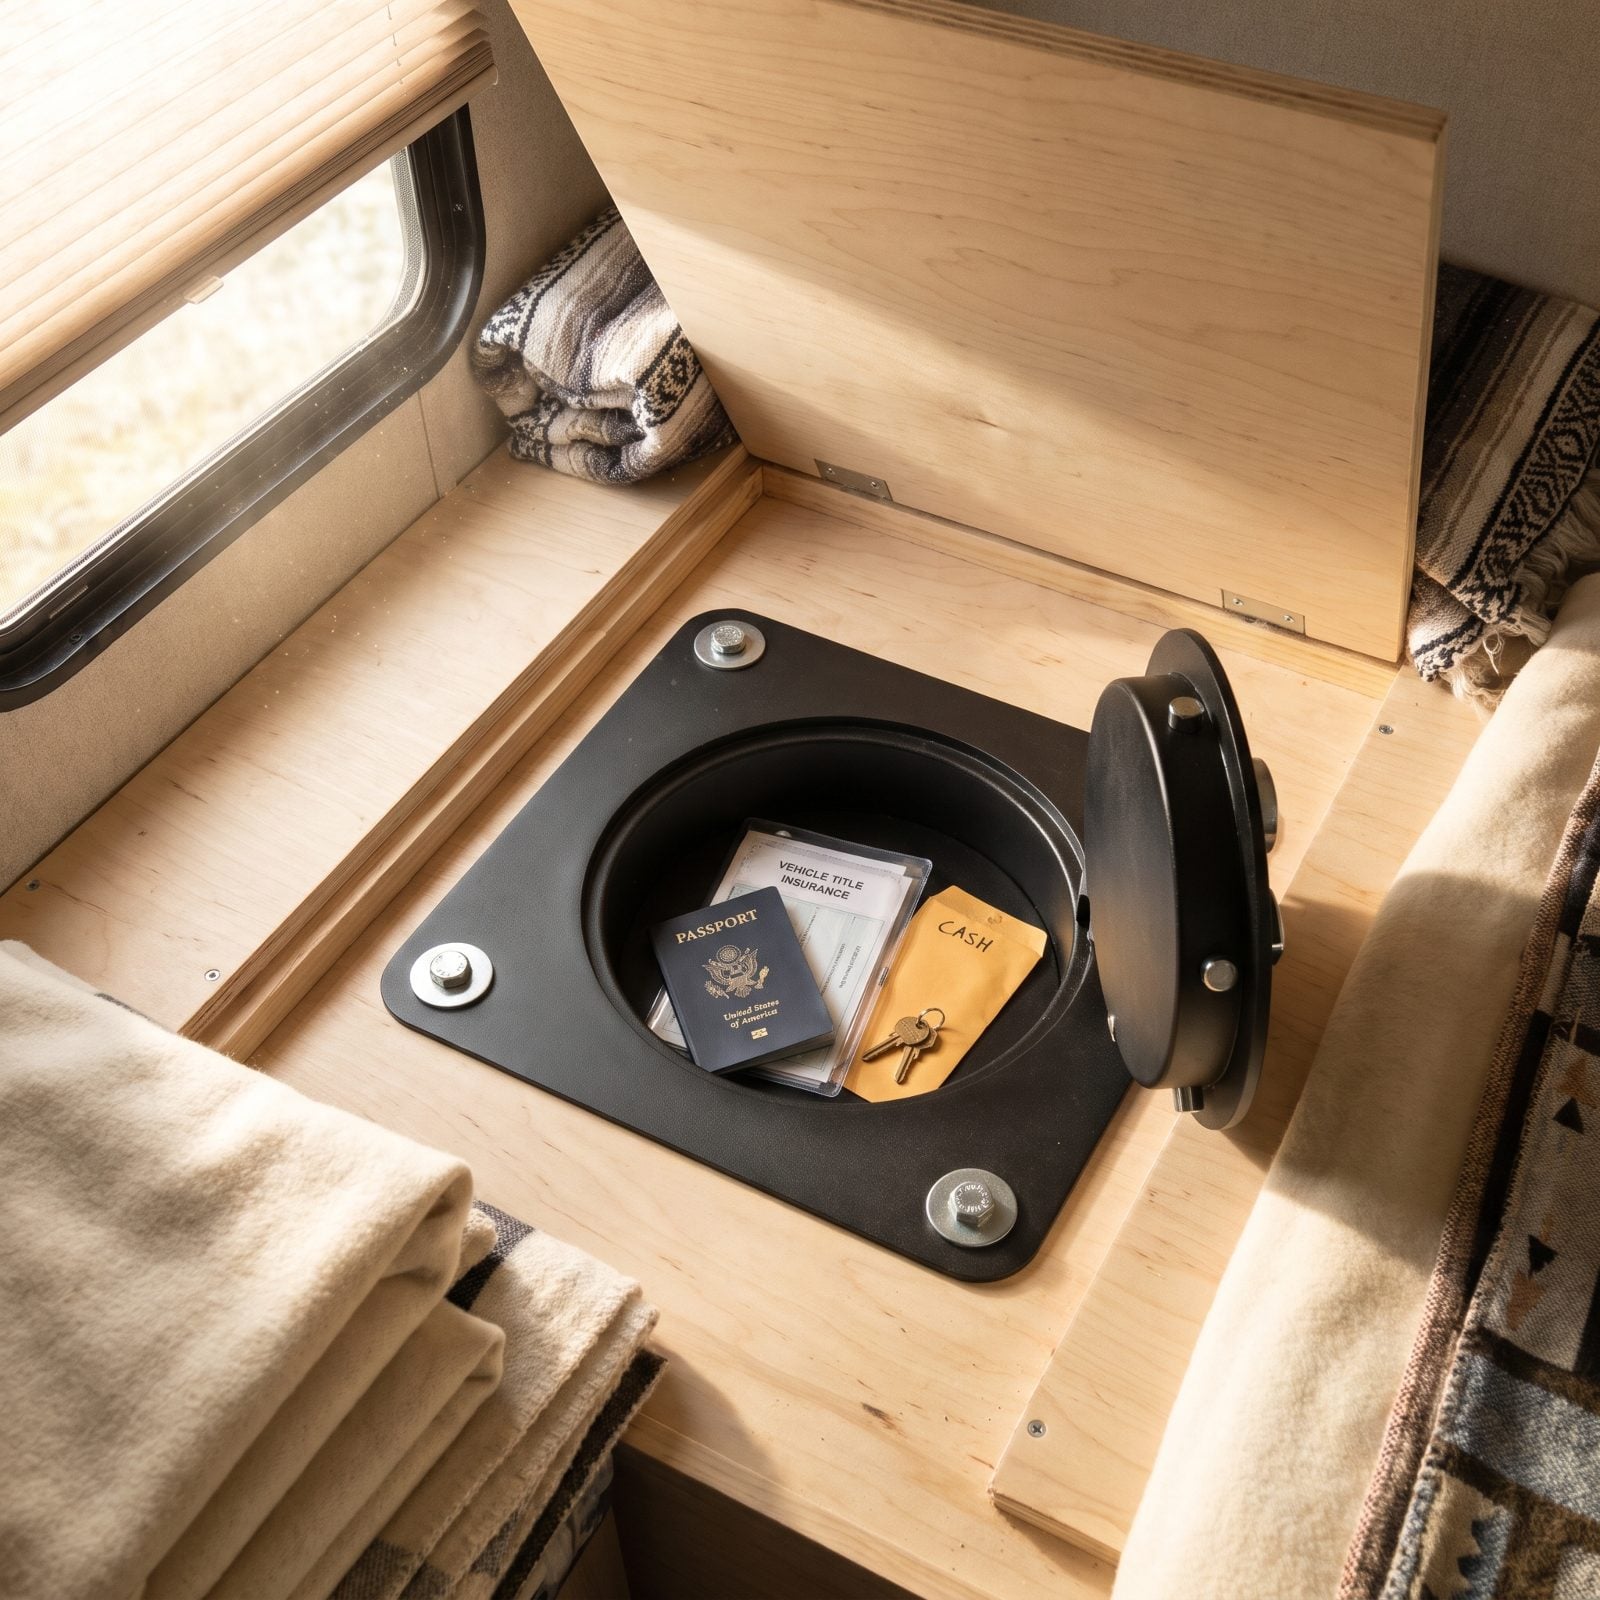
A safe you can carry off isn’t a safe — it’s a gift box for a thief. Bolt one to the RV subfloor and nobody can just grab it and crack the lock later in a parking lot.
Pick a small model, drill through the base into a solid cross member, and torque four bolts down tight. Tuck it under a raised bed with blankets piled around it, and a quick smash-and-grab walks right past it without a clue. Passports, the title, backup cash, a spare set of keys — all of it out of sight.
4. Secure Flat Items With Lid-Mounted Elastic Straps
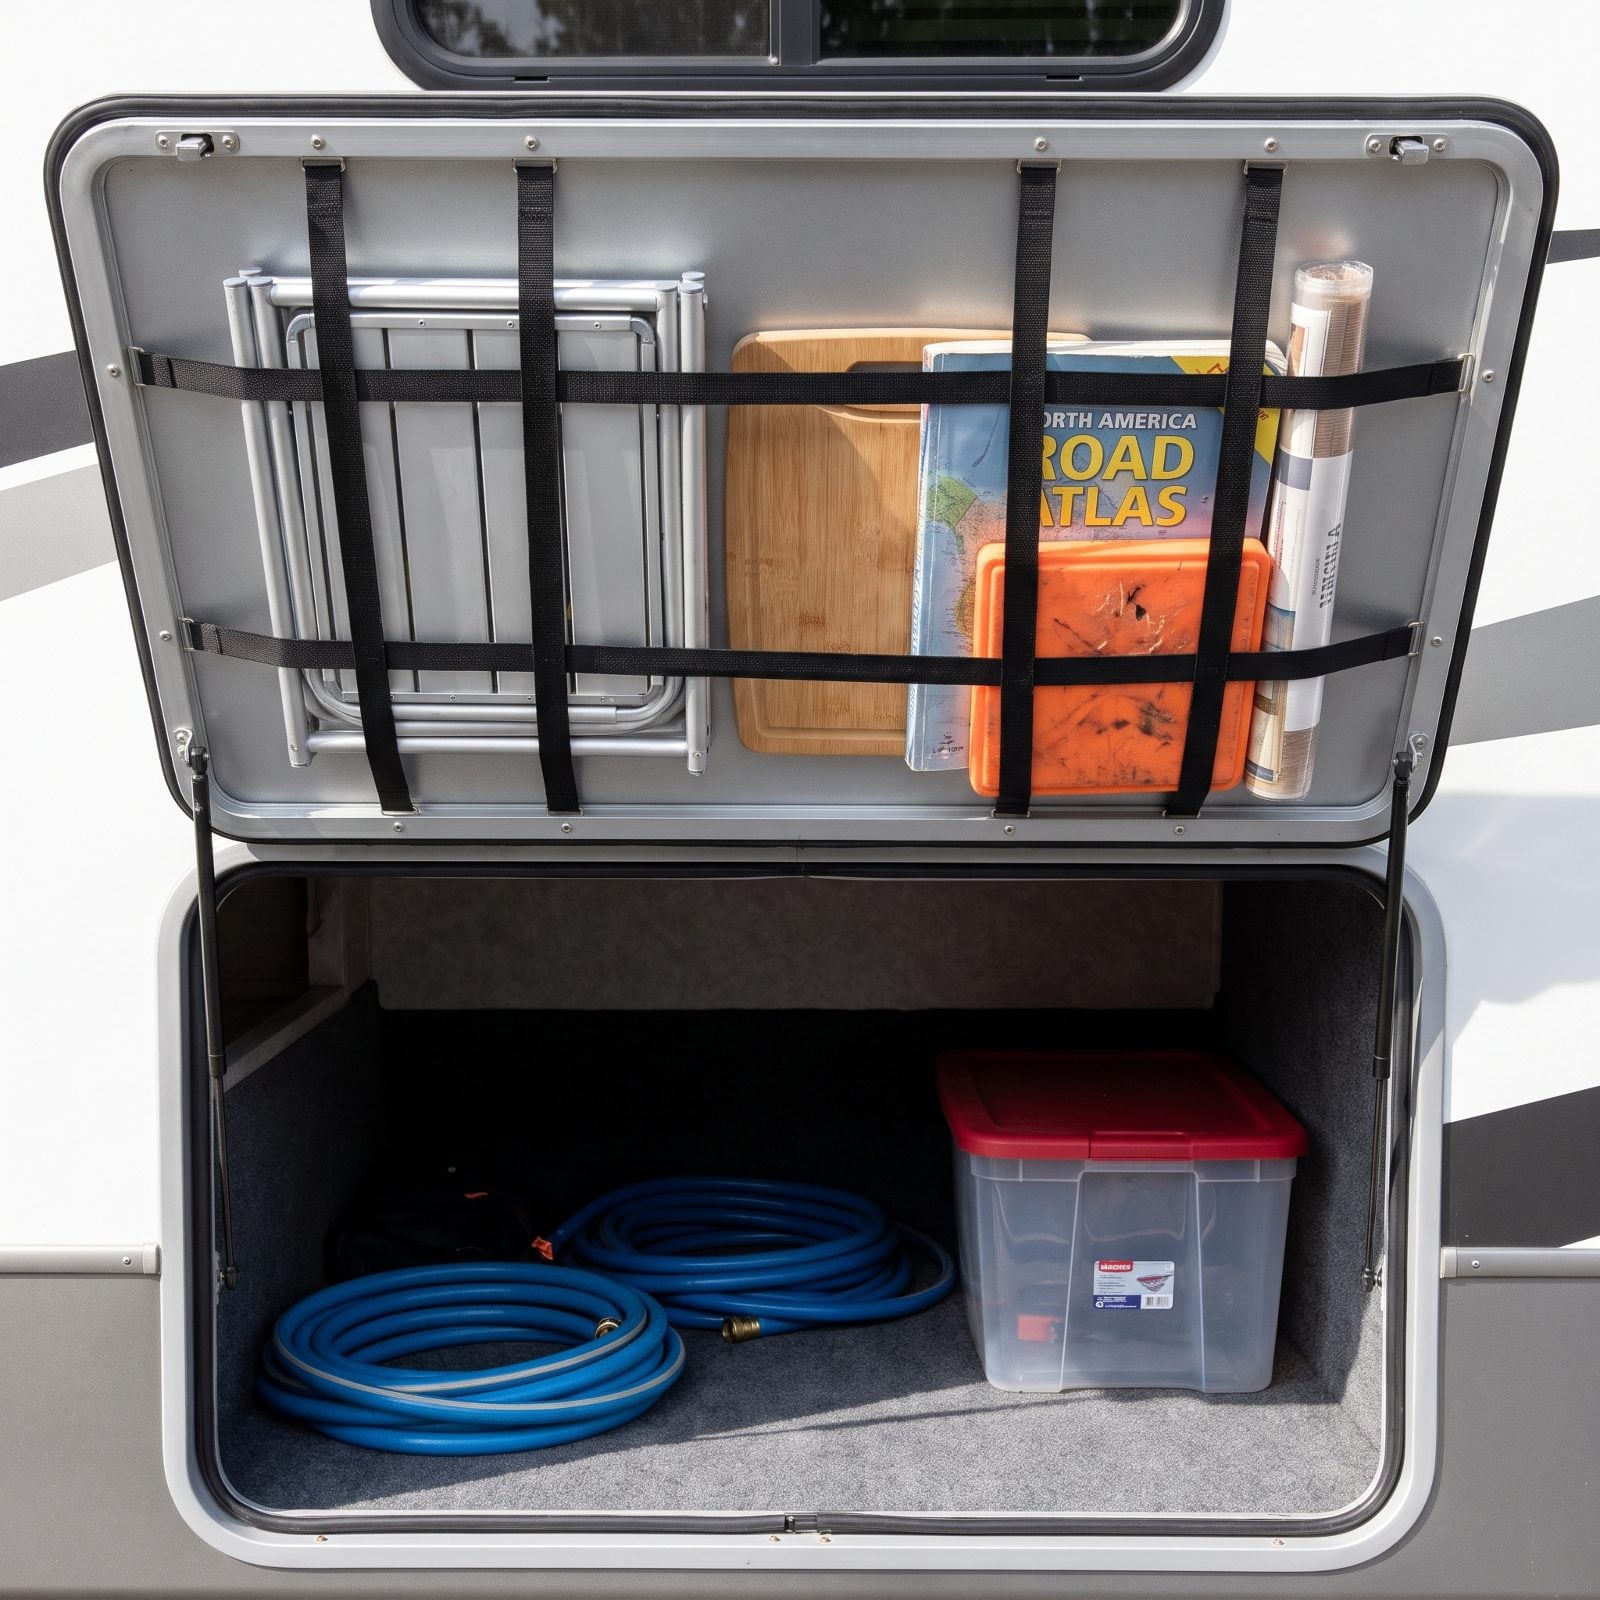
Flat things are the worst to store. They slide, they vanish behind heavier gear, and you forget you own them until they turn up scratched. Stretch a grid of elastic webbing across the underside of a bay lid or a hinged panel, and all that wasted vertical surface finally earns its keep.
Cutting boards, the folding table, a road atlas, leveling pads, placemats — slip them behind the straps and they ride flat and silent down the highway. Rivet the strap ends at the corners so a pothole doesn’t launch the whole works into your hoses.
3. Use a Padded Case for Spare Electronics
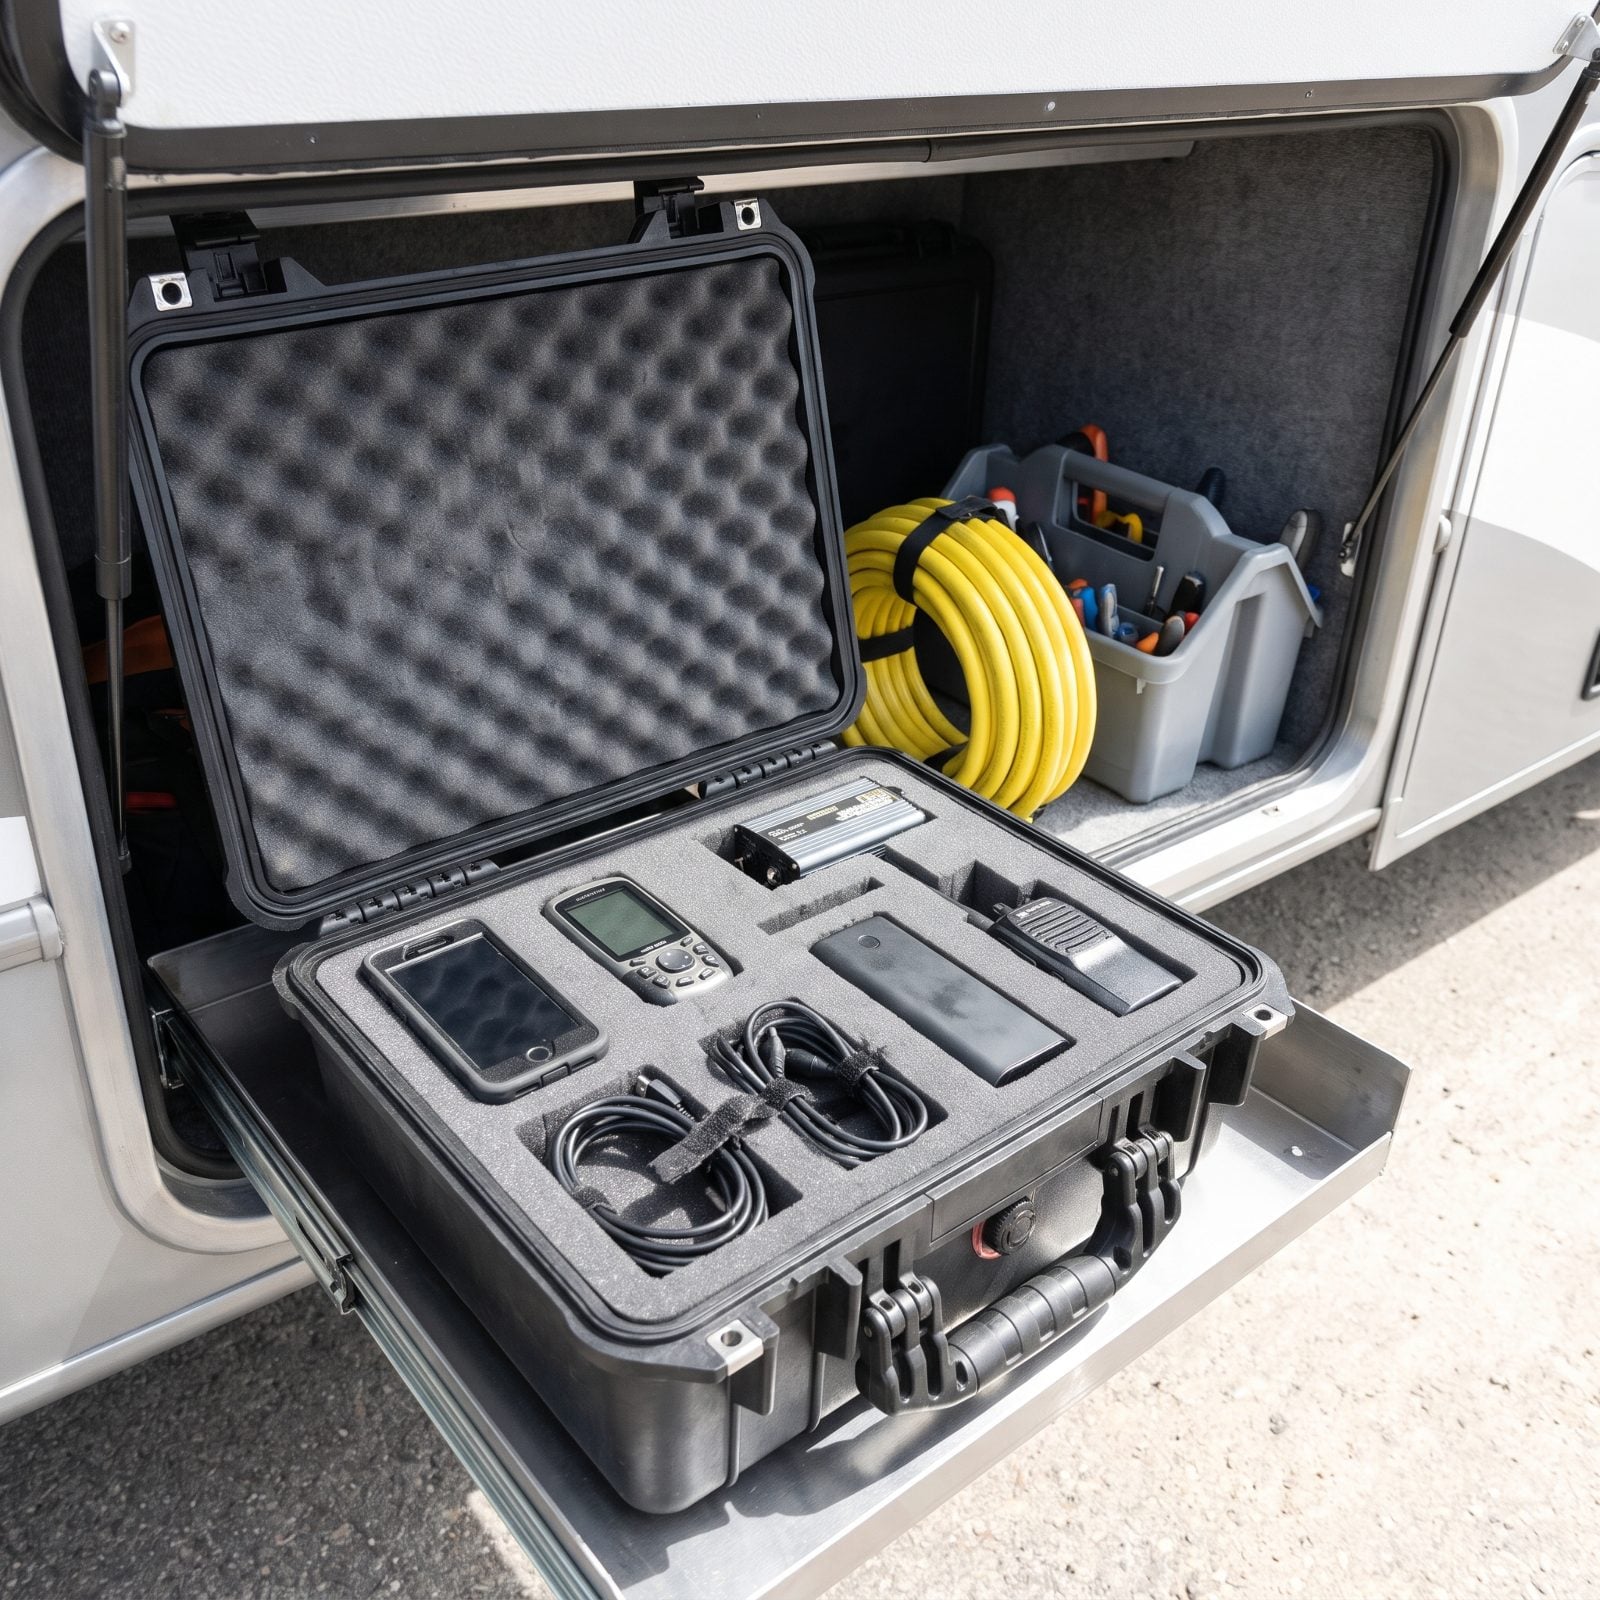
Road vibration is slow murder on electronics. A loose GPS unit bouncing in a bin for months quits on you right when you need it, and you never connect the dots.
A hard case with cut foam cradles each spare device so nothing rattles against anything else — backup phone, power bank, two-way radios, a spare inverter. The foam doubles as insulation against the temperature swings a basement bay goes through, which electronics hate almost as much as the shaking.
2. Keep an Emergency Go-Bag Nearest the Bed Opening
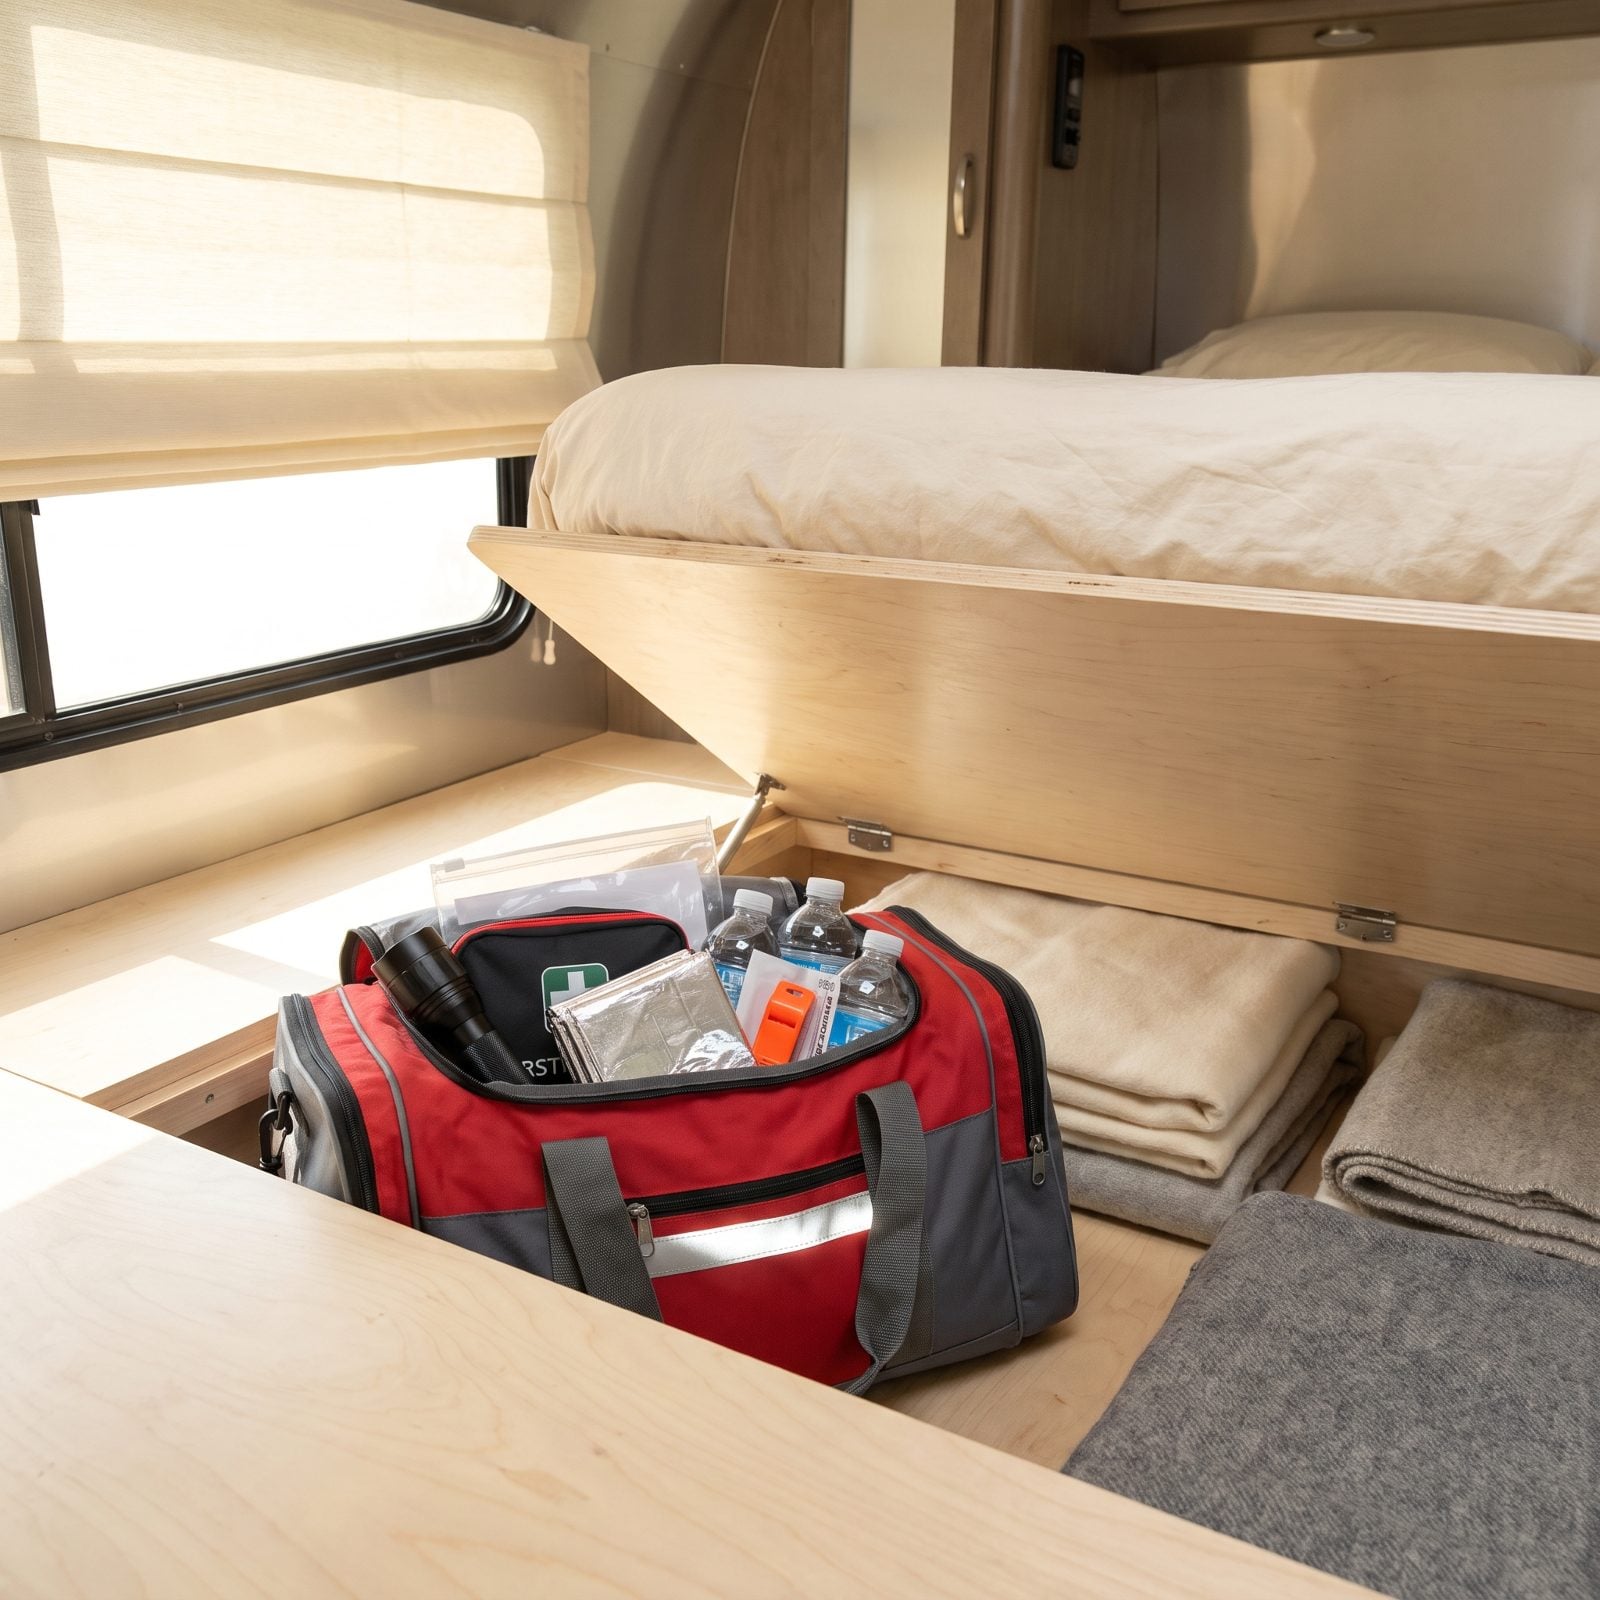
Everything in your storage has a hierarchy, and the go-bag sits at the top of it. The thing you’d grab in the dark at two in the morning cannot be buried behind the folding chairs and the winter bedding.
Park it at the lip of the bed opening — the first thing your hand lands on when you lift the platform. Flashlight, first aid, water, documents, an emergency blanket. Then make a rule and keep it: nothing gets stacked in front of the go-bag, ever. Dumb little rule. It’s the only one that matters when you actually need the bag.
1. Add a Side-Access Hatch to the Bed Platform
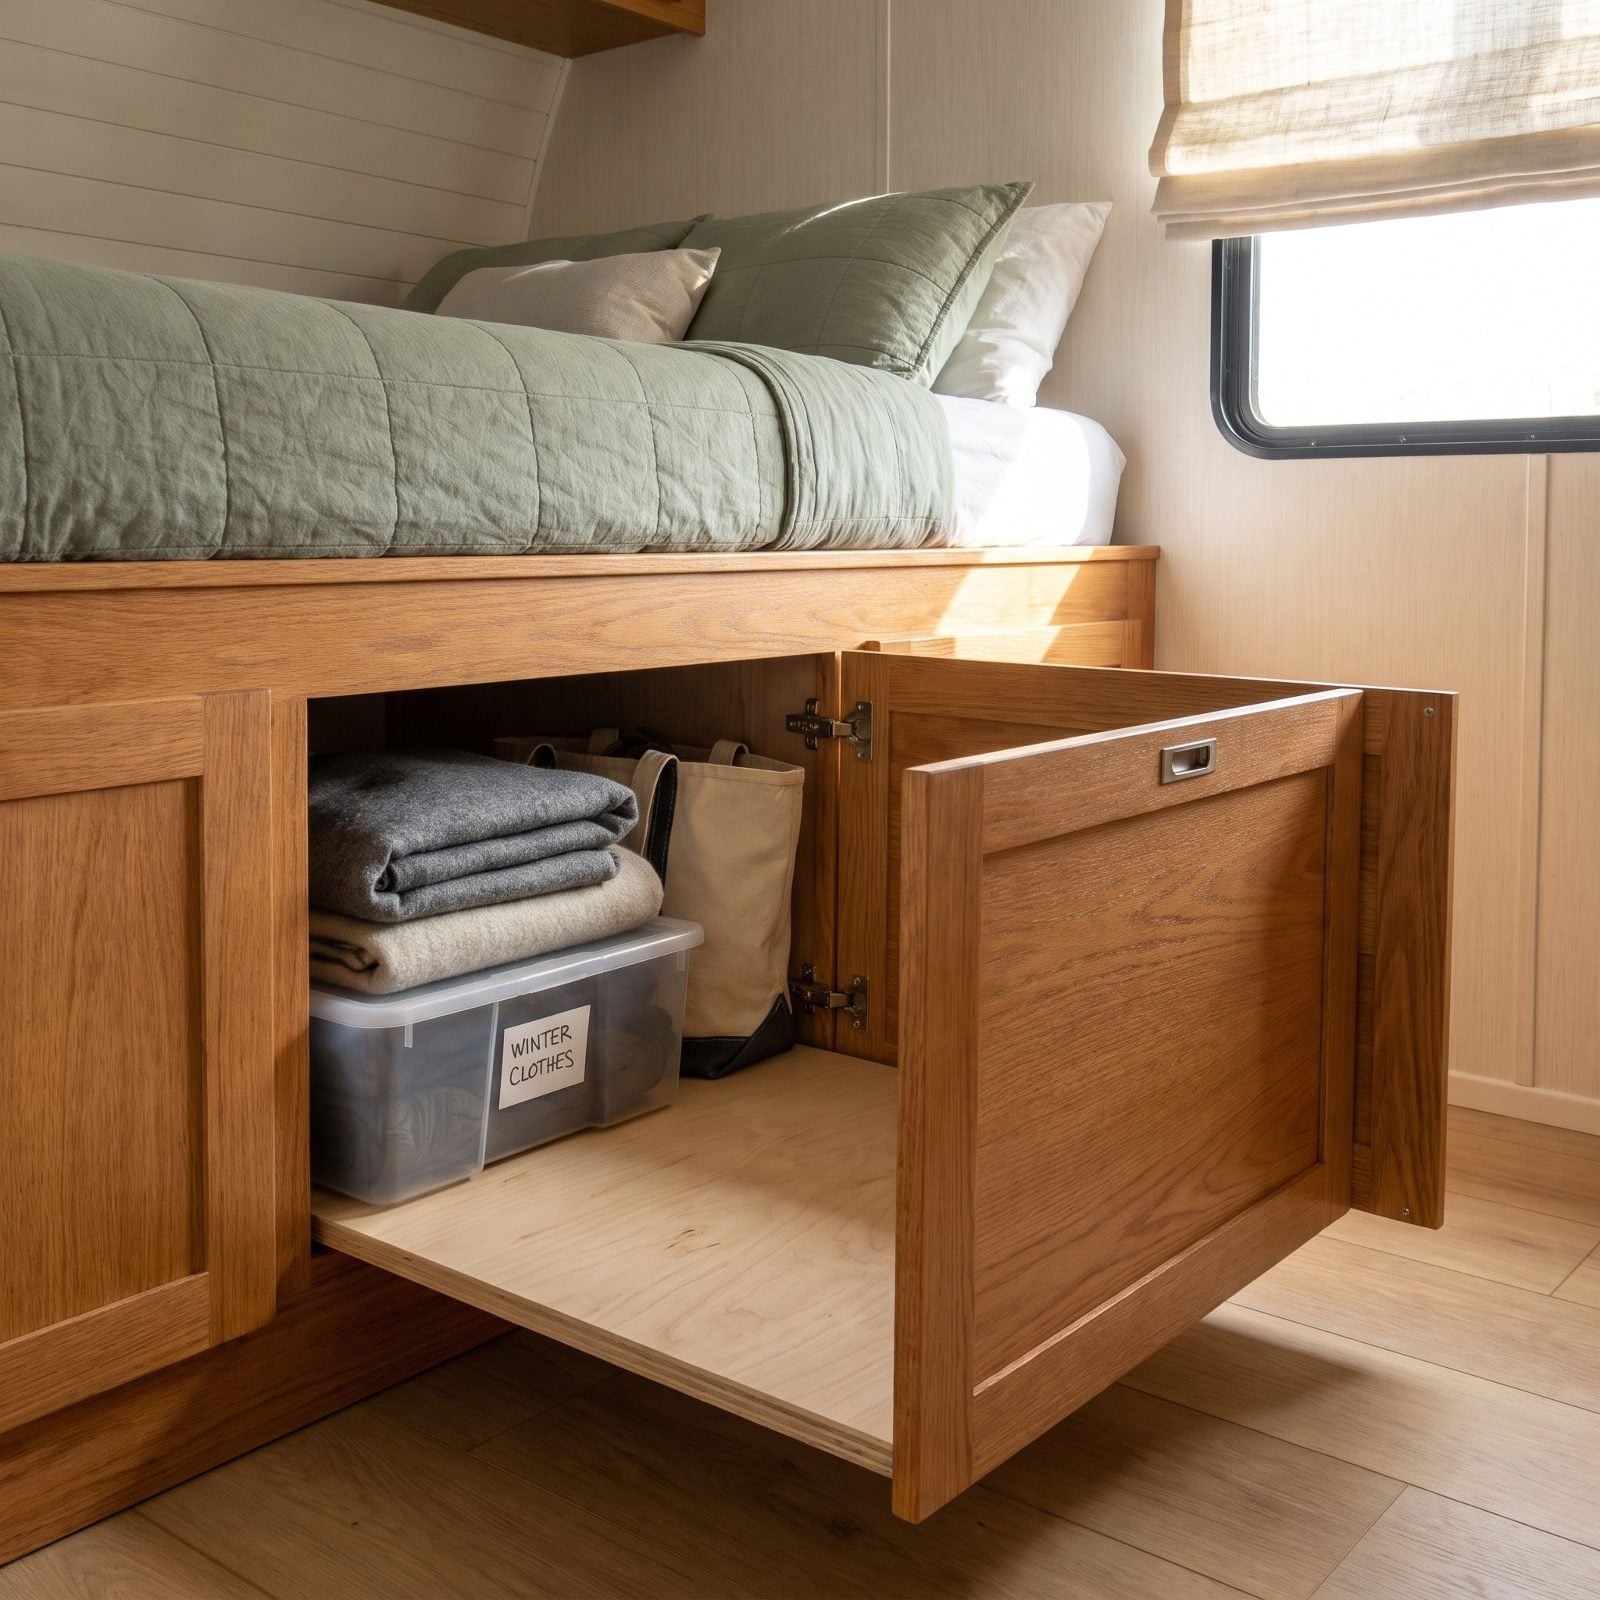
Lifting a mattress to reach one bin is fine until your partner is asleep on it. Then the whole under-bed cavity may as well be welded shut. A side-access hatch cut into the bed platform fixes the thing nobody tells you about lift-up storage — you can’t get in without taking it all apart.
Frame a small hinged door into the exposed side of the bed base, add a flush pull, and you reach straight in from standing height. Keep the bins you grab most — snacks, a book, the chargers — right behind the hatch.